Linux 0.00 & 0.11 on Qemu!

While checking out oldlinux.org, I came across two things that are somewhat exciting.

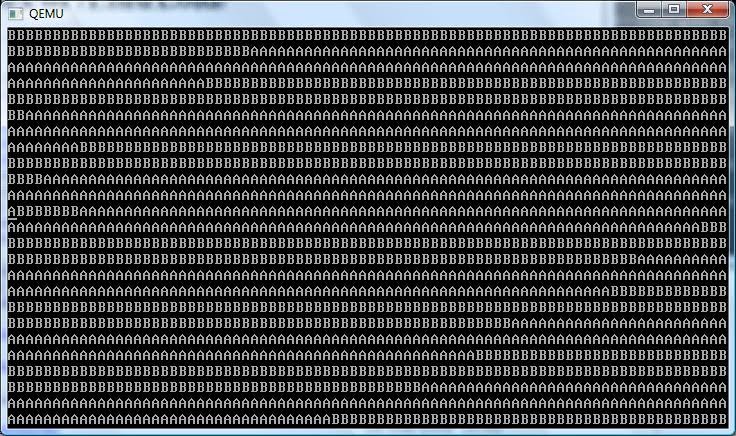
The first, is Linux 0.00 The first ever known version of Linux. It’s only two assembly files, an 8086 booter, and the 80386 kernel that sets up protected mode, and two hard coded tasks, then runs the two tasks. It’s very exciting. There is even some commented source available on the oldlinux forum here.

For those who want to check it out, I’ve padded it out onto a diskette image on sourceforge here.

Don’t expect too much, it just prints “AAAA” and “BBBB” over and over, but it’s the first booting version of Linux.

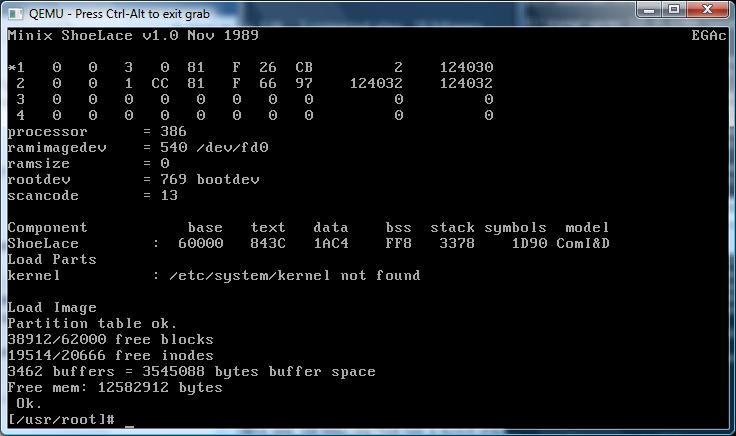
The next thing I found was a BOCHS archive with Linux 0.11 installed, along with GCC 1.40 and a few other programs. This image can even build Linux 0.00 and a slightly modified version of 0.11 that can run bash. I’ve found BOCHS somewhat difficult to configure, and since Qemu is faster, I’ve converted the disk image into a ‘qcow2’, then got it running on Qemu 0.12.5. Just unzip the archive here, and you can be running some really ancient Linux.

Linux 0.00 in action.

Linux 0.00 in action.

Remember that Linux 0.11 is OLD. At this point it didn’t support multiple users, nor did it even have a shutdown or reboot command. Instead we all ran ‘sync’ a dozen times, then pulled the plug. Also it was VERY unstable, and quite prone to panics and crashes.. Although I think a majority of them back then were due to file system corruption from pulling the plug at the wrong time… 🙂

Linux 0.11 on Qemu 0.12.5

Linux also had no support for things like TCP/IP, UUCP, shared libraries, etc… although I’m pretty sure it had working serial port support.. In many ways it feels like 32v, although more primitive. This disk image also has the ability to re-build the patched kernel, and even Linux-0.00. What is also cool is the ‘shoelace’ loader which can boot the Linux kernel, so you don’t have to suffer the boot/root disks of the time, and the fun of hex editing stuff.

For people that love ancient stuff from 1991 this will be great fun indeed!

***UPDATE

For people who are interested in ancient Linux on Windows, I did get the toolchain to build with MinGW, and it seems to work ok!  I have a post about it here.  I have also been able to get the 32bit portion of the Linux kernel to cross compile on Windows as well!  That adventure is here.

Great resource for ancient Linux

I came across this site, old linux.org That has a bunch of resources for ancient Linux.

They even have a version of Linux 0.11 that can run in VMWare!

However Qemu won’t boot it, because of some issue with the IDE controller…

HD-controller reset failed: 00
Kernel panic: HD controller not ready

I’ve tried a bunch of versions of Qemu to no avail.. It may just be easier to modify the source to Linux, although that’ll require some kind of build environment capable of building early Linux… I don’t know if I’ll do it, as it’d be modifying the old software which clearly worked back in the day, but at the same point it’s behavior that is consistent with a *LOT* of versions of Qemu.

I’ll have to see, but it’d be cool to get 0.11 running under free emulators, and possibly regress back further. I see MINIX is also available on the site so it may be even possible to get 0.01 running…!

Slackware 3.5

A friend of mine was having a hard time trying to configure XF86 from the old Slackware 3.5 days… 1998.

Wow time sure has flown!

Anyways I kind of liked Linux back then as a lot of distros had OpenLook, which made my Linux box feel like a way cheaper SUN box.

While Slackware 3.5 installs great on Virtual PC, the networking just crashes out… So I thought I’d just fire it up on Qemu.

qemu.exe -net nic,model=ne2k_pci -net user -hda Slackware 3.5 Hard Disk.vhd” -L pc-bios -redir tcp:58080::80

And with a bit of tweaking I managed to get it running!

Although with normal VGA there is some weird issues with the cursor…

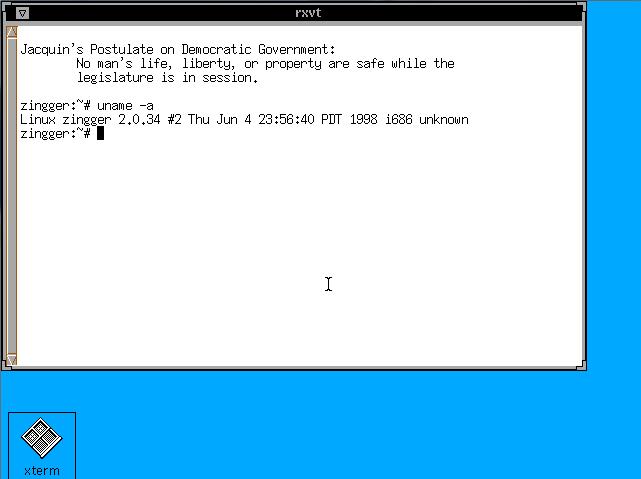
Slackware 3.5 running openlook

Slackware 3.5 running openlook

It was about as hard as I remember for the xf86config days… you kind of had to mash a few together to get it working…

And if it saves anyone the hassle, here is the XF86Config. (gzipped!)

This is basically regular VGA with a PS/2 mouse… It works on Qemu & Virtual PC, so I’m sure your favorite emulator ought to work as well.

On the road to X11

This is going to be.. involved to do… But there is some hope. The source to X11 R5 is still online, even though the xfree86-1.2 stuff is long gone. I was able to find a binary 2 bit Xserver for 386BSD, so that’s promising.

So my hope would now lay in making up a configuration file that’ll satisfy the Xfree86 1.2 server, and build enough of X11R5 to where it’s able to do something….

I have no idea if it’s even that easy to do, but if anyone has any leads on a source copy of xfree86-1.2 or 1.3 that’d probably be easier to build for 386BSD as it was used in the time frame… 2.0 was for the forks of NetBSD & FreeBSD so no doubt it’d hinge on things like DLL’s…

In the meantime, you can check out Neils Horn’s blog, with an example of what Xfree86 1.x was capable of on 0.96 linux.. Back in the day.

Proxmox 1.4 is out

I’ve been rooting for proxmox for a while now, and I’ve just installed it on a DL385 with a 1.7 TB FC NAS…. This version is SO MUCH BETTER then the prior ones with regards to storage….

I’m installing a Windows 2003 server right now for some basic tests, but I’ll have to post back later with far more testing…

So far, so good though.

Also if you are going to install with a SAN of some kind, make sure to have it disconnected on install.

Qemu test…

*Edit, this is completely out of date, and replaced by the much more improved Apache 1.3 for Windows NT 3.1.  Not that it’s visible to a visitor, but it’s live @ http://winnt31.superglobalmegacorp.com/

Well I figured I’d try Qemu on the PowerPC 64 platform… (AKA Playstation 3), and I loaded up NT 3.1 & Serweb… Not exactly a ‘high performance’ solution but I wanted to see it work..

And you can too!

http://216.75.197.51

I just put some minor things on NT 3.1 on there, although I’ll have to get something… better on there.

In the meantime, enjoy some old cat stuff.

Aranym, Atari 68040/mmu emulator!

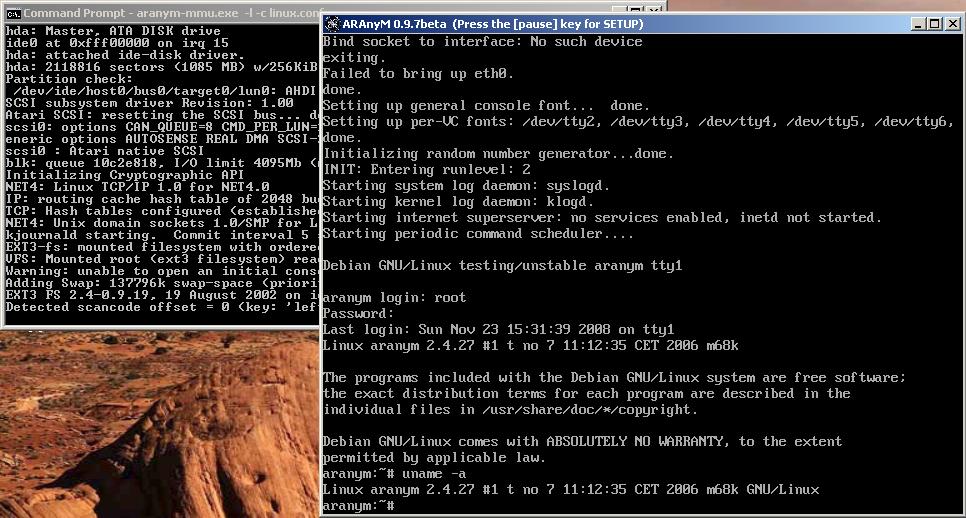
Well it was the weekend, and I was playing with FORTRAN (Language systems fotran to be exact, all 30lb of it!) and anyways to check to FPU & crash issues I though I’d check it out on an actual m68k Macintosh. So as I was using Basilisk II for some stuff, I was wondering if anyone ever did upgrade the CPU emulation to 68040/mmu emulation. And it turns out that the Basilisk II emulation is taken from UAE, which in turn has been used in a few other emulators including aranym.Aranym is “Atari runs on any machine”, and what these guys have done, is fleshed out the UAE 68000 emulation enough to where it will run m68k linux!

Both a windows version and the source can be found here.

Now for the fun part!

You can download a patched kernel here that supports the virtual Ethernet, or just run a stock kernel (no networking though!)

Next you’ll want some kind of root filesystem, I would recommend the ‘etch’ disk which can be downloaded here.

Naturally, you’ll need a config, here is what I’m using..

—8<——8<——8<—

[GLOBAL]
FastRAM = 256
Floppy =
TOS =
EmuTOS =
AutoGrabMouse = No

[LILO]
Kernel = ./vmlinux
Args = root=/dev/hda1 video=atafb:vga16 stram_swap=0
debug=par
Ramdisk =

[ETH0]
Type = bridge
Tunnel = tap0

[STARTUP]
GrabMouse = No Debugger = No

[IDE0]
Present = Yes
IsCDROM = No
ByteSwap = No
ReadOnly = No
Path = etch.img
Cylinders = 2102
Heads = 16 SectorsPerTrack = 63
ModelName = Master

—8<——8<——8<—

Then finally run it like this:

aranym-mmu.exe -l -c linux.conf

I’ll have to play some with the networking to get it going, it seemed straight forward the FAQ here, however I had no luck.

Anyways, it’s no A/UX, but it’s a *NIX like thing on the m68k. Now we just have to beg the Mac people to flesh out the hardware on their emulators to support Linux, OpenBSD, NetBSD & A/UX….

Linux on Aranym

Linux on Aranym


Proxmox VE

Well frankly I’ve been majorly disappointed with Microsoft’s latest offerings in the world of virtualization. Frankly it’s been one BIG step backwards in terms of management.

I mean check this well meaning blog on how “easy” it is to setup remote management. And of course for the most part it NEVER works.

I know this must be a major news flash to Microsoft but you see virtual servers are like mainframes. The zone 0 OS must be able to stand on it’s own, and have just enough to bootstrap the hypervisor and allow itself to be managed in a stand alone fashion. After all if it were in a domain, where do you think those domain controllers are? Yep they are Virtual machines! And how do you ‘manage’ a domain resource with no DC’s? The whole 2008 Hyper-V is a BIG miscalculation on Microsoft’s part. I hope they wake up and notice how they had a good thing and have destroyed it.

All this nonsense sent me searching for an alternative which I’m pretty sure I found a great blend of system emulation, and something like SUN containers for Linux. There is even a Debian etch based quick install version called Proxmox which incorporates KVM (The new Linux hypervisor) and OpenVZ. And of course it’s FREE!

The cool thing is that the main management works on a web page, the consoles can be controlled via a VNC viewer that uses JAVA, and it’s VERY quick to setup.

The system emulation KVM uses the core devices from Qemu so a lot of Qemu virtual machines will “just work” if you copy them over. If you are installing an OS onto the virtual machine the ‘easy’ way is with the physical CD, you can use ISO images, however they are awkard to use. You have to flag the VM to pause on startup switch over to the monitor page and issue the following command:

change ide1-cd0 /directory/isoimage.iso

then tell the emulator to start up with the ‘c’ command which will continue from the pause…. Yeah I know it’s not terribly eligant.

On the OpenVZ front, it’s FAST as there is no real emulated IO it’s native. So I decided to use the wiki template and setup a wikipedia mirror at home. If anyone feels as brave you too can find instructions here:

These are some of the table times to load:

601M pages.sql Query OK, 7,473,186 rows affected, 8 warnings (5 min 10.52 sec)
837M revision.sql Query OK, 7,473,200 rows affected, 65535 warnings (2 min 11.84 sec)
18G text.sql Query OK, 7,473,202 rows affected, 1 warning (12 min 12.07 sec)
20M category.txt Query OK, 471,207 rows affected (13.14 sec)
1.8G categorylinks Query OK, 24,501,837 rows affected, 30177 warnings (28 min 28.31 sec)
5.6G externallinks Query OK, 36,492,925 rows affected (3 min 50.34 sec)
362M latestimage Query OK, 807,906 rows affected, 2 warnings (34.35 sec)
555M imagelinks Query OK, 18,615,721 rows affected (10 min 49.60 sec)
32k interwiki Query OK, 651 rows affected (0.08 sec)
186M langlinks Query OK, 5,780,509 rows affected (2 min 17.75 sec)
2G logging Query OK, 16,398,421 rows affected (2 min 51.75 sec)
45M oldimage Query OK, 118,449 rows affected (1.97 sec)
7.6G pagelinks Query OK, 270,641,297 rows affected (6 hours 12 min 4.83 sec)
104M redirect Query OK, 3,234,481 rows affected (23.71 sec)
1.2G template-link Query OK, 48,885,222 rows affected (50 min 7.08 sec)
68k user_groups Query OK, 3,947 rows affected (0.11 sec)

Even the ‘longest’ part here with the 270 million records took six hours… Not too bad! That’s still 12,122.88 TPS!

Also as a tip for anyone else crazy enough to do a sizable mediawiki (like wikipedia) or any single server wiki look to this page.

The upshot is that by loading this APC
extension into PHP and mediawiki load times for my cached site went from 2-5 minutes to 1-10 seconds.

The OpenVZ portion has various application templates that can be loaded into the zones from CentOS, Debian, Ubuntu, to pre configured applications like the media wiki and a few others.

If anything I’d say that proxmox is what I was hoping Microsoft’s Hyper-V could have been. A container version of windows with easy remote admin along with some system emulation could have made things MASSIVLY easier to deal with. It’s a shame they decided to go with this bizarre WMI based thing.

Linux the old

My first experience with Linux was with SLS, or Soft Land Systems. It was the first pre-packed Linux system for those of us who didn’t have a Minix system to cross build from. Although Taunenbaum saw this as a draw back, like Linus many of us had 386 computers, and wanted to exploit their power. Many of us were sickened by the shattered hope that was the 286, which provided protected mode, abet in 64k chunks. The 386 offered the holy grail, or a 4 gigabyte address space! No more offset games.

At the time the closest one could hope in terms of a personal Unix was SCO Xenix, which with the developer packages was prohibitively expensive, or Coherent. Coherent was a clean room re-implementation of Unix version 7 ( http://www.vaxenrule.com/sls%201.05.zip.torrent ).

I’m going to use Qemu, again because of it’s cross platform nature, and it’s ability to emulate the NE2000. One can only hope one day that VMWare or Virtual PC would allow some kind of interface for us to ‘hack’ emulated hardware into their infrastructure…..

Anyways first let’s create a 200mb disk

Qemu-image create –f qcow sls.disk 200M

Don’t laugh, 200mb back then was a ‘big deal’… Really. Mine was SCSI, and probably weighed some 7lb.

Unzip your sls distro somewhere accessible from your Qemu tree. I’m just going to stuff mine under a sls directory. During the install we will need a boot disk, simply copy any one of the files to ‘boot’. We’ll touch on it later. To boot from the floppy I’m going to issue:

qemu -L . -hda sls\sls.disk -m16 -net nic -net user -fda sls\a1.3 -boot a

At the LILO prompt simply press enter. Then you’ll be informed
Press to see SVGA-modes available, to continue….

Press space. Early Linux kernels had this annoying ‘feature’ compiled in.. I know, I think I’m the only person that doesn’t like custom fonts, nor do I like directory colors.

At the login prompt, login as root then run the fdisk command. The keystrokes for creating a primary Linux partition is as follows:
n
p
1
1
400

Now we are going to make a smallish swap partition.
n
p
2
401
406

Now we need to change its type to swap.
t
2
82

It’s just a byte flag, but each operating system selects a flag to identify itself to others, a marker of what is where. Before emulation on dual boot systems this was a “big deal”… However now dedicating a virtual machine to an entire OS takes out the complexity that plagued so many users so long ago….

Let’s save the changes type typing in ‘w’.

We are then told to reboot the system. Type in ‘sync’ a few times, then close qemu & restart it with the same flags.

Now we can login as ‘install’. We can use the color screen, so enter ‘y’. We are going to do the brave thing, and use floppy disk images. That’s option 1. The floppy images are 3 ½” so that’s option #2.

Now we need to identify the root & swap partitions. Select #1, then type in /dev/hda1. It will want to format it, so let it. Next select #2 for the swap, and type in /dev/hda2 .
Now we can select #7 to commence installation.

To get the full experience we are going to install the full thing… 100MB of it.. Option #4. We don’t want to be prompted we simply want everything that SLS has to offer, so answer ‘n’.

You will be prompted for a2-a4 Don’t forget in Qemu it’s ctrl-alt-2 for the runtime config, and you just issue:

change fda sls\a2

and so on for the rest of the disks. Then ctrl-alt-1 to go back to the main screen.

While this may seem tedious it’s better & faster than the real thing. Trust me!

Once X11 finishes unpacking, place in the boot disk, and let it write to it. Next feel free to preset the video mode to -1. We don’t have a modem, so you can answer no. Next we’ll allow the install to mark /dev/hda1 as the active partition. Just press enter for the question about dos partitions. Pick a snazzy hostname. The default softland works just fine. We have no patch disks, so you can just enter ‘n’ and press enter.

Phew we have just installed SLS! Press enter!

After that you can boot up into Linux 0.99.15g/SLS 1.0 . The best that 1994 has to offer.

Before we leave for now, lets get X-11 rolling. Login as root, no password, and then run syssetup. Choose 5,2,6,0. This configures the basic VGA server, a PS/2 mouse & exits the basic program. Running ‘startx’ Should get you into a really old X-11. No Gnome/KDE here! The mouse however acts erradictly. Ctrl-alt-backspace will bring you back to the prompt. I’ll see if I can figure this out later…

But for now that covers a basic install. Next up we’ll do some networking, and a game perhaps….