Merry Christmas 2024!

While doom scrolling on eBay I always seem to stop and look at the upgrade version of Windows 3.1. It has to be the most clearly marked “why bother upgrading” version of Windows, and at the same time the ugliest. Fitting for the season’s ugly sweater theme!
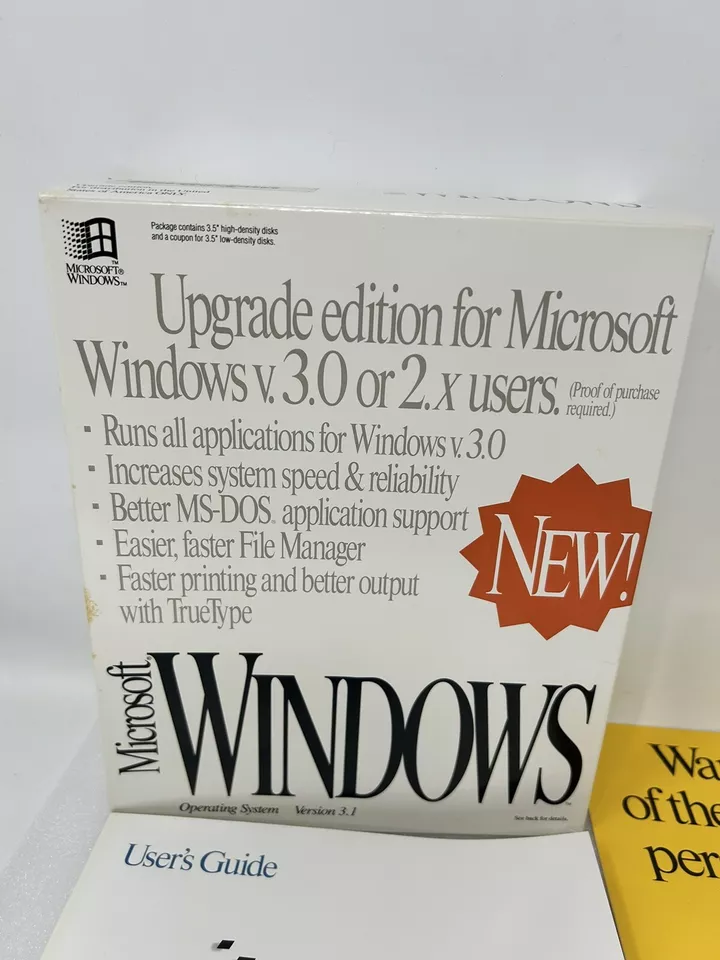
The ugliest Windows ever

It’s amazing how terrible this thing has always looked to me. As far as ‘proof’ I remember being able to fake it out by doing a ‘copy con win.com ^Z’ type thing to create a fake windows directory with win.com & kernel286.exe … I think. But back when this was a NEW! product, I had to install Windows 3.0 anyways to get the CGA driver.
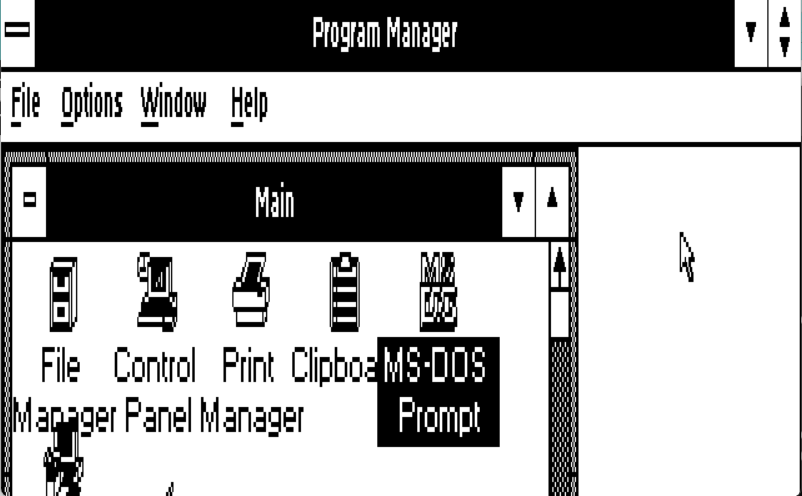
Windows 3.1 in CGA

I don’t know how I used Windows with CGA either.

Speaking of impossible, back in the dark ages of Windows/286 2.1 this thing snuck out:

Microsoft Windows/286 – Italian

One day I’d love to get this Italian Windows 2.1 and frame it? I don’t know who snuck in the Buone Fest onto the box art, but I’d like to think it was subversive, as I hadn’t seen anything like that on any of the other retail Operating System packaging?

It’s been a real struggle this year from the relocation, losing just about everything that I’d tried to do, then losing my job, that brief absolute terror of being unemployed with zero callbacks trying to job hunt to now spending nearly every waking hour at work.

Alcatel – Lucent saves the day

Speaking of stress, I haven’t had to build a physical network in ages, and this was news to me that all the SFP connectors are now vendor locked. Thinking I could just buy some cheap SFP DAC cables and plug away and I was greeted with the fact that neither the Dell, nor Cisco switches would recognize them. Oddly enough, Linux/Windows didn’t care at all. I had ordered some RJ45 10 gig SFPs to run across the data centre, and found out as well that I’d ordered Cisco keyed generic ones, and yes of course they don’t work in the Fortigate firewalls, nor the Dell switches. Those needed their own special ones. Luckily for me I had been pulling out all the old SFPs from decommissioned equipment as I had figured that the single mode fiber optics may be useful if I ever need anything, and there was a couple of these Alcatel-Lucent SFP-GIG-T (1gig) modules that at least saved the day in that I could connect stuff, while waiting for the trial and error of needing 2 weeks to get the appropriate 10 gig interfaces.

Also with mentioning is that Dell switches configure in cluster groups and the 25 gig clusters have to be configured down to 10gig mode to recognize and work with 10/1gig modules.

port-group 1/1/5
 mode Eth 25g-4x
!
port-group 1/1/6
 mode Eth 10g-4x

For example.

Speaking of, setting up a LACP bundle on the Dell switch was a snap! Just remember your port-groups!


interface ethernet1/1/1
 description "WIN-HVN-100 port 0"
 no shutdown
 channel-group 1 mode active
 no switchport
 flowcontrol receive off

There isn’t all that much to do in the individual ethernet ports, but you get the idea. Since I’m short on cables, I’ve only got the first two ports populated, but I’m aiming for 4×25 per server!

interface port-channel1
 description WIN-HVN-100
 no shutdown
 switchport mode trunk
 switchport trunk allowed vlan 50,75-78,150,875,901-902

I did find that by explicitly allowing the VLANs onto the port helped a lot. And by default, the switches do LACP so there isn’t all that much to do.

And checking the LACP status is a snap as well:

hyperv-lan-core-01# show interface port-channel 1 summary
LAG     Mode      Status    Uptime              Ports
1       L2-HYBRID up        1 day 21:45:26      Eth 1/1/1 (Up)
                                                Eth 1/1/2 (Up)
                                                Eth 1/1/3 (Down)
                                                Eth 1/1/4 (Down)

Needless to say, I was happy as ‘it just worked’!
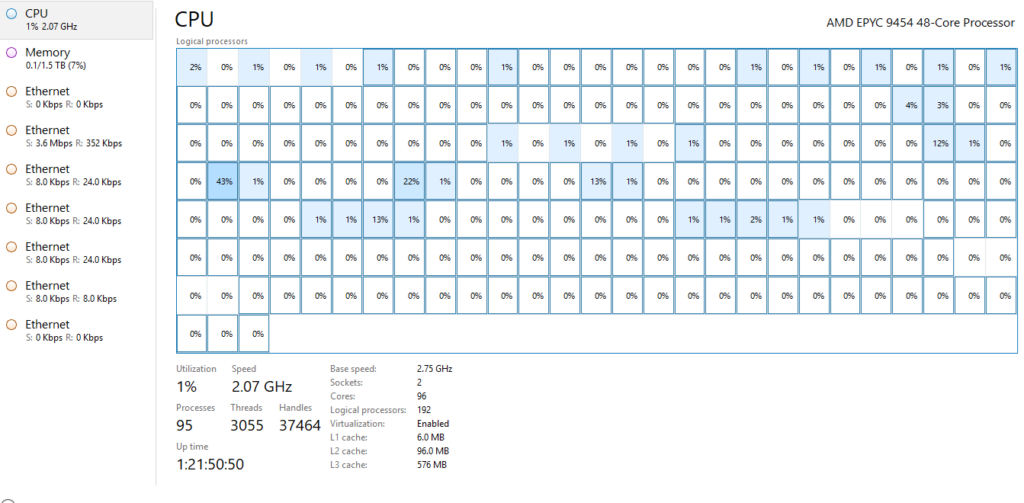
AMD Epyc 9454 48-Core Processor

Speaking of which, I deployed Hyper-V 2019 Server. Shame VMware had to go get Broadcomm’ed as there won’t be any more free Hyper-V servers, but for now it’s fine.

I had meant to write more on setting up Hyper-V as doing it through PowerShell is a bit daunting at first.

First setup your load balancing network team. In this case I’m using a 4 port 25gig card:

New-NetlbfoTeam -Name "Converged Network Team" -TeamMembers "Integrated NIC 1 Port 1-1","Integrated NIC 1 Port 2-1","Integrated NIC 1 Port 3-1","Integrated NIC 1 Port 4-1" -TeamingMode lacp

The port names are 100% system dependent, but you can get the idea. And setting the LACP was surprisingly easy.

The next step is to create a virtual switch

New-VMSwitch -Name "Converged Network Switch" -NetAdapterName "Converged Network Team"

I just load everything onto the same switch as I’m old, and trust my VLANs. And the servers are 1u so they don’t exactly have a lot of NIC’s for splitting stuff out but as always do what works for you.

The next step is to add the virtual network card onto my management VLAN in this case it’s 75

add-vmnetworkadapter -switchname "Converged Network Switch" -name Management -managementos
set-vmnetworkadaptervlan -managementos -vmnetworkadaptername "Management" -vlanid 75 -access

From there you can now use the ‘sconfig’ and setup your management IP address, load up Windows patches, load more drivers, and manage the server using the remote RSAT tools. Be sure to enable the remote desktop, unless you really love to type.

I went ahead and installed these services to get my servers onto an existing Hyper-V cluster. I’m sure some can be removed, but YMMV as always:

Install-WindowsFeature -Name FileAndStorage-Services
Install-WindowsFeature -Name File-Services
Install-WindowsFeature -Name FS-FileServer
Install-WindowsFeature -Name Storage-Services
Install-WindowsFeature -Name Hyper-V
Install-WindowsFeature -Name NET-Framework-45-Core
Install-WindowsFeature -Name NET-Framework-45-Features
Install-WindowsFeature -Name NET-WCF-Services45
Install-WindowsFeature -Name NET-WCF-TCP-PortSharing45
Install-WindowsFeature -Name Failover-Clustering
Install-WindowsFeature -Name Multipath-IO
Install-WindowsFeature -Name RSAT
Install-WindowsFeature -Name RSAT-Feature-Tools
Install-WindowsFeature -Name RSAT-Clustering
Install-WindowsFeature -Name RSAT-Clustering-PowerShell
Install-WindowsFeature -Name SNMP-Service
Install-WindowsFeature -Name Windows-Defender
Install-WindowsFeature -Name PowerShellRoot
Install-WindowsFeature -Name PowerShell
Install-WindowsFeature -Name WoW64-Support

Interestingly enough, on 2019 the option is there for the Linux Subsystem. I didn’t install it, but that’d be an interesting thing to share out.

I did have some weird issue with remoting and explicitly enabled it with a

Enable-PSRemoting -Force

It’s probably me, but it worked for me.

Then it’s a matter of adding all the other virtual networks Hyper-V seems to love:

add-vmnetworkadapter -switchname "Converged Network Switch" -name Backup -managementos
add-vmnetworkadapter -switchname "Converged Network Switch" -name "Live Migration" -managementos
add-vmnetworkadapter -switchname "Converged Network Switch" -name Cluster -managementos
set-vmnetworkadaptervlan -managementos -vmnetworkadaptername "Backup" -vlanid 76 -access
set-vmnetworkadaptervlan -managementos -vmnetworkadaptername "Live Migration" -vlanid 77 -access
set-vmnetworkadaptervlan -managementos -vmnetworkadaptername "Cluster" -vlanid 78 -access

And of course, don’t forget your shared storage, in this case my servers have that 4x25gig card, and a smaller custom 2×25 gig card that I used to storage A/B. Fun times!

From there I could use sconfig to join my machines to the domain, and then finally add them into the cluster, and start moving my workload over to the new servers, which is what I’ll be doing throughout the Christmas break.

Speaking of work:

A very Christmas Vacation like tree

They ordered this very Clark Griswald like Christmas tree. They had to cut it down to get the base to fit the lobby area with it reaching into the 2nd floor. It’d been so long since I’d seen something like this at work. But thats me working remotely for nearly 20 years.

Something awe inspiring about it.

real life Snoopy

Which reminds me of this Snoopy I saw on twitter. As terrible as life feels from time to time, there is a bit of hope, and fun here and there as my muse is always quick to point out when I’m feeling down.

And sometimes it’s better to just get it out, as who knows, maybe this could be useful in the future somehow.

Thanks for everyone’s ongoing support over on Patron and here. It really means the world to me.

Merry Christmas to all!

Manually migrating NT 4.0 on VMware ESX to Hyper-V or what is a ‘flat’ vmdk anyways?

So due to recent economic events I’m having to consolidate all my VM’s back to the office I’m currently renting. I had a fancy 1gig internet connection installed and I’m still under contract for a year. Before the c00f it made sense as I did a lot out of that office and was getting ready to do something fun and big. I had planned on making a cloud service, I’d bought a bunch of Xeon boards, and started the initial build of my cloud to shop around but then the world ended the following weekend. As they say, bad timing.

So as a fan of old junk I still have some NT 4.0 stuff, and it’d been running on VMware for years, no issues everything being great. But I need to do double+ duty at the moment and to make it easier than trying to get GPU passthru working, I’m just going with Hyper-V on the Windows 10 desktops that I have running. May as well make people doubly useful!

In some idea of ‘performance’ I had converted all the virtual disks to ‘flat’ VMDK’s and never thought twice about it as it worked, and all was well.

Naturally to start with I uninstall VMware Tools while running under ESXi and shut down the VMs.

Well after rsync‘ing my disks back, I converted them with qemu-img and got this weird error that my VMDK’s were not VMDK’s. They are infact FLAT disk images. With really screwed up geometry that prevented both qemu and Hyper-V from mounting the raw converted disk images.

So first let’s verify the data:

root@NT15:/mnt/d/virtual/USENET-AltaVista# sfdisk -d USENET-AltaVista-flat.vmdk
label: dos
label-id: 0x8058e639
device: USENET-AltaVista-flat.vmdk
unit: sectors

USENET-AltaVista-flat.vmdk1 : start=          63, size=     4096512, type=7, bootable

And sure enough yeah it’s like a typical DOS disk with the start 63 sectors in. So to mount this under Linux (WSLv2 too!) we need to tell the loop driver the offsets, which is the start and size * 512 or:

# mount -o loop,offset=32256,sizelimit=2097414144 USENET-AltaVista-flat.vmdk /mnt

And all is good. Yes even a type 7 for HPFS/NTFS it mounted find and the data is there.

Now the ‘fix’ was an old one from back in the day, when moving stuff around and things get goofed you can try to xcopy and permissions always get messed up or cheat, and just use another NT installation and format a floppy disk and copy the following system files to it:

  • ntldr
  • ntdetect.com
  • boot.ini

In my case that’s all I needed to do, I re-ran qemu-img to convert from raw to vpc disk images:

qemu-img convert -f raw -O vpc USENET-AltaVista-flat.vmdk USENET-AltaVista-flat.vhd

And setup Hyper-V to boot my virtual diskette first, and in no time my NT was back up and running.

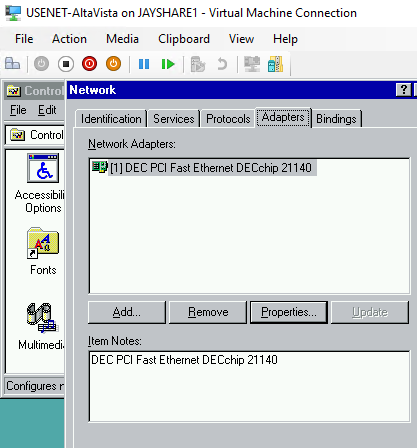
Naturally be sure to install the legacy network adapter for the VM, and re-configure NT for the DECchip 21140 adapter.

DECchip 21140

Dont’ forget to re-run service pack 6, and the update. Since these disks & VMs were pre-installed I didn’t have to mess with the “CompatibilityForOlderOperatingSystemsEnabled” flag. Although that was quite the fun adventure at the time.

In my case there was some IP addresses to change, but it’s back online with minimal effort which is always fine. Hyper-V doesn’t have any real integration stuff for old Windows so it’s pretty much a set it an forget it thing, or use Terminal Server for remote access.

So yes, many of the hosted things I have are down. I know. Yes it sucks. And yes I think the disk I put this on at the moment kind of sucks too. It’s been super cold here lately and I didn’t want to be exposed out there riding around getting soaked in the high winds so I’ll keep shuffling stuff later. But for now I got to save some hosting fees. And things like the gopher are dead. for the moment.

Enable Hyper-V on Windows 10 Home

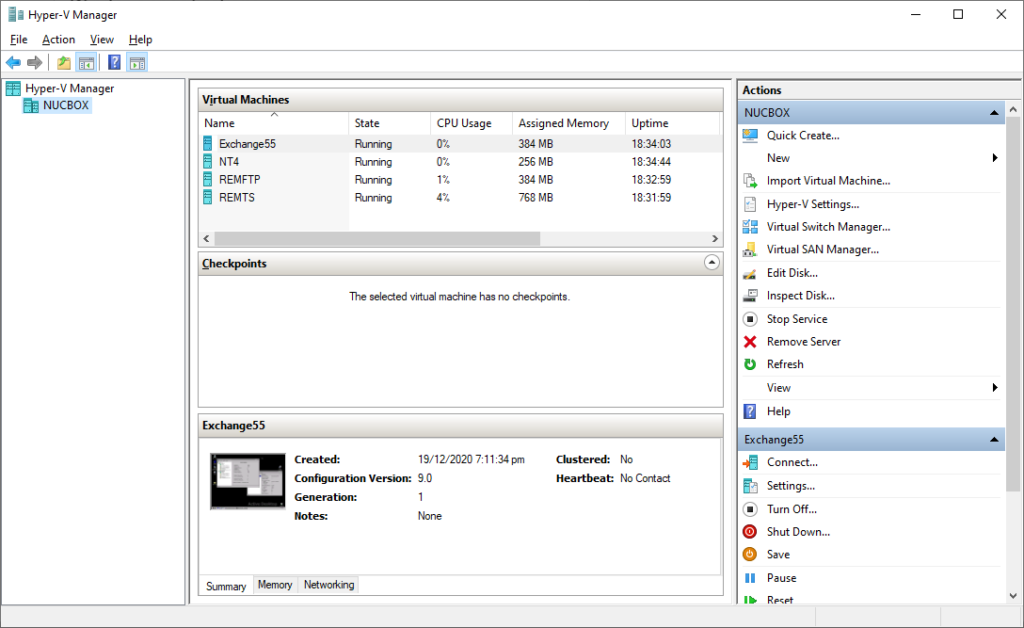
So you are in a hurry and need to build a network in a box. It was a bit of a surprise, and you have no time. On site there is ONE computer, it’s a NUC. A tiny one. And you cannot replace the base OS for “reasons”… No problem, you say, just add in Hyper-V and you can build an ‘older’ but useful domain controller, exchange server, VPN & utility servers and then yeah you find out the killer:

Ugh

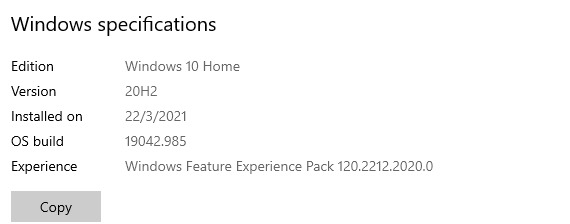
Windows 10 Home.

Well it turns out that you actually *CAN* install Windows 10 with a little command line shake and bake:

pushd "%~dp0"
dir /b %SystemRoot%\servicing\Packages\*Hyper-V*.mum >hyper-v.txt
for /f %%i in ('findstr /i . hyper-v.txt 2^>nul') do dism /online /norestart /add-package:"%SystemRoot%\servicing\Packages\%%i"
del hyper-v.txt
Dism /online /enable-feature /featurename:Microsoft-Hyper-V -All /LimitAccess /ALL
pause

I picked up this tip from TheWindowsClub. And yep, it works!

Super cool!

Of course this also means you can turn your unsuspecting parent’s home machine into a remote server….

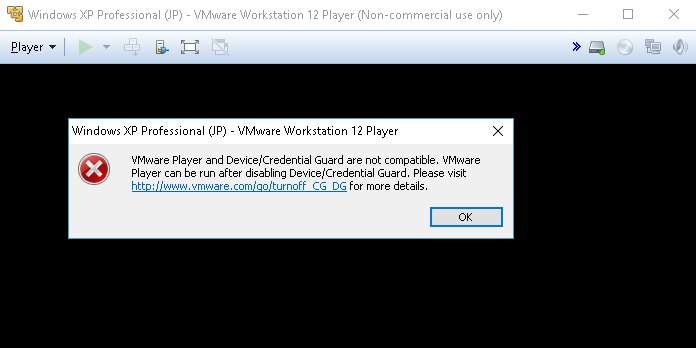
VMware Player and Device/Credential Guard are not compatible!

What is this?!

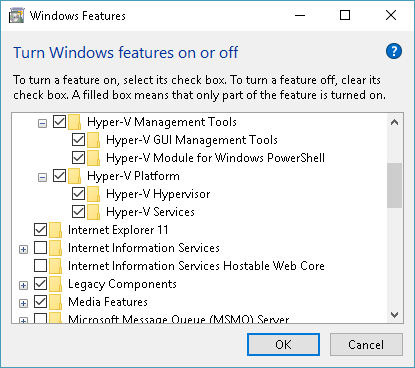
Well it turns out that by turning on all the SDK stuff for Windows 10, including the mobile dev, which includes the Windows phone emulator it naturally uses Hyper-V.

Hyper-V Hypervisor enabled

And obviously the two hypervisor’s wont play nice with each-other.  You could just disable it, and go back and forth re-enabling it when needed, or make a new boot selection without it!

I found this post here: Switch Easily Between VirtualBox And Hyper-V WithA BCD Edit Boot Entry In Windows 8.1

C:\> bcdedit /copy {current} /d "No Hyper-V" 
The entry was successfully copied to {ff-23-113-824e-5c5144ea}. 

C:\> bcdedit /set {ff-23-113-824e-5c5144ea} hypervisorlaunchtype off 
The operation completed successfully.

note: The ID generated from the first command is what you use in the second one. Don’t just run it verbatim.

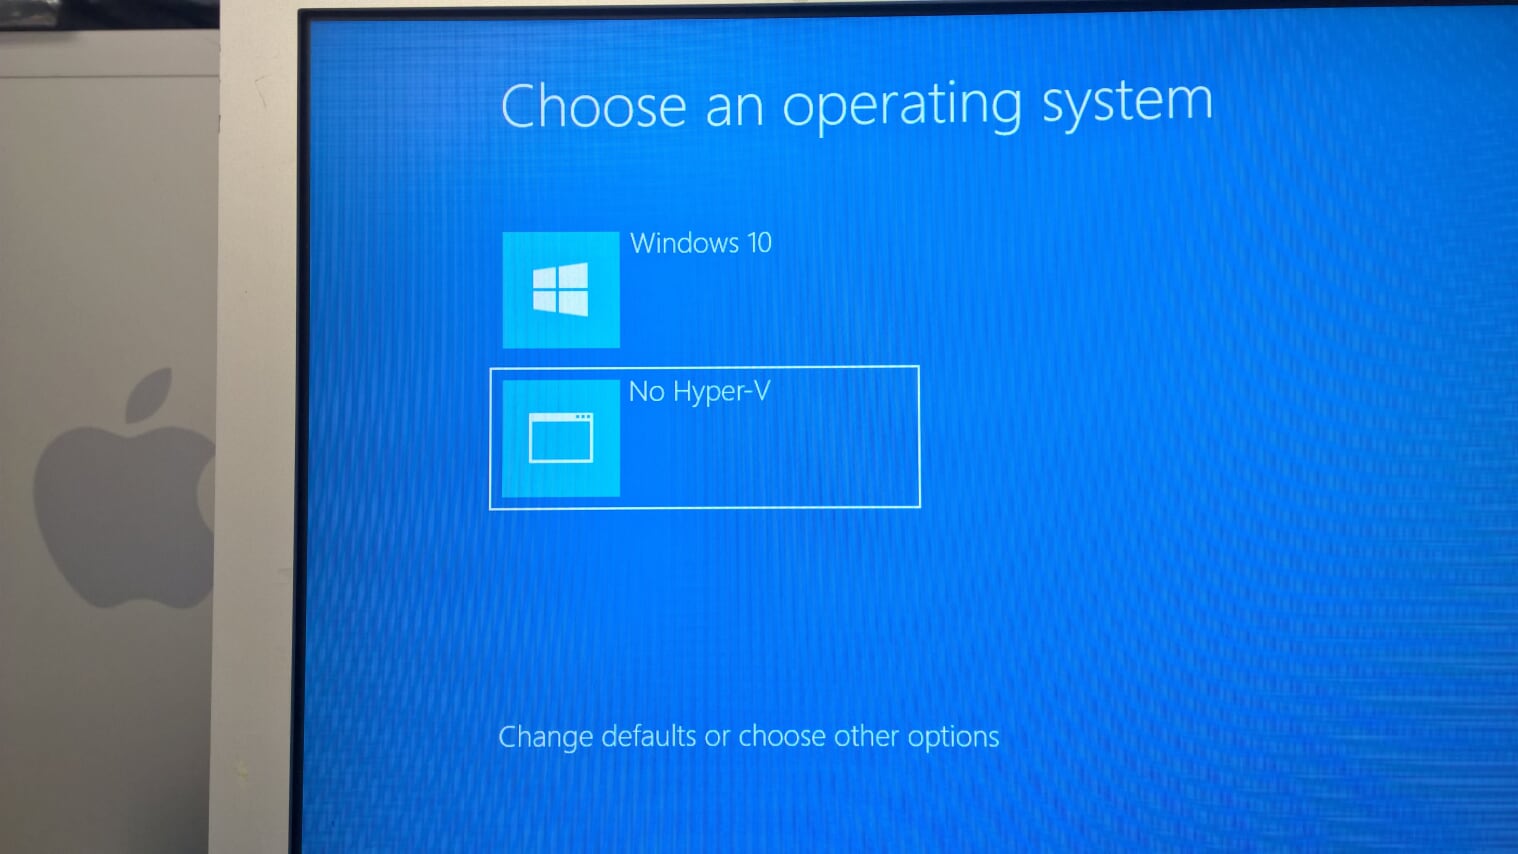
When you restart, you’ll then just see a menu with two options…

  • Windows 10
  • No Hyper-V

Sounds easy enough, doesn’t it?

BCD Boot menu

And just like that on power up, I can switch between Hyper-v and no Hyper-V.

Oh yeah with the latest version of Windows 10 (October 2018) I had to list the BCD table with:

bcdedit /enum ACTIVE /v

As after the upgrade it had tagged both of my boot selections to enable Hyper-V everywhere. I had to delete the #2 entry and re-create the no hyperv dance. {current} doesn’t work anymore.

Loading NT 4.0 & Windows 2000 on Hyper-V

In this attempt to get NT 4.0 running on my machine, here is what I did. This holds true for 2008r2, and 2012 along with the Windows 10 preview.

old versions of Windows are not supported, but with a little bit of fun from PowerShell you can get them to work.

First make sure you run PowerShell as Administrator!

PS C:\WINDOWS\system32> get-vm

Name State CPUUsage(%) MemoryAssigned(M) Uptime Status
—- —– ———– —————– —— ——
NT40 Off 0 0 00:00:00 Operating normally
Windows 2000(wks) Off 0 0 00:00:00 Operating normally

As you can see here I have two virtual machines.  Both of them are ‘off’ since there is no memory assigned, nor is there any uptime.  It’s weird to me how they are “Operating normally’ since they aren’t running but I guess that’s a feature.  Make sure the VMs are powered off before trying to do this.

Restricting the CPU capabilities was the checkbox to enable in the first version of Hyper-V.  Now it’s hidden from the user, so you need to enable this in Power Shell.

First let’s check a VM:

PS C:\WINDOWS\system32> Get-VMProcessor NT40 | fl CompatibilityForOlderOperatingSystemsEnabled

CompatibilityForOlderOperatingSystemsEnabled : False

As you can see it’s disabled.  Now to enable it with:

PS C:\WINDOWS\system32> Set-VMProcessor NT40 -CompatibilityForOlderOperatingSystemsEnabled $true

Now we can verify it’s turned on:

PS C:\WINDOWS\system32> Get-VMProcessor NT40 | fl CompatibilityForOlderOperatingSystemsEnabled

CompatibilityForOlderOperatingSystemsEnabled : True

And we are good to go.

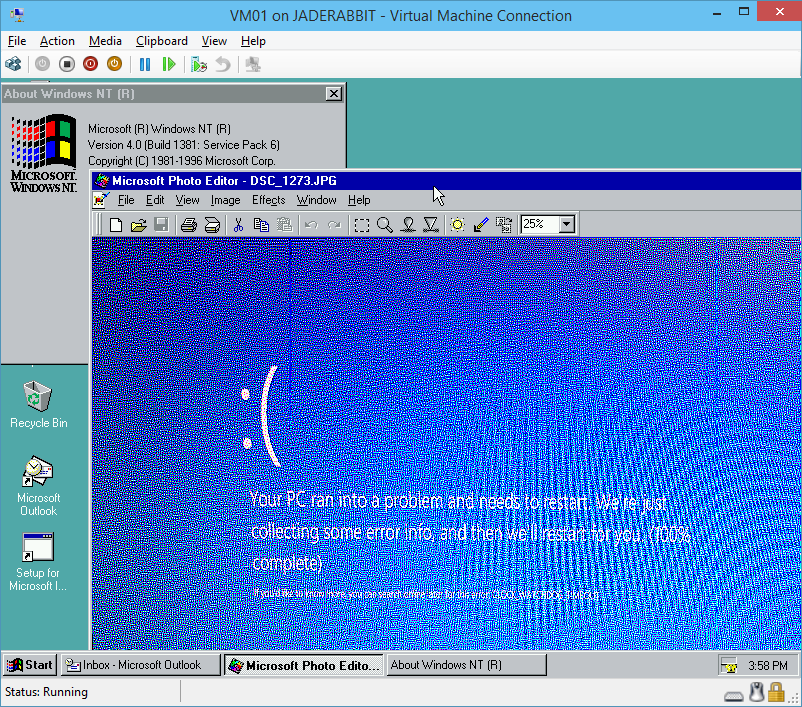
NT 4.0 Service Pack 6 on Hyper-V / Windows 10 Technical Preview 9879

NT 4.0 Service Pack 6 on Hyper-V / Windows 10 Technical Preview 9879

Now for the networking part, remember to remove the existing network adapter, and add the ‘legacy’ network adapter.  On my PC there was an additional snag, which is that every time a VM reboots, or is powered on the legacy adapter will receive NO packets.  Go into the Hyper-V console, and disconnect the legacy adapter, and reconnect it, and network traffic will flow.

And additional note on installing Windows 2000.  You *MUST* change the HAL uppon instalation.  By default it’ll detect an ACPI system, but the driver ACPI.SYS will bluescreen the VM.  Hit F5 when it prompts about storage adapters, and select the ‘STANDARD PC’ HAL from the list.

Just to make the flags more clear

Hyper-V to be a part of Windows 8?

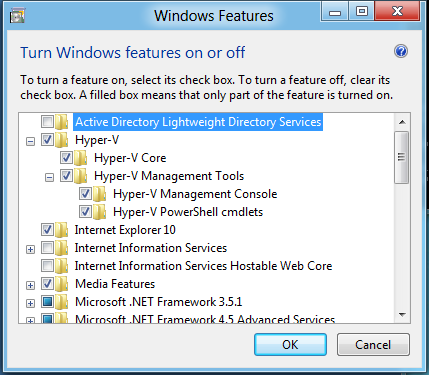
While trying to install Virtual PC for windows on the Windows 8 Build 8102, I eventually found out after a lot of finagling that it just isn’t supported.  However, get this Hyper-V is in there!

Hello Hyper-V

I was hoping for maybe some kind of desktop hyper-v experience but hell I’ll take anything I can get at this point.. At least I can still load up the cisco VPN in my old VM and keep on working there… But I probably shouldn’t have loaded 8 on my main machine.. Live & Learn.

How to fix weird mouse issues with VM’s migrated from MS Virtual PC/Virtual Server/Hyper-V

I had this issue with one VM where the mouse would either play dead, or it’d just hide in a corner.  While I did have RDP access, it was.. quite annoying.

So some googling around I found this.

1. Do it all over again, but make sure to uninstall the Virtual Machine Additions before you convert the machine.
2. Install VMWare tools without the mouse driver (choose custom installation)
3. Open regedit, and use your mad keyboarding skillz to navigate to
HKEY_LOCAL_MACHINE\SYSTEM\CurrentControlSet\Control\Class\{4D36E96F-E325-11CE-BFC1-08002BE10318}
..then remove the value msvmmou and any adjacent spaces from the Regvalue UpperFilters, leaving whatever else is there, then reboot.

And it actually worked!

Proxmox VE

Well frankly I’ve been majorly disappointed with Microsoft’s latest offerings in the world of virtualization. Frankly it’s been one BIG step backwards in terms of management.

I mean check this well meaning blog on how “easy” it is to setup remote management. And of course for the most part it NEVER works.

I know this must be a major news flash to Microsoft but you see virtual servers are like mainframes. The zone 0 OS must be able to stand on it’s own, and have just enough to bootstrap the hypervisor and allow itself to be managed in a stand alone fashion. After all if it were in a domain, where do you think those domain controllers are? Yep they are Virtual machines! And how do you ‘manage’ a domain resource with no DC’s? The whole 2008 Hyper-V is a BIG miscalculation on Microsoft’s part. I hope they wake up and notice how they had a good thing and have destroyed it.

All this nonsense sent me searching for an alternative which I’m pretty sure I found a great blend of system emulation, and something like SUN containers for Linux. There is even a Debian etch based quick install version called Proxmox which incorporates KVM (The new Linux hypervisor) and OpenVZ. And of course it’s FREE!

The cool thing is that the main management works on a web page, the consoles can be controlled via a VNC viewer that uses JAVA, and it’s VERY quick to setup.

The system emulation KVM uses the core devices from Qemu so a lot of Qemu virtual machines will “just work” if you copy them over. If you are installing an OS onto the virtual machine the ‘easy’ way is with the physical CD, you can use ISO images, however they are awkard to use. You have to flag the VM to pause on startup switch over to the monitor page and issue the following command:

change ide1-cd0 /directory/isoimage.iso

then tell the emulator to start up with the ‘c’ command which will continue from the pause…. Yeah I know it’s not terribly eligant.

On the OpenVZ front, it’s FAST as there is no real emulated IO it’s native. So I decided to use the wiki template and setup a wikipedia mirror at home. If anyone feels as brave you too can find instructions here:

These are some of the table times to load:

601M pages.sql Query OK, 7,473,186 rows affected, 8 warnings (5 min 10.52 sec)
837M revision.sql Query OK, 7,473,200 rows affected, 65535 warnings (2 min 11.84 sec)
18G text.sql Query OK, 7,473,202 rows affected, 1 warning (12 min 12.07 sec)
20M category.txt Query OK, 471,207 rows affected (13.14 sec)
1.8G categorylinks Query OK, 24,501,837 rows affected, 30177 warnings (28 min 28.31 sec)
5.6G externallinks Query OK, 36,492,925 rows affected (3 min 50.34 sec)
362M latestimage Query OK, 807,906 rows affected, 2 warnings (34.35 sec)
555M imagelinks Query OK, 18,615,721 rows affected (10 min 49.60 sec)
32k interwiki Query OK, 651 rows affected (0.08 sec)
186M langlinks Query OK, 5,780,509 rows affected (2 min 17.75 sec)
2G logging Query OK, 16,398,421 rows affected (2 min 51.75 sec)
45M oldimage Query OK, 118,449 rows affected (1.97 sec)
7.6G pagelinks Query OK, 270,641,297 rows affected (6 hours 12 min 4.83 sec)
104M redirect Query OK, 3,234,481 rows affected (23.71 sec)
1.2G template-link Query OK, 48,885,222 rows affected (50 min 7.08 sec)
68k user_groups Query OK, 3,947 rows affected (0.11 sec)

Even the ‘longest’ part here with the 270 million records took six hours… Not too bad! That’s still 12,122.88 TPS!

Also as a tip for anyone else crazy enough to do a sizable mediawiki (like wikipedia) or any single server wiki look to this page.

The upshot is that by loading this APC
extension into PHP and mediawiki load times for my cached site went from 2-5 minutes to 1-10 seconds.

The OpenVZ portion has various application templates that can be loaded into the zones from CentOS, Debian, Ubuntu, to pre configured applications like the media wiki and a few others.

If anything I’d say that proxmox is what I was hoping Microsoft’s Hyper-V could have been. A container version of windows with easy remote admin along with some system emulation could have made things MASSIVLY easier to deal with. It’s a shame they decided to go with this bizarre WMI based thing.

Hyper-V with Windows 2008 core

So I got a new Acer 5800 pc… CHEAP.. A quad core cpu, 4 gigs of ram and 600+ GB of diskspace for slightly over $500 CDN. Talk about POWER on the cheap!

So I wanted to load up the new Microsoft Hyper-V stuff, and check out the new “core” windows.

First this core thing is weird… And not very intuitive. I hope you are good with netsh!

Also, loading device drivers was a MAJOR pain. Let me say loading the marvel lan drivers was really strange until I came acrosss something about pnputil.

It would have been nice to have some kind of pop up help guild along with the CLI window so that us n00bs could have at least a guide as to what the hell is going on in server core.

Anyways for me the fun was:

pnputil -i -a yk60x64.inf

Then it worked like a champ. I know as time goes on, people will need this little tidbit on how to load device drivers on Windows 2008 core server. So I thought I’d put it out there.

Needless to say, i’m on the road, so I don’t have access to my Netware 3.12 CD, nor my Qemu VM so I can’t get into some kind of networking with Qemu thing like I want to. But I’ll do so soon. Honestly!

From what I hear about this Hyper-V is that it’s faster, and more feature filled then the prior versions of Virtual Server… I’ll have to see as now I’m loading the network drivers….

Oh, and another thing, is that all the services are IPv6 native, and Windows 2008 server, like Vista defaults to IPv6 then fails to IPv4. It seems like a good time for some 6to4 guides, or new DSL/WAP’ that do the 6to4 dance.