On trying to extract files from a Texas Instruments S1500

So this started out as a weird thing that killed a day for me. I thought it was a little fun to look at but, ultimately I proved that I could extract files, but not from the requested image.
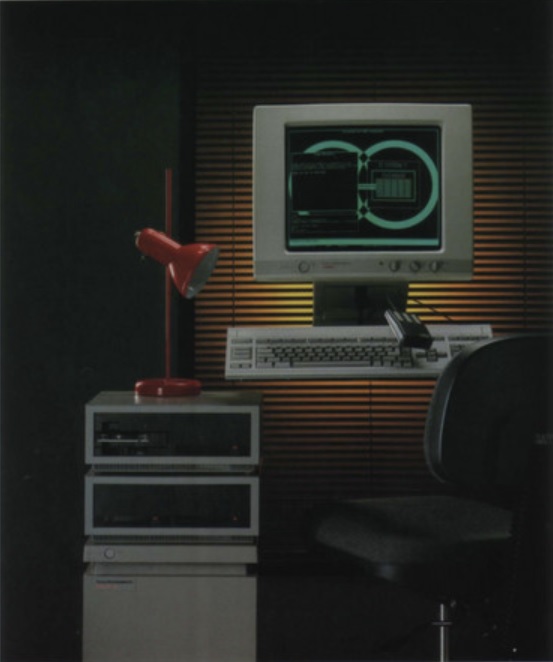
So let’s get into some more details, my failure, and well it’s been raised into another chance for some luck/fast knowledgeable hacker to get a payout to extract a single file.

As mentioned above the computer is the Texas Instruments S1500, the disk image was dumped on bitsavers years ago as s1505_cp3540/s1505_cp3540.dd.gz. As you may guess it’s a raw ‘dd’ of a disk.

Now looking at a few sources namely unix-ag the OS in question is TI System V, an AT&T SVR3.2 derivate. Running strings does reveal ‘SysVr3TCPID’ And this appears to be the Unix Version Banner:

(c)Copyright 1993 Hewlett-Packard Company,  All Rights Reserved.
(c)Copyright 1986-1992 Texas Instruments Incorporated,  All Rights Reserved.
(c)Copyright 1984-1988 AT&T, All Rights Reserved.
(c)Copyright 1979, 1980, 1983, 1985-1990 The Regents of the Univ. of California
(c)Copyright 1980, 1984, 1986 Unix System Laboratories, Inc.
(c)Copyright 1990 Motorola, Inc.
(c)Copyright 1989-1990 The Santa Cruz Operation. All Rights Reserved.
                         RESTRICTED RIGHTS LEGEND
Use, duplication, or disclosure by the U.S. Government is subject to
restrictions as set forth in sub-paragraph (c)(1)(ii) of the Rights in
Technical Data and Computer Software clause in DFARS 252.227-7013.
                         Hewlett-Packard Company
                         3000 Hanover Street
                         Palo Alto, CA 94304 U.S.A.
Rights for non-DOD U.S. Government Departments and Agencies are as set
forth in FAR 52.227-19(c)(1,2).

Along with further extraneous info like:

TI Sys V
V/68-1.0
3.3.2
MC680X0
Hewlett-Packard 9000 Series 1500

Fantastic. Well digging around you’ll eventually find that SYSV filesystems have a magic number, and it’s 0xfd187320

So a simple search through the raw filesystem reveals some:

neozeed@remlazar:/mnt/c/temp$ xxd s1505_cp3540.dd | grep 'fd18 7e20 0000 0002'
0035b7f0: 0000 0000 0000 0000 fd18 7e20 0000 0002  ..........~ ....
00f5b7f0: 0000 0000 0000 0000 fd18 7e20 0000 0002  ..........~ ....
02f5bff0: 0000 0000 0000 0000 fd18 7e20 0000 0002  ..........~ ....
04cc0bf0: 0000 0000 0000 0000 fd18 7e20 0000 0002  ..........~ ....
0505bff0: 0000 0000 0000 0000 fd18 7e20 0000 0002  ..........~ ....
1f1267f0: 0000 0000 0000 0000 fd18 7e20 0000 0002  ..........~ ....

And this fits the bill, as the next 32bit ‘word’ is the version, in this case 2 to indicate 1024k blocks ,and improvement added to SYSVr2. One thing is that the struct to read a super block is 512bytes (or is it always?), and the magic number is near the end, so from the above offsets, subtract 496 (decimal!) and you can get the start and sizes of each filesystem. Fantastic!

Speaking of SYSVr2, Do you know what is another SYSVr2? A/UX.

Shoebill was panned for not emulating the full Macintosh, rather it reads the kernel directly from the filesystem, and boots into it. That means Shoebill can read UFS/SYSV. Great start?

So I took the filesystem code from Shoebill, hacked it enough to let me build on Visual Studio, and point it to a raw filesystem and take a look. I put it here: filesystem.c

Now I’m impatient so it still needs a legit Apple A/UX virtual disk. Granted we don’t need it, but it made it easier to let the existing code fiddle with apple partitions, but when it comes time to read SYSV blocks, I closed the file handle and swapped things around. And that lead to this:
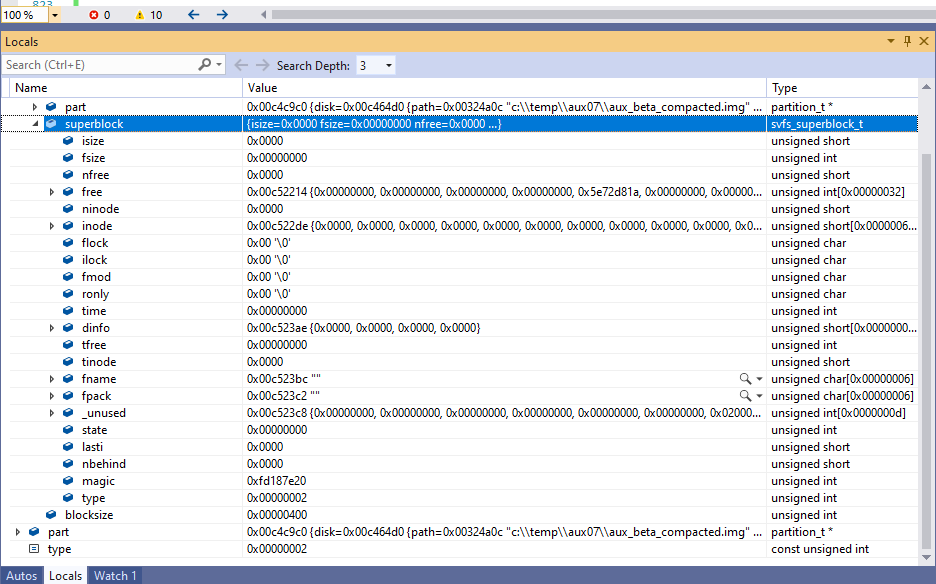
As you can see there is a LOT of zeros. However the magic & type align.
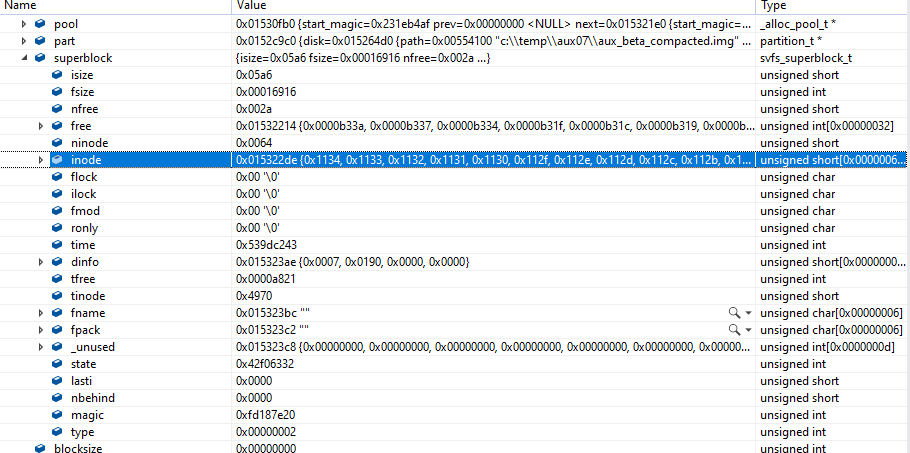
Meanwhile here is what an A/UX SYSV filesystem looks like. Notice far less zeros.
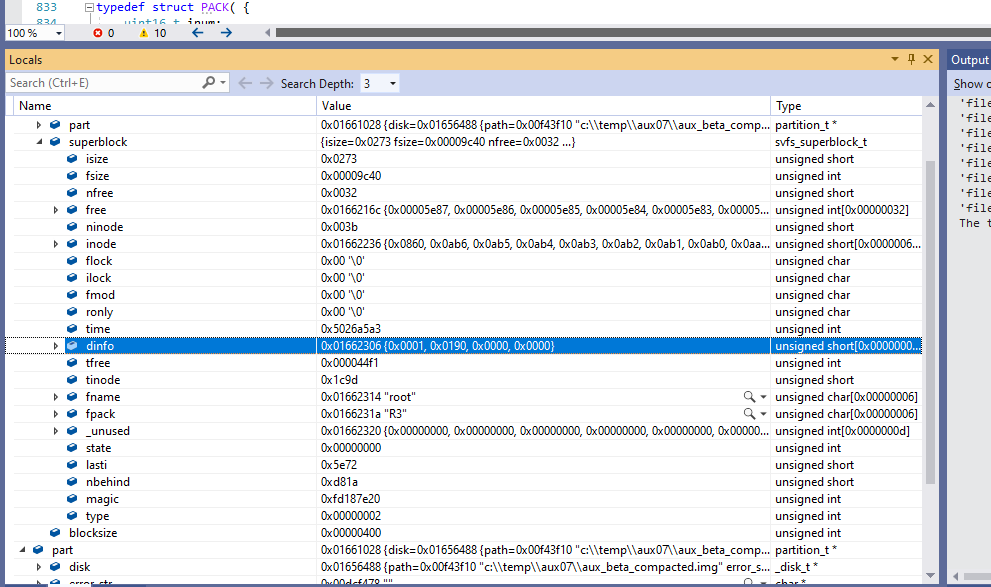
Additionally I was able to get another 68k based SYSV Unix disk, and yeah not all zeros. Also yes, using the Shoebill code it extracted files just fine.

However using my approach on the filesytem I always only get a directory with 2 enteries the ‘. ..’. I modified the source to just count inodes and write them to disk. And use inode 2 is just a tiny file. No doubt with all the zeros the disk is either very corrupted (backup superblocks?! where?! how?!) or the kernel implicitly knows these things, or finds them somewhere else.

I’ve been authorized to give a bounty of $200 USD to be able to extract arbitrary files from the 1505 disk image. I thought I’d give it a shot, but I don’t get how the super block aligns but the data doesn’t. Unless there is some other insane padding thing for a 1k superblock? The more I think about it, it’s probably likely as I know at some point I was skipping 3 blocks from an offset to get to a superblock, and 3 is just a weird number. 1 block header, 2 block superblock makes more sense.

Additionally this table may prove useful, especially for the ‘skip 3’ or pad to 1k:

Tape and disk utility is in progress...

26 partitions, 12-longword descriptors:
     Name    Start    Length   User  Comments
1  * LABL vl 0        2        FFFF
2  * PTBL pt 2        3        FFFF
3    SAVE sb 5        3        FFFF
4    FMT  fp 8        9        FFFF
5    TZON tz 17       296      FFFF
6  * unx1 lb 313      1024     0002  TI Sys V 3.3.2
7  * unx1 lb 313      1024     000A  TI Sys V 3.3.2
8  * unx1 lb 313      1024     0013  TI Sys V 3.3.2
9  * unx1 lb 313      1024     0014  TI Sys V 3.3.2
10   unx2 lb 1337     1024     0002  TI Sys V 3.3.2
11   unx2 lb 1337     1024     000A  TI Sys V 3.3.2
12   unx2 lb 1337     1024     0013  TI Sys V 3.3.2
13   unx2 lb 1337     1024     0014  TI Sys V 3.3.2
14   unx3 lb 2361     1024     0002  TI Sys V 3.3.2
15   unx3 lb 2361     1024     000A  TI Sys V 3.3.2
16   unx3 lb 2361     1024     0013  TI Sys V 3.3.2
17   unx3 lb 2361     1024     0014  TI Sys V 3.3.2
18 * cfg1 cb 3385     17       FFFF  TI Sys V 3.3.2
19   cfg2 cb 3402     17       FFFF  TI Sys V 3.3.2
20   cfg3 cb 3419     17       FFFF  TI Sys V 3.3.2
21 * root fb 3436     12288    FC02  TI Sys V 3.3.2
22   usr  fb 15724    32768    FC02  TI Sys V 3.3.2
23   jdis an 48492    2        FFFF  multi-volume file system anchor
24   pipe fb 48494    1024     FC02  pipe file system partition
25 * swap pb 49518    32768    0002
26   prt1 fb 82286    448972   FC02  part of jdis multi-volume
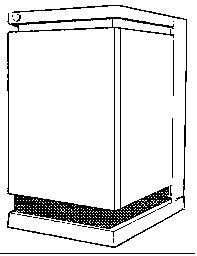
Did you know there is almost nothing left to document that this poor machine even existed?

Seriously look for “TI System V”

Heck even on the UTZOO archives..

AltaVista UTZOO search (superglobalmegacorp.com)

It’s like 5 posts, 3 being the same, someone who couldn’t dial out, and someone on the old UUCP map! Save me!

Reverse-engineering QNX 1.2 to boot from HDD

This is a guest post from Mihai Gaitos, hawk.ro. A winning entry for Virtualization Challenge IV – Act II – QNX 1.2 HDD Boot ($2000 prize).


Since a lot of people (especially Zir Blazer) tried to use the available QNX 1.2 / QNX 2 tools to install a HDD boot loader and load the existing kernel, I decided to take a different approach and build a new loader. At first I was under the impression that maybe a BIOS disk driver was already present in the kernel. After realizing that there was no HDD driver included, I decided to try reverse-engineering the relevant parts of QNX.

Starting from the start (boot sector) helped me extract the kernel from the boot diskette and analyze it just enough to validate that it’s the right thing and the assumed entry point is correct.

In order to make things easier (and because it was a fun project per se) I wrote a somewhat simple QNX filesystem access tool that enabled me to extract files from the diskette and HDD images.

Going for mount

Afterwards, my main activity was centered on mount. As opposed to typical Linux/Unix mount, here it also loads the HDD driver. After finding out the executable file format (ftp.qnx.com/usr/free2/technotes/qnx_load) I wrote another small tool to extract the code and data segments of QNX executables. Analyzing the disassembly, I have determined what operations mount performs in order to install the driver and mount a QNX partition. The main steps are:

  • load the driver file contents into malloc-ed buffer (inside the data segment of mount)
  • send a TA_ALLOC_SEG message to task in order to allocate a separate segment and copy driver there
  • build a DEFINE_DRIVER message using data from driver file and the allocated segment address and send the message to fsys (part of kernel, but separate task)
  • send a SET_ATTR message to fsys that has the side-effect of initializing the driver
  • use the driver to read first HDD sector (partition table)
  • send another SET_ATTR message to adjust disk size and offset to values read from partition

Knowing this gave me an idea to what my loader would need to do beside simply loading the kernel from HDD. However, this still depended on having an already running kernel to send messages to.

Back to kernel

The kernel is split into 5 parts:

  • task (task and memory management)
  • fsys (disk and filesystem)
  • dev (terminal devices)
  • idle (CPU arbiter)
  • shared (int 72 handler, mostly libc and other shared functions)

Description in parenthesis are my assumptions.

The copy protection routine (tries to read the last sector from diskette and if the read succeeds resets the computer) provides a good entry-point into the fsys part of the kernel. I assumed it can be replaced with some code to emulate what mount does. However, trying to allocate a segment (via TA_ALLOC_SEG message) hangs. I think this is causing a deadlock, since fsys initialization is called from task before it finished its initialization. Fortunatelly, while digging into this I noticed the header structure of the kernel, thus enabling me to increase its size in order to fit the xt driver at the end of fsys (it would have been slightly easier to put it at the end of shared, but that didn’t occur to me at the time).

Failing to use syscalls (DEFINE_DRIVER and SET_ATTR) meant I had to determine what those messages actually did. I disassembled fsys separately and proceeded to manually follow the code path in order to determine the effect each of those messages should have in the context of mounting a disk. Eventually it emerged that almost all of the data structures can be prefilled in the kernel image, leaving only the call to driver initializaion function.

I modified the kernel to add the xt driver at the end of fsys (modifying the header by hand), replaced the copy-protection routine with code to call its initialization, and indeed the harddrive was available from the start, without the need to run mount. I was still booting from diskette at this time but I was past the most difficult hurdle.

Finishing touches

Loading the kernel proved somewhat simple (I still have some knowledge about 16-bit assembly and real-mode BIOS) but the kernel “insisted” in trying to run /cmds/sh from floppy. At first I solved this by an ugly hack, modifying the command line string in kernel image from “/cmds/sh” to “3:/xi/sh” and “/config/sys.init” to “3:/xi/sys.init” (3: being the HDD identifier, similar to C: from DOS). The xi was needed in order to keep the same string length, or at least not making it larger since there was some other importand data just past this.

This mostly solved the challenge (there were some other minor mistakes and fixes), except I disliked that hack and went on to analyzing that first start of /cmds/sh, disassembling fopen (in shared) and finally finding the memory location where of the search system variable (somewhat similar to PATH). Modifying that variable eliminated the need for starting the first shell with “3:”.

Room for improvement

At present some parameters are hardcoded and the kernel is just placed at the end of the HDD, outside of QNX parition and its position and size is written in the boot sector (somewhat similar to the original QNX diskette approach). The partition size itself is hardcoded (by hand) in the kernel data structures instead of being read from the partition table on boot. Still, for something that is unlikely to ever run outside an emulator, I deem it good enough (for now).

Thanks

  • to Zir Blazer for putting a lot of effort into his approach and documenting each step
  • to Mitchell Schoenbrun for providing insight into QNX system philosophy
  • to forty for beating the first challenge and identifying the copy-protection routine address
  • and of course, to Tenox, Neozeed and Dan Dodge for the challenge. And for providing me with a great prize for 3 weeks of hard-working fun!

To access files, tools, bootable image and ready to run in your browser PCjs with QNX 1.2 go to Mihai’s site hawk.ro post.