The Rise of Unix. The Seeds of its Fall. / A Chronicle of the Unix Wars

It’s not mine, rather it’s Asianometry‘s. It’s a nice overview of the rise of Unix. I’d recommend checking it out, it’s pretty good. And of course, as I’m referenced!

The Rise of Unix. The Seeds of its Fall.

And part 2: A Chronicle of the Unix Wars

A Chronicle of the Unix Wars (youtube.com)

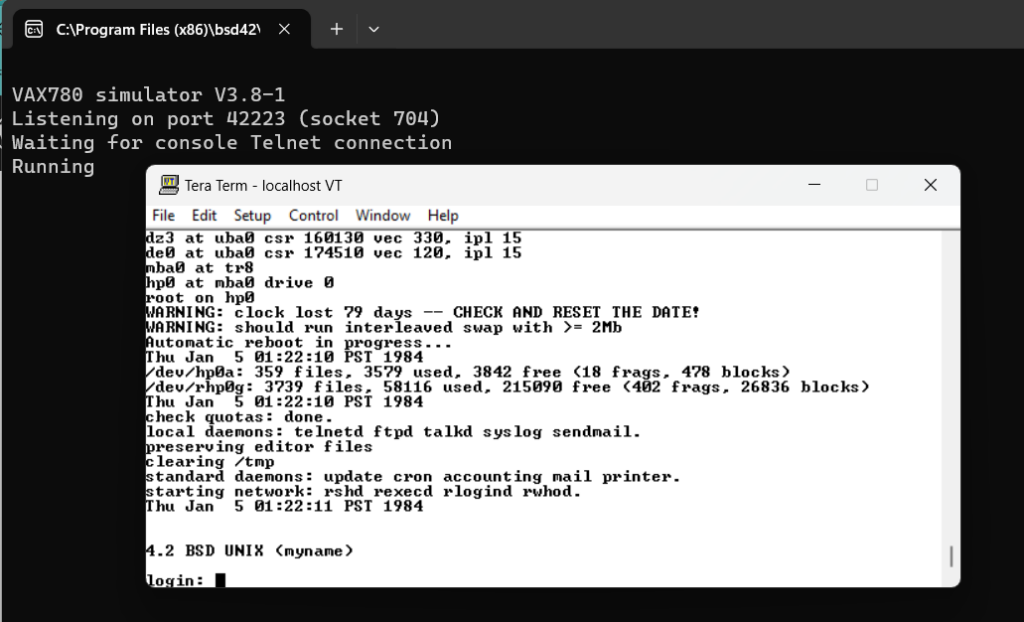
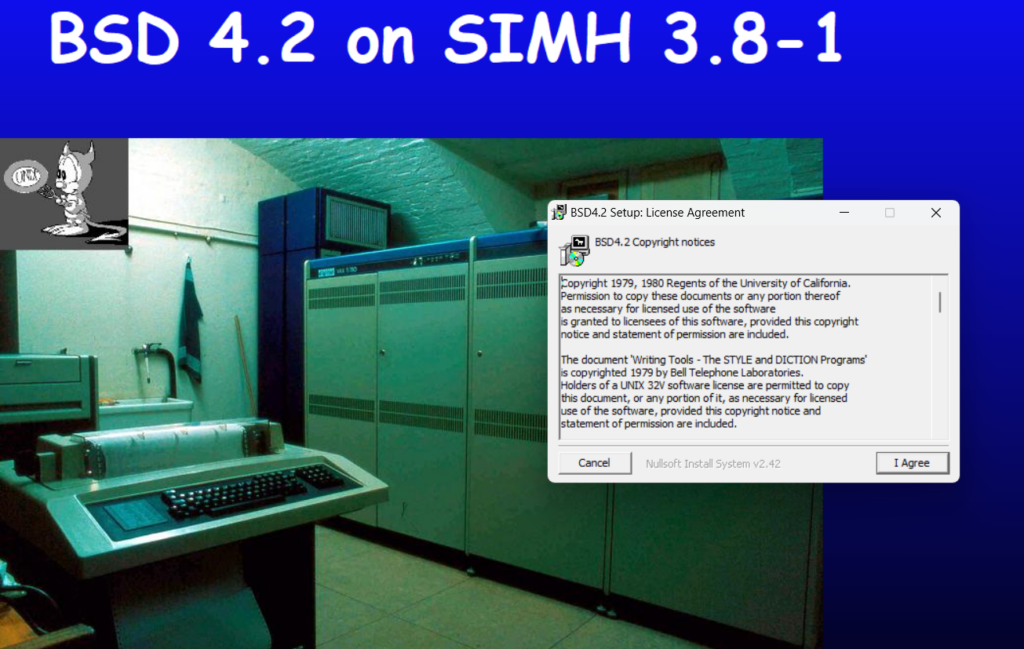
Years ago I had tried to make these old OS’s accessible to the masses with a simple windows installer where you could click & run these ancient artifacts. Say 4.2BSD.

Download BSD4.2-install-0.3.exe (Ancient UNIX/BSD emulation on Windows) (sourceforge.net)

Installing should be pretty straight forward, I just put the license as a click through and accept defaults.

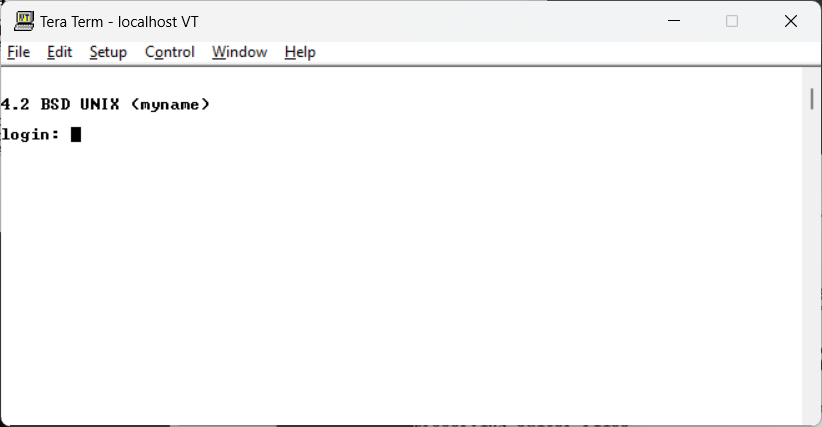
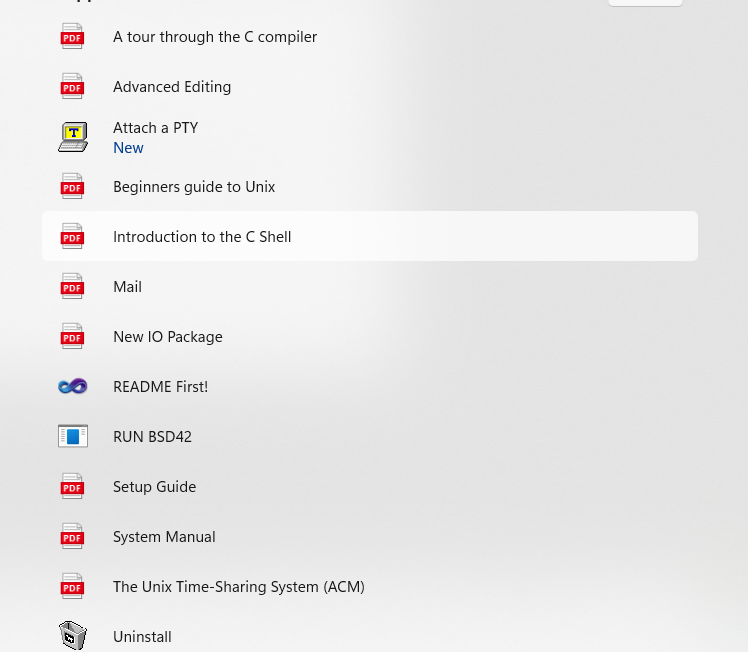
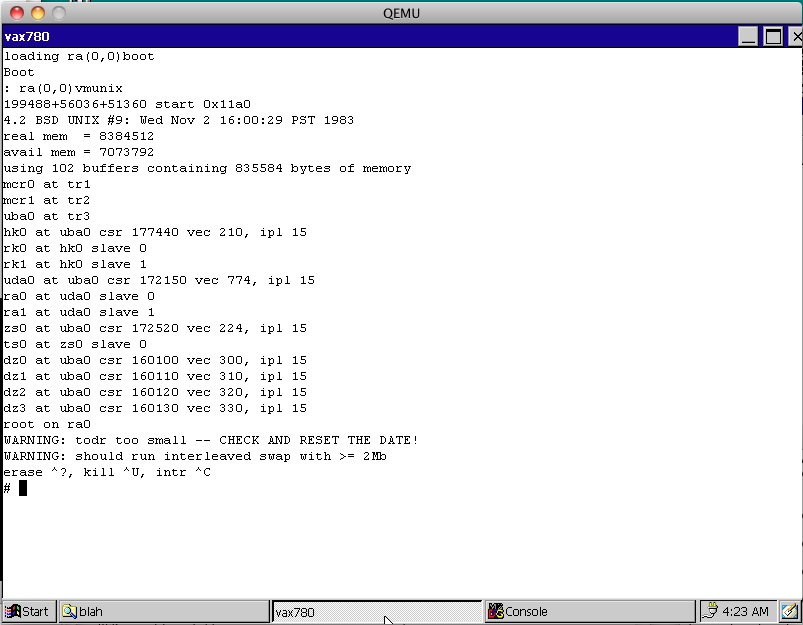
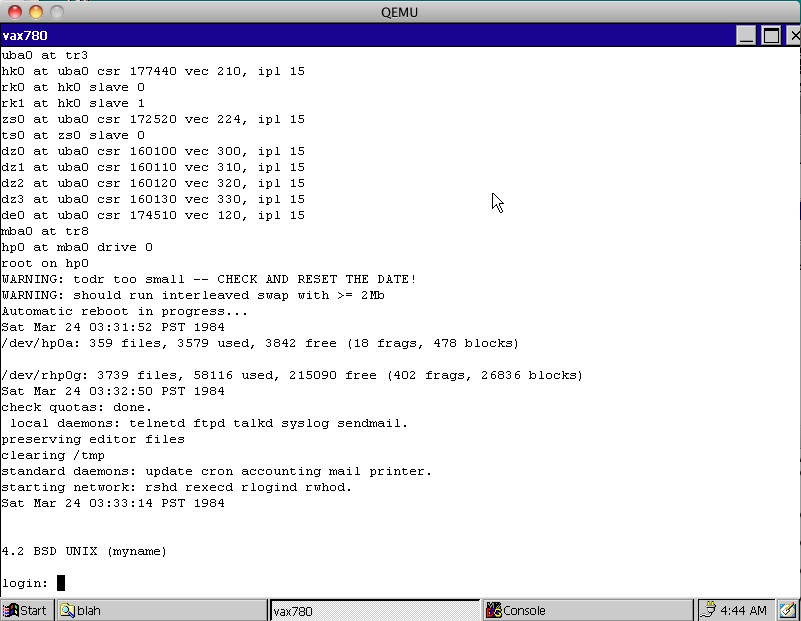
Starting BSD via ‘RUN BSD42’ and the emulator will fire up, and being up a console program (Tera Term) giving you the console access. Windows will probably warn you that it requested network access. This will allow you to access the VAX over the network, including being able to telnet into the VAX via ‘Attach a PTY’ which will spawn another Tera Term, prompting you to login.

telnettting into the VAX

You can login as root, there is no password, and now you are up and running your virtual VAX with 4.2BSD!

All the items

I converted many of the old documents into PDF’s so you may want to start with the Beginners guide to Unix. I thought this was a great way to bring a complex system to the masses, but I’m not sure if I succeded.

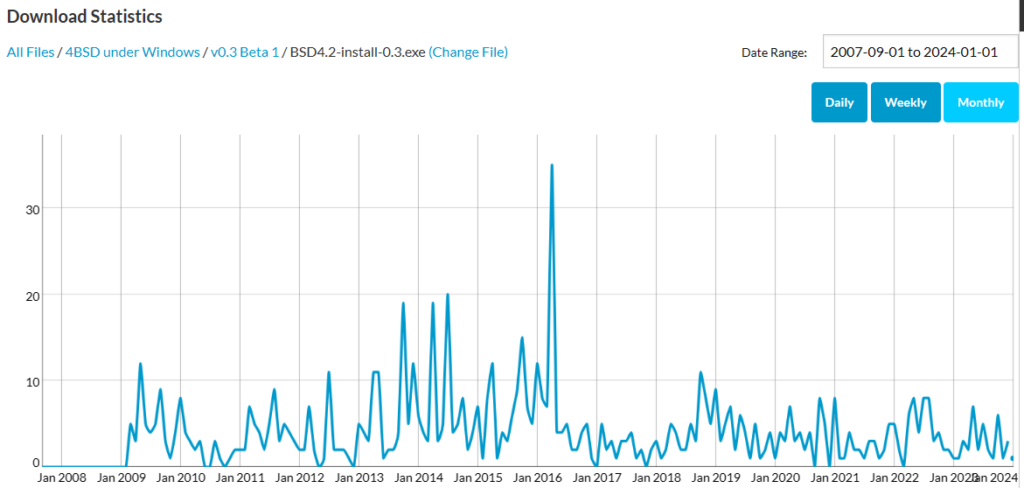
776 downloads

As it sits now, since 2007 it’s had 776 downloads. I’d never really gotten any feedback so I’d hoped it got at least a few people launched into the bewildering world of ancient Unix. Of course I tried to make many more packages but I’d been unsure if any of them went anywhere. It’s why I found these videos so interesting as at least the image artifacts got used for something!

But in the off hand, maybe this can encourage some Unix curious into a larger world.

Other downloads in the same scope are:

Enjoy!

Re-visiting the SUN-2 emulator: Adding SLiRP!

While I’ve covered Brad Parker (lisper)’s ‘emulator-sun-2before, booting into SunOS isn’t anything that new.

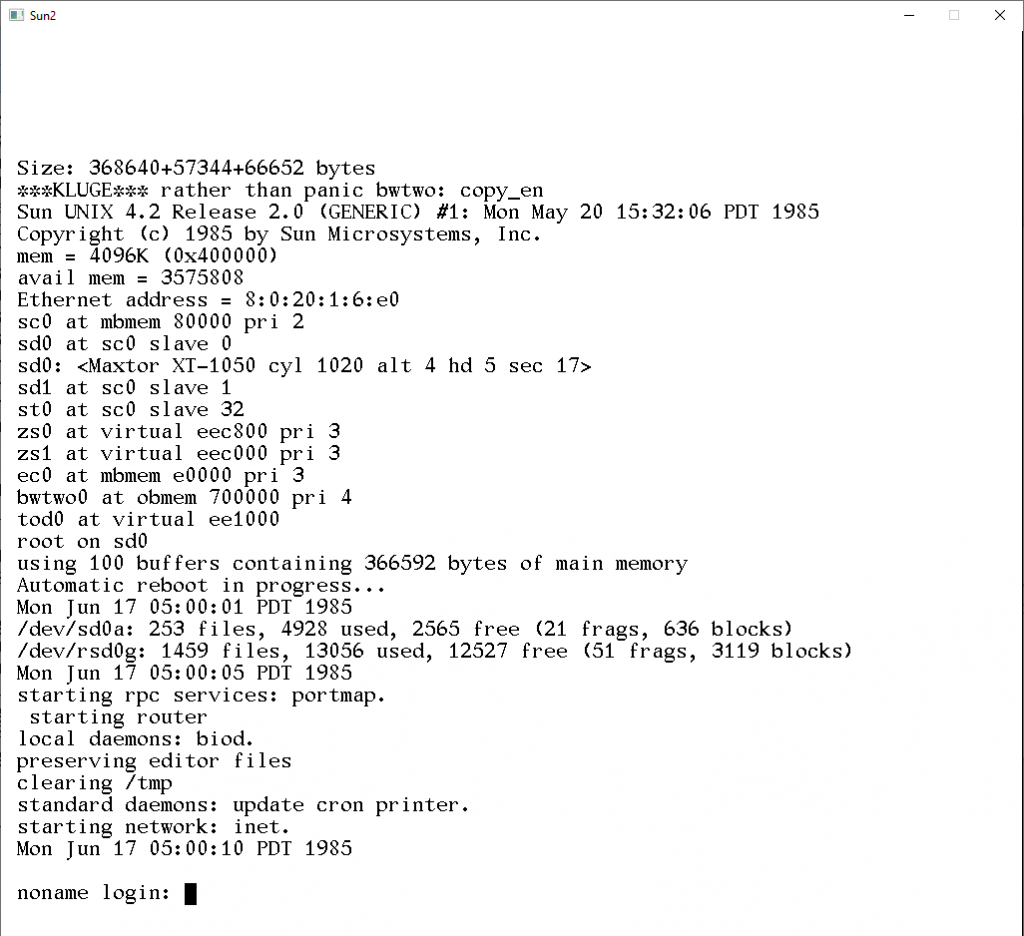
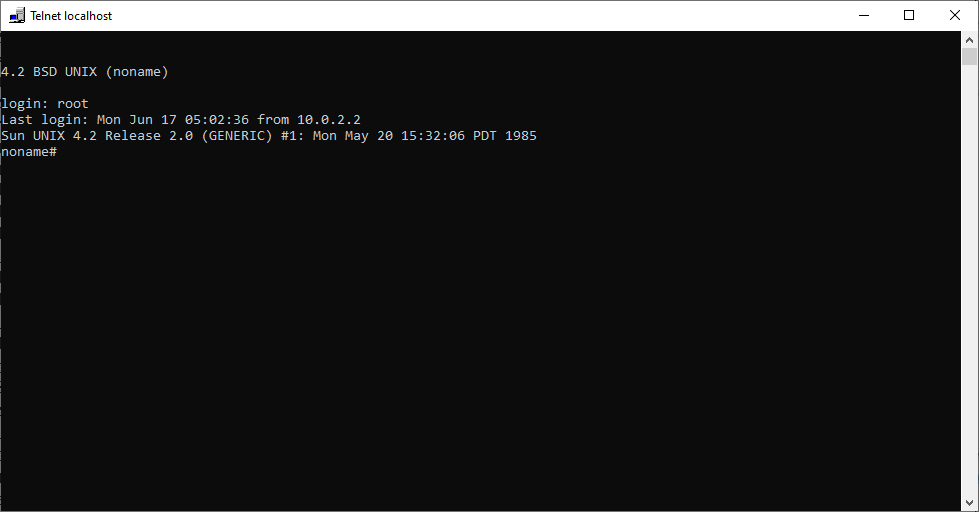
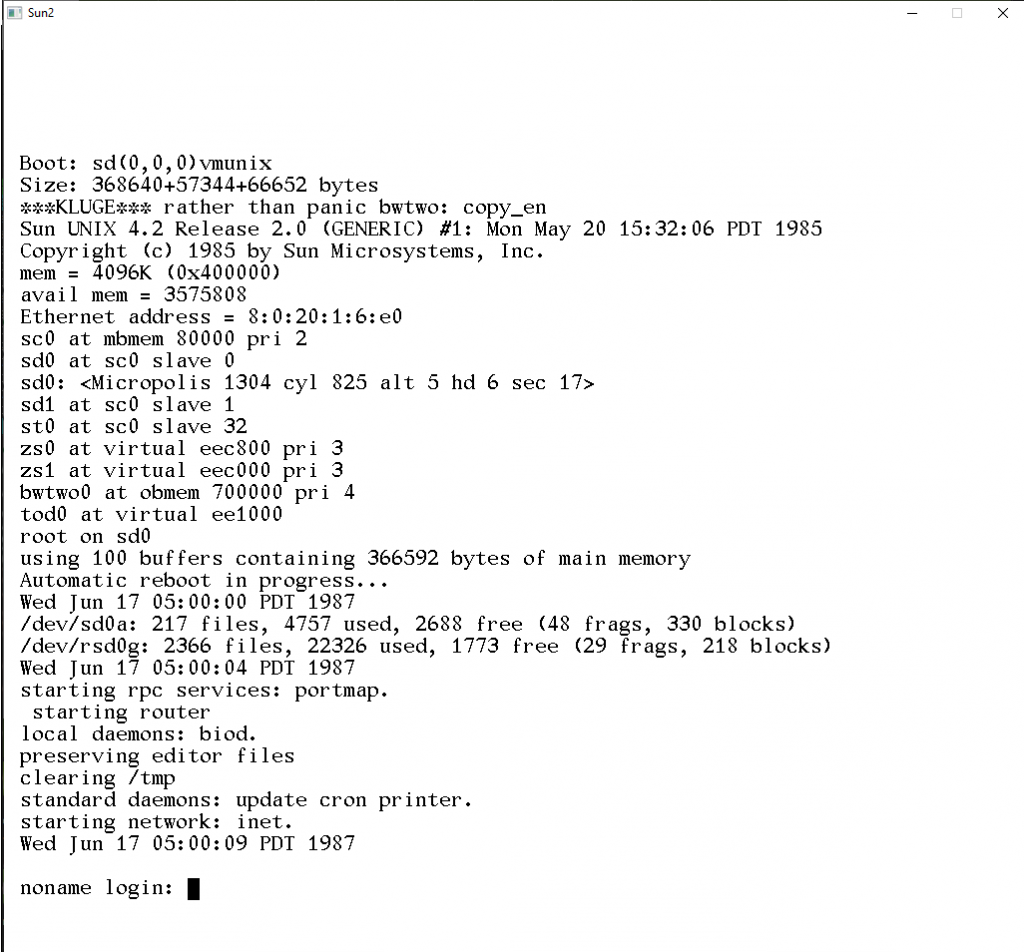
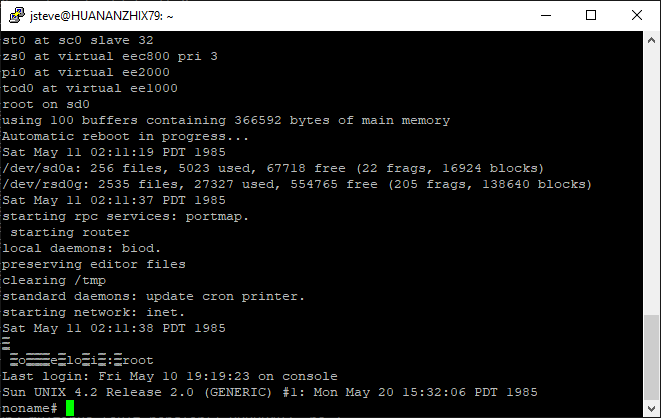
However, with the latest updates, from github, adding in a prior botched attempt, and some messing around, and finally, I got it to ping at first, then it was a matter of where to place the ‘slirp tick’. I first though putting it on the interface poll was a good spot, but for some reason the machine causes a deadlock/stall on boot before the PROM can even initialize. I’m not sure why. Searching further I found a good timer portion and injected the code. And sure enough I was greeted with the login banner:

I’ve been able to paste in about 100kb of a uuencoded tar file, and it didn’t lock the VM, and I was able to uudecode it, and actually build the source (Infotaskforce ’87 if anyone cares). So I’m at the point I think it’s stable enough to shove into the world, although I guess until I revisit it again.

You can download it on sourceforge: sun2.zip

emulator-sun-2

Since I was playing with the 68000 based GCC ’87 I know it was going to be more geared to SUN workstations, certainly of the early 80’s vintage as they would be the most ‘affordable/cheap/donated’ to FSF (Or so I’d imagine).

Naturally the go to emulator is TME, however this time while searching around for the install scripts and stuff I found lisper‘s (heeltoe.com) emulator-sun-2, a greatly cut down and SUN-2 focused emulator that emphasizes ease of use.

Wait, what? SUN-2, and ease of use? Why yes, not only that, as it uses SDL 1.2 it also means it’s much easier to compile. After an hour of messing around with it, I had it running on Windows. After a few minutes I had it running on my ARM based Acer NovaGO.

At it’s core is the m68k 68010 emulation from Karl Stenerud‘s Musashi core which is a great choice for the SUN-2 as it’s a 68010 based machine. Some fun notes from web.cuzuco.com/~cuzuco/sun2/ include:

  • CPU is a Motorola 68010 running at 10MHz
  • Maximum physical memory is 4 Megabytes
  • Maximum virtual memory is 16 Megabytes
  • All I/O is via a Multibus (an Intel design)
  • Main disk is a SMD, the largest size is 380Mbyte
  • Has a SCSI adapter, but the disk is slow and small (42Mbyte)
  • Sun was just finishing NFS
  • alludes to future AT&T UNIX System VI and VII
  • Display supported dual heads and a resolution of 1152×900
  • List price as tested: $44,900
  • Sun was still private, had 400 employees and sold 1500 units

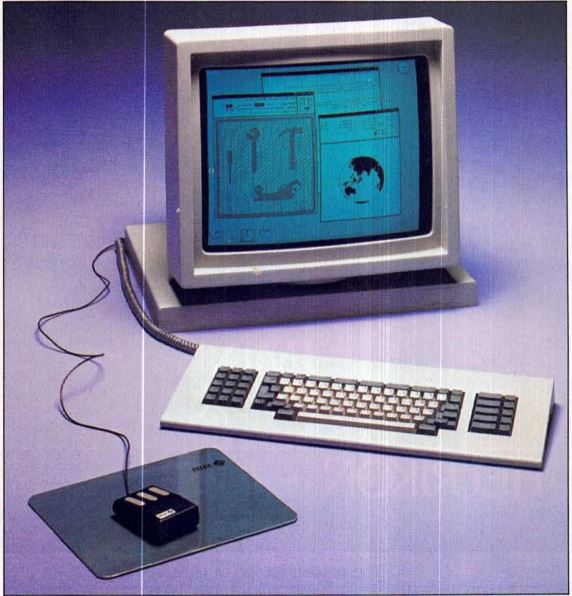
You can read about the debut of the SUN-2 in the UNIX/WORLD Magazine, VOlume 1, Number 5 dated October 1984 in archive.org. It starts on page 86.

I started to integrate sigurbjornl’s patches for networking but I think I need to work through SunOS 2.0’s weird VAX 4.2BSD arp issues (anyone have the source code to SunOS 2.0?!). I’ll probably update it with UDP or some fixed ARP thing to remove that or just let the SUN-2 talk to a VAX with 4.2BSD so they can be weird, together.

I’m also pretty sure my old Cockatrice III sort of debugged SLiRP thing broke the packed structs to let it work properly when compiled with Microsoft C, so I’ll have to break down and either try to fix that, or update and borrow the vastly updated SLiRP from SIMH.

For Windows users who want to play along the bundle is on the terribly named page “Ancient UNIX/BSD emulation on Windows” as SUN2.zip.

Running TME on Linux Subsystem for Windows (v1?)

I know in all the trade news everyone is excited that the newest Linux Subsystem for Windows will provide a native kernel. I would imagine it’s going to run along the lines of containers which means using the Hyper-V stuff. So good bye VMWare?

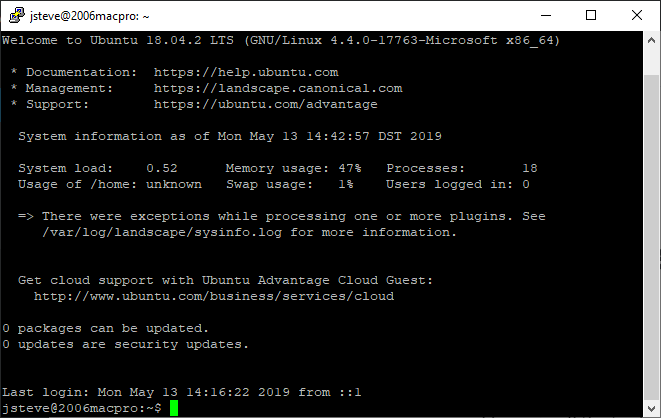
Anyways I want to run SunOS 2.0 which means no graphics are needed, but what I do need is a pty. I’m a n00b so I don’t know how to generate them myself, but I did see that I can piggyback on a ssh session. So first you need to enable & run sshd, which instructions are here, Although with Ubuntu 18.02 LTS there is further steps listed here. If everything is okay, you can SSH into your Windows machine, getting the Linux subsystem.

Some notes on building:

First let’s get the emulator and patches for SunOS 2

wget http://people.csail.mit.edu/fredette/tme/tme-0.8.tar.gz tar -zxvf tme-0.8.tar.gz wget http://www.heeltoe.com/download/sun2/diffs-20111125 cd tme-0.8 patch -p1 < ../diffs-20111125

Using GCC 5 or 7 (probably everything post version 3, the -Werror will cause building TME to error out.

I just removed the following block from configure

if test "x$enable_warnings" = "xyes" -a "x$GCC" = "xyes"; then CFLAGS="${CFLAGS-} -Wundef -Wall -Werror" CXXFLAGS="${CXXFLAGS-} -W" fi

Now you can run configure & make. I follow the general wisdom, which involves disabling shared libraries. Otherwise you can play with the dynamic linker. Yuck.

sh configure --disable-shared make

It doesn't like to build in parallel, so be prepared to wait.

And yes, building fb-xlat-auto.c & fb.c does take a long while. Also make sure to have bison & flex installed.

Using Debian 9/GCC 6.3.0 I do get a bomb compiling module.c

module.c: In function 'tme_module_init': module.c:93:3: error: 'lt_preloaded_symbols' undeclared (first use in this function) LTDL_SET_PRELOADED_SYMBOLS();

In this case I just copy the definition from libltdl/ltdl.h and put it into module.c It'll complain about it being a duplicate, but it'll compile. I don't understand that either.

Now we need to set the variable LTDL_LIBRARY_PATH to pickup the config for each hardware component.

export LTDL_LIBRARY_PATH=$HOME/tme-0.8

Ok and now let's get ready to install SunOS 2.0

$ mkdir sunos2 cd cd sunos2/ wget https://web.archive.org/web/20060720001131/http://www.soupwizard.com/sun2/sunos/sunos_2.0_sun2.tar.gz tar -zxvf sunos_2.0_sun2.tar.gz mv sunos-2.0-sun2/tape1 . wget http://people.csail.mit.edu/fredette/tme/sun2-multi-rev-R.bin perl $HOME/tme-0.8/machine/sun/tme-sun-idprom 2/120 8:0:20:02:02:02 > my-sun2-idprom.bin

Now we can configure the emulator. One thing to take note of is what pts device has been created once you SSH'd into Windows.

$ ls -l /dev/pts/ total 0 crw--w---- 1 jsteve tty 136, 0 May 13 15:08 0 c--------- 1 root root 5, 2 May 13 10:47 ptmx

So in this case it's /dev/pts/0 for me, as I'm the first (and only) thing connected.

Now you need to edit the config. This is the one that I'm using:

mainbus0: tme/machine/sun2 multibus my-sun2-idprom.bin cpu0 at mainbus0: tme/ic/m68010 obio0 at mainbus0 obio: tme/generic/bus size 8MB obmem0 at mainbus0 obmem: tme/generic/bus size 16MB ram0 at obmem0 addr 0x0: tme/host/posix/memory ram 4MB rom0 at obmem0 addr 0xef0000: tme/host/posix/memory rom sun2-multi-rev-R.bin rom0 at obmem0 addr 0xef8000 clock0 at obio0 addr 0x2800: tme/machine/sun2/clock tod0 at obio0 addr 0x3800: tme/machine/sun2/tod zs0 at obio0 addr 0x2000 ipl 6: tme/machine/sun2/zs mbio0 at mainbus0 mbio: tme/generic/bus size 8MB mbmem0: tme/generic/bus size 8MB mainbus0 mbmem at mbmem0 addr 0x00000 sc0 at mbmem0 addr 0x80000 ipl 2: tme/bus/multibus/sun-sc scsibus0 at sc0: tme/scsi/bus console0 at zs0 channel A: tme/host/posix/serial device /dev/pts/0 break-carats sd0 at scsibus0: tme/scsi/disk id 0 type acb4000 disk0 at sd0: tme/host/posix/disk file my-sun2-disk.img st0 at scsibus0: tme/scsi/tape id 4 type emulex-mt02 tape0 at st0: tme/host/posix/tape command tape0 load tape1/01 tape1/02 tape1/03 tape1/04 tape1/05 tape1/06 tape1/07 tape1/08 tape1/09 tape1/10 command mainbus0 power up

Now we are almost ready! Create a 1GB disk image with dd:

dd if=/dev/zero of=my-sun2-disk.img bs=1M count=1024

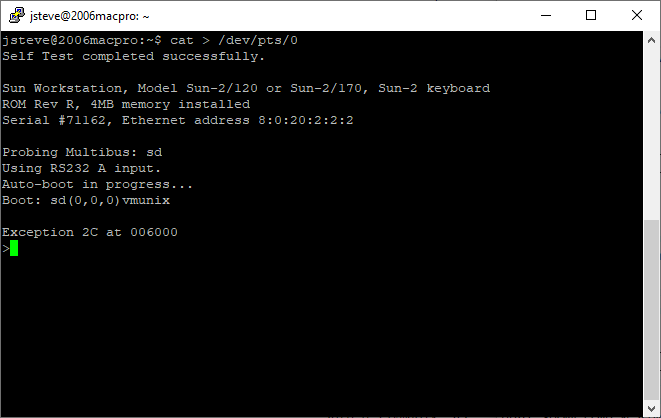
Now we are ready to go. From the ssh connection just type in 'cat > /dev/pts/0' and now everything we type in will be on the console. Now from a normal bash session type in '$HOME/tme-0.8/tmesh/tmesh SUN2-MULTIBUS' If everything goes well the bootpromp text will pop up on your SSH session.

SUN-2/120 on Windows!

And if everything has gone right, we are now at the firmware prompt, ready to install SunOS 2.0!

Instructions from retrocomputinggeek.com gives a pretty good walk through of configuring a 1GB disk, and the installation. Although as a hint use the -as flags when booting SunOS for the install. And after booting the miniroot, follow the instructions on heeltoe regarding doing the 1st tape of the install.

>b st() Boot: st(0,0,0) Boot: sd(0,0,1)vmunix -as Size: 368640+57344+66652 bytes Sun UNIX 4.2 Release 2.0 (GENERIC) #1: Mon May 20 15:32:06 PDT 1985 Copyright (c) 1985 by Sun Microsystems, Inc. mem = 4096K (0x400000) avail mem = 3575808 Ethernet address = 8:0:20:2:2:2 sc0 at mbmem 80000 pri 2 sd0 at sc0 slave 0 sd0: sd1 at sc0 slave 1 st0 at sc0 slave 32 zs0 at virtual eec800 pri 3 pi0 at virtual ee2000 root device? sd0* using 100 buffers containing 366592 bytes of main memory #

After that it's a matter of working out which tar file goes where. Is there even an install process? I just untarred the rest of the tapes in the /usr directory.

For the impatient, tme-0.8-linux-x86_64_bin.tar.gz and
tme-0.8-SunOS-2.0.tar.gz. As always read the 404 page.

4.2BSD TCP/IP networking

I got this note from  Allen Garvin, that details his adventure in taking a stock 4.2BSD VAX image, getting it running on SIMH, and turning on the network stack.

Although 4.2 may have had security issues, (R Morris), and had some clear issues with scaling. Along with a whole host of other issues.  Naturally if you want something more ‘robust’ on modern networks, you’ll want 4.3BSD which corrected quite a number of issues.

You can read about it over on his blog.  It’s very good with step by step instructions, goes over retrieving the NIC driver, re-building the kernel, and getting it operational on our LAN.

Building and using GCC 0.9 aka the first public version

In my quest for old software, I’ve seen this file in multiple searches, gcc-0.9.tar.bz2, which is the first version of GCC!
article from virtuallyfun.superglobalmegacorp.com

GCC 0.9 on SIMH VAX / 4.2BSD

GCC 0.9 on SIMH VAX / 4.2BSD

From the original announcement:

 Date: Sun, 22 Mar 87 10:56:56 EST
From: rms (Richard M. Stallman)

   The GNU C compiler is now available for ftp from the file
/u2/emacs/gcc.tar on prep.ai.mit.edu.  This includes machine
descriptions for vax and sun, 60 pages of documentation on writing
machine descriptions (internals.texinfo, internals.dvi and Info
file internals).

   This also contains the ANSI standard (Nov 86) C preprocessor and 30
pages of reference manual for it.

   This compiler compiles itself correctly on the 68020 and did so
recently on the vax.  It recently compiled Emacs correctly on the
68020, and has also compiled tex-in-C and Kyoto Common Lisp.
However, it probably still has numerous bugs that I hope you will
find for me.

   I will be away for a month, so bugs reported now will not be
handled until then.

   If you can’t ftp, you can order a compiler beta-test tape from the
Free Software Foundation for $150 (plus 5% sales tax in
Massachusetts, or plus $15 overseas if you want air mail).

Free Software Foundation
1000 Mass Ave
Cambridge, MA  02138

[tapes are generally in Unix tar format.  If you have other needs,
write to the above address, and ask if they can be met. -len]

And indeed, the files are dated 22/03/1987 making this the first public release of GCC.

GNU CC is a fairly portable optimizing C compiler intended for
machines with 32-bit words that have several registers and address
memory in terms of 8-bit bytes.  It supports full ANSI standard C, not
including libraries (which we do not consider to be part of a
compiler).
Currently we have working machine descriptions for the Vax and for
the 68000/68020 (including 68881 support).
Optimizations performed by GNU CC include:

  • Invariant code motion out of loops.
  • Common subexpression elimination.
  • Automatic register packing (register declarations are unnecessary
    and ignored).
  • Constant propagation and elimination of consequent dead code.
  • Copy propagation.
  • Elimination of dead stores.
  • Jump optimization including cross-jumping.
  • Delaying of stack adjustments after function calls.
  • Arithmetic performed in subword types when appropriate.
  • Many local optimizations.

GNU CC runs about as fast as PCC.
Most of the optimizations are machine-independent or controlled by a
machine description.  GNU CC takes advantage of all the 68020
addressing modes that we can see how to make the Sun assembler
assemble.  Debugging output for DBX is available whether you request
optimization or not.

Seeing as 4.3BSD didn’t ship until 1988, I went ahead and set out to build this on 4.2BSD. The first stumbling block I hit is that GCC needs bison.  The oldest version of bison I have is 1.25 which honestly is just too new!  However in the same location as GCC is this file gnu1988.tar.bz2 which contains all of the current GNU software of 1988!  And what is on that tape?

  • bison-1.00
  • gcc-1.21
  • gdb-2.5.1
  • gplusplus-1.21
  • libgplusplus

So this is probably as old as it is going to get, so I downloaded and went to compile bison, however getopt is a missing call!  A creative search found getopt.c (local mirror) and even better PCC liked it enough to get a running bison so I could then configure GCC.

Configuring GCC is a manual process, but not too involved:

  • Make a symbolic link from file `config.h’ to the top-level
    config file for the machine you are using. Its name should be
    `config-MACHINE.h’. This file is responsible for
    defining information about the host machine. It includes
    `tm.h’.
  • Make a symbolic link from `tm.h’ to the machine-description
    macro file for your machine (its name should be
    `tm-MACHINE.h’).
  • Make a symbolic link from `md’ to the
    machine description pattern file (its name should be
    `MACHINE.md’)
  • Make a symbolic link from
    `aux-output.c’ to the output-subroutine file for your machine
    (its name should be `MACHINE-output.c’).Make sure the Bison parser generator is installed.Build the compiler. Just type `make’ in the compiler directory.

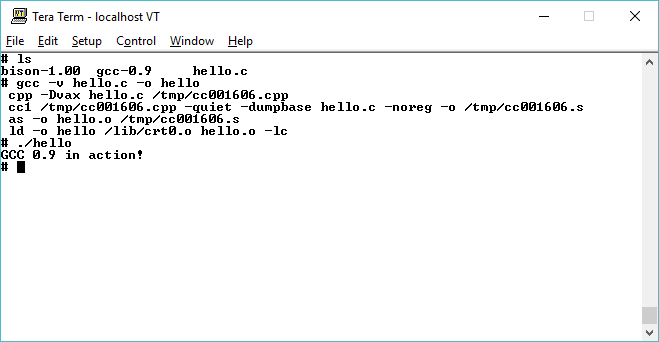
And in a minute I had GCC compiled.  I ran it with -v and got this output:

# gcc -v
ld /lib/crt0.o -lc
Undefined:
_main

It really is nowhere near as featured as 1.21 that is for sure!  So time to do a simple hello world program:

# cat hello.c
#include <stdio.h>
void main(){
printf(“GCC 0.9 in action!\n”);
}
# gcc -v hello.c -o hello
cpp -Dvax hello.c /tmp/cc002050.cpp
cc1 /tmp/cc002050.cpp -quiet -dumpbase hello.c -noreg -o /tmp/cc002050.s
as -o hello.o /tmp/cc002050.s
ld -o hello /lib/crt0.o hello.o -lc
# ./hello
GCC 0.9 in action!

And there we go!

I don’t know why, but I haven’t seen anything about anyone actually running GCC 0.9.  Or even where or how they found this ‘lost’ file. Â Let alone anyone even building or running it in 2016.

For anyone who wants to try, SIMH tape files of the binaries are here:

And of course source tapes are here.
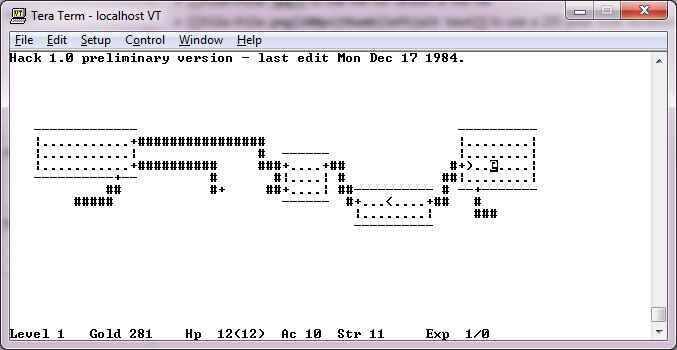
Hack 1.0 preliminary version

The source code to Hack was posted onto usenet back in December of 1984:

From: [email protected] (funhouse)
Newsgroups: net.games,net.sources
Subject: Hack sources posted
Message-ID: <[email protected]>
Date: Mon, 17-Dec-84 09:11:48 EST
Article-I.D.: mcvax.6238
Posted: Mon Dec 17 09:11:48 1984
Date-Received: Tue, 18-Dec-84 07:04:44 EST
Organization: CWI, Amsterdam
Lines: 20
Xref: watmath net.games:1303 net.sources:2185

I will post the sources for Hack to net.sources.
They come in 10 parts; the total source is slightly over 400kbyte.

Hack is a game resembling rogue (but much richer than the versions
of rogue I have had access to).

The game runs on all machines with sufficient address space:
$ ls -l /usr/games/HACK
-rws--x--x  1 play       159744 Nov 10 19:09 /usr/games/HACK
$ size /usr/games/HACK
text	data	bss	dec	hex
106496	34816	29264	170576	29a50
but if you are unfortunate enough to have a backward C compiler
(without structure assignments or bitfields or functions returning
structures or with only 6 significant chars to an identifier)
then you'll have to work to get this running.

I am happy with mail, but will be abroad the next four weeks.

Good Luck & Happy Hacking !

Oddly enough the full source code to Hack had been lost.  Even the Nethack Wiki didn’t have the full source code, although thanks to the UTZOO archives by Henry Spencer, I was able to look through enough of the tapes since I had the date and subject in hand, and I was able to pull out the entire thing.

hack 1.0 preliminary version

hack 1.0 preliminary version

I’ve added a package tape for SIMH, as it builds and runs on 4.2 BSD out of the box.

It’s really cool to have saved this from the digital dumpster, although it was there all along.  And thanks to others for at least pointing out that part of it was missing or I’d never even look.

25 years of GCC!

In 1987 the first announcement went out that Stallman had introduced perhaps the most important piece of GNU software ever:  GCC.

I haven’t been able to locate the 1.0 release or even the 0.9 beta (*Edit as an update, yes I’ve found it, and installed it!), as close as I could find was 1.21 from May 1st, 1988. Even at this time, GCC supported the following CPUs:

  • m68k
  • ns23k
  • spur
  • vax
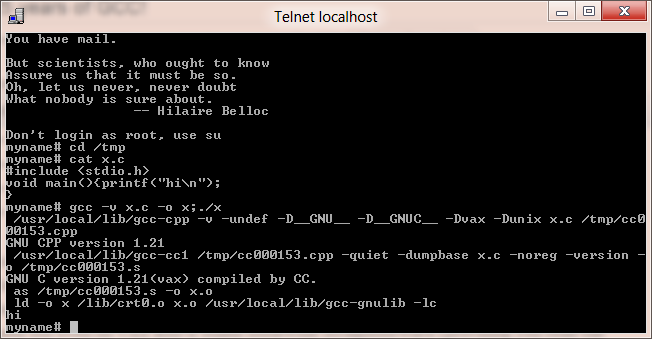
Amazingly GCC at this point is pretty snappy, and very ANSI compliant unlike PCC.  At this point it still relies on native assemblers, linkers, librarians it still was pretty versatile. Back then there was no auto configuration tools you have to link configuration scripts by hand but even on VAX BSD it builds somewhat straightforward (providing you read the documentation)..

GCC 1.21 on 4.2 BSD

I don’t know if it serves any practical value but I went ahead and built a source package for GCC 1.21, along with a 4.2 BSD binary package.. I suspect it’d only be an interest to a select few.. Although if anyone has 1.0 or 0.9 I’d be interested!

By 1991 GCC 1.40 supported not only the i386, but Linux kernel.. And as they say the rest is history.

And finally a video summation of all the changes to GCC…


RetroBSD!

2.11 BSD Unix for PIC32, build #826:
     Compiled 2011-08-07 by [email protected]:
     /Volumes/Users/vak/Project/retrobsd/trunk/sys/pic32/compile
phys mem  = 128 kbytes
user mem  = 96 kbytes
root dev  = (0,0)
root size = 16384 kbytes
swap size = 2048 kbytes
standard daemons: update.
Sun Aug  7 16:47:45 PST 2011

2.11 BSD UNIX (pic32) (console)

login: root
Password:
Welcome to RetroBSD!
# _

Wow isn’t that cool? Who needs a ‘basic stamp’ if you can have UNIX!  Not to mention it’s from Serge Vakulenko, of DEMOS fame!

From the main site:

RetroBSD is a port of 2.11BSD Unix intended for embedded systems with fixed memory mapping. The current target is Microchip PIC32microcontroller with 128 kbytes of RAM and 512 kbytes of Flash. PIC32 processor has MIPS M4K architecture, executable data memory and flexible RAM partitioning between user and kernel modes.

Main features:

  • Small resource requirements. RetroBSD requires only 128 kbytes of RAM to be up and running user applications.
  • Memory protection. Kernel memory is fully protected from user application using hardware mechanisms.
  • Open functionality. Usually, user application is fixed in Flash memory – but in case of RetroBSD, any number of applications could be placed into SD card, and run as required.
  • Real multitasking. Standard POSIX API is implemented (fork, exec, wait4 etc).
  • Development system on-board. It is possible to have C compiler in the system, and to recompile the user application (or the whole operating system) when needed.