(This is a guest post by Antoni Sawicki aka tenox)
TL;DR RCPD plays nicely with NAT, re-implemented as a stand alone daemon, from scratch, without ined, r-daemons. Fully open, no security or authentication. Docker friendly.
I often find myself needing to copy a file or two, in or out of an emulated system with some weird networking setup like qemu net user, SLiRP, NAT, etc. Or from/to a physical machine, but having server running in a Docker container, sometimes on a Mac, which has even weirder network contraptions.
Most of the old file transfer protocols like FTP have tendency to open a reverse connection from the server back to the client, which doesn’t play very well with NAT. Even TFTP (who would have thought!) requires nf_conntrack, STUN, proxies, connection helpers, punching holes, UPnP and other nonsense. While they can be individually worked out, it’s rather not universal. Vintage OS SSH/SCP is either non existent or ciphers are too old to play well with modern SSH server. NFS is mostly OK but it has it’s own quirks and you can’t run it in a Docker container. I seen people doing shit like this. I’m also guilty of using Kermit to transfer files over network from time to time. Overall quite frustrating situation.
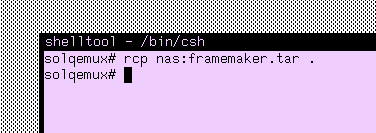
It turns out that the rcp protocol is very easy on NAT, as it uses just a single, outgoing TCP connection. Not only it worked in all my use cases, but also Berkeley r-commands are ubiquitous on pretty much all vintage OSes that I work with. From Unix, VMS to Windows NT. There are ports to OS/2, DOS and everything else. A recent practical example was how Neozeed and I copied a VBScript in to Windows 2000 64bit install.
The server side however is somewhat of a challenge. It has been obsolete for quite some time now. For starters, R-daemons require inetd, which is mostly not a thing on modern Unix. Then there are actual rshd/rexec/rlogin/rcpd daemons. I spent several hours trying to hack netkit-rsh and rsh-redone to play nicely in Docker, without good results. Even if it could be done, there still are /etc/hosts.equiv, ~/.rhosts and other bullshit “security” contraptions to deal with.
Annoyed with all this nonsense decided to write RCPD from scratch. Docker friendly, fully open, no security or authentication of any kind. I also didn’t want remote shell (rsh/rlogin/rexec), just the file copy part. The original rcpd was using rshd under the hood. This is now completely eliminated and the shell stuff is synthetically generated to satisfy the protocol.
Now if I want to copy a file in to a vintage system I can simply do this:
That’s it. It just works™ with net user and Docker on a Mac vmnet.
The best part that the whole thing has been written and debugged entirely by Claude!
I often work on vintage Unix Workstations and other obsolete systems. I have a need to browse modern web on old computers somehow. In the past I developed Web Rendering Proxy to help with this. While WRP is awesome as a showcase, and some light browsing, unfortunately it falls little short of being practical for a daily driver.
Like many others I have been cheating and using a VM with a web browser and remotely connecting to it via VNC or RDP. This is rather obvious and mostly works, but a VM is hard to run and upkeep. Takes time to boot and eats resources. You need to customize it, install updates and other nonsense. I wanted something much simpler, leaner and not requiring any maintenance. I also need to run it on ARM based hosts like a Mac or Raspberry PI.
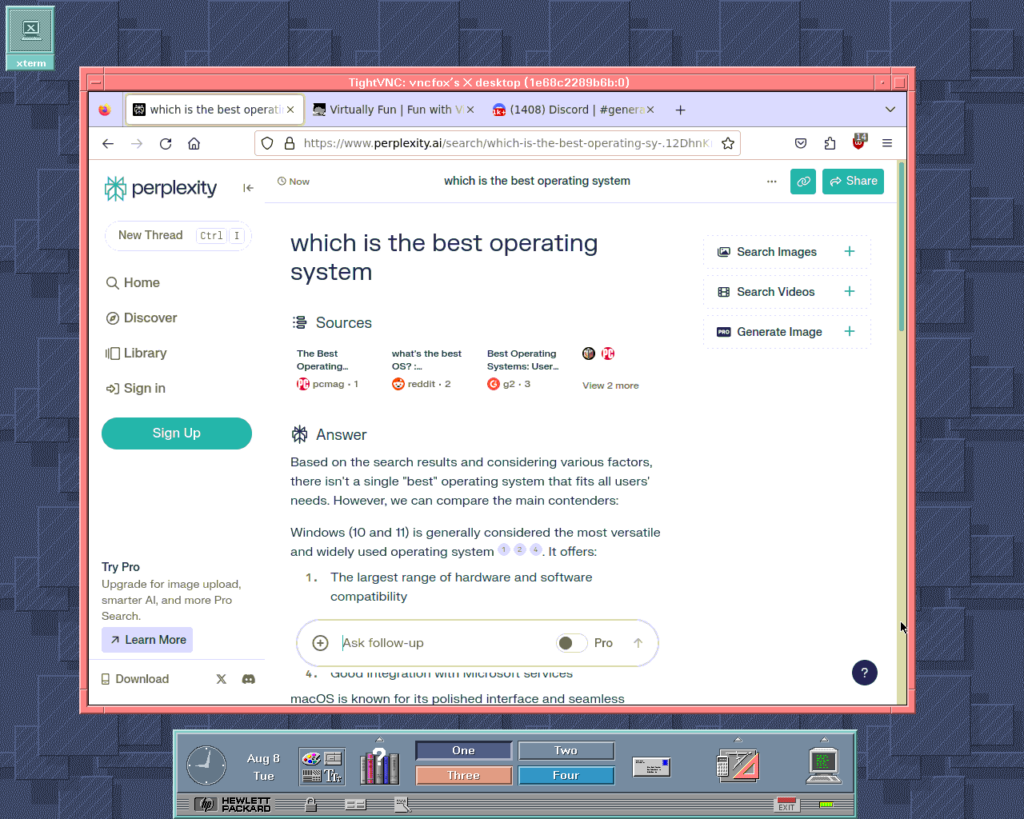
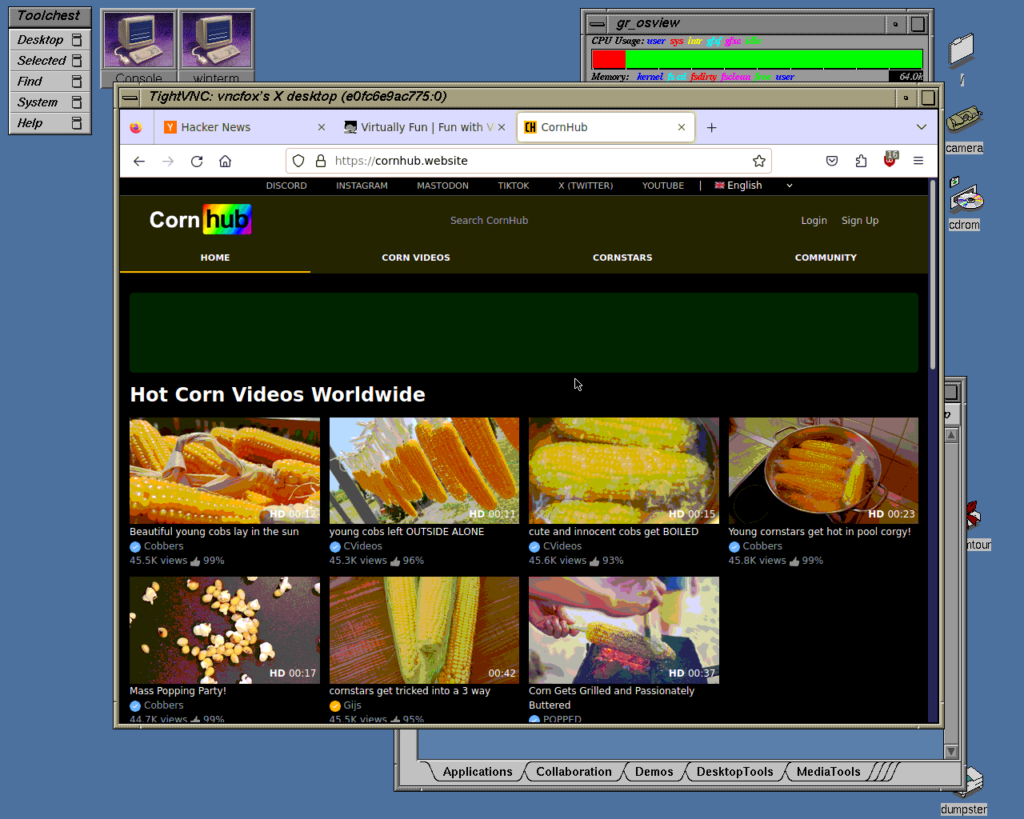
Enter VNCFOX – a Firefox browser with TightVNC server packaged as a Docker container. It’s small, lean, easy to run and there is no boot time and lengthy updates. You can mount Firefox .mozilla profile in a Docker volume to preserve your settings, plugins like uBlock, history, cookies and cache, across container restarts! I also typically bind mount a folder exported over NFS in to /home/vncfox/Downloads.
VNCFOX on HP-UX 9
TightVNC version of VNC is rather crucial, especially for older computers. Without the “Tight” protocol, VNC screen refresh consumes a lot of CPU on the client side and the session is laggy. TightVNC works incredibly smooth. For ease of use I have compiled clients for some older operating systems.
Overall this approach works really well, including stuff like Perplexity/ChatGPT/Claude, Google Docs, Email, even Discord and other web based chat clients. I regularly now post and edit this very blog from a HP-UX workstation!
VNCFOX on IRIX 5.3
The container is dual platform for both AMD64 and ARM64. It can be run even on Mac host with Apple Silicon. Raspberry PI maybe?
Is it future proof? Maybe. Apparently Wayland supports VNC, including Tight protocol. Some day I will migrate the server. But for now x11 vncserver works pretty well.
Useful keyboard shortcuts:
F8 – TightVNC Menu – Including clipboard transfer etc
(This is a guest post by Antoni Sawicki aka Tenox)
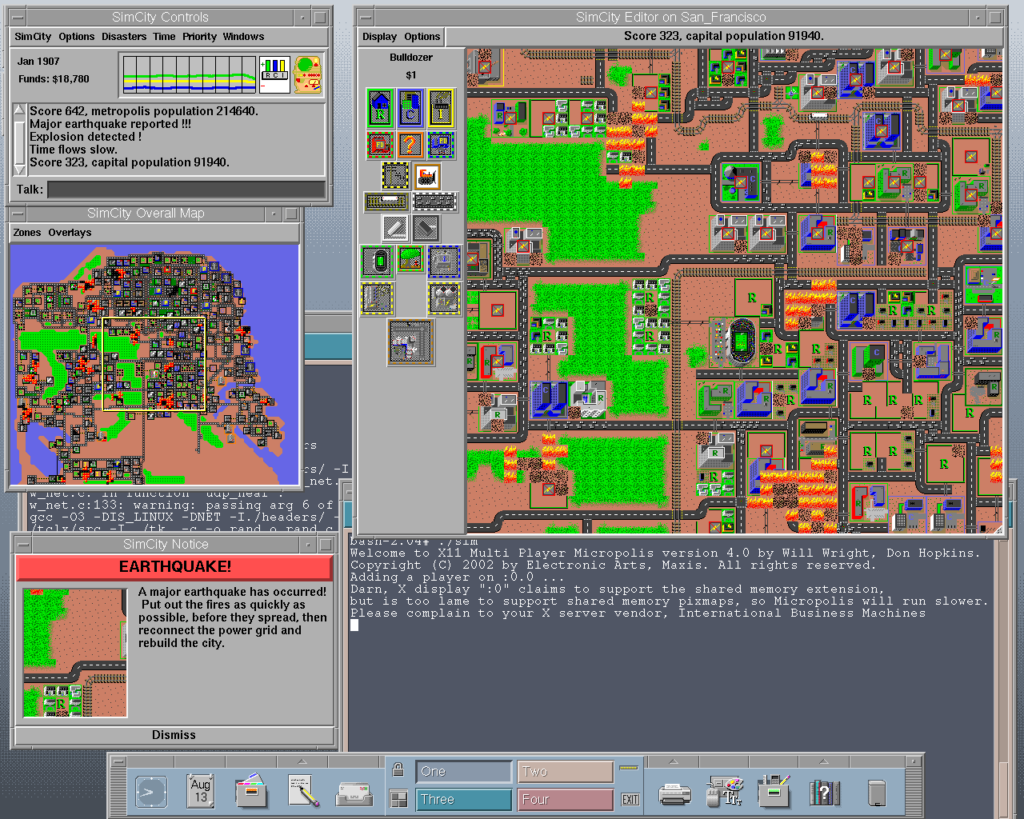
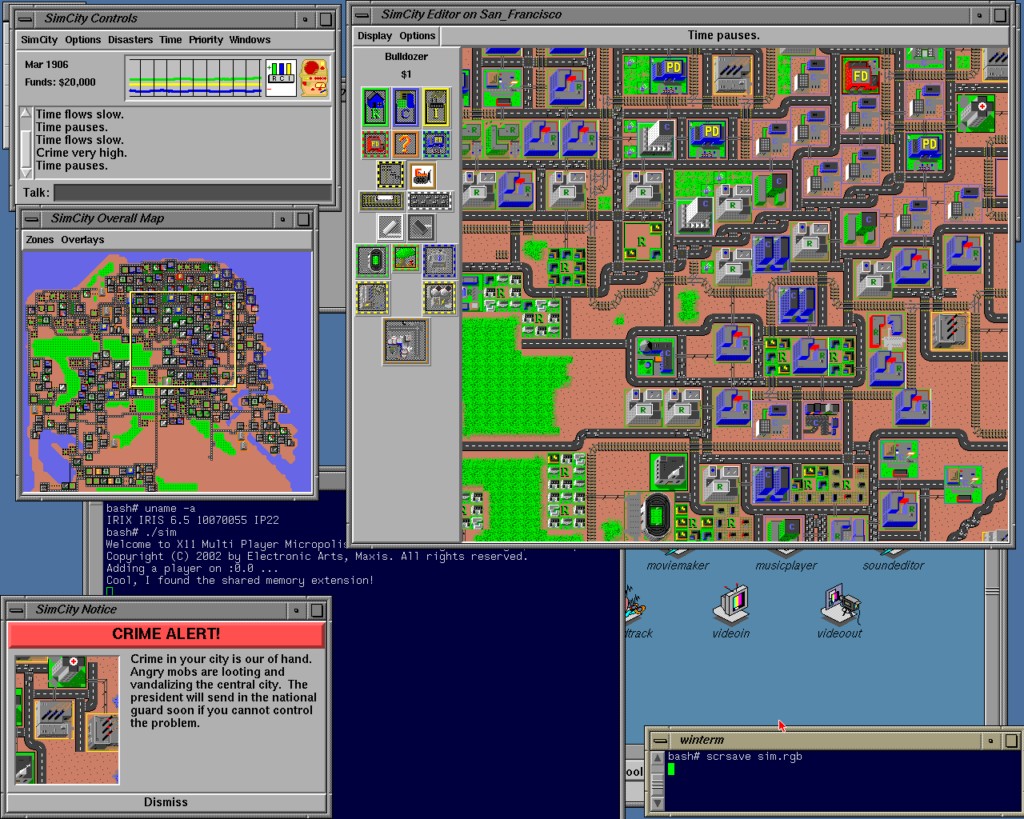
Previously I managed to crack and unlock the demo version of DUX SimCity for UNIX. It worked just fine on the original pre-built platforms, DEC Unix, HPUX, SunOS and IRIX. Unfortunately the IRIX binary is for 5.3 in COFF format and doesn’t work on more modern ELF based IRIX like 6.2 and above. More importantly however, there never has been a release for IBM AIX! Inability to play SimCity on RS/6000 is excruciating. Not to mention several other Unix systems of that time.
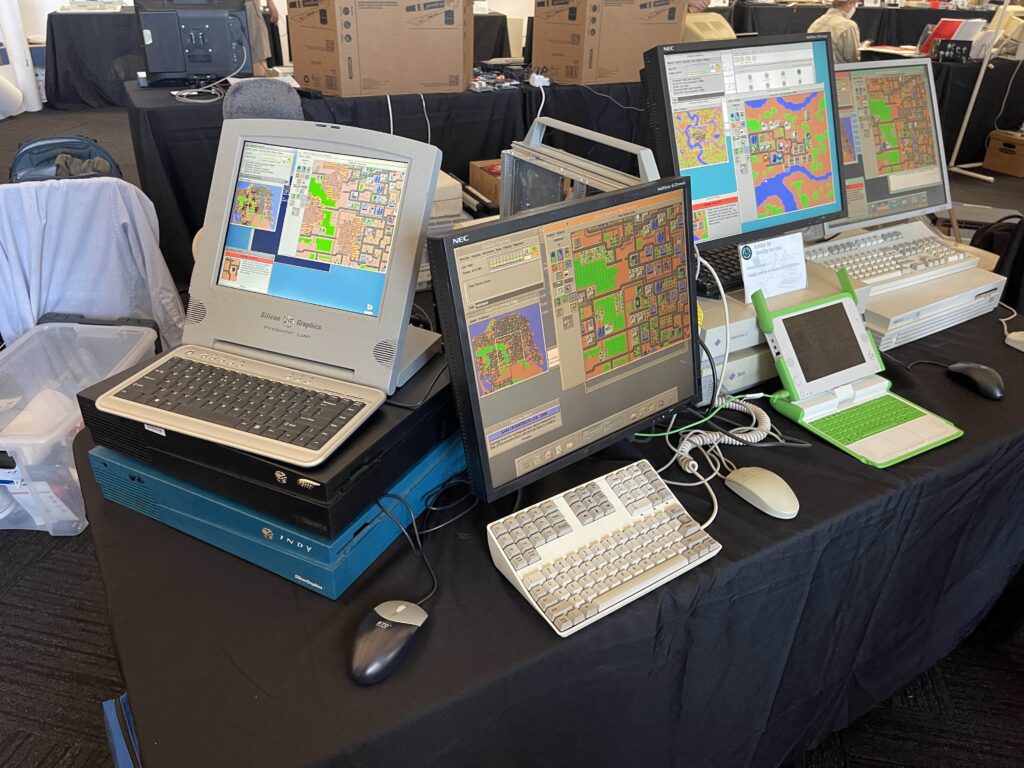
SimCity for UNIX Exhibit on VCF West 2024
A few days ago I ran a VCF West 2024 exhibit showcasing this important piece of software history. I got to chat with many people about these shortcomings and decided to see if something can be done about it.
On the right of the picture above, you can see a OLPC XO. This laptop plays an important role of SimCity history. During conception of OLPC, the game has been open sourced under a new name “Micropolis”. This was insanely fantastic endeavor, kudos for everyone involved. Unfortunately the software has been “enhanced” to run on XO Sugar GUI thing, ported to C++ Python and otherwise defaced in several different ways.
Fortunately there survives a very early source code of Micropolis, aka old gen. While GPL and under a new name, has only minor, cosmetic changes compared to the original source code. With some minor tweaking and working around funnies with xlC and MIPSpro compilers, I was able to build old-gen Micropolis for AIX 4.3, 5.1, IRIX 6.5 and HP-UX 11.31 on IA64.
Most importantly however, in the process, I discovered that the original DUX SimCity assets, including TCL/TK GUI cruft was directly usable with just a few small changes in sim.c. Effectively undoing all the changes mentioned in DONE and making it almost the original, except for name. A hybrid GPL Micropolis – DUX SimCity Demo Asset build has been born!
Yes, it’s from 1981. I’m that old to remember this.
Getting NT ready
The first thing I wanted was to install the Pre-Release onto a HPFS disk. I’ve uploaded this over on archive.org (Windows NT December 1991 prepped for Qemu). I took the CD-ROM image, removed all the MIPS stuff, built a boot floppy, and setup the paths so that the floppy can boot onto the secondary hard disk to a ‘full’ version of NT. This lets me format the C: drive as HPFS, and then do a selective install of Windows NT to ensure that that the software tools (compiler) are installed.
I use a specially patched vintage QEMU build, qemu-0.14.0.7z which kind of makes it ‘easier’, along with the needed disk images in dec-1991-prepped.7z
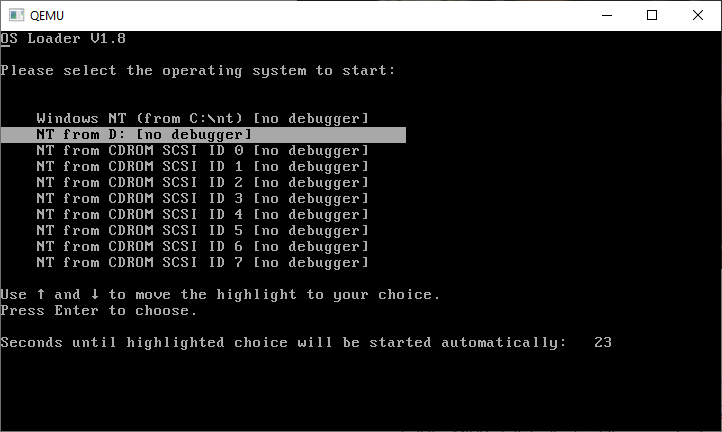
This will bring up the boot selection menu. The default option is fine, you can just hit enter.
boot NT from D:
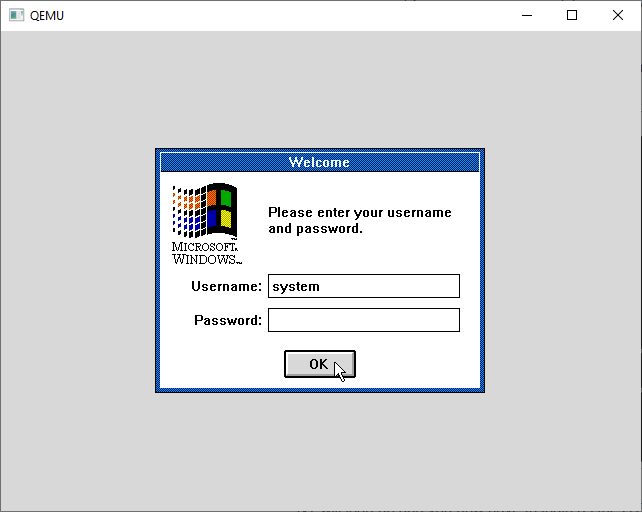
NT will load up and you now have to login as the SYSTEM user. We need the advanced permissions to format the hard disk.
Login as ‘system’
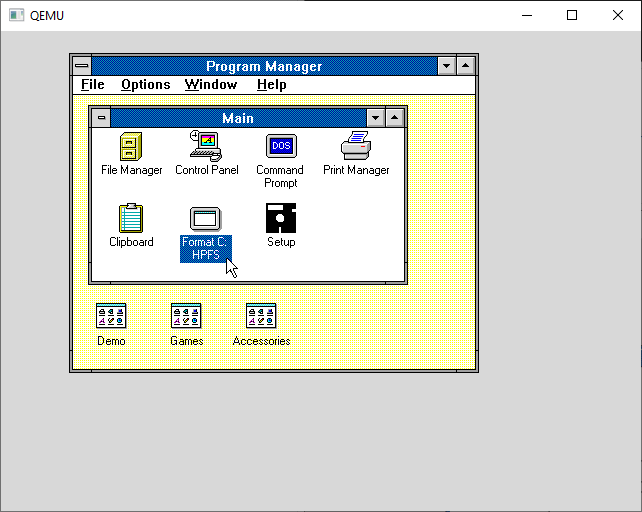
From the desktop we first format the C: drive as HPFS. I made icons for all this stuff to try to make it as easy as possible.
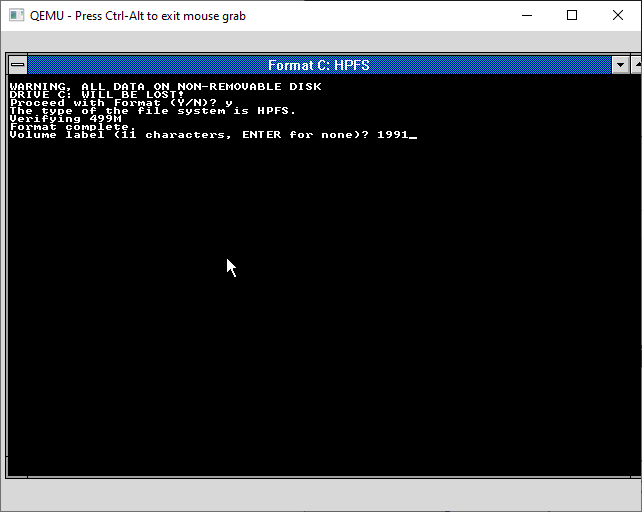
You’ll get asked to confirm you want to do this, and give the disk a creative name.
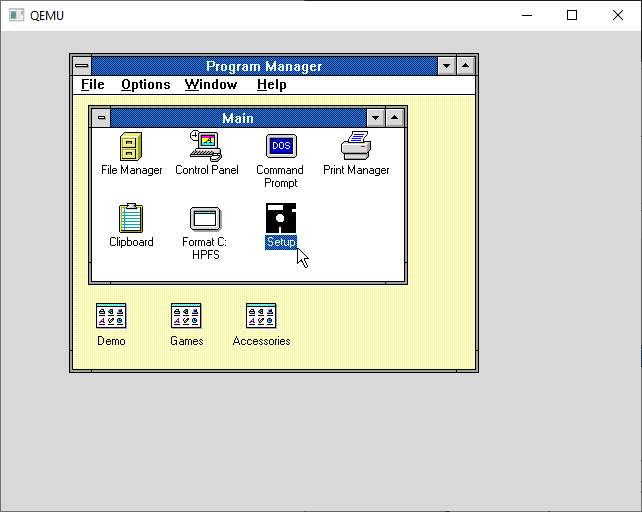
And with the disk formatted it’s time to start the setup process.
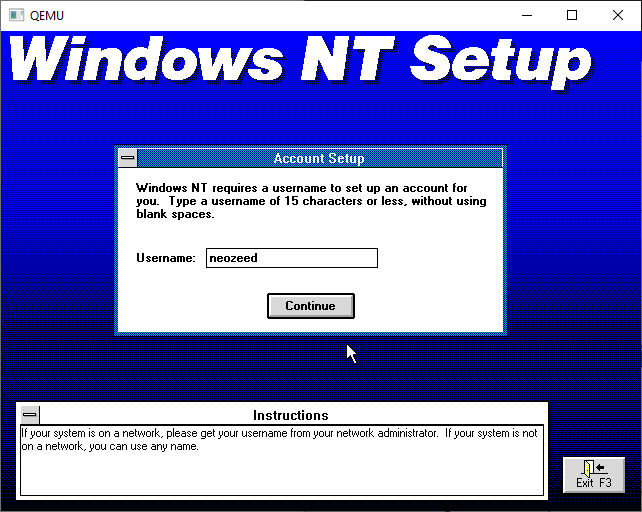
Who are you?
And what slick account do you want? It doesn’t matter tbh.
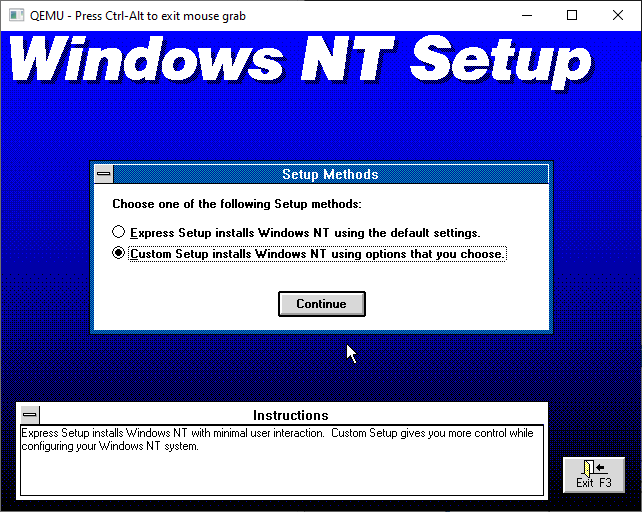
I’m going to do a custom install as the NIC’s aren’t supported, and even if they were it’s just NetBEUI anyways.
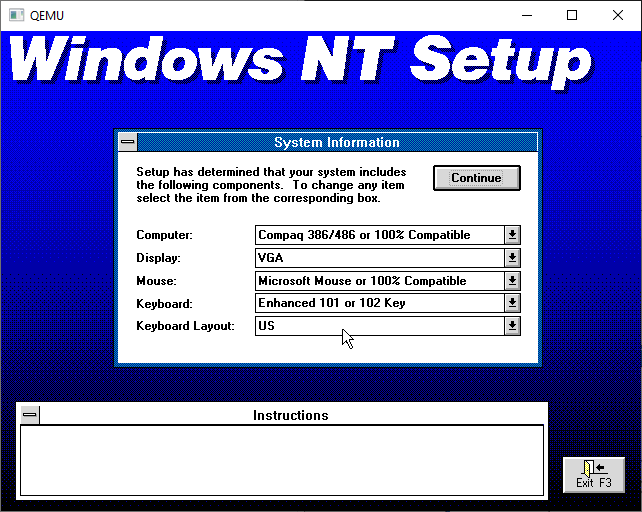
And select your hardware platform. NT basically only supports this config, so it doesn’t matter.
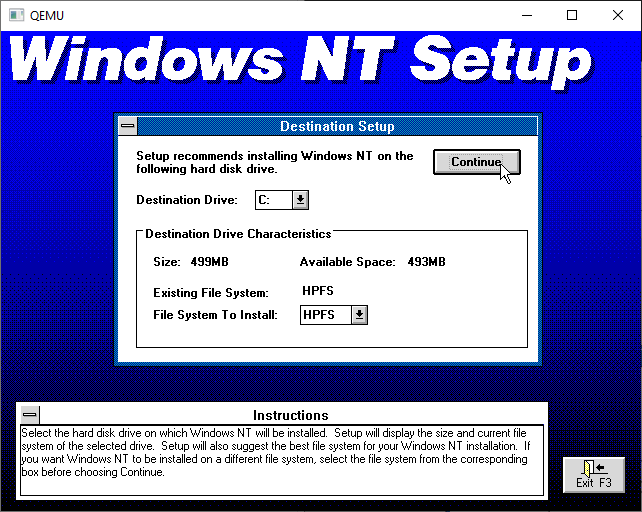
The default target drive is our C drive, which we had just formatted to HPFS.
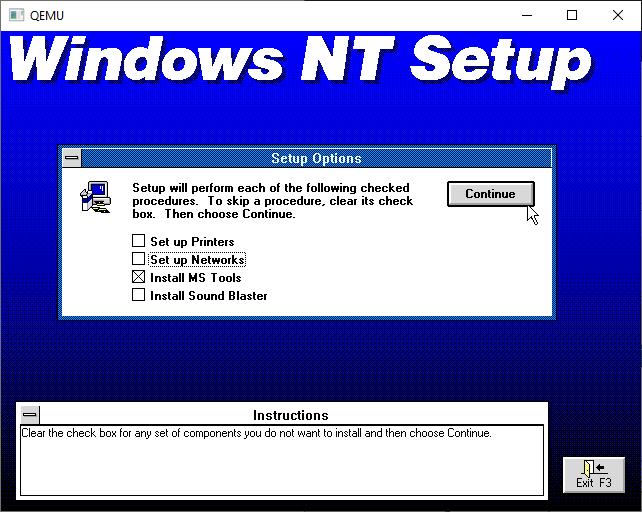
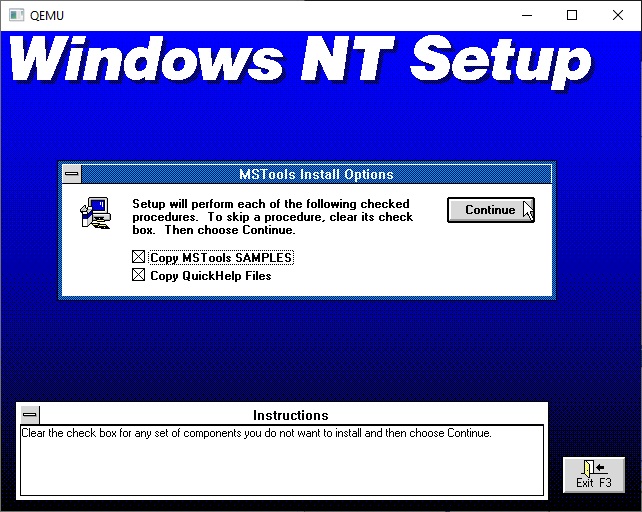
Next, I unchecked everything only leaving the MS Tools
It’ll offer the samples & help files. I always install them as I eventually need examples of stuff to steal, and to learn that including <windows.h> won’t work right unless you manually define a -Di386 on the command line. I’m saving you this pain right now up front.
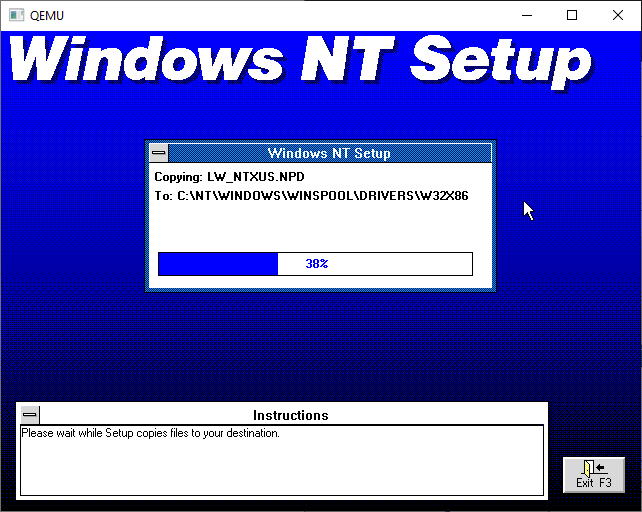
Files will copy, and on a modern machine this takes seconds.
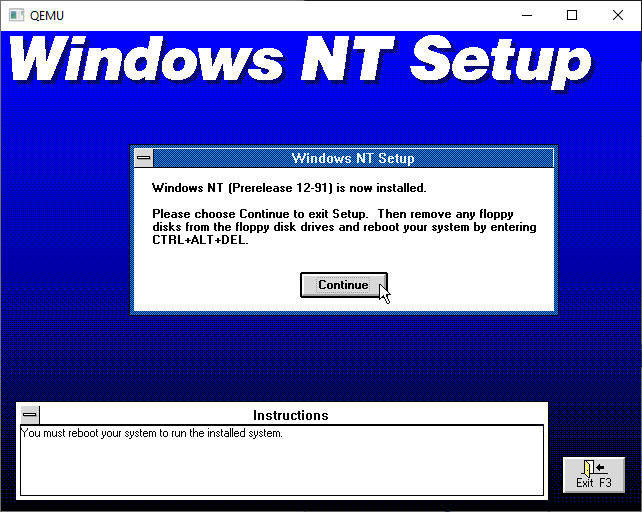
And there we go!
And Windows NT is installed.
Yay.
I put in a ‘CAD’ feature in this Qemu hitting control+alt+d will send the familiar pattern, and after a few times NT will reboot. We are pretty much done with NT for the moment, but congrats you’ve installed the December 1991 Pre-release onto a HPFS disk for those sweet long long file names!
Going over the strategy:
I’ve already built GCC 1.40 for NT, so what is the rest of the stuff needed to build Linux? It’s a quick checklist but here goes, in no specific order:
GCC 1.40
bin86
binutils
gas 1.38
bison
unzip
zip
Luckily as part of building on Windows 10 using MinGW, I had fixed the weird file issues as MS-DOS/Windows NT/OS2 handle text/binary files, as we went through with how Github mangled MS-DOS 4.00.
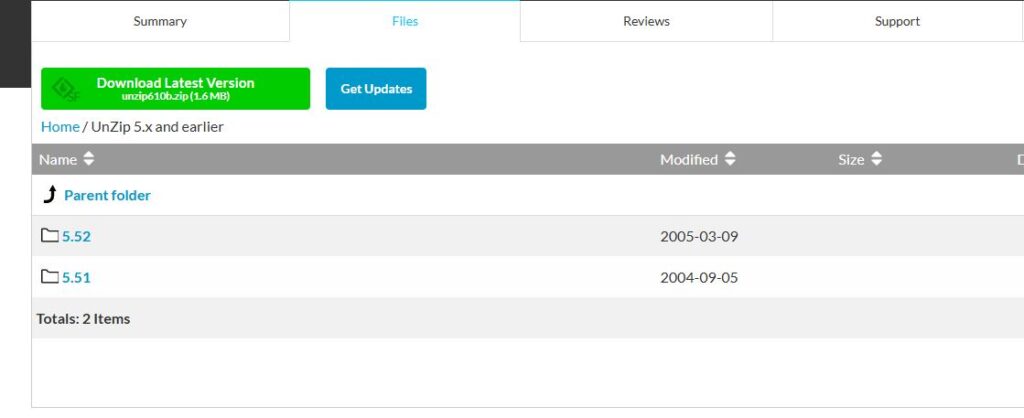
The primary reason I wanted a working zip/unzip was to deal with long file names, and to auto convert text files. And this ended up being an incredible waste of time trying to get the ‘old’s code on the Info-Zip page.
Info-Zip’s old downloads. Version 5 only!
I’m sure like everything else, the old versions are removed as they probably suffer from some catastrophic security issue with overflows. The issue I ran into is that the version 5 stuff uses so many features of shipping NT, to even 2000 that it was going to be a LOT of work to get this far. The quicker & easier path as always turned out to be a time machine.
Thankfully, since I had made a copy of the UTZOO archives, I was able to fish out, both version 3.1 from the archives. Also known as “Portable UnZIP 3.1”, parts 1/2/3. I also found version 4.1 as well. And people wonder why you want to save these ‘huge’ data sets. If the lawyers could have their way, they would obliterate all history.
I spent a lot of time messing with Makefiles, as linking & object conversion on old NT is a big deal, and not the kind of thing you want to do more than once. Another big pain is that large files become delete only. I don’t know what the deal with notepad is, but I could remove text, but not change or add. I solved that by wrapping a number of things by including it in another file with some #define work to go around it. Needless to say, that sucked.
One thing that constantly threw issues is that this version of Windows doesn’t handle Unix style signals. I removed all the signal catch/throw stuff, and the binaries ran fine. Why on earth does ‘strip’ need signals is beyond me, but it runs fine without them!
On Windows I just unzip the bin.zip file and leave source.0.zip intact into a directly say something like temp. Then I can use a cool feature of Qemu where it can mount a directory as a read-only FAT disk. This saves a lot of time!
Will drop to the bootloader. Hit enter to login, and you’ll be at the desktop. Hit enter again, and open a command prompt.
open the command prompt
By default, the Numlock is messing with the arrow keys (I think it’s mapping to the old 83 key keyboard no matter what?) Hit num-lock and your arrow keys should kind of work. It’s a great time saver.
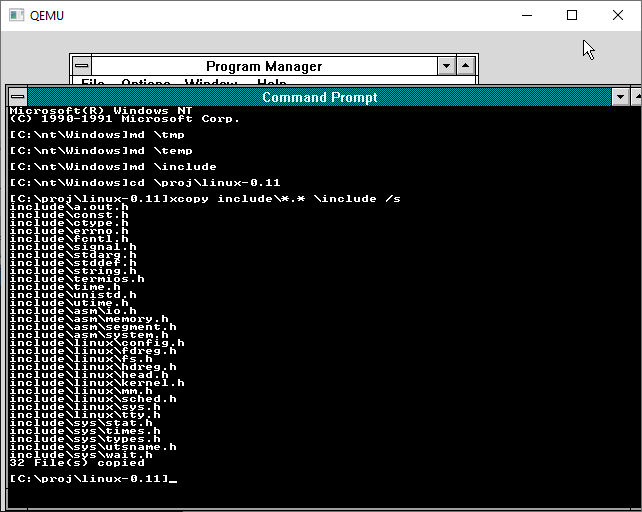
copy the binaries to \bin & get ready to unzip
I copied the binaries & the ygcc.cmd file into the \bin directory, created a \proj directory and get ready to unzip all the source code. For some reason this version of unzip doesn’t understand the zip compression, so it’s just storing instead, much like TAR. It’s not that involved but unzip with the -d flag so it creates directories as needed.
unzipped
This will let us keep long file names. HPFS is case insensitive, but it also preserves the case, so don’t worry about the names being all weird. It doesn’t matter.
One thing worth mentioning is that even though the C pre-processor does compile it just hangs when trying to run it. I’m not sure what is wrong exactly, but it’s just not worth fighting. Instead, I had the better idea, of using the Microsoft C compiler to pre-process the source. Apparently, this is how they originally built Windows NT, pre-processing on OS/2, then uploading the pre-processed files to a SUN workstation with the i860 compiler and downloading the objects to be converted & linked. Wow that must have been tedious!
I created a CMD file ‘ygcc.cmd’ to run the cl386 pre-processor, call CC1 & GAS and clean up afterwards.
Before you can build Linux, you need to create both a \tmp & \temp directory. Also the include files need to be copied to the \include directory to make the pre-processor happier.
I’ve tried to make this as simple as possible there is a ‘blind.cmd’ file which I built that’ll manually compile Linux. There is no error checking.
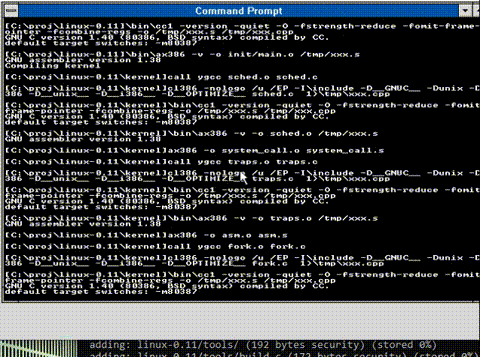
And saving everyone the excitement here is an animation of the build process
Actually compiling Linuxcompiled!
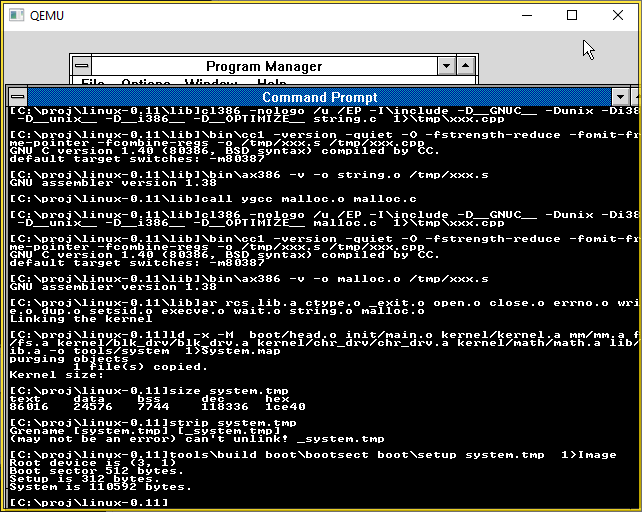
And there we go! All compiled!
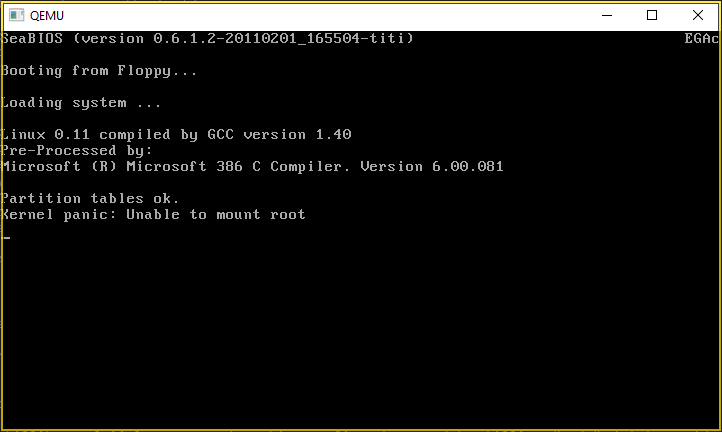
From there it’s a matter of copying the Image file out of the VM, I used the boot floppy and 7zip’s ability to extract FAT images, and then boot up Qemu using the Image file as a ‘floppy’ as back in the day we used to rawrite these to floppy disks.