Running VMWare ESXi 6.5 under Linux/KVM!

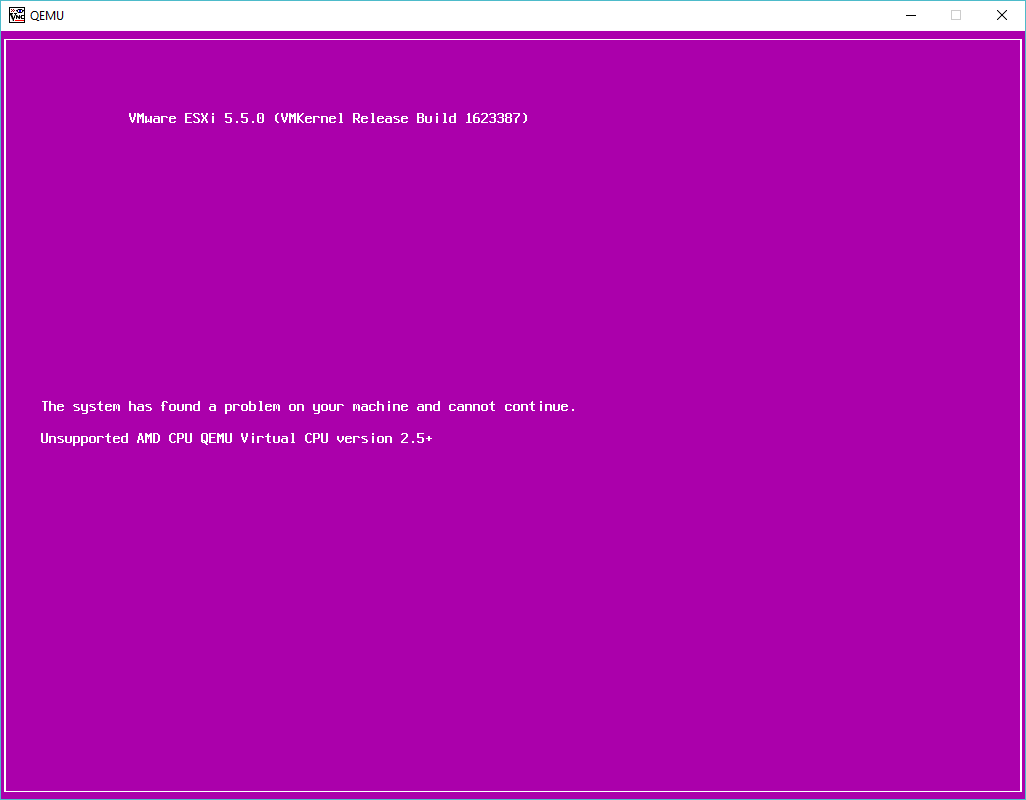
So with VIRL in hand, the next thing I wanted to do was play with some LACP, and VMWare ESX.  Of course the best way to do this is under KVM as you can use UDP to bounce packets around between virtual machines, like the VIRL L2 switch.  I went ahead and fired up 5.5 and got this nice purple screen of death.

Purple screen of death!

So naturally I need to force the processor type.  Also after reading a few sites, I needed to turn on a nested & ignore_msrs settings:

root@ubuntu:/etc/modprobe.d# cat qemu-system-x86.conf

options kvm_amd nested=1
options kvm ignore_msrs=1

Naturally if you are using an Intel processor the statements need to reflect that.  All being well you will see something like this in your log file:

Mar 7 11:34:38 ubuntu kernel: [ 14.802132] kvm: Nested Virtualization enabled
Mar 7 11:34:38 ubuntu kernel: [ 14.802134] kvm: Nested Paging enabled

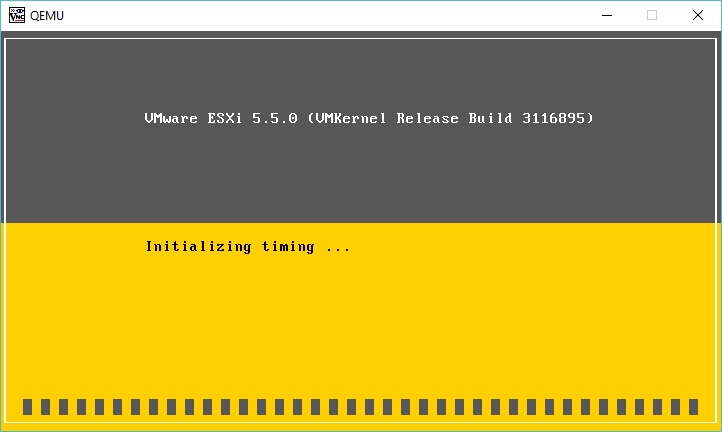
I got a little further trying to install VMWare ESXi 5.5 update 3, however it just hangs on Intitializing timing…

vMWare 5.5.0 update 3 hanging

(I did later solve the 5.5 problem in a follow up here!)

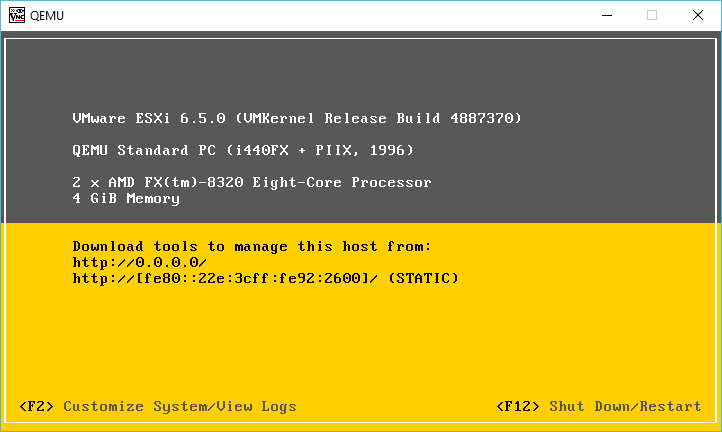
After going nowhere with that, I went ahead and downloaded VMWare ESXi 6.5 which as of today is the latest version, and that installed just fine!

ESXi 6.5.0 running under KVM

For anyone brave or crazy enough to think about reproducing this, here is my install command line (yes Im doing this old school way on purpose)

kvm -vnc 0.0.0.0:1 -cpu host \
-machine pc-i440fx-2.1 \
-m 4096M \
-smp cpus=2 \
-boot order=d \
-drive file=esx-1.qcow2,if=ide,index=0,media=disk \
-serial telnet:127.0.0.1:5001,server,nowait \
-monitor tcp:127.0.0.1:6001,server,nowait \
-net none \
-device vmxnet3,mac=00:2e:3c:92:26:00,netdev=esx-0 \
-device vmxnet3,mac=00:2e:3c:92:26:01,netdev=esx-1 \
-device vmxnet3,mac=00:2e:3c:92:26:02,netdev=esx-2 \
-device vmxnet3,mac=00:2e:3c:92:26:03,netdev=esx-3 \
-netdev socket,id=esx-0,udp=127.0.0.1:10000,localaddr=127.0.0.1:20000 \
-netdev socket,id=esx-1,udp=127.0.0.1:10001,localaddr=127.0.0.1:20001 \
-netdev socket,id=esx-2,udp=127.0.0.1:10002,localaddr=127.0.0.1:20002 \
-netdev socket,id=esx-3,udp=127.0.0.1:10003,localaddr=127.0.0.1:20003 \
-cdrom VMware-VMvisor-Installer-5.5.0.update03-3116895.x86_64.iso \
-boot d

As you can see it really isn’t that involved, well once you get the formatting to make some sense.  And to run it normally I run it something like this:

kvm -vnc 0.0.0.0:1 -cpu host \
-machine pc-i440fx-2.1 \
-m 4096M \
-smp cpus=2 \
-drive file=esx-1.qcow2,if=ide,index=0,media=disk \
-serial telnet:127.0.0.1:5001,server,nowait \
-monitor tcp:127.0.0.1:6001,server,nowait \
-net none \
-device vmxnet3,mac=00:2e:3c:92:26:00,netdev=esx-0 \
-device vmxnet3,mac=00:2e:3c:92:26:01,netdev=esx-1 \
-device vmxnet3,mac=00:2e:3c:92:26:02,netdev=esx-2 \
-device vmxnet3,mac=00:2e:3c:92:26:03,netdev=esx-3 \
-netdev socket,id=esx-0,udp=127.0.0.1:10000,localaddr=127.0.0.1:20000 \
-netdev socket,id=esx-1,udp=127.0.0.1:10001,localaddr=127.0.0.1:20001 \
-netdev socket,id=esx-2,udp=127.0.0.1:10002,localaddr=127.0.0.1:20002 \
-netdev socket,id=esx-3,udp=127.0.0.1:10003,localaddr=127.0.0.1:20003

So it’s basically the same, just no mounted CD-ROM image.  Now this is all fun, but what about networking?  As I had mentioned before, I bought a VIRL license, which includes a l2 Catalyst image, so why not use that, instad of a ‘traditional’ Linux bridge?  Sure!  In this example I’m going to connect the 4 ethernet ports from the ESXi into the first 4 ports on the cisco switch, with the last port connecting to a Linux bridge, that I then route to, as I wanted all my lab crap on a seperate network.  To start the switch I use this script:

kvm \
-m 768M \
-smp cpus=1 \
-boot order=c \
-drive file=vios_l2-adventerprisek9-m.vmdk.SSA.152-4.0.55.E.qcow2,if=ide,index=0,media=disk \
-serial telnet:127.0.0.1:5000,server,nowait \
-monitor tcp:127.0.0.1:51492,server,nowait \
-net none \
-device e1000,mac=00:2e:3c:92:26:00,netdev=gns3-0 \
-device e1000,mac=00:2e:3c:92:26:01,netdev=gns3-1 \
-device e1000,mac=00:2e:3c:92:26:02,netdev=gns3-2 \
-device e1000,mac=00:2e:3c:92:26:03,netdev=gns3-3 \
-device e1000,mac=00:2e:3c:92:26:04 \
-device e1000,mac=00:2e:3c:92:26:05 \
-device e1000,mac=00:2e:3c:92:26:06 \
-device e1000,mac=00:2e:3c:92:26:07 \
-device e1000,mac=00:2e:3c:92:26:08 \
-device e1000,mac=00:2e:3c:92:26:09 \
-device e1000,mac=00:2e:3c:92:26:0a \
-device e1000,mac=00:2e:3c:92:26:0b,netdev=gns3-tap \
-netdev socket,id=gns3-0,udp=127.0.0.1:20000,localaddr=127.0.0.1:10000 \
-netdev socket,id=gns3-1,udp=127.0.0.1:20001,localaddr=127.0.0.1:10001 \
-netdev socket,id=gns3-2,udp=127.0.0.1:20002,localaddr=127.0.0.1:10002 \
-netdev socket,id=gns3-3,udp=127.0.0.1:20003,localaddr=127.0.0.1:10003 \
-netdev tap,id=gns3-tap,ifname=tap0,script=/etc/qemu-ifup \
-nographic

Now as you can see the udp sockets are inverse of eachother, meaning that the ESX listens on 10000 and sends to 127.0.0.1 on port 20000, while the switch listesns on 20000, and sends packets to 10000 for the first ethernet interface pair.

By default VMware only assigns the first NIC into the first virtual switch, so after enabling CDP, we can see we have basic connecitivity:

AMD-kvm#sho run int gig0/1
Building configuration…

Current configuration : 99 bytes
!
interface GigabitEthernet0/1
media-type rj45
speed 1000
duplex full
no negotiation auto
end

AMD-kvm#show cdp neigh
Capability Codes: R – Router, T – Trans Bridge, B – Source Route Bridge
S – Switch, H – Host, I – IGMP, r – Repeater, P – Phone,
D – Remote, C – CVTA, M – Two-port Mac Relay

Device ID Local Intrfce Holdtme Capability Platform Port ID
KVMESX-1 Gig 0/0 155 S VMware ES vmnic0

Total cdp entries displayed : 1

And of course the networking actually does work… I created a quick VM, and yep, It’s online!

AMD-kvm#show mac address-table
Mac Address Table
——————————————-

Vlan Mac Address Type Ports
—- ———– ——– —–
1 000c.2962.09e5 DYNAMIC Gi0/0
1 002e.3c92.2600 DYNAMIC Gi0/0
1 76b0.3336.34b3 DYNAMIC Gi2/3
Total Mac Addresses for this criterion: 3

And of course some obliguttory pictures:

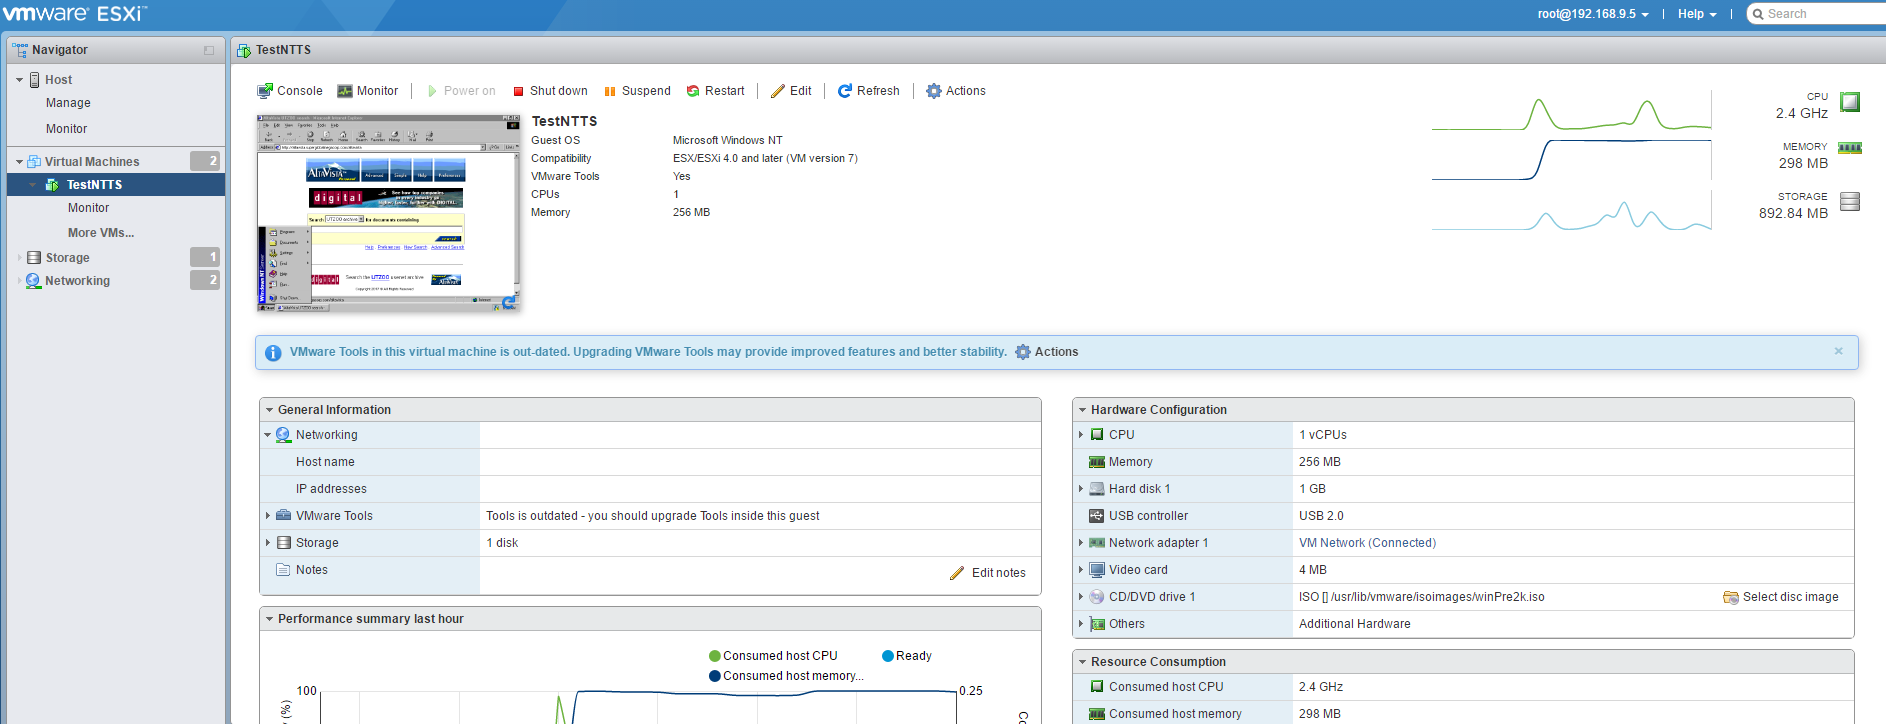
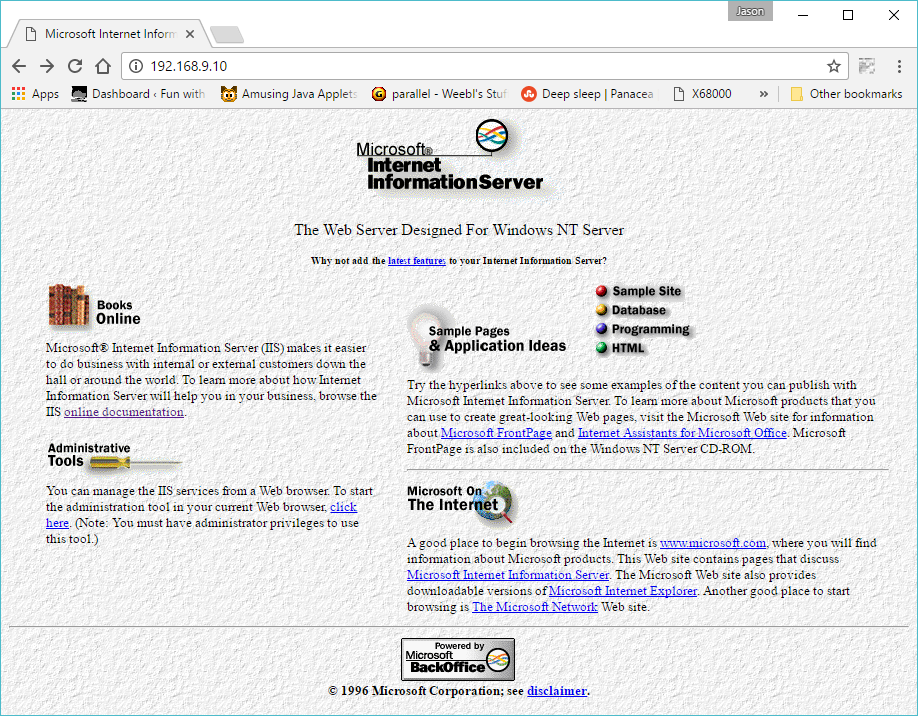
Nested ESXi running a simple NT 4.0 server

And:

Welcome to IIS 2.0

With ip forwarding turned on my Ubuntu server, and an ip address assigned to my bridge interface, I can then access the NT 4.0 VM from my laptop directly.

Nex’t time to make the L2 more complicated, and add in some L3 insanity…

Getting started with cisco VIRL L2 virtual Ethernet switches

Well for the longest time there was no generally available way to emulate a cisco L2 switch. right before Dynamips was abandoned, in 0.28RC1, there was actually some work on the the Catalyst 6000 Supervisor 1 line card, although no interfaces are supported, and it was largely seen as impossible at the time.

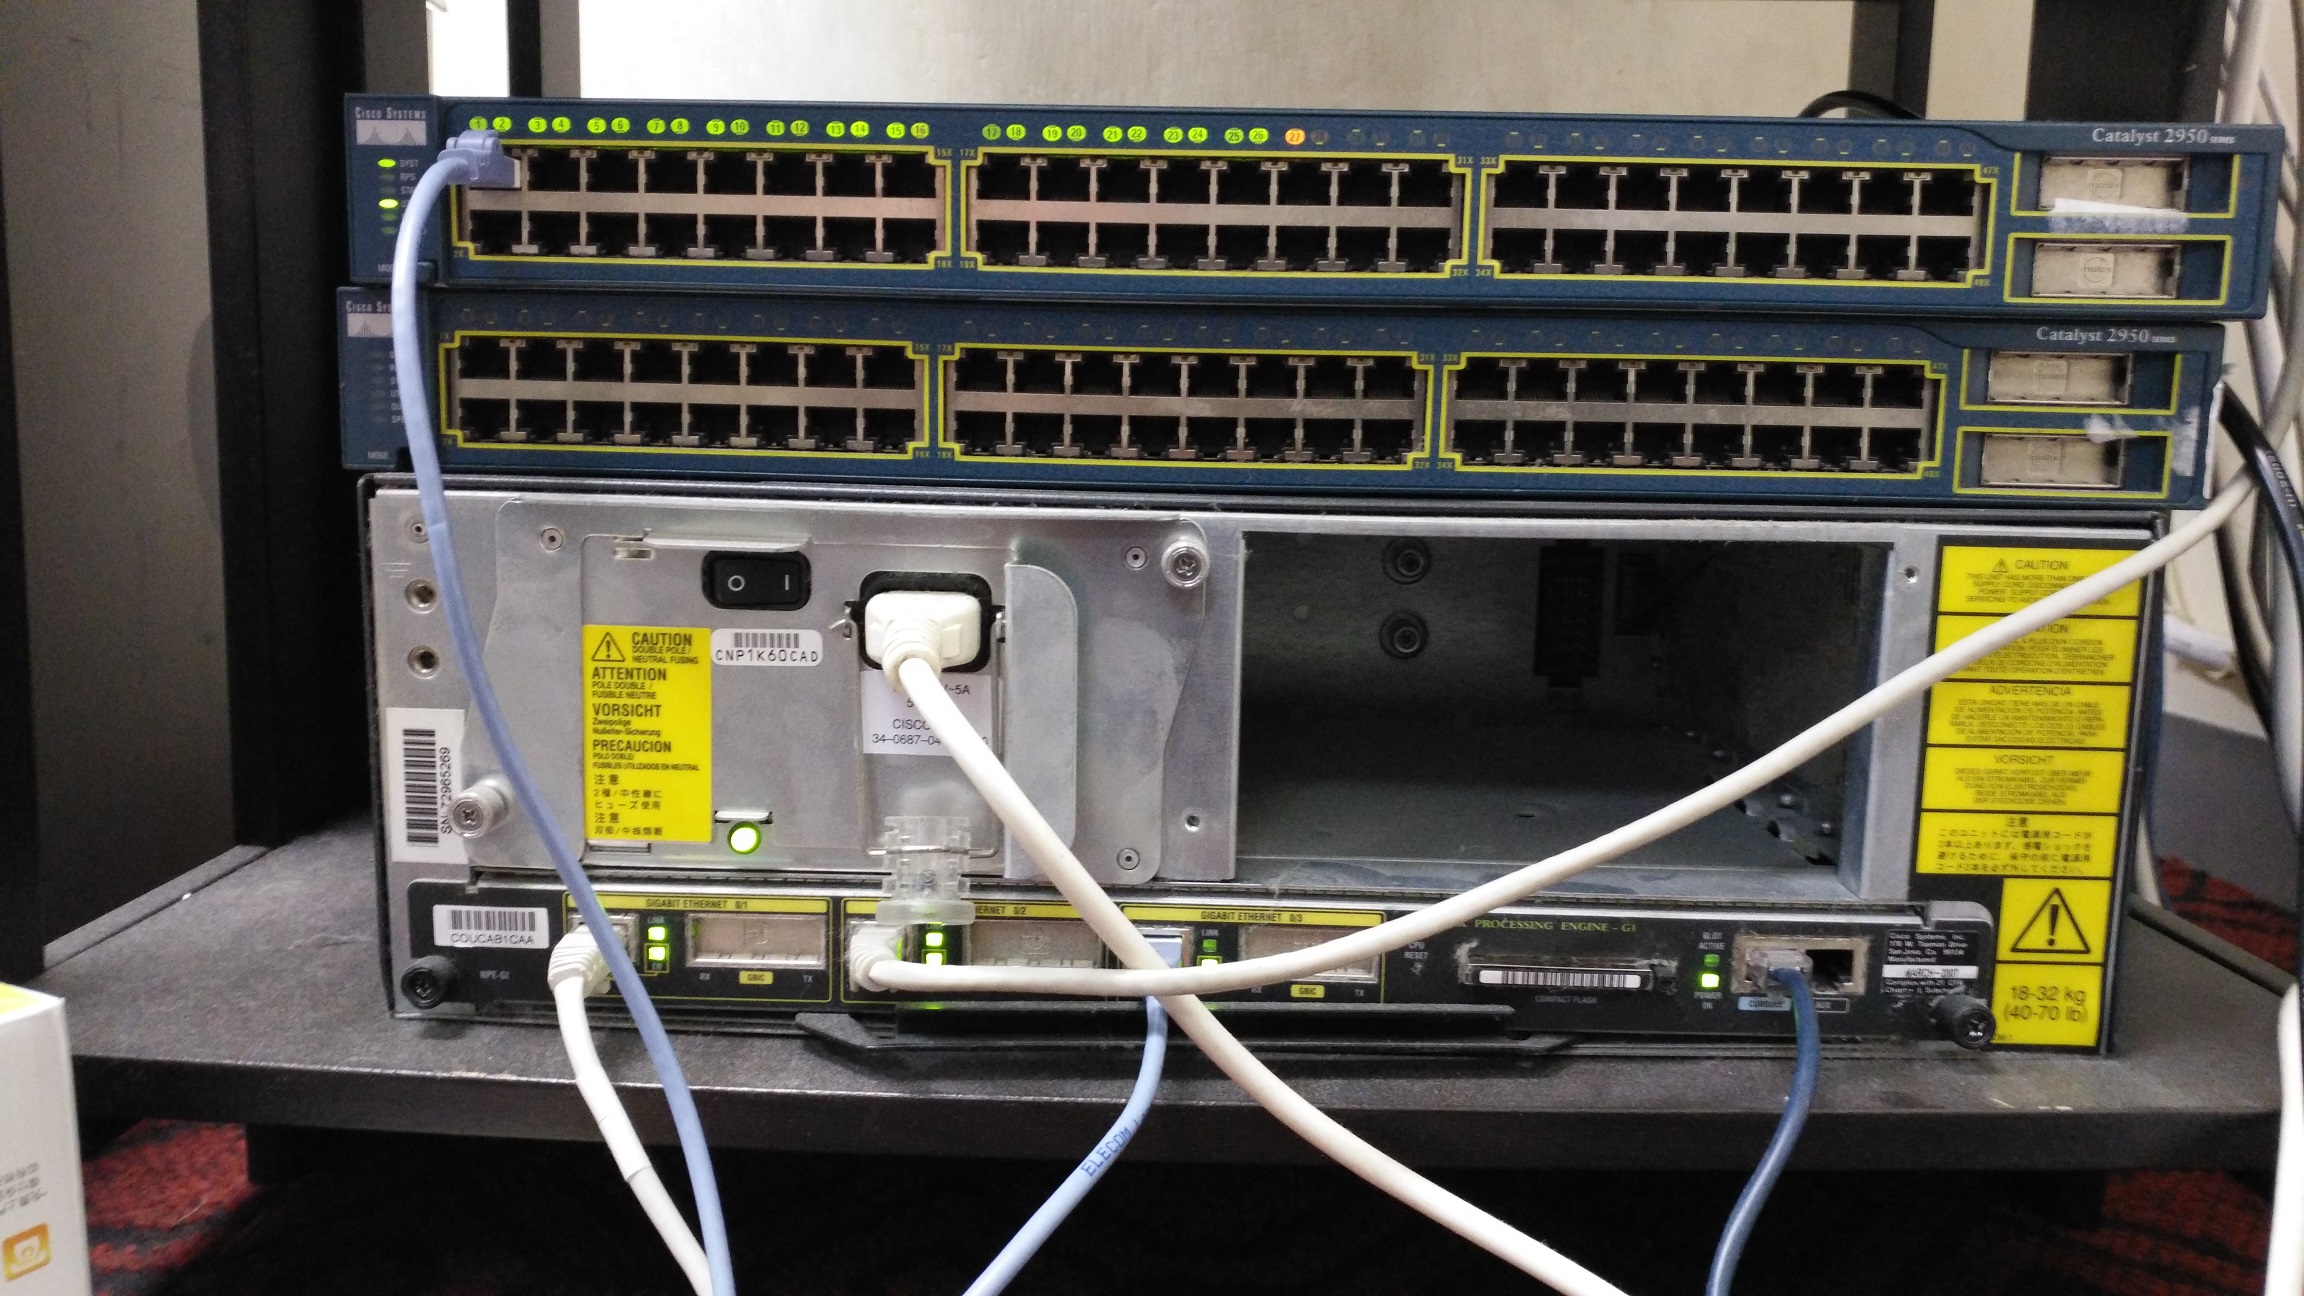
While there may have been leaks of the internal IOU or IOS on UNIX, these are even more dubious than buying your own cisco 7200 and running that IOS on Dynamips.  Indeed in the old days you’d no doubt find people with home labs that look something like this:

My sad lab.

So yeah, I know it’s not new but it was new to me.  But yes, VIRL is something us mere mortals can buy without a CCIE on hand, or a multi-million dollar contract on hand.  Although it isn’t free, but compared to everything else cisco sells it’s cheap…

So VIRL comes in a few different flavors.  They do have an ISO to run on bare metal x86 machines, OVAs for deployment on VMWare Workstation, and ESXi (Although for player you’ll have to get VIX and the vmnet config util from workstation, as I went through here & here).

Although that’s not so much what I’m interested in.  As always I’m more interested in something that lets me run it on my own.

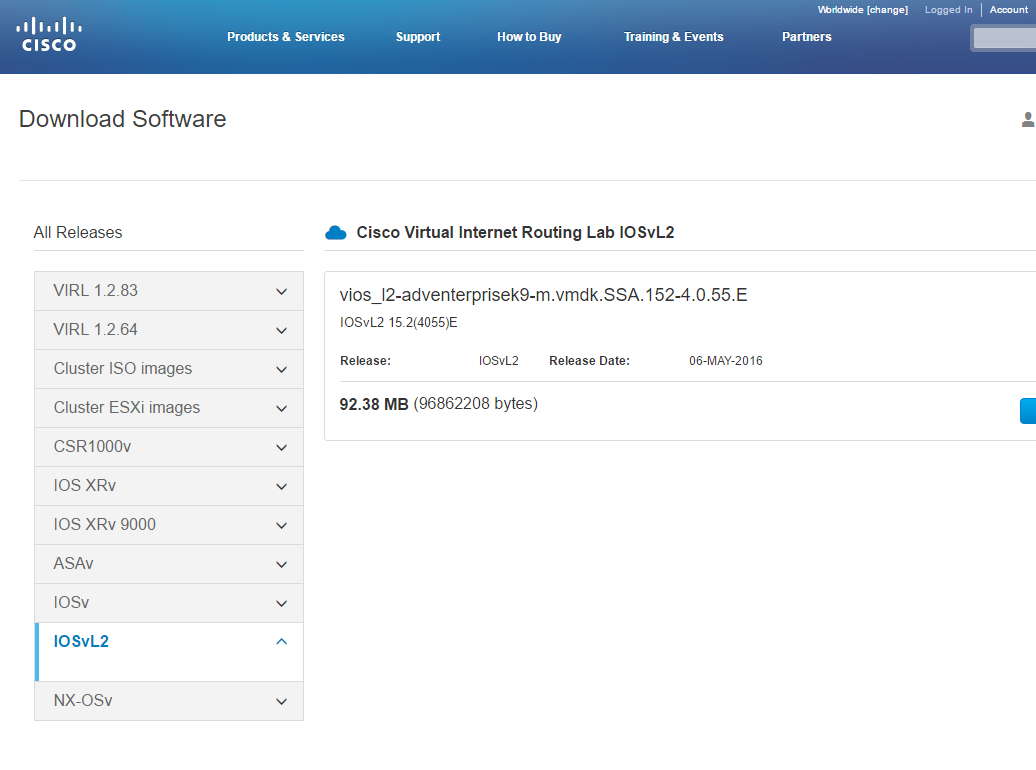
Downloading the l2 image

So as of today, the latest file is vios_l2-adventerprisek9-m.vmdk.SSA.152-4.0.55.E, with the MD5 checksum of 1a3a21f5697cae64bb930895b986d71e.

So as a first test, you can run the L2 image with Qemu/KVM!  I found it works better renaming vios_l2-adventerprisek9-m.vmdk.SSA.152-4.0.55.E to vios_l2-adventerprisek9-m.vmdk.SSA.152-4.0.55.E.vmdk otherwise there was some issues with Qemu picking up the image.

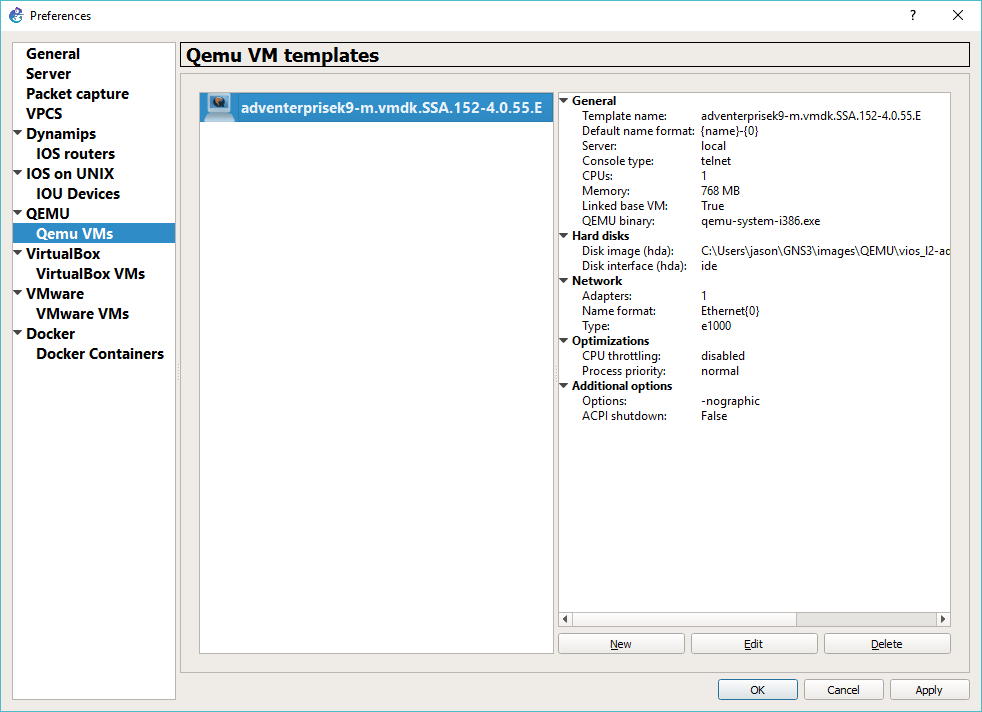
The command line for a switch can be a little crazy so it’ll break some of it up onto separate lines.  This way you can see that I bound a few interfaces to listen on UDP, while most of them are unbound, but you get the idea.  Naturally it being a cisco product, it drives with a serial console.

qemu-system-i386w.exe
-m 768M
-smp cpus=1
-boot order=c
-drive file=vios_l2-adventerprisek9-m.vmdk.SSA.152-4.0.55.E.vmdk,if=ide,index=0,media=disk
-serial telnet:127.0.0.1:5000,server,nowait
-monitor tcp:127.0.0.1:51492,server,nowait
-net none -device e1000,mac=00:2e:3c:92:26:00
-device e1000,mac=00:2e:3c:92:26:01,netdev=gns3-1
-netdev socket,id=gns3-1,udp=127.0.0.1:10003,localaddr=127.0.0.1:10002
-device e1000,mac=00:2e:3c:92:26:02
-device e1000,mac=00:2e:3c:92:26:03
-device e1000,mac=00:2e:3c:92:26:04
-device e1000,mac=00:2e:3c:92:26:05,netdev=gns3-5
-netdev socket,id=gns3-5,udp=127.0.0.1:10000,localaddr=127.0.0.1:10001
-device e1000,mac=00:2e:3c:92:26:06 -device e1000,mac=00:2e:3c:92:26:07
-device e1000,mac=00:2e:3c:92:26:08 -device e1000,mac=00:2e:3c:92:26:09
-device e1000,mac=00:2e:3c:92:26:0a -device e1000,mac=00:2e:3c:92:26:0b
-nographic

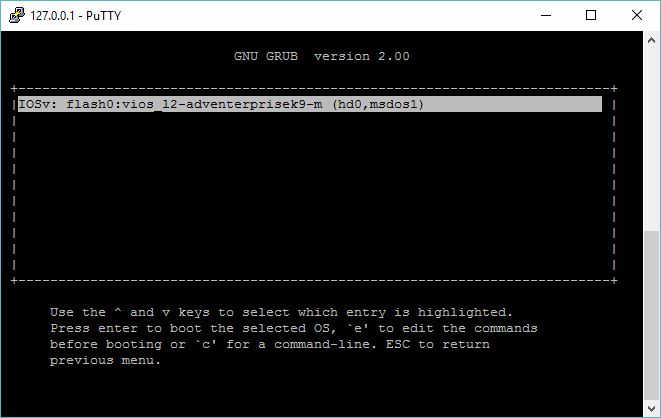
In some ways, this is very much like running Solaris on QEMU via a serial console.  Once booted up, if you grab the console you’ll see:

l2’s grub console

Now, while I think it’s interesting to play with, but I know many people don’t like to setup and run a dozen programs manually, so how do we get this to run under GNS3!

As of right now the current version is 1.5.3, so let’s step through this real quick

Version 1.5.3

First when you fire it up (by default) you’ll get the option to specify using a local server

use local server

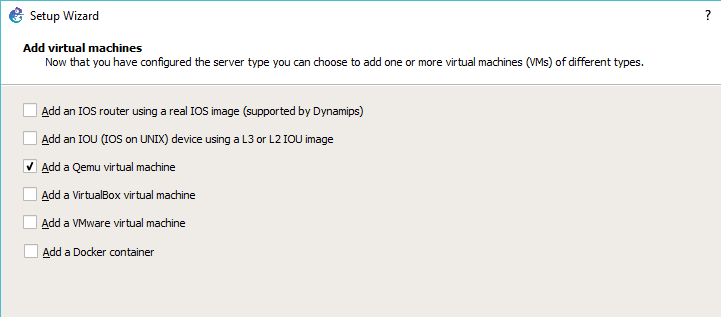
Next you will want to check the box to add a Qemu VM

Add a Qemu VM

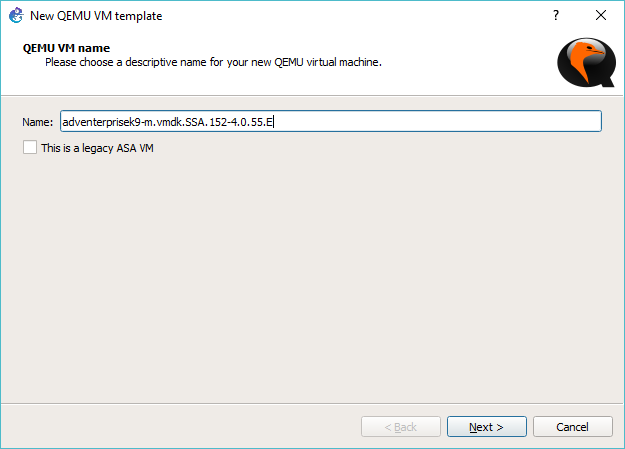
give it a name like adventerprisek9-m.vmdk.SSA.152-4.0.55.E… Or anything else you wish to call it.

give it a name

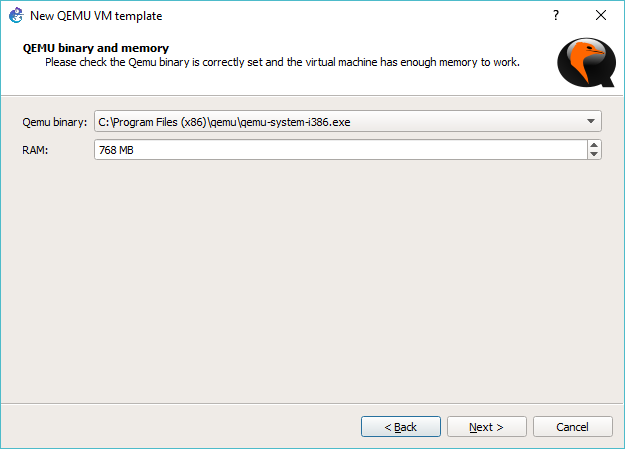
Next I set the emulator to qemu-system-i386.exe and give it 768MB of RAM.

set the Qemu emulator & RAM

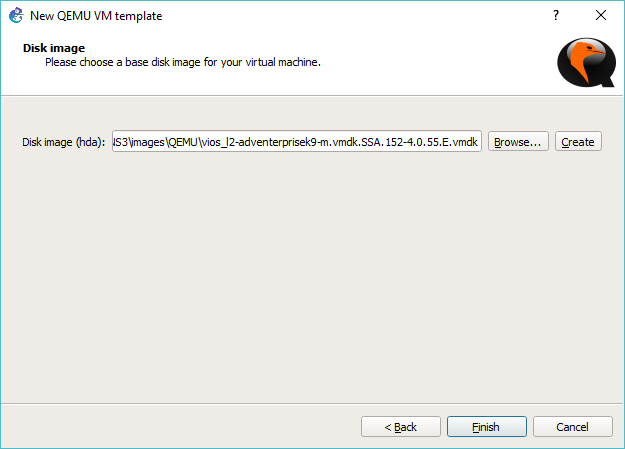
hit next, and then it’ll prompt to select a disk image.  In this example, remember I had renamed the downloaded VIRL image to have a VMDK extension.

select the image

Then GNS3 will prompt to add it to the default images directory

add it to the images directory

After that the wizard is complete.

Then finish

However there is still a bunch of settings that still need to change.  If you don’t make these changes you’ll have a switch with a single Ethernet port, and you will only be able to deploy a single switch, so that won’t be any fun!.

Once the wizard has finished you’ll be in the Preferences.  Just hit edit, on the template we just added, or otherwise it’s under Edit->Preferences.

Hit edit

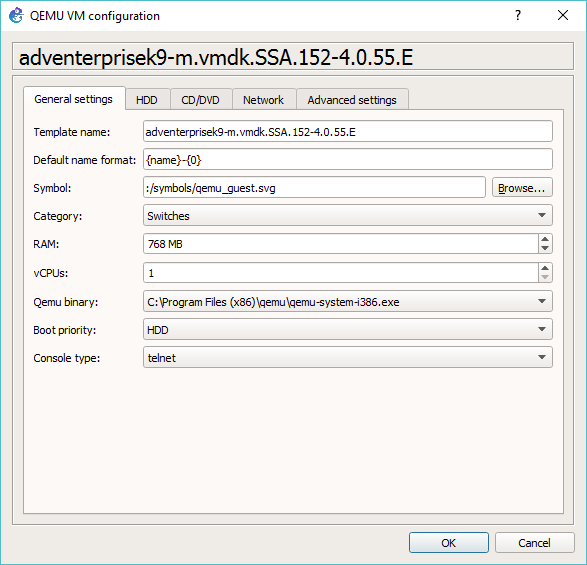
First thing is kind of cosmetic, but go ahead and set the Category to Switches, so that way it ‘flows’ nice in the UI.

set category

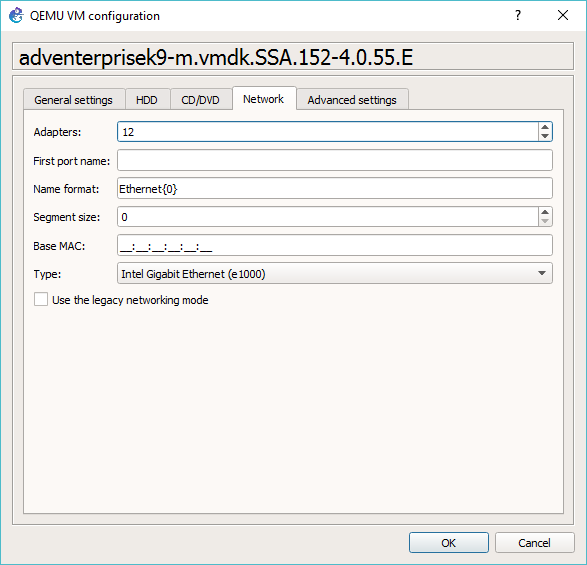
Next hit the Network tab, and then add some adapters.

set the adapters to something more usable like 12

I’ve set the switch to 12 adapters.  The default of 1 isn’t too useful.  Next up hit the Advanced settings tab.  Be sure to un-check the ‘Use as a linked base VM’ . This will let you deploy multiple copies.  On Windows there is some weird issue where changes are seemingly not saved, so be sure to have a config backup strategy beyond saving the config locally.

uncheck the Use as linked base VM

Great, hit OK, and now we’ve got our L2 template for GNS3!

As a bonus, I put it on Linux, and it’ll run under KVM, however if you use the cisco downloaded files, you’ll see this error while booting:

-Traceback= 1DBB7C8z 8DBFE5z 90522Ez 904F50z 904D5Dz 900F45z 901B7Bz 901B0Fz 8D7C0Dz 8D7B0Dz 887061z 8BAE73z 8B9FD7z 8B7827z 8BCCC4z 8C0587z – Process “Async write process”, CPU hog, PC 0x008D7D62

Over and over, and it’ll be generally slow.  For some reason KVM/Qemu on Linux is struggling with the VMDK.  So the solution is to simply convert it from a VMWare VMDK into a Qcow2 image with:

qemu-img convert -f vmdk -O qcow2 vios_l2-adventerprisek9-m.vmdk.SSA.152-4.0.55.E.vmdk  vios_l2-adventerprisek9-m.vmdk.SSA.152-4.0.55.E.qcow2

Now using the qcow2 file, the switch will boot up just fine!

For any reference I’m running Ubuntu 16.10

and the KVM version is:

# kvm –version

QEMU emulator version 2.6.1 (Debian 1:2.6.1+dfsg-0ubuntu5.3), Copyright (c) 2003-2008 Fabrice Bellard

FreeBSD 12 to cut support for iBCS / SYSV binaries

Cant’ say it’s that surprising, as last time I did a test with even NetBSD it broke post NetBSD 4.0.1

FreeBSD 12 Looking At Dropping SVR4 Binary Compatibility

As they say, with a little testing you can find that stuff has been broken for years without anyone complaining that loud.  I guess the lucky thing is that with the rise of fast computers, and decent virtualization and emulation we’ve been running Xenix on Qemu for nearly a decade!

It’s interesting how at one point ABI compatibility was seen as the holy grail of running everything all at once, and micro kernels were going to let us run ‘personalities’ of everything.  And we’ve now gone full IBM using hardware virtualization to run paravirtualized guest OS’s at will.  Although I still think that OS/2 2.0 had the best paravirtualized guest OS experience, the way it ran Windows seamlessly on the OS/2 desktop.

Just upgraded some RAM

128GB

16x8GB memory.  Sure it’s not the newest, or greatest, but it’s nice to be able to right size the RAM on all my lab crap, and now have all kinds of extra RAM.  The machine is built around SAS, but I don’t have the right sled adapter, and only a single disk.  Although it really doesn’t matter as there is a really nice internal USB slot inside this Dell r710, and VMWare installs just fine onto it. I already had all my virtual machines on an external NAS so it really didn’t matter.

I’ll probably either get more sleds and SAS disks, or some kind of flash PCIE cards.  I haven’t really decided yet.

It’s crazy to think of a time when 128kb was a lot of memory, let alone 1MB, or even a monstrous 16MB. It seemed crazy to hit that 24bit limit of the 286, then the 32bit limit of the 386.. At least we are a ways off from hitting the 64bit limit, but now that I have work servers with 1TB+ of RAM, well, it’s only a matter of time.

Personal AltaVista + UTZOO reloaded

Introduction

Long before websites, during the dark ages of the BBS, on the internet there was (well it’s still there!) a distributed messaging system called usenet.  There are countless topics on just about everything that was full of all kinds of incredible conversations.  Before the walled gardens, and the ease of running individual bulletin boards, the internet had prided itself on having one big global distributed messaging system.  It was a big system, and one thing that was always taken for granted was that it was too big to save, and that whatever you put out there would probably be erased as all sites had a finite amount of very expensive disk space, and they would only keep recent articles.

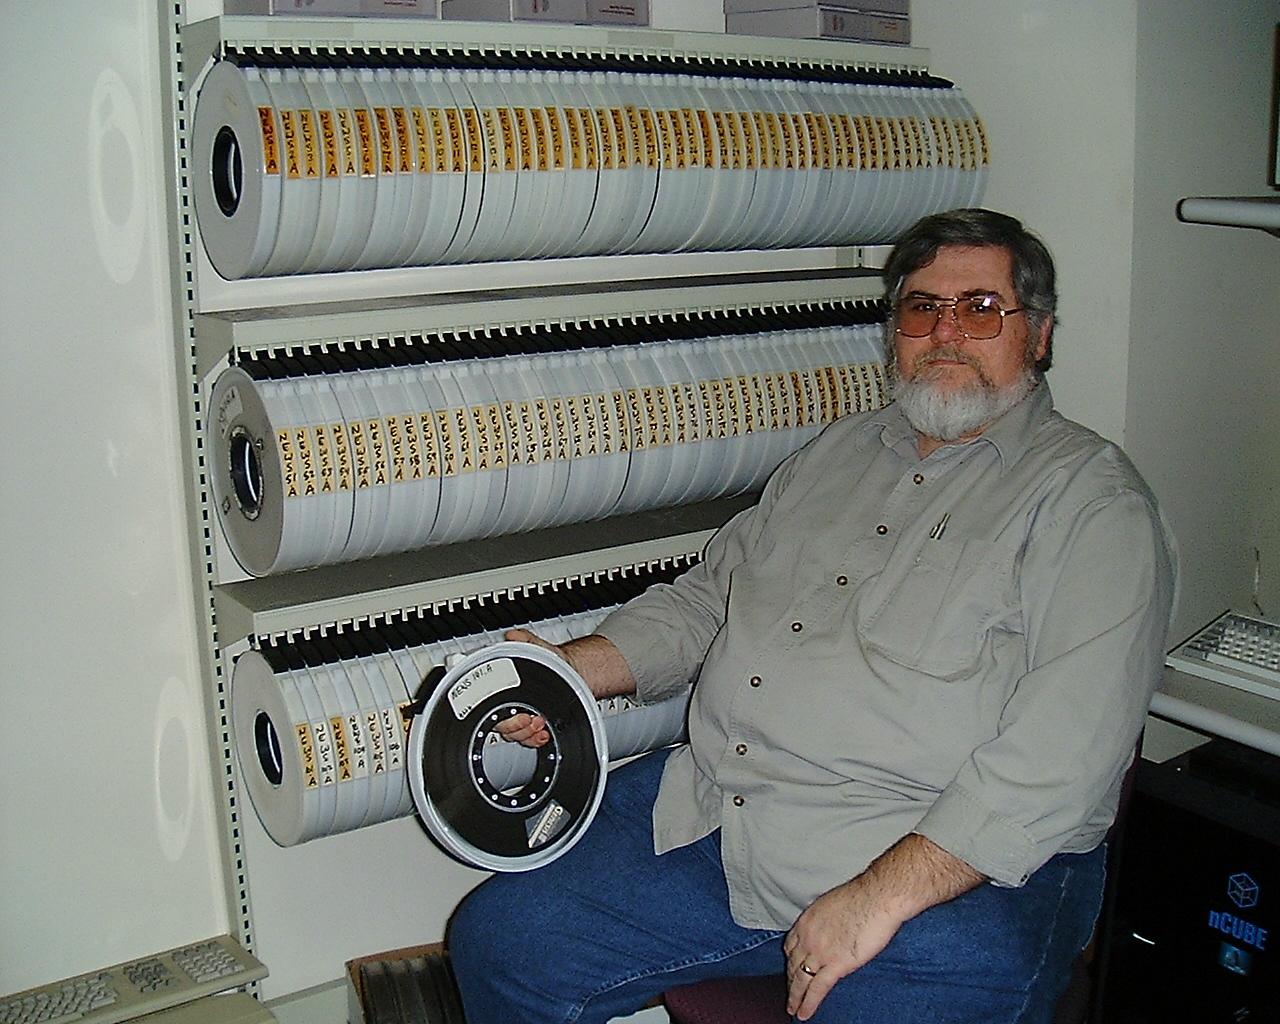
But it turns out that in the University of Toronto, in the zoology department they had a tape budget, and were in fact archiving everything they could.  In all they had amassed 141 tapes spanning from  February 1981 (though these are not Usenet posts, just internal netnews University stuff) all the way up to about midnight of July 01, 1991!

While the archive was made available to a few people in 2001, it was made generally available in 2009, and then in 2011 on archive.org where I downloaded a copy of it.  There is some interesting backstory over on Dogcow land, as it took quite a bit of effort to get the data from the tapes, and then slowly released out into the wild.

As mentioned on the archive.org site:

This is a collection of .TGZ files of very early USENET posted data provided by a number of driven and brave individuals, including David Wiseman, Henry Spencer, Lance Bailey, Bruce Jones, Bob Webber, Brewster Kahle, and Sue Thielen.

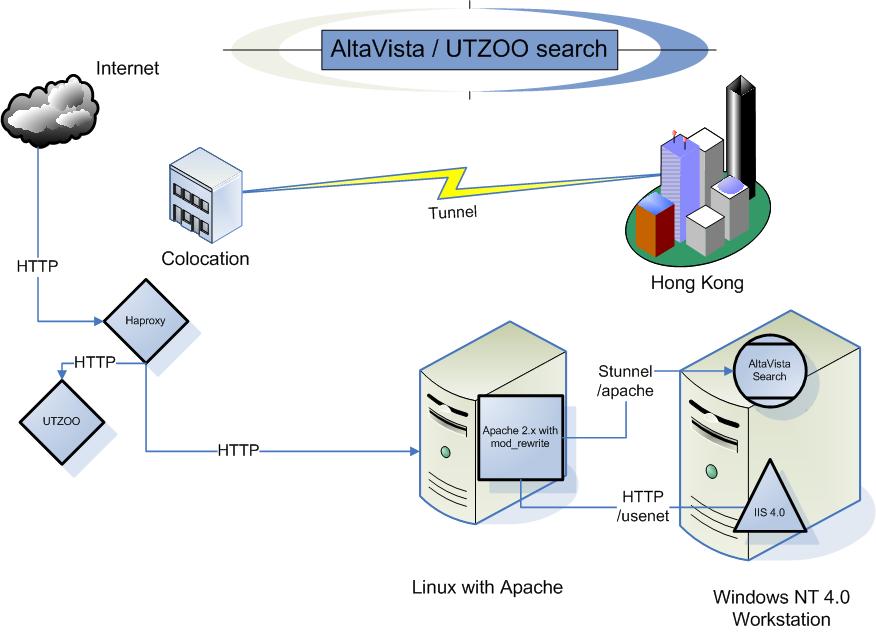
OK, so back a few months ago, I had setup AltaVista personal desktop search along with the UTZOO usenet archive for the purpose of using something more sophisticated than grep, but maintaining that legacy/retro feel us using outdated technology.  To recap the first challenge is that the desktop search product, is only meant to be used from the desktop of a Windows 98/NT 4.0 workstation.  It uses a super ancient version of JAVA as the webserver, and they chose to bind it to 127.0.0.1:6688 .  So the first thing to get around that was to build a stunnel tunnel allowing me to effectively connect to the webserver remotely.  And since the server assumes it’s locally I had to use Apache with mod_rewrite to setup some simple regex expressions to massage the pages into something that would be usable from a non local machine.

So with that word salad up, let’s have a brief picture!

Flow diagram

Stepping it up

On my ‘general’ hosting machine, I use haproxy to reverse proxy out multiple sites out the single address.  This is a super simple solution that allows me to have all kinds of different backends using various hosting platforms, such as Apache 1.3 on Windows NT 3.1.  So for this to work I just needed to create an altavista.superglobalmegacorp.com DNS record, and then the following in the haproxy config:

frontend named-hosts
bind 172.86.179.14:80
acl is_altavista hdr_end(host) -i altavista.superglobalmegacorp.com
use_backend altavista if is_altavista

backend altavista
balance roundrobin
option httpclose
option forwardfor
server debian8 10.0.0.18:80 check maxconn 10

So as you can see it’s really simple it looks for the string ‘altavista.superglobalmegacorp.com’ in the host header, and then sends it to the backend that has a single web server, in this case a lone Debian server, aptly named debian8 that throttles after 10 concurrent connections.

The next thing to do was generate a SSL self signed cert, which wasn’t too hard.  The stunnel installer has a profile ready to go, so it was only a matter of finding a version of OpenSSL that’ll run on NT 4.  As this isn’t public encryption I really don’t care about it using crap certs.

On the Debian server is where all the regex magic, is along with the stunnel client to connect to the NT 4.0 Workstation.

client = yes
debug = 0
cert = /etc/stunnel/stunnel.pem

[altavista]
accept = 127.0.0.1:8080
connect = 10.0.0.19:8443

Likewise on NT stunnel will need a config like this:

cert = c:\stunnel\stunnel.pem

; Some performance tunings
socket = l:TCP_NODELAY=1
socket = r:TCP_NODELAY=1

; Some debugging stuff useful for troubleshooting
debug = 0
output = c:\stunnel\stunnel.log.txt

[altavista]
accept = 8443
connect = 127.0.0.1:6688

With the ability for the Debian box to talk to the AltaVista web server, it was now time to configure Apache.  This is the most involved part, as the html formatting by AltaVista personal search is hard coded into the java binary.  However thanks to mod_rewrite we can modify the page on the fly!  So the first thing is that I setup to virtual directories, the first one /altavista maps to the search engine, and then I added /usenet which then talks to IIS 4.0 on the Windows NT 4.0 workstation, which is just allowing read & browse to the usenet files that will need to be indexed.

#This part connect to a stunnel connection to the Altavista server
ProxyPass “/altavista” “http://localhost:8080”
ProxyPassReverse “/altavista” “http://localhost:8080”
#This connects to IIS 4.0 on the NT 4.0 machine
ProxyPass “/usenet” “http://10.0.0.19/usenet”
ProxyPassReverse “/usenet” “http://10.0.0.19/usenet”
ProxyRequests Off
RewriteEngine On

Because we mounted it on a sub directory we need to redirect the root to /altavista so I simply add:

#Redirect the root to the /altavista path.
#
RedirectMatch 301 ^/$ /altavista

To get the images to work, along with fixing the 127.0.0.1 hardcoding,  I copied them from the NT workstation onto the Apache server, then added this regex statement:

#clean up urls
Substitute “s|Copyright 1997|Copyright 2017|n”
Substitute “s|127.0.0.1:6688|altavista.superglobalmegacorp.com/altavista|n”
Substitute “s|file:///c:\Program Files\DIGITAL\AltaVista Search\My Computer\images\|/images/|n”

And now the site is starting to work.  The most involved regex is to change the links from local text files, into a path to point to the usenet shares.  This changes the text for u:\usenet\a333\comp\33.txt into a workable URL.

Substitute “s|>u:\\\\usenet.([a-z]{1,}[0-9]{3,})\\\([0-9a-z\+\-]{1,})\\\([0-9]{1,})|—><a href=\”http://utzoo.superglobalmegacorp.com/usenet/$1/$2/$3.txt\”>[$2\] Click for article|

Naturally there is a LOT of these type of statements to match various depths, and pattern types as there is A news, B news and C news archives, plus scavenged bits.

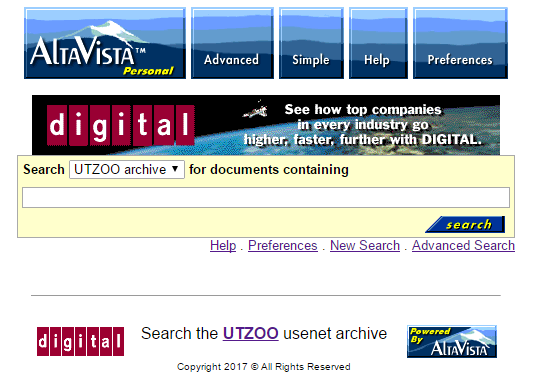
Additionally I disabled a bunch of URL’s that would either try to alter the way the engine works, or allow the search location to change, just giving you empty results, along with altering some of the branding, as digital.com doesn’t exist anymore, and various tweeks.  The finished config file for Apache is here.

Now with that in place, I can hit my personal AltaVista search.  The next insane thing was to rename all the files from the UTZOO dump adding a .txt extension, and then re-encoding them in MS-DOS CR/LF format.  I found using ‘find -type f’ to find files, and then a simple exec to rename them into a .txt extension.  Then it was only a matter of using ZIP to compress the archives, and then transferring them to Windows NT, and running UNZIP on them with the -a flag to convert them into CR/LF ASCII files on Windows.  This took a tremendous amount of time as there are about 2.1 million files in the archive.

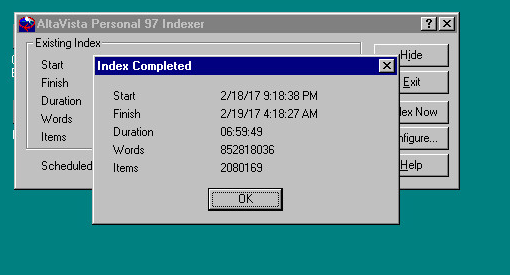
Now with the files on Windows, now I had to run the indexer.

Indexed in under 7 hours!

While I had originally had an IIS 4.0 instance on the same NT 4.0 Workstation serving up the result files, I thought it may make more sense to just serve them from the UTZOO mirror server I have in the same collocation so it’d be much faster, so that way only the queries are relying on servers in Hong Kong, instead of being 100% located in the United States.

So here we go, my search portal for all that ancient usenet goodness:

altavista.superglobalmegacorp.com

If you are hoping for the wealth of knowledge to be gained from people posting on usenet from 1981 to 1991 then this is your ticket.  Keep in mind that usenet being usenet, there is discussions on everyone and everything, and like all other forums before you know it it’ll end with calling people Hitler, and how the Amiga is the greatest computer ever (well it was!).  A tip when searching by year, is that people commonly wrote the year as 2 digits.  However when looking for numbers like, say Battletech 3025, it will pull up files named 3025.txt.  To prevent this just add -3025.txt to stop names like 3025.txt, or if you want to find out about the movie Bladerunner from 1982, try searching for bladrunner 82 -82.txt +review +movie.  If you have any questions, there is of course the manual with a guid on how to search.

While the story of AltaVista is somewhat interesting, but much like how Digitial screwed up the Alpha market by trying to hoard high end designs, they also didn’t set the search people free to focus on search.  And the intranet stuff was crazy expensive, look at this ad from 1996 which translate to a minimum of $10,000 USD a year to run a single search engine!  But as we all know, the distributed model of google won search and AltaVista never had a chance as it was caught up in the Compaq/HP mess then spun out to be quickly absorbed by Yahoo.

Meanwhile it appears the original owners of altavista.com, AltaVista Technology, Inc. of California, are actually still in business.  If anyone cares I’ll put the installation files, and some of the config’s in this directory.

The Harris HCX-9 aka TAHOE platform

A machine born in legend

This is a machine that is shroud in legend, and of course played an integral part of internet history but oddly enough almost all trace of it ever existing has vanished.

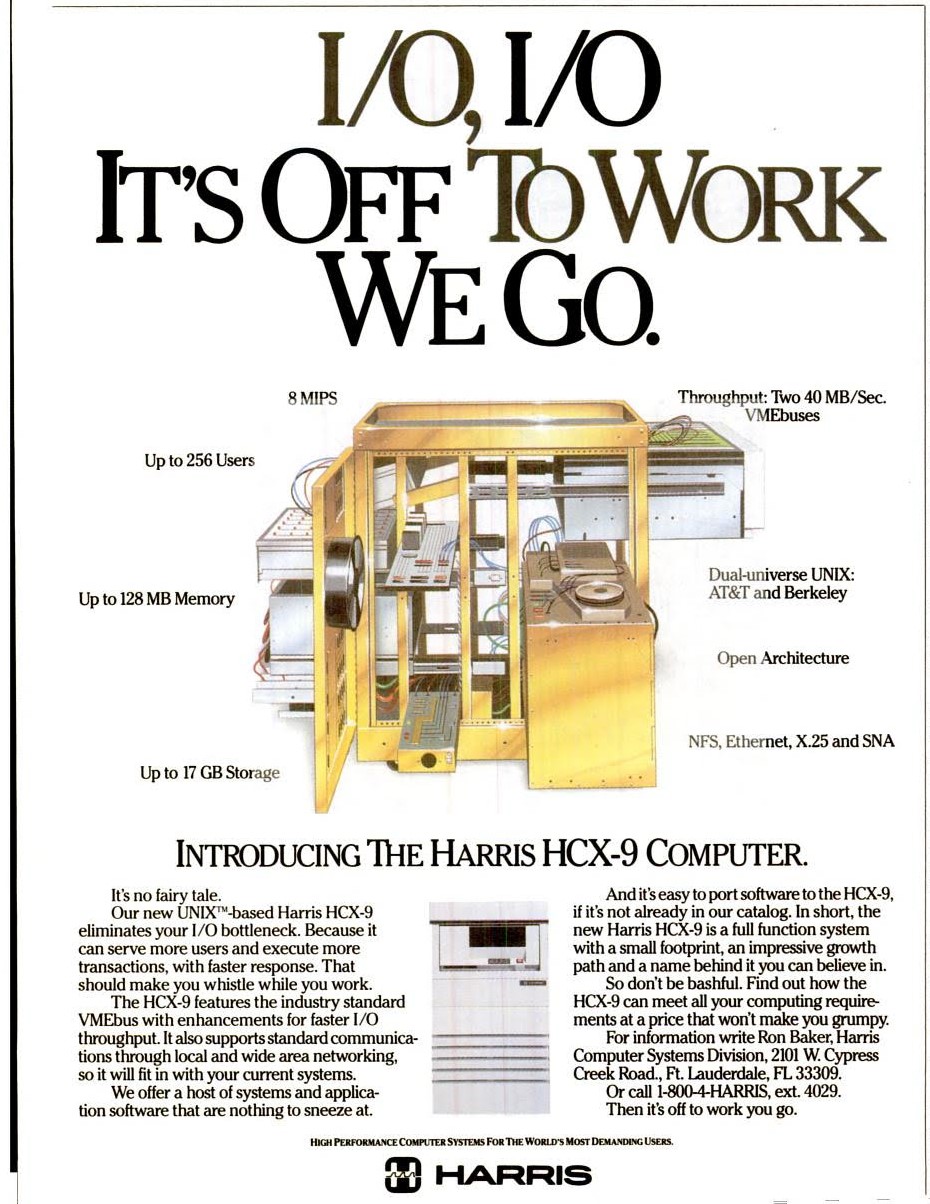
The release of BSD, aptly named the 4.3BSD TAHOE release was completed in June of 1988. However shortly after this release the makers of the CPU, Computer Consoles Incorporated abruptly exited the market killing off the platform.  What is interesting though is that while CCI was manufacturing the TAHOE processor, they also sold it to 3 other OEM’s, Sperry (which merged with Buroughs, and re-branded as Unisys), and ICL Ltd. and Harris is the only other one to have picked up the CPU for inclusion in it’s own machines.  Among them was the HCX-7, and the HCX-9.

The Harris HCX minicomputers were one of the possible machines that the CSRG team at Berkeley saw as a possible successor to the aging VAX line of minicomputers for their operating system.  While this may not have been the first port of UNIX or BSD for that matter, it was the first port of a 32bit BSD, that was included into the main VAX BSD source, and as such could be redistributed with the BSD license (which at the time required an AT&T 32V license).  The fundamental thing this did was to split out the VAX specific code as a mainstream port was to be rolled back into the main CSRG source, unlike any other 3rd party port at this point.

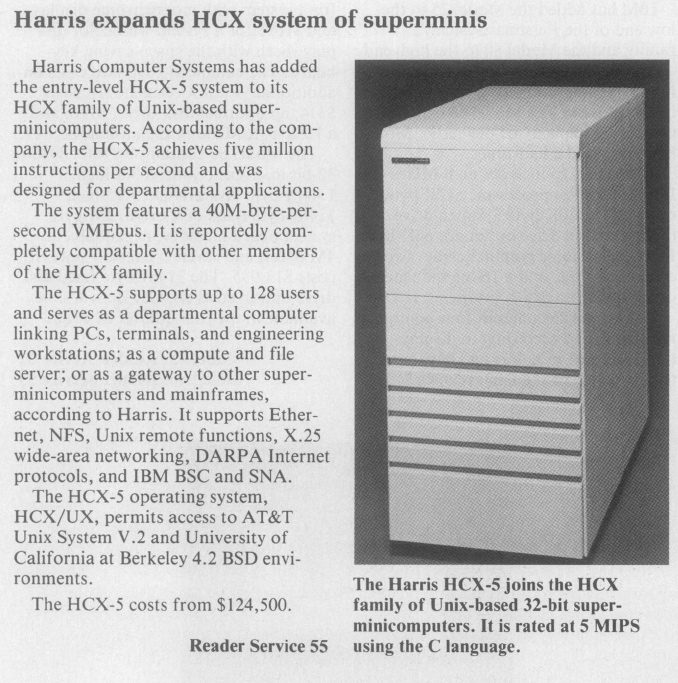
HCX-5

The HCX-5 ran an internal version of 4.2BSD, along with SYSV in a ‘dual universe’ config, while the HCX-9 was to be supported by the CSRG, as the file GENERIC.hcx9 indicates from 4.3BSD TAHOE.  As you can see the HCX-5’s starting price of $124,500 USD is if anything a continuing of the mindset that BSD only ran on super expensive minicomputers.

POWER 6/32 = HCX-9

Indeed from the config file in 4.3BSD TAHOE, we see this:

GENERIC POWER 6/32 (HCX9)

And for quite some time, I’ve always been searching for a CCI POWER 6/32, meanwhile it appears that was merely a reference platform that became the HCX-9 as indicated from the machine config file.  The evidence was hiding in plain sight, as always it was a typo that lead me here as I was searching for TAHOE processors, and came across people looking for GCC on the TAHOE, running BSD.  And following their threads I noticed that they were running Harris minis’ which then lead me to make the connection that the TAHOE was a processor, not just a machine, and that other vendors sold their own machines with the CPU.

Future cut short

Needless to say, once CCI exited the market these machines evaporated so quickly that they are only remembered in legend in BSD.  I’ve seen people debate if the machine actually existed, who put it out, or even what was it exactly? A workstation? Server?  As we can see from the Harris models, it was meant to be a minicomputer, to compete with the likes of the Digitial VAX.

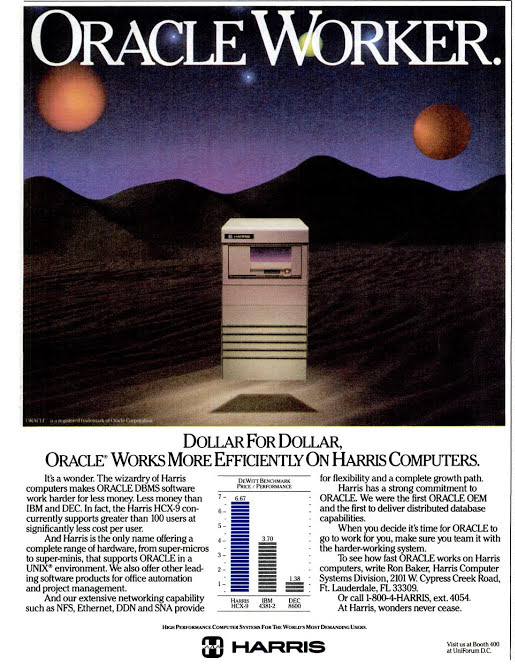
Oracle Worker

As we can see from this ad, with Oracle support and the official porting target of the CSRG the HCX-9 was expected to have a bright future.  Instead it was cut so short there is barely any mention of it even existing.

Sadly this minicomputer target idea continued, as the CSRG sidestepped the commodity 32bit processors, namely the cheaper 68020 & 80386.

Moving to Debian 8

So if you can read this, then the server is working.

After a few errors here and there, it appears to be working now.

Hopefully this clears up the phantom ‘logging in’ issue others were having.  Also I haven’t seen any php5 updates on Debian 7 in a while, so it was time to dump the DB, and copy over into a new VM.

PCem v12 released

PCem v12 released. Changes from v11 :

  • New machines added – AMI 386DX, MR 386DX
  • New graphics cards – Plantronics ColorPlus, Wyse WY-700, Obsidian SB50, Voodoo 2
  • CPU optimisations – up to 50% speedup seen
  • 3DFX optimisations
  • Improved joystick emulation – analogue joystick up to 8 buttons, CH Flightstick Pro, ThrustMaster FCS, SideWinder pad(s)
  • Mouse can be selected between serial, PS/2, and IntelliMouse
  • Basic 286/386 prefetch emulation – 286 & 386 performance much closer to real systems
  • Improved CGA/PCjr/Tandy composite emulation
  • Various bug fixes

Thanks to Battler, leilei, John Elliott, Mahod, basic2004 and ecksemmess for contributions towards this release.

http://pcem-emulator.co.uk/

Meet the superfans who spent a decade bringing Daikatana back to life

Daikatana!

No, really I got an email today from Frank Sappone, that his passion project the fixing and overhaul of Daikatana was written up on PCGAMER.  Although my involvement may have gotten edited down, honestly all I did was give that little bit of a push and inspiration that it could be done by spending a good week on installing Solaris, and porting the dedicated server portion from SPARC Solaris, to x86 Solaris.  Once we had it running there, it was far easier to then get it running on Linux and OS X as a dedicated server.  Once we had that push Frank was able to use his great knowledge of Quake/QuakeWorld/Quake II and fix an incredible amount of bugs, and bring it into a fairly good state.

The real star here is of course the Johns, John Carmack for making the source code to Quake/QuakeWorld, Quake II, open so we could always refer back to this code, which Daikatana was based off an early beta of Quake II, and John Romero for giving us the needed source to make it all possible.

11.75 HKD is like $1.50 USD

It’s on sale right now at steam!

You can find Frank’s hard work here on bitbucket.org

For Windows users, you can simply download DK_EXE_030816_FULL.7Z, from his site (mirror).  And from the readme:

It’s a 7zip package. After you’ve downloaded the package you extract it to Daikatana’s folder. If you have Steam installed to it’s default path Daikatana’s folder is located in:

C:\Program Files\Steam\steamapps\common\Daikatana\

(or if you’re running 64-bit Windows):
C:\Program Files (x86)\Steam\steamapps\common\Daikatana\

If it asks if you would like to overwrite any files, do so and overwrite the files. End result is that when Daikatana starts you can see in the right bottom corner of the red area in main menu “1.3” instead of “1.2”. You’re also able to access for example the HD resolutions from the Video menu.

If you start playing multiplayer with Daikatana community, you’re also going to need:

dkcustom.rar (Pak9)

You extract that package into:

C:\Program Files\Steam\steamapps\common\Daikatana\data\


And to further celebrate this awesome press day, I’ve purchased a limited number of steam keys, reply with a comment (be sure to include a working email address!) and I’ll send you a key!  That’s right it’s the:

ON SALE DAIKATANA GIVEAWAY!

*Quantities limited.

WSAPoll & MinGW

For some reason if you try to use WSAPoll, you’ll get this fine error on linking:

poll.c:(.text+0x26): undefined reference to `WSAPoll’

Yeah.

Turns out that it’s basically missing from the includes.  Thanks to this hint, just simply add this into your source/header after pulling in winsock2.h and it’ll link.

typedef struct pollfd {
SOCKET fd;
SHORT events;
SHORT revents;
} WSAPOLLFD, *PWSAPOLLFD, FAR *LPWSAPOLLFD;
WINSOCK_API_LINKAGE int WSAAPI WSAPoll(LPWSAPOLLFD fdArray, ULONG fds, INT timeout);

And now you can happily compile and link.