Qemu enters the 2.0 release candidate phase!

Lots of big changes headed for the 2.0 release.  From the change log:


Incompatible changes

  • All onboard buses now have distinct names, so that all of them can be reached with “-device bus=…”. As a result of this, some buses that used to have duplicates got renamed:
    • i2c-bus.0 to i2c-bus.1 for machines n800, n810;
    • virtio-mmio-bus.0 to virtio-mmio-bus.3 for vexpress-a15, vexpress-a9;
    • virtio-mmio-bus.0 to virtio-mmio-bus.31 for virt;
    • usb-bus.0 to usb-bus.1 for xilinx-zynq-a9, fulong2e;
    • ide.0 to ide.1 for isapc, mips, g3beige, mac99, prep;
This change requires care when doing migration from 1.x to 2.x QEMU; you need to specify bus=NEW explicitly on the destination for devices on the renamed bus.
  • Another bus rename is pci to pci.0 for pseries. This does not require as much care on migration; if you were specifying “bus=pci” explicitly, QEMU will not start unless you change that to “bus=pci.0″.
  • qemu-system-arm no longer defaults to the obsolete “integratorcp” if no machine is specified on the command line (this was a recurring source of confusion). Users with existing integratorcp images will need to add “-M integratorcp” to the command line if it is not already present.

Future incompatible changes

  • Three options are using different names on the command line and in configuration file. In particular:
    • The “acpi” configuration file section matches command-line option “acpitable”;
    • The “boot-opts” configuration file section matches command-line option “boot”;
    • The “smp-opts” configuration file section matches command-line option “smp”.
Starting with QEMU 2.1, -readconfig will standardize on the name fo the command line option.

ARM

  • Support for “-M virt”, a board type that only uses virtio devices
  • Support for “-cpu host” when running under KVM
  • Support for new 32-bit mode ARMv8 instructions in TCG
  • Support for all 64-bit mode ARMV8 user-accessible instructions except for the optional CRC and crypto extensions
  • Support for AArch64 disassembling (requires a C++ compiler to be installed on the host)
  • Initial support for KVM on AArch64 systems (some features such as migration are not yet implemented)
  • Support for the Canon PowerShot A1100 DIGIC board using “-M canon-a1100″
  • Support for the allwinner-a10-based board “-M cubieboard”
  • Support for flow control in the Cadence UART
  • “integratorcp” is no longer the default machine (see the ‘incompatible changes’ section above)

Power

  • Support for Altivec 2.07 and VSX instructions when running under TCG
  • Support for ISA 2.06 “load/store quadword instructions”, “divide extended instructions” and “floating-point test instructions” when running under TCG
  • PReP is not anymore (incorrectly) included in qemu-system-ppcemb
  • Improved support for “-nodefaults” on the pSeries machine. Display devices created with “-device VGA” will be handled correctly in the device tree.
  • Support for boot order in pSeries emulation

s390

  • Support for adapter interrupts in virtio-cc2

SPARC

  • Support for Sun CG3 framebuffer with the Sun4m machine. The CG3 framebuffer can be requested with “-vga cg3″.
  • Support for the CASA compare-and-swap instruction in TCG.

x86

  • On the Q35 machine, the HPET interrupt can now be attached to GSIs 16-23, like on real hardware.
  • The Q35 machine now supports CPU hotplug.
  • Two flash chips can be specified using the “-drive if=pflash” or “-pflash” options twice.
  • Memory layout has changed slightly; to improve performance, the PIIX4 machine (“-M pc”) now has 3GB of low memory instead of 3.5GB if the guest has more than 3.5GB of memory. Similarly, the Q35 machine (“-M q35″) now has 2GB instead of 2.75GB of low memory if the guest has more than 2.75GB of overall memory.
  • Support for migration of Intel MPX registers.
  • The Apple SMC device is now exposed in the ACPI tables.
  • On the PIIX machine, PCI hotplug now supports devices behind a bridge (only for bridges not added by hotplug; hot-plugged bridges can still use the PCI Standard Hot-Plug Controller).
  • Support for the Hyper-V reference time counter via the “hv-time” suboption of “-cpu”. This can improve performance of Windows guests substantially for applications that do many floating-point or SIMD operations. (Requires KVM and Linux 3.14).
  • The distributed qemupciserial.inf file now allows installing multiport PCI serial devices on Windows too.
  • ACPI tables generated by QEMU can now be used by OVMF firmware. OVMF starting with SVN r15420 is needed. In particular hotplug, pvpanic device and other ACPI based features now work for OVMF.

KVM

  • x2apic is now enabled by default when KVM is in use.

Xen

  • PCI passthrough of devices with a ROM now works.

Xtensa

  • added support for ML605 and KC705 FPGA boards.
  • Cache-related opcodes now correctly check privilege level/memory accessibility.

Device emulation

SCSI

  • the SCSI layer can offload the WRITE SAME command to the host storage. This is supported on XFS file systems, raw devices, and iSCSI targets.
  • SCSI disks can report a port WWN and port index, to make them look more like “real” SAS disks

USB

  • support for suspend-to-RAM in the XHCI controller
  • support for Microsoft descriptors, to make Windows use remote suspend by default.

GUI

  • Windows hosts support keyboard translation in the GTK+ interface
  • Support for SDL 2.0.

VNC

  • Setting the password via monitor command will not enable password auth as side effect any more. Use “qemu -vnc ${display},password” on the command line to enable password authentication.
  • Improved performance.

GTK+

  • Support for mouse wheel.
  • Support for enabling/disabling grab-on-hover from the command line using “-display gtk,grab-on-hover=on|off”.
  • QEMU for Windows now also supports GTK+ and uses it by default. Console windows (monitor, serial and parallel console) are not available with GTK+.

Monitor

  • New HMP command cpu-add for CPU hotplug
  • New QMP commands object-add and object-del for generic object hotplug (enables virtio-rng hotplug)
  • New HMP commands object_add and object_del for generic object hotplug
  • Improved command-line completion for device_add and device_del (as well as the new commands object_add and object_del)
  • dump-guest-memory can produce kdump compressed format.

Migration

  • Various fixes for migration with qcow2 images. Migration with qcow2 images is now reliable.
  • Reduction (or elimination) of guest stalls during migration
  • RDMA migration is now activated with the “rdma:HOST:PORT” syntax (used to be “x-rdma:HOST:PORT”)

Network

  • New backend “netmap” on BSD systems

Block devices in system emulation

  • Live snapshot merge (…-commit) can be used to merge the active layer of an image into one of the snapshots
  • Live and offline snapshot merge (“commit”) will resize the destination image if necessary.
  • The iSCSI and Gluster backends support snapshot merge.
  • “query-block-stats” provides statistics for all images in the chain of backing files
  • node-name, query-named-block-nodes: external snapshot, resize, change password (???)
  • Experimental support in virtio-blk for M:N threading model: if you specify x-dataplane=on, you can also create I/O threads with “-object iothread” and point virtio-blk devices to the desired iothread with the “x-iothread” property. Properties of the running iothreads can be queried with the QMP command “query-iothreads”.

Various

  • -name now supports a “debug-threads” suboption. With this option, QEMU will assign names to each threads in order to simplify debugging. Note that thread names do not constitute a stable API.
  • Improved coverage for “make check”.
  • Lots of bugfixes reported by Coverity (mostly for non-x86 guests).

Block devices and tools

  • Network block drivers (curl, iscsi, rbd, ssh, glusterfs) can be built as shared library modules with “–enable-modules” configure option.
  • When the destination of “qemu-img convert” is a raw device, qemu-img can ask the host storage to “discard” it instead of writing zeroes
  • “qemu-img convert” can be passed a “-S 0″ option to create a fully allocated image
  • “qemu-img convert” can use hints from the host storage to speed up the transfer
  • “qemu-img convert”, “qemu-img create”, “qemu-img amend” support multiple occurrences of the “-o” command line option.
  • The libcurl interface had bitrotted and has been fixed.
  • A new “quorum” driver for redundant storage is supported.
  • QEMU is able to operate even if the underlying storage requires the buffer size to be a 4K multiple. This is the case for 4K-native disks (with cache=none or when accessed through iscsi:// URLs) and some raw devices. When this happens, QEMU emulates unaligned accesses using read-modify-write cycles if necessary. On properly configured guests newer than ~2009 there should be no performance penalty.
  • qemu-io supports command editing via readline
  • Pseudo-protocols like blkdebug and blkverify can be nested arbitrarily
  • Improved error messages for many operations
  • QEMU can access NFSv3 shares directly from userspace using libnfs. The share must be configured to allow access from high-numbered ports

TCG

  • Improvements to the TCG optimizer make it produce faster code
  • QEMU can use getauxval to detect the host instruction set for PPC64, ARM, s390
  • QEMU supports generating MOVBE, ANDN, instructions in the x86 backend
  • Improved code generation on AArch64 and SPARC hosts
  • Support for AArch64 disassembling (requires a C++ compiler to be installed on the host)

Tracing

  • LTTng 2.x is now supported

User-mode emulation

  • Support for AArch64 user-mode emulation
  • Target specific minimum kernel versions, –enable-uname-release configure parameter will be removed in next release.
  • Support for timer system calls: timer_create, timer_settime, timer_gettime, timer_getoverrun and timer_delete.
  • Support for accept4 socketcall
  • Support for sendmmsg/recvmmesg system calls
  • Support for capset/capget system calls
  • Bug fixes

Known issues

  • On Win32, QEMU must be compiled with --disable-coroutine-pool to work around a suspected compiler bug.
  • The GTK+ terminal windows (monitor, serial console, parallel, …) are still unusable in TCG mode: they lose characters and can raise deadlocks.
  • QEMU for Windows does not support GTK+ terminal windows.
  • AArch64 disassembler support may cause linker errors when configuring with --cc= without matching --cxx= argument.


I’ll have to see if I can build a win64 version.  And OS X as well…

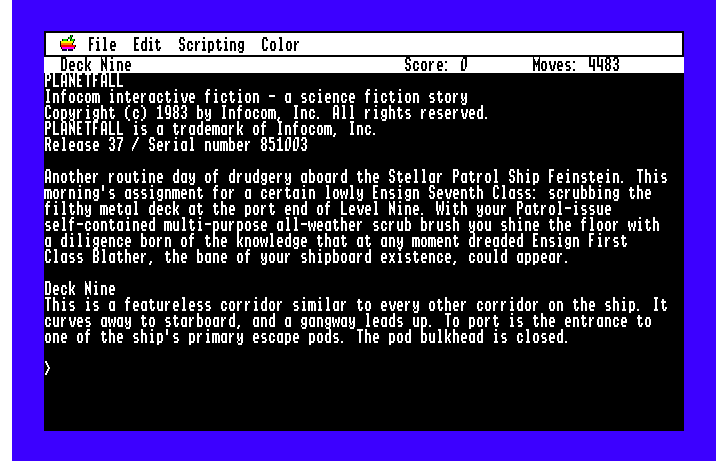
Virtual IIGS for Chrome, Active GS!

It’s a simple pluggin for Chrome, download it and you are good to go.  As a bonus, check out The Lost Treasures of Infocom!

No really!

Besides the disk swapping, it’s pretty cool!

Planetfall!

Planetfall!


WRP for QT-Webkit

(note this is a guest post from Tenox)

Due to a popular demand, a previously mentioned Web Rendering Proxy has been ported to QT-Webkit, which allows it to run on Linux, BSD and other operating systems.

QT doesn’t support writing GIF images so JPEG is being used instead. You may want to adjust the option for image quality versus size.

The installation of required components is straight forward, on Ubuntu:

apt-get  install  python-qt4  libqt4-webkit

Generaly you if you can get qt-webkit2png to run, WRP will also work. Note for Windows users, you will need a X11 display server like the one that comes with Cygwin.

The script is available here.

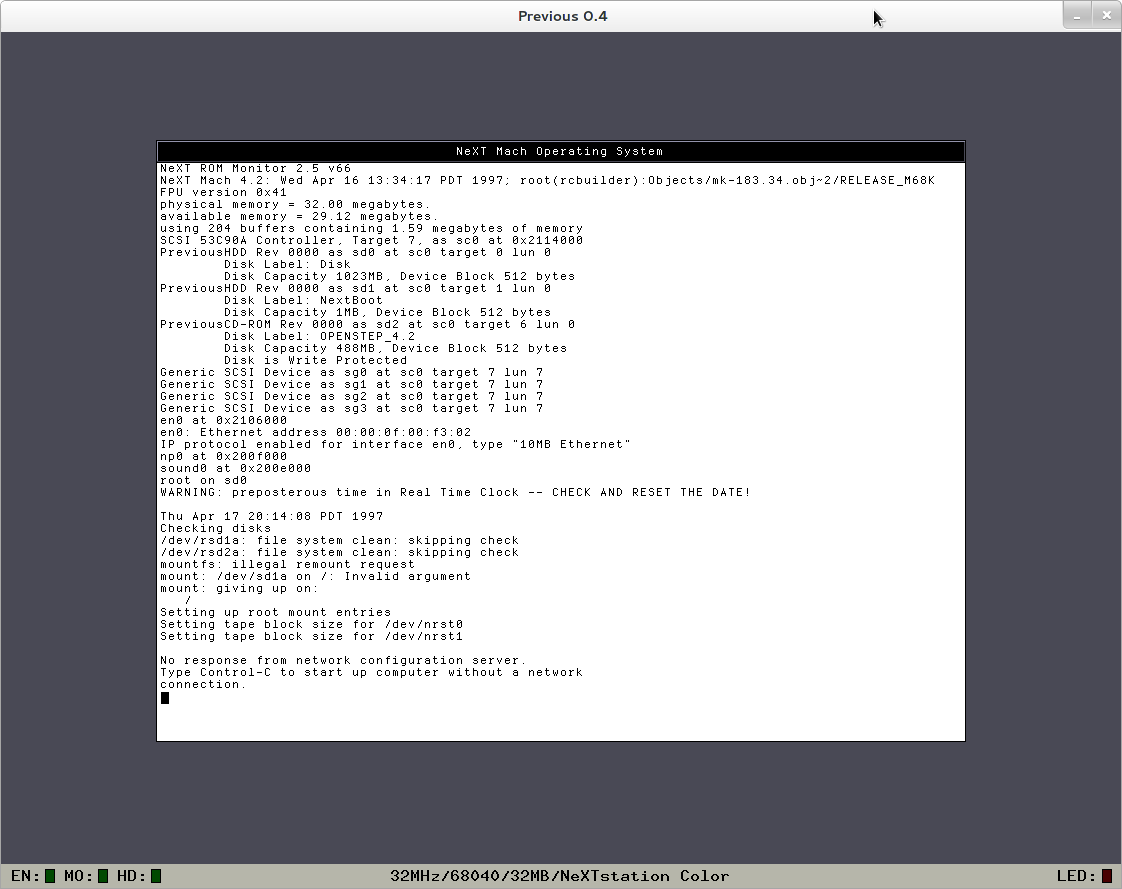
Previous boots NeXTSTEP!

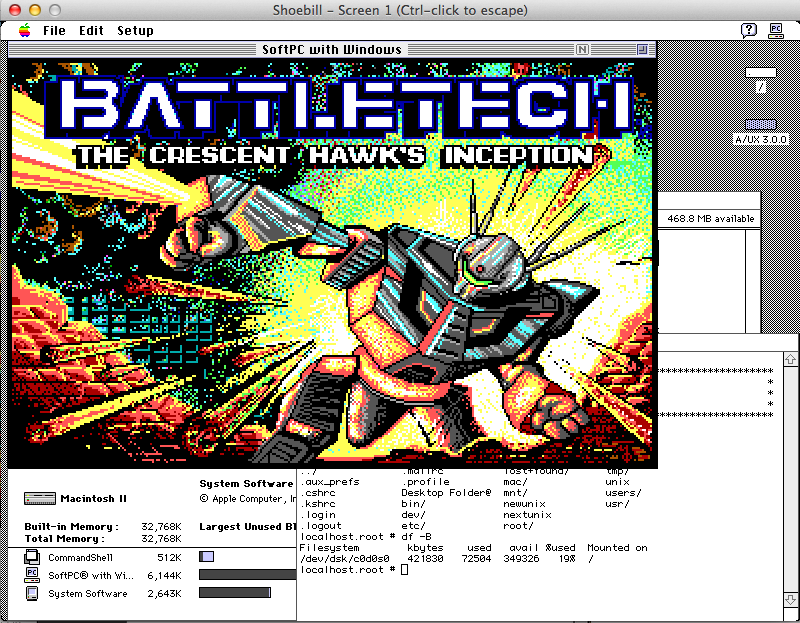
So first we got AMIX, then A/UX now NeXTSTEP!

x

(I lost the original image, so here is OPENSTEP on 0.4)


NeXTSTEP 3.2 in single user mode

You have to grab the source from sourceforge, and build it yourself.  I haven’t attempted it yet, but wow!  Apparently the latest snap is capable of running 0.9 – OpenSTEP 4.0!

Mirroring Wikipedia

So I had an internet outage, and was thinking if I was trapped on my proverbial desert island what would I want with me?

Well wikipedia would be nice!

So I started with this extreme tech article by Sebastian Anthony, although it has since drifted out of date on a few things.

But it is enough to get you started.

I downloaded my XML dump from Brazil like he mentions.  The files I got were:

  • enwiki-20140304-pages-articles.xml.bz2 10G
  • enwiki-20140304-all-titles-in-ns0.gz 58MB
  • enwiki-20140304-interwiki.sql.gz 728Kb
  • enwiki-20140304-redirect.sql.gz 91MB
  • enwiki-20140304-protected_titles.sql.gz 887Kb

The pages-articles.xml is required.  I added in the others in the hopes of fixing some formatting issues.  I re-compressed it from 10GB using Bzip2 to 8.4GB with 7zip.  It’s still massive, but when you are on a ‘slow’ connection every saved GB matters.

Since I already have apache/php/mysql running on my Debian box, I can’t help you with a virgin install.  I would say it’s pretty much like every other LAMP install.

Although I did *NOT* install phpmyadmin.  I’ve seen too many holes in it, and I prefer the command line anyways.

First I connect to my database instance:

mysql -uroot -pMYBADPASSWORD

And then execute the following:

create database wikimirror;
create user ‘wikimirror’@’localhost’ IDENTIFIED BY ‘MYOTHERPASSWORD’;
GRANT ALL PRIVILEGES ON wikimirror.* TO ‘wikimirror’@’localhost’ WITH GRANT OPTION;
show grants for ‘wikimirror’@’localhost’;

This creates the database, adds the user and grants them permission.

Downloading and setting up mediawiki 1.22.5 is pretty straight forward.  There is one big caveat I found though.  InnoDB is incredibly slow for loading the database. I spent a good 30 minutes trying to find a good solution before going back to MyISAM with utf8 support.

With the empty site created, I do a quick backup incase I want to purge what I have.

/usr/bin/mysqldump -uwikimirror -pw1k1p3d1a wikimirror > /usr/local/wikipedia/wikimedia-1.22.5-empty.sql

This way I can quickly revert as constantly re-installing mediawiki is… a pain.  And it gets repetitive which is good for introducing errors, so it’s far easier to dump the database/user and re-create them, and reload the empty database.

When I was using InnoDB, I was getting a mere 163 inserts a second. That means it would take about 24 hours to import the entire database!!  Which simply is not good enough for someone as impatient as me.  As of this latest dump there are 14,313,024 records that need to be inserted, which would take the better part of forever to do.

So let’s make some changes to the MySQL server config.  Naturally backup your existing /etc/mysql/my.cnf to something else, then I added the following bits:

 key_buffer = 1024M
max_allowed_packet = 384M
query_cache_limit = 18M
query_cache_size = 128M

I should add that I have a lot of system RAM available.  And that my box is running Debian 7.1 x64_86.

Next you’ll want a slightly modified import program,  I used the one from Michael Tsikerdekis’s site, but I did modify it to run the ‘precommit’ portion on it’s own.  I did this because I didn’t want to decompress the massive XML file on the filesystem.  I may have the space but it just seems silly.

With the script ready we can import!  Remember to restart the mysql server, and make sure it’s running correctly.  Then you can run:

bzcat enwiki-20140304-pages-articles.xml.bz2 | perl ./mwimport2 | mysql -f -u wikimirror -pMYOTHERBADPASSWORD  –default-character-set=utf8 wikimirror

And then you’ll see the progress flying by.  While it is loading you should be able to hit a random page, and get back some wikipedia looking data.  If you get an error well obviously something is wrong…

With my slight moddifications I was getting about 1000 inserts a second, which gave me…

 14313024 pages (1041.174/s),  14313024 revisions (1041.174/s) in 13747 seconds

Which ran in just under four hours.  Not too bad!

With the load all done, I shut down mysql, and then copy back the first config.  For the fun of it I did add in the following for day to day usage:

 key_buffer = 512M
max_allowed_packet = 128M
query_cache_limit = 18M
query_cache_size = 128M

I should add that the ‘default’ small config was enough for me to withstand over 16,000 hits a day when I got listed on reddit.  So it’s not bad for small-ish databases (my wordpress is about 250MB) that see a lot of action, but wikipedia is about 41GB.

Now for the weird stuff.  There is numerous weird errors that’ll appear on the pages.  I’ve tracked the majority down to lua scripting now being enabled on the template pages of wikipedia.  So you need to enable lua on your server, and setup the lua extensions.

The two that just had to be enabled to get things looking half right are:

With this done right, you’ll see Lua as part of installed software on the version page:

mediawiki installed softwareAnd under installed extensions:

wikimedia installed extensions

I did need to put the following in the LocalSettings.php file, but it’s in the installation bits for the extensions:

$wgLuaExternalInterpreter = “/usr/bin/lua5.1″;
require_once(“$IP/extensions/Lua/Lua.php”);
$wgScribuntoEngineConf[‘luastandalone’][‘luaPath’] = ‘/usr/bin/lua5.1′;
require_once( “$IP/extensions/Scribunto/Scribunto.php” );

Now when I load a page it still has some missing bits, but it’s looking much better.

The Amiga page...

The Amiga page…

Now I know the XOWA people have a torrent setup for about 75GB worth of images.  I just have to figure out how to get those and parse them into my wikipedia mirror.

I hope this will prove useful for someone in the future.  But if it looks too daunting, just use the XOWA.  Another solution is WP-MIRROR, although it can apparently take several days to load.

Atari System V UNIX Saga “Part II“ TenoxVGA

(this is a guest post from Tenox)

In the previous article I explained how I got hooked up on Atari UNIX and brief efforts in the hardware department. TL;DR I got stuck on lack of a specialized Atari high resolution 1280—960 CRT monitor, which operates using ECL rather than VGA signaling.

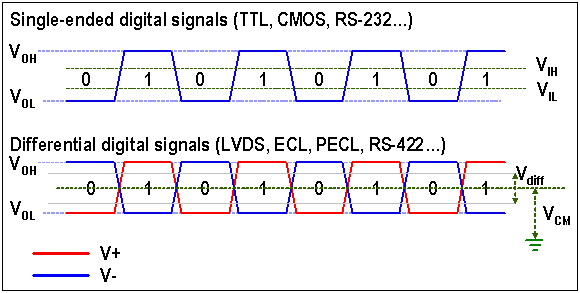
So what is ECL signal? Without going to too much in to the details ECL is a differential signal much like LVD SCSI. These are basically more interference resistant and therefore allow higher bandwidths.

07c0be30313

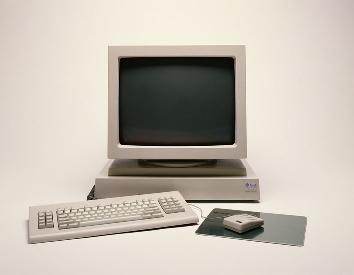
ECL signaling was used for high resolution monochrome monitors for Sun, SGI, DEC, HP, NeXT, etc. before VGA got it’s high resolution modes via VESA extensions.

sun3-60-small

During the research phase I came across a device made by Extron, which basically converts ECL to VGA signal. These were made to allow SUN/SGI/HP/NeXT workstations to be hooked up to a VGA projector.

rgb202xi-lg

Despite hours spent attempting to get these working by myself and other Atari users alike, this just didn’t work.

At this time the only viable approach would be to make such adapter from scratch and specifically for the Atari TT. I have rather limited experience in electronic circuit design. I was not the first to come up with such an idea. Over last 20 years or so adapters like that were made and tried before by much more experienced people, but still with rather crappy results. It was obvious I needed a professional help. Fortunately for last several years I have been living in the Silicon Valley, which is abundant with required skills.

I have found a helpful company with an extensive expertise in video signal processing, described the problem, they understood, gave me a reasonable quote, I delivered my Atari computer and waited patiently. After a few weeks I’ve got an email that I can come in ad see a preliminary results. They have made this device:

1a

And Atari TT was operating in the monochrome 1280-960 mode on an LCD panel! Well nearly there

3a

The signal was shifted a little bit, and the board was operating from a lab bench power supply. Not a big deal. After a few days they have added a small bread board with a circuit to shift the horizontal sync and a voltage converter to obtain -5V needed for ECL components. Everything was just perfect.

4a

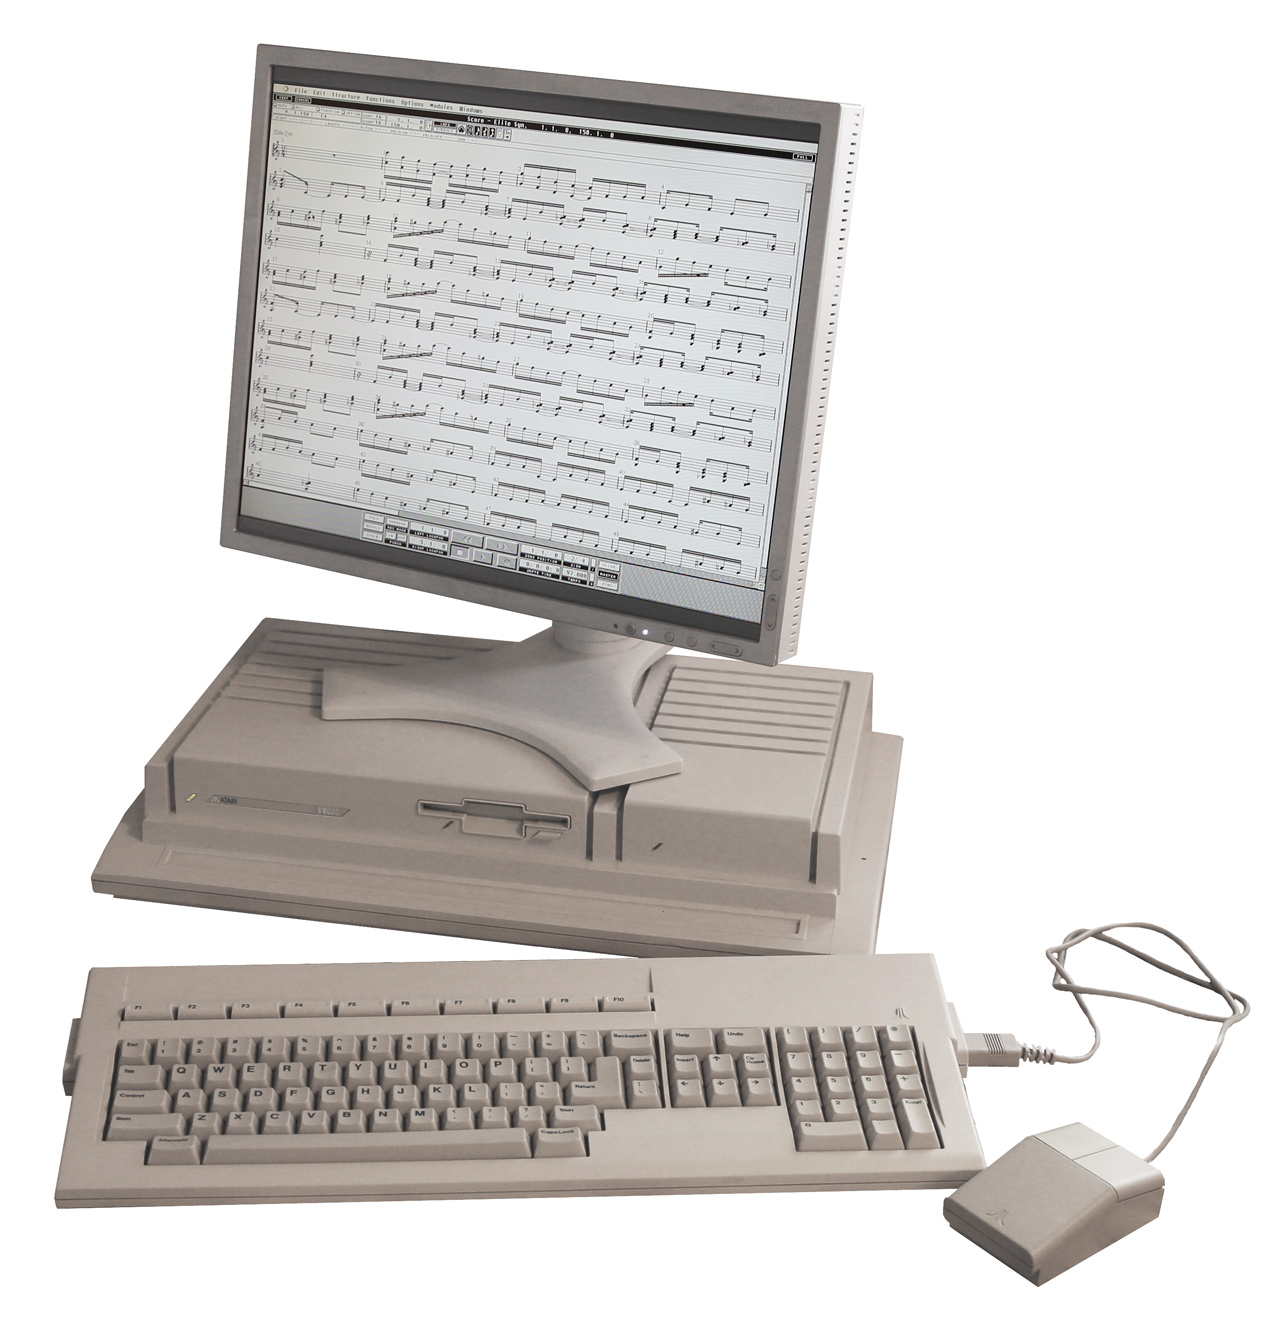
I have ordered qty 25 of the unit to be made and knowing the final price went to look for more serious commitments from Atari users who previously expressed interest. Being out of touch with Atari for quite a long time I realized that most of the interested users are musicians who still use TT for Cubase, and would like to have a larger and more modern LCD screen. They were delighted so see this:

6a

Also in the mean time I started testing more and more LCD panels and realized a rather big issue. TT High mode is 1280-960 where as most LCD panels operate in 1280-1024 mode. This is a 64 pixels difference vertically and also 4:3 to 5:4 aspect change. I have assumed this would work just fine if monitor was set to so called 1:1 mode or expansion/scaling off. Unfortunately to my utter surprise almost zero monitors out there had this mode! Only the newer, larger Dell monitors had it. But who would want to waste a 24 monitor to run such a small resolution on, with large black border. I went through endless monitors, new and used, user manuals, specs, computer junkyards like HSC and WeirdStuff, etc. Nothing seemed to work. Everything was getting anti aliased and blurred. And then someone has recommended me a NEC 1990 LCD panel:

7a

It did have 1:1 mode as well as custom aspect ratios and most advanced display settings known to an LCD panel. Worked like a dream. The screen was 100% perfectly sharp like you were looking on Atari ST emulator on a PC or Mac. The black bars on top and bottom are the lacking 64 pixels, but they are almost not noticeable. Fortunately, the NEC monitor goes for $50 USD on eBay and matches Atari TT in case color. It’s a perfect TTM 19x replacement. Most users who bough the adapter would also invest $50 and get the same monitor to avoid anti aliasing and have a perfect image display. I also became an instant fan of NEC 1990 and now see it as THE LCD panel for all my retro computing activities.

Back to Atari, one problem solved, I was hit with another disaster. The finally assembled converter units were producing rather crappy picture. The picture was oscillating and there were a lot of nasty artifacts and imperfections on the screen. The NEC LCD panel couldn’t even auto adjusting to the signal.  Long story short, once components from the bread board were incorporated on to a much smaller PCB they started interfering with now un-differentiated and unshielded video signal. Also some of the ICs were overheating and changing properties after a while. The investigation and problem solving went over budget rather quickly. The company stopped charging me at some point and worked in spare time to solve the problem. Unfortunately it took several months to finish. This is mainly because each try requires a new PCB reprint, at low cost / priority which is of course made in China. So about 1 month for 1 try just to see if it’s any better. From a time perspective now I can understand why all previous attempts to construct such a device failed miserably. It required a LOT of patience and professional expertise to finish it.

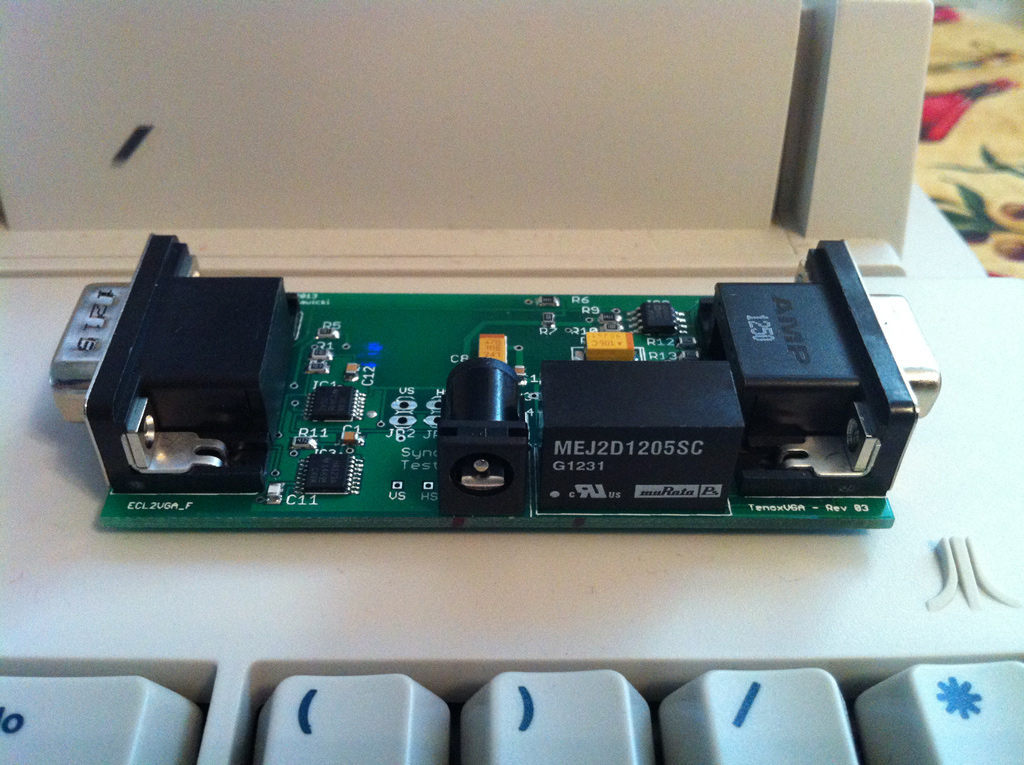
This is how a final version of TenoxVGA looks like:

onkeyboard1

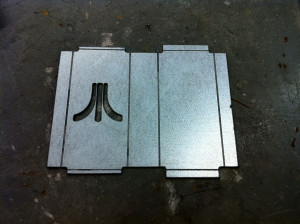
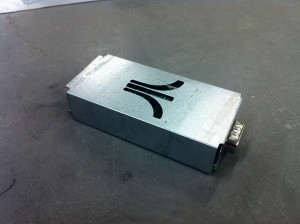
In the mean time I had some time to come up with a case for it. I have experimented with a water jet cutter:

c2c3

but finally settled for a 3d printed version. It’s much cheaper and easier to produce than cutting and bending a sheet metal:

cable

Once I have received a shipment of 25 units and got appropriate power supplies and cables I have winged a website with paypal payment and started selling to the happy Cubase users.

tt-big

Having fixed the 20 year old video problem I was now ready to install Atari System V UNIX

…continued in this post!