Bywater basic

bwbasic and life.bas

bwbasic and life.bas

Well I forget what it was I was looking for, but I came across this great site, all about Vintage BASIC, and some various GAMES!

Now back in the 1970’s and early 1980’s BASIC was quite different then it is in it’s current Microsoft incarnation as Visual Basic .NET. But not all that surprising is that Microsoft was a popular BASIC distributor to the microcomputers of the time, supplying BASIC for Commodore, among others, wikipedia has a great list of all the variants of their 8 bit rommable basic.

Back in college a friend was just a little obsessed with basic (he probably still is) and he was all happy as hell to have found this little interpreter written in C, that we could run on the RS/6000 called Bywater BASIC.

Now while vintage-basic has this basic interpreter written in Haskell to run the programs, I thought I’d see if I could get some to run on Bywater.

First was picking a version, and building it. I found that version of 2.5 was the easiest to build on my NeXT, and with a minor amount of hacking, even windows.. bwbasic needs a BIG stack… so 16bit stuff is out, but I guess it doesn’t matter as they had Quick Basic, and the old MS basic so this would be redundant.

Anyways out of the examples I chose the life program, and with a few changes it’ll run on QuickBASIC as a test, and bwbasic 2.5

2 PRINT TAB(34);"LIFE"
4 PRINT TAB(15);"CREATIVE COMPUTING  MORRISTOWN, NEW JERSEY"
6 PRINT: PRINT: PRINT
8 PRINT "ENTER YOUR PATTERN:"
9 X1=1: Y1=1: X2=24: Y2=70
10 DIM A(24,70),B$(24)
20 C=1
30 INPUT B$(C)
40 IF B$(C)="DONE" THEN B$(C)="": GOTO 80
50 IF LEFT$(B$(C),1)="." THEN
B$(C)=" "+RIGHT$(B$(C),LEN(B$(C))-1)
END IF
60 C=C+1
70 GOTO 30
80 C=C-1: L=0
90 FOR X=1 TO C-1
100 IF LEN(B$(X))>L THEN L=LEN(B$(X))
110 NEXT X
120 X1=11-C/2
130 Y1=33-L/2
140 FOR X=1 TO C
150 FOR Y=1 TO LEN(B$(X))
160 IF MID$(B$(X),Y,1)<>" " THEN A(X1+X,Y1+Y)=1:P=P+1
170 NEXT Y
180 NEXT X
200 PRINT: PRINT: PRINT
210 PRINT "GENERATION:";G,"POPULATION:";P;:
IF I9 THEN
PRINT "INVALID!";
END IF
215 X3=24:Y3=70:X4=1: Y4=1: P=0
220 G=G+1
225 FOR X=1 TO X1-1:
PRINT:
NEXT X
230 FOR X=X1 TO X2
240 PRINT
250 FOR Y=Y1 TO Y2
253 IF A(X,Y)=2 THEN A(X,Y)=0:GOTO 270
256 IF A(X,Y)=3 THEN A(X,Y)=1:GOTO 261
260 IF A(X,Y)<>1 THEN 270
261 PRINT TAB(Y);"*";
262 IF X<X3 THEN X3=X
264 IF X>X4 THEN X4=X
266 IF Y<Y3 THEN Y3=Y
268 IF Y>Y4 THEN Y4=Y
270 NEXT Y
290 NEXT X
295 FOR X=X2+1 TO 24:
PRINT:
NEXT X
299 X1=X3: X2=X4: Y1=Y3: Y2=Y4
301 IF X1<3 THEN X1=3:I9=-1
303 IF X2>22 THEN X2=22:I9=-1
305 IF Y1<3 THEN Y1=3:I9=-1
307 IF Y2>68 THEN Y2=68:I9=-1
309 P=0
500 FOR X=X1-1 TO X2+1
510 FOR Y=Y1-1 TO Y2+1
520 C=0
530 FOR I=X-1 TO X+1
540 FOR J=Y-1 TO Y+1
550 IF A(I,J)=1 OR A(I,J)=2 THEN C=C+1
560 NEXT J
570 NEXT I
580 IF A(X,Y)=0 THEN 610
590 IF C<3 OR C>4 THEN A(X,Y)=2: GOTO 600
595 P=P+1
600 GOTO 620
610 IF C=3 THEN A(X,Y)=3:P=P+1
620 NEXT Y
630 NEXT X
635 X1=X1-1:Y1=Y1-1:X2=X2+1:Y2=Y2+1
640 GOTO 210
650 END

You just type in some stuff as a starting pattern, then type in “DONE” on it’s own on a single line, and it’ll animate the sequence…

I should also add that the history of Bywater basic is kind of interesting it was started by Verda Spell, the grandmother of Ted Campbell who released it into the public domain.

From the original documentation:

Her (Verda’s) programming efforts were cut
tragically short when she was thrown from a Beaumont to Port
Arthur commuter train in the summer of 1986. I found the source
code to bwBASIC on a single-density Osborne diskette in her knitting
bag and eventually managed to have it all copied over to a PC
diskette. I have revised it slightly prior to this release.

pcap and IPX/SPX

I found this link where someone had implemented a virtual NE2000 for DosBOX, allowing you to run among other things DOOM!

This reminded me of my own work to add pcap into Qemu back in the 0.9.0 days… SO I figured I’d try to build the thing out and see how they interact!

So the first thing to do was build DosBOX, and add the patch. I found that 0.73 worked pretty well for this!

So after some hammering around, I got it to build, and launched it on two separate machines (one over terminal server) on my lan, and launched the oldest network doom version I could find to get things going.

Doom multiplayer IPX-SPX

Doom multiplayer IPX-SPX

And there we go. Now in the dosbox.conf you have to make sure that they have unique MAC addresses, and of course, that they are bound to the correct physical nic. in the config file, there is a list option that will print out the possible choices then you can just put the number, or the full name into the right spot on the ini file. I’ve build a prebuilt win32 version of this with all the DLL’s and the gravis ultrasound enabled… You can download it here.

The next thing I did was search high & lo for my patches to Qemu, and thankfully I’d emailed them to myself as it seems all the other places are dead… So with a little playing with Qemu 0.90 to enable the adlib, and remove some logging messages, I’d built a client machine again with Doom. Naturally I had the DosBOX & Qemu face each-other off.. Sadly this is a little SLOW.

DOSBox and qemu IPXSPX Doom

DOSBox and qemu IPXSPX Doom

For those that wish to download, you can find the Qemu client & server files.

Now for Qemu, you’ll need to get that full NIC name… Dosbox provides a great way to see what it is, just paste it into the batch files, and you’ll be good to go.

And remember you’ll need WinPcap installed!!!!!!

Taking Clipper to the Harbour

In the last instance, I left with an example of running a Clipper 87 program compiled with a simple C routine, then rebuilt that with Clipper 5.3 using both a 286 & 386 Dos extender.

The next step will be taking that program and making a win32 exe.

And for that we are going to use this great program harbour.

Much like f2c, harbour translates dBase PRG files into either C, or a p-code VM just like clipper did. For this example, I just downloaded Harbour from sourceforge, and installed it in my c:\hmg directory.

Porting applications is pretty straight forward, however Harbour needs a ‘main’ procedure to exist in order to work correctly. So the first change to my simple clipper program is to create wrap my simple Clipper program in a main procedure.

HI.PRG

procedure main
? “hello from clipper”
? “”
c_hi()
return

Now the C program needs some changes as well. Notice how this looks very different from the old c program, but at the same time, it’s not too different. Also because harbour translates the clipper into C, stdio is now working correctly so I can use printf.

HI_C.C

#include “hbvmpub.h”
#include “hbinit.h”

HB_FUNC( C_HI )
{
printf(“hi from C\n”);
}

Now to setup the environment, translate the clipper, build the c program and link them together….

\hmg\MINGW\mingwvars.bat

\hmg\HARBOUR\bin\harbour.exe hi.prg -m

gcc hi_c.c -I\hmg\harbour\include -c

gcc -mconsole hi.c hi_c.c -I\hmg\harbour\include -mconsole -Wl,–start-group -lhbextern -lhbdebug -lhbvm -lhbrtl -lhblang -lhbcpage -lgtcgi -lgtpca -lgtstd -lgtwin -lgtwvt -lgtgui -lhbrdd -lhbuddall -lhbusrrdd -lrddntx -lrddcdx -lrddnsx -lrddfpt -lhbrdd -lhbhsx -lhbsix -lhbmacro -lhbcplr -lhbpp -lhbcommon -lkernel32 -luser32 -lgdi32 -ladvapi32 -lws2_32 -lwinspool -lcomctl32 -lcomdlg32 -lshell32 -luuid -lole32 -loleaut32 -lmpr -lwinmm -lmapi32 -limm32 -lmsimg32 -lwininet -lhbpcre -lhbzlib -Wl,–end-group -ohi.exe -LC:/hmg/HARBOUR/lib

And running this gives me:

C:\temp>hi

hello from clipper
hi from C

C:\temp>

Now I know there is all kinds of front ends and other fun stuff, however I think it’s good to know how the thing actually works…

What is even more cool about Harbour is that once you get your program working there, it can be easily rebuilt for OS/2, Linux, Win32, Win64, Windows CE and a few other platforms where GCC is available.

And the best part is that they won’t soak up 100% of your CPU!!!

DBASE III and friends.

Do you remember the ‘dot’ prompt?
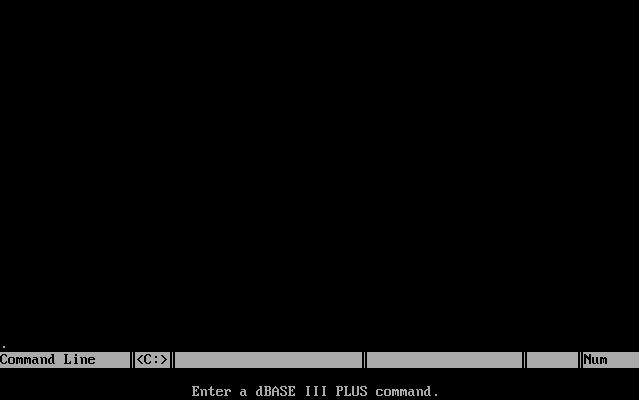
Dbase III

Dbase III

I’m sure most people have never heard, or seen the thing. But this was the wonderful world of dBase, a simple to use database utility that set the world on fire back in the CP/M, MS-DOS days. The cool thing about dBase was that you could program it, and the syntax was very easy to pick up, compared to SQL. And you could save your scripts into these .PRG files which were human readable, and quite capable of doing all kinds of fun things.

As people’s level of complexity grew with dBase, people started to deploy it as an application, which in this day in age isn’t that unheard of, it happens today in the form of the Access 2007 runtime. However back then, the big deal was taking your .PRG script files for dBase, and compiling them with a 3rd party compiler. For some reason the people behind dBase were slow to the market, so Nantucket Corporation, arrived with Clipper, a superset of the dBase language, that could translate the dBase scripts into code for a p-code interpreter (it’s the same thing as a virtual machine, like Sun’s java, or z-machine from Infocom). Naturally once you compiled your .PRG file, it could still access the same database files, that you had created in dBase III, or you could even create your own on the fly within the .PRG file.

Now what’s really cool about Clipper is that, not only could it compile the dBase PRG files, but you could also link in code from MASM (The Microsoft Assembler), and Microsoft C (Other C compilers can work too, but MS C works best, as Clipper seems to have been written in MSC.). So you can be free to write all kinds of strange and interesting things. So far I’ve only written a few things to call the video bios from Microsoft C.

So as a very basic example of this, let’s make a simple .PRG file.. I’m going to name this HI.PRG, and I’m going to call a function hic from the dBase script.

HI.PRG

? “Hello from clipper”
? “”
hic()

Now for the C program. *NOTE* that printf won’t work as the libc stdio isn’t initialized correctly.. However other stuff works fine, I’m sure there is a fix, somewhere, but I didn’t need it so it doesn’t matter. Also this program will work with both the “Summer ’87” compiler, and Clipper 5.3, however the syntax I’m going to give is specific to the Summer ’87 release.

HIC.C

#include <stdio.h>
#define CLIPPER void pascal

CLIPPER hic()
{
putch(‘a’);
}

Now we compiler & link everything like this:

clipper hi.prg -m
cl /c /FPa /AL hic.c
tlink hi.obj hic.obj clipper.lib

And this will now produce a hi.exe, that when executed will produce this output:

C:\TEMP>hi

hello from clipper
a
C:\TEMP

Ok, now this is all fun, however you’ll hit roadblocks eventually as the Summer ’87 compiler & library produces code that is meant for real mode on the 8086/8088 CPU. So if you are adding to an already ‘bloated’ 540kb program, you are going to run into trouble quickly. This is where Clipper 5.x comes into play.

Clipper 5.x introduced the ability to build & link programs for protected mode, provided you have a DOS Extender, that is tailored to Clipper. There were several available at the time, and around Clipper 5.3 they included the exospace product which was wrapped around Tenberry DOS Extender, DOS/16M.

Now you may be wondering, what is ‘real mode’, ‘protected mode’, and a ‘dos extender’, not to mention how they all interact with each other. I’ll try to explain this.

The old 8086/8088 CPU’s could address 1MB of ram on their 20bit address bus (2^20 is 1,048,576) and this memory is chopped up into 64kb segments. The IBM PC reserves the top 384kb for adapters, hardware shared memory, and the ROM BIOS, leaving 640kb for MS-DOS and your user programs. This is where that mis attributed quote 640kb ought to be enough for anyone comes from. This 8086/8088 ‘mode’ is called the ‘real’ mode.

Well remember leaving the old CP/M computers that typically had 48kb or 64kb of ram, 640kb seemed plenty at the time. Naturally it was a matter of time until people were making programs where they ran out of memory.

The solution from Intel was the 80286 processor which was fully backwards compatible with the 8088/8086, however it included a new mode of operation, protected mode, which when activated would supply a virtual address space of 1GB (1,073,741,824), and a 24bit memory bus (2^24 is 16,777,216), allowing users to access 16MB of ram.

Another big feature of protected mode, is that memory is then protected so if a program accesses memory that it shouldn’t, it’ll generate a protection fault. The 80286 also introduced TSS’s to support multitasking in hardware. The idea being with these two features a rouge program wouldn’t crash the entire OS.

Intel’s thinking was that the 8088/8086 software was a fad, and that once people saw the power of protected mode, they’d never want to leave it, so there is *NO* method for switching the 80286 back from protected mode to real mode once it’s been entered.

Naturally this would require a whole new operating system to function in protected mode, and it would be incompatible with old MS-DOS programs as they simply will not function in protected mode. IBM & Microsoft started to collaborate on this new OS, called OS/2. The biggest obstacle that faced the team was that a new operating system that didn’t support the growing ‘legacy’ base of MS-DOS applications would be doomed to fail. The IBM AT had this ‘cheat’ that while doing it’s POST in BIOS, the CPU would be switched to protected mode, to check & detect the memory. Then the instruction pointer would be saved in the start of ram, and the keyboard controller would be used to reset the CPU, allowing the BIOS to continue back in real mode. While this did work, it was far too slow for an operating system to use where you may need to switch several thousand times a second.

Gordon Letwin spent a lot of time on trying to find a way to switch the 80286 from protected mode to real mode, when he hit upon what is known as the triple fault. The idea is that you place your instruction pointer much like the keyboard controller reset method, but you then remove all ‘safety nets’ by clearing the interrupt table for the CPU, and cause it to crash by throwing an interrupt. The CPU can’t process the interrupt because the table is invalid, so it will end up doing a quick reset as the microcode assumes the processor has encountered a critical software problem.

This was a big save for OS/2 as now it could boot up into protected mode, run protected mode programs, and would allow the user to select a special ‘dos box’ that would switch the processor into real mode, and run MS-DOS programs while switching back & forth between real & protected mode to service interrupts, and allow OS/2 programs to continue to execute in the background.

However when the first version of OS/2 was released in 1988, it had a confusing topview like interface, which was full screen text, and didn’t appear to multi task as you could only work on one thing at a time.

So with that the idea of a dos extender was born.

The people behind Tenberry worked with Microsoft, and deiced that they could bring the number one benefit of protected mode, a larger address space, to MS-DOS by writing a special program, the DOS Extender. Since MS-DOS & the PC BIOS are real mode programs, and can’t function in protected mode, what Tenberry did was write a special loader that could load OS/2 programs into protected mode, but every time the program would make a MS-DOS call, the DOS Extender would intercept the call, switch the processor into real mode, make the call, then return to protected mode, and return the result to the program.

The result being that you didn’t have to install a new operating system, just rebuild your applications, link with the DOS Extender and now you could have access to 16MB of RAM!

Ok, so with that in mind, here is me rebuilding the same programs for protected mode.

C:\TEST>clipper hi.prg -m
CA-Clipper (R) 5.3
Copyright (c) 1985-1995, Computer Associates International, Inc.
Microsoft C Floating Point Support Routines
Copyright (c) Microsoft Corp 1984-1993. All Rights Reserved.
267K available
Compiling HI.PRG
Code size 61, Symbols 64, Constants 19

C:\TEST>cl /c /FPa /AL hic.c
Microsoft (R) C Optimizing Compiler Version 5.10
Copyright (c) Microsoft Corp 1984, 1985, 1986, 1987, 1988. All rights reserved.

hic.c

C:\TEST>exospace file hi.obj,hic.obj

ExoSpace for CA-Clipper 5.3
Copyright (c) 1993 – 1995 Computer Associates International Inc.

DOS/16M Copyright (c) Tenberry Software, Inc. 1987 – 1995

EX01 – General Linking Utility (for CA-Clipper ExoSpace). V2.11(w/VMM 6.01)
Copyright (c) Tenberyr Software, Inc. 1987 – 1994

Reading object files and library headers.
Processing library directories.
Extracting library objects.
Assigning selectors.
Preparing GDT image.
Writing code image to .EXP file.
Sorting 1737 relocations.
Building relocation tables.
Writing GDT image to .EXP file.

1044544 bytes used out of 44702592 bytes available.

Generating .\HI.EXE…

EXOSPACE : .\HI.EXE successfully linked

C:\TEST>

And we can now run the program!

DOS/16M Protected Mode Run-Time Version 6.01
Copyright (C) Tenberry Software Inc. 1987 – 1994

hello from clipper
a
C:\TEST>

As you can see, the only visible change to the user is the banner printed by the DOS Extender as the program executes. Now if the program makes a LOT of calls to DOS from protected mode it can get slow. It’s very noticeable say if you have a database that you read a record, parse it, then fetch another record. However if you need lots of ram you don’t have much of a choice… Not to mention that 286 DOS Extenders are limited to 16MB of Ram, very few (if any?!) support swapping, or allow programs to address the 1GB virtual address space.

The solution, again came from intel in the form of the 80386 CPU. The 386 is a superset of the 286, and like it, also supports the 286’s protected mode and the 8088/8086’s real mode. The 80386 also introduces a 32bit protected mode, v86 mode, and a method to quickly switch from protected to real mode.

So what does this mean for DOS Extenders? That a 386 DOS Extender will be significantly faster then a 286 DOS Extender. Also the v86 mode, supports virtual 8086 machines, allowing a 32bit DOS Extender to run MS-DOS in a virtual machine, and make MS-DOS & BIOS calls all from protected mode.

One great free 32bit Dos Extender for Clipper is CauseWay, which is now free!

So using the same object files generated from the DOS/16M extender, I just simply relink with CauseWay’s linker which will also link in the CauseWay extender. I’m not all that good with CauseWay’s syntax so I opted for a ‘response’ file, in the format of something exospace would use.

HI.LNK

FILE hi.obj,hic.obj
OUTPUT hi.exe
LIBRARY clipper.lib

Now running the CauseWay linker:

C:\TEST>wl32 /lc:exospace.def @hi.lnk
CauseWay WL32 for Clipper Version 1.32 Copyright 1993-1999 Michael Devore.
All rights reserved

Link of executable file successfully completed.

C:\TEST>

Then running the exe…

C:\TEST>hi

hello from clipper
a
C:\TEST>

All nice and transparent to the end user. And it feels significantly faster then the 286 extender when it comes to lots of MS-DOS transactions… I’ll have to time it, but right now you’ve only got my observation.

This post is way longer then I had originally thought so I’m going to break this up, but this blog post is an idea of what I’ll cover next time…

OpenWatcom for the DEC Alpha

Someone had contacted me about running some Fortran programs on the DEC Alpha with Windows NT. Now I know that DEC had released some compilers for the Alpha, the Digital Visual Fortran thing which some people still sell for around $600 USD.

OUCH.

But luckily a friend mentioned that I should look at the source code for Open Watcom.

So, I figure for the hell of it, I’ll show how to build a Dec Alpha cross compiler for both C & Fortran. First I’m using Open Watcom 1.8, the current ‘release’ version. You are on your own for older or newer versions.

First install Open Watcom 1.8, with whatever your host is (I’m running on win64, so I’m using the win32 install), and set the target for 32bit NT. We will need the headers so this is the easiest way to ensure your Watcom can make NT exes.

Next you are going to need the file owaxp0401.zip. This is a pre-compiled version of the compiler & libraries for the DEC Alpha. All we need from this is the libaxp directory, which you can just unzip to your Watcom directory.

Now we’ll need to copy some files to satisfy the build process.

C:\WATCOM\binnt>copy wcl386.exe bwcl386.exe
C:\WATCOM\binnt>copy wlib.exe bwlib.exe
C:\WATCOM\binnt>copy wrc.exe bwrc.exe

Ok, now with that out of the way, run c:\watcom\owsetenv.bat to setup your environment, and now let’s extract the source to 1.8. I’m just going to use c:\temp as a place to put it. Also you will have to edit the setvars.bat file, and change the following:

set OWROOT=c:\temp\ow18src
set WATCOM=c:\watcom
set DOC_BUILD=0

Now I suppose you could save this into a batch file, and kick that off, and this will build the needed libraries, then the C compiler.

cd c:\temp\OW18src\bld\builder\nt386
wmake
cd c:\temp\ow18src\bld\dwarf\dw\osi386\
wmake
cd c:\temp\OW18src\bld\yacc\nt386
wmake
copy yacc.exe \WATCOM\binnt\byacc.exe
cd c:\temp\OW18src\bld\re2c\nt386
wmake
copy re2c.exe \WATCOM\binnt\re2c.exe
cd c:\temp\ow18src\bld\cg\risc\axp\nt386\
wmake
cd c:\temp\ow18src\bld\sdk\rc\wres\flat386\mf_r
wmake
cd c:\temp\ow18src\bld\cfloat\osi386
wmake
cd c:\temp\ow18src\bld\as\alpha\inline\osi386\
wmake
cd c:\temp\ow18src\bld\owl\osi386\
wmake

Now this will build the cross compiler…

cd c:\temp\OW18src\bld\cc\wcl\nt386.axp
wmake
copy wclaxp.exe \WATCOM\binnt
cd c:\temp\OW18src\bld\cc\nt386.axp
wmake
copy wccaxpc.exe \WATCOM\binnt\wccaxp.exe
copy wccdaxpc.dll \WATCOM\binnt\wccdaxp.dll
cd c:\temp\OW18src\bld\as\alpha\nt386
wmake
copy wasaxp.exe \WATCOM\binnt

Now for the Fortran 77 compiler. Please note that the default flags include -we which will cause the compiler to error if there is a warning. And as luck would have it, one function doesn’t declare a prototype… So you can either remove the -we flat from the mif file, or fix the c file… The choice is yours.

cd c:\temp\OW18src\bld\f77\wfl\nt386.axp
wmake
copy wflaxp.exe \WATCOM\binnt
cd c:\temp\OW18src\bld\f77\wfc\nt386.axp
wmake
copy wfcaxp.exe \WATCOM\binnt
attrib c:\temp\OW18src\bld\f77\f77lib\flags.mif -r
notepad c:\temp\OW18src\bld\f77\f77lib\flags.mif

Do a search and replace on -we and replace it with nothing…

cd c:\temp\OW18src\bld\f77\f77lib\winnt.axp\_s
wmake
copy flib.lib \WATCOM\libaxp

With all that out of the way, let’s build some test programs…

Let’s start with hello.f for the Fortran compiler.

C234567
program hello
print *, ‘Hello!’
end

c:\temp>wflaxp hello.f
Open Watcom F77 Alpha AXP Compile and Link Utility Version 1.8
Portions Copyright (c) 1990-2002 Sybase, Inc. All Rights Reserved.
Source code is available under the Sybase Open Watcom Public License.
See http://www.openwatcom.org/ for details.
wfcaxp hello.f
Open Watcom FORTRAN 77 Alpha AXP Optimizing Compiler Version 1.8
Portions Copyright (c) 1984-2002 Sybase, Inc. All Rights Reserved.
Source code is available under the Sybase Open Watcom Public License.
See http://www.openwatcom.org/ for details.
hello.f: 3 statements, 40 bytes, 1 extensions, 0 warnings, 0 errors

Open Watcom Linker Version 1.8
Portions Copyright (c) 1985-2002 Sybase, Inc. All Rights Reserved.
Source code is available under the Sybase Open Watcom Public License.
See http://www.openwatcom.org/ for details.
loading object files
searching libraries
creating a Windows NT(AXP) character-mode executable

c:\temp>

Watcom Fortran cross on Dec Alpha

Watcom Fortran cross on Dec Alpha

Ok, now that’s enough for now…! Later I’ll show how to build these compilers so they’ll run on the Dec Alpha.

Some more random stuff.

Well while I was playing with NeXTSTEP on my P4, I managed to screw up the BIOS settings… The sound card I have is the AWE 64, one of those great ISA Plug & Play cards. The crazy thing is the only way to configure it properly is with a Pnp capable OS..

But back in the day, you could configure these things under MS-DOS with the ICU, or ISA configuration utility.. Which has become nearly impossible to track down, but I did manage to find a copy from Dell ICU-143N.EXE. It’s a bit crazy to setup, but once you go through the motion you can setup the IRQ dma etc etc, and with one more bit of ‘trickery’ on the nextstep pnp sb16 driver it’ll work. Naturally mine needed a different hex code 0x08ec009d

phew.

With that out of the way, I found another program for the NeXT, str a port of a SUN mod player.. Oddly enough it’s too slow to run on my m68k next cube, but it runs great on my white box now that I’ve managed to run the thing. At least it’ll be some kind of starting point for audio for Quake.

In other news Artyom managed to get Solaris 2.3 installed & running on Qemu.

I know people wanted me to go over AIX for the pc, but it tends to corrupt itself like crazy, however I got a tip that if you boot from floppy all the time, then have it mount the hard disk as multi user it doens’t freak out with hdintr issues…

That’s about it for today.

NeXTSTEP audio & mod files…

Well I’ve been looking for a way to get some audio out of Quake for NeXTSTEP… and it’s incredibly complicated. I found some ‘smallish’ program for the m68k black hardware that is a MOD player, modPlayer 2.5 which also included source!

However, for me I can’t run it as the monitor to my cube is busted… But I was able to compile it to verify the source ‘works’. I then built it on my white box (P4 2.4Ghz 1GB of ram, and a real soundblaster 16!) and, after removing the reference to the decrunch routine it produced.. noise, and lots of it. But I did feel like I was getting *somewhere*.

I figure the main reason it’s exploding is that the m68k port uses the same CPU as the Amiga for these MOD files, so no doubt there is some bit flipping needed to go from big endian to little endian, but I know *nothing* about the MOD format.. So after a quick google search on basic mod players, I found qmod, a module player written in Quick Basic!!

So I looked around for a copy of Quick Basic 4.5, and tried to build the program, and it was all crash & burn.

At work we have a copy of PDS, the Professional Development System, also known as Basic 7.1 .. This thing is still useful, it will target OS/2 so you can write these massive programs (and run them under Windows 2000). So I figured I could use that to get the thing to build.. And I ran into the same errors about overflows, and all kinds of crap.

So the next thing to try was a copy of Visual Basic 1.0 for DOS that I got from ebay a while back.. I made images of the disks, which was fun, installed the thing to get.. the exact same errors. But I have to say VB for DOS was cool in that the output window can be in a windows (although text one) and you can trace and see at the same time… If only this was on store shelves in 1992!!!!

Anyways after looking at the command line options for VB for dos, I spotted this…

/Ah Enable huge dynamic arrays

I was surprised! So it would seem the answer was in the compiler, not the nice interface.. I just has ‘assumed’ that the interface would provide all the options.. Not so.

So I re-extracted the qmod source as I’d hopelessly altered it, then ‘fixed’ the one line that prevented compilation…

DEF SEG = VARSEG(mixarea(0))

I just removed that line, and ran the compiler & linker.. and it runs!

C:\TEMP>bc /Ah /O qmod.bas

Microsoft (R) Visual Basic (TM) for MS-DOS (R)
Compiler – Professional Edition Version 1.00
Copyright (C) 1982-1992 Microsoft Corporation. All rights reserved.

Object Filename [qmod.obj]:

Source Listing [nul.lst]:

42555 Bytes Available
33278 Bytes Free

0 Warning Error(s)
0 Severe Error(s)

C:\TEMP>link qmod.obj

Microsoft (R) Segmented Executable Linker Version 5.31.009 Jul 13 1992
Copyright (C) Microsoft Corp 1984-1992. All rights reserved.

Run File [qmod.exe]:
List File [nul.map]:
Libraries [.lib];
Definitions File [nul.def]:

C:\TEMP>

Now this program does require a sound blaster card, and it also requires the blaster environment variable set properly… So for Virtual PC it’s simply

SET BLASTER=A220 I5 D1 H5 T4

Then run qmod and the supplied mod file, and away it goes!

Qmod under Virtual PC

Qmod under Virtual PC

And I have to say it’s really cool to listen to this thing work, only using peek/poke (ok it’s inp/out in the new syntax…) but it’s playing the soundblaster, and it sounds GREAT.

So going back to PDS & Quick Basic 4.5 they all support the /Ah flag.. So it’ll build on any of them.

So for those who aren’t inclined to play compiler games, here is a pre-built version of Qmod, and it includes a mod file.

Now for those of you who don’t have Virtual PC, or not running on Windows, the program will run on DOSBox as well!

I just found I had to tweak the cpu config a little to make it run.. This is my CPU block in the configuration file.

[cpu]
#core=auto
core=simple
#cputype=auto
cputype=486_slow
cycles=auto
cycleup=500
cycledown=500

Now when you launch DOSBox, it’ll pick some low cpu cycle number and stay there when you launch qmod.. And it’s too low so it’ll sound horrible. So hitting CTRL+F12 will increase the cycles. Set it to 25000, and it’ll run fine. If you set it too high, CTRL+F11 will bring it down. DOSBox already sets the blaster environment variable for you, so it should ‘just work’.

From there I’d recommend sites like Amiga Music Preservation, or Mod Archive. Qmod can play quite a few of the files with the MOD extension, but not all.. But it’s a great small example program.

As luck would have it, my whitebox is having some weird boot issue, so I can’t go any further on this… But I figure I’d share this much with the world…

Package for Quake on NeXTSTEP

Ok, I’m getting nowhere quick on the sound thing so I’ll release what I have now. Thanks to the instructions here, I’ve setup a package which can be easily installed on NeXTSTEP.

All packaged up!


Simple, right? Just download the package, and you should be able to install it with no issues. I’ve built it for all the CPU types that NeXTSTEP supported so let me know if you have any luck…

Also I’m going to leave the quake server running on my server, the only issue is that the hostname is too long for Quake to deal with, so you’ll have to type in the ip address (75.127.119.16). Also you’ll have to launch this from the command line… 😐

If anyone has any hints on audio streams on NeXTSTEP drop me a line…..

Multiuser on Quake for NeXTSTEP!

The picture says it all…

Its alive!


I took the unix timer code, and got that working (not surprising, NeXTSTEP still is 4.3 BSD at heart), and I fixed enough of the key bindings so it’s getting playable. In addition I went back through the WinQuake source and pulled out the BSD networking and that works great. There was a sound driver in there for the next, but it lacks the output functions…. So it would seem that’s the last thing to hack through for a more ‘complete’ Quake experience.. well that & the mouse.

I’ll probably dig around to find out how to make one of those nifty NeXT packages, and release a test version since it’s playable ‘enough’…

In other news, Qemu 0.12.4 has been released! I haven’t even tried it yet, but on my page “MIPS blast from the past” it’s said to be usable…

Quake on NeXTSTEP 3.3

I’m one third of the way there…..

At least the video is kind of working… Right now I’m still using the cannibalized stuff from the UAE project’s port to NeXTSTEP. This is what I used for Frontier, although I’d like to think I’m getting a slightly better handle on it. Right now I just have to figure out why my keyDown & keyUP handlers are not working…. And implement the timer so it doesn’t run at warp speed. With the timer in place it should be able to do network play.

I suspect this would be FAR too slow to play on the m68k,Sparc or HPPA hardware but then who knows… My monitor for my m68k is broken so I can’t run it to find out…

Quake for NeXTSTEP

Quake for NeXTSTEP

This runs VERY fast on Qemu 0.90 I may have to rewire some stuff to run in on my whitebox, but I have a feeling I’m going to have to re-install… I forget where I left off on my NeXTSTEP setup on the old P4.

Anyways that’s what I have for the last few hours….