Shoebill ported to Windows!

Shoebill!

Shoebill!

Good news, as mentioned here, the Shoebill emulator was recently given some much needed SDL love, and ported to Linux.

Well that’s great and all, but the vast majority of people who run anything these days do it with Windows.  So I decided to try to get it to compile with MinGW to see how far I could get.

And the short version is that I got it working!

The long version is that in the first pass there is some SIGUSR2 stuff that is undefined.  And for a good reason, since it won’t work.  So I just commented them out.  The next minor problem was the lack of bzero.  Honestly I don’t know why bzero is missing from MinGW, but who knows why.

Shoebill also processes some internal macros with a perl script that for some reason was dropping in binary values into the source, making GCC mad.  I just commented out a line that was adding in more comments into the header.  This let me compile with a simple pass.

There was some issues reading the ROM file, since the 68000 is a BIG ENDIAN processor, and the 8086 is LITTLE ENDIAN, Shoebill makes extensive use of hotns and hotnl, ntohl, and ntohll.  These can be found in the winsock library, and even better they dont need any winsock initialization, they work right away.  I just have to make sure I include winsock2.h, and link against the winsock library.

However when trying to boot, the checksum was 0x00000000, not the expected value!   Luckily there was an assert to catch that and crash.  This led me to notice that in Linux files are opened in binary mode by default, while on Windows, they are opened in ASCII mode.  A quick change of all the fopen calls, and I was reading the ROM, but now crashing on the disk.

As it turns out newer versions of GCC go all crazy when it comes to structs, and try to automatically align to boundaries for quick access.  Which sound nice, until you try to read in some binary data, and expect things to be in certain locations and find out that your structure is larger than expected, and data is read in the wrong place.

The solution is to force the compiler to leave it alone with

__attribute__ ((__packed__))

HOWEVER as luck would have it, Microsoft apparently packs structures a different way, and you have to either make a macro to do a bunch of work to force it to make the structure 1:1 of what you expect, or use the CFLAG option of

-mno-ms-bitfields

And now MinGW’s GCC will build something along the lines of what it’d build on Linux.

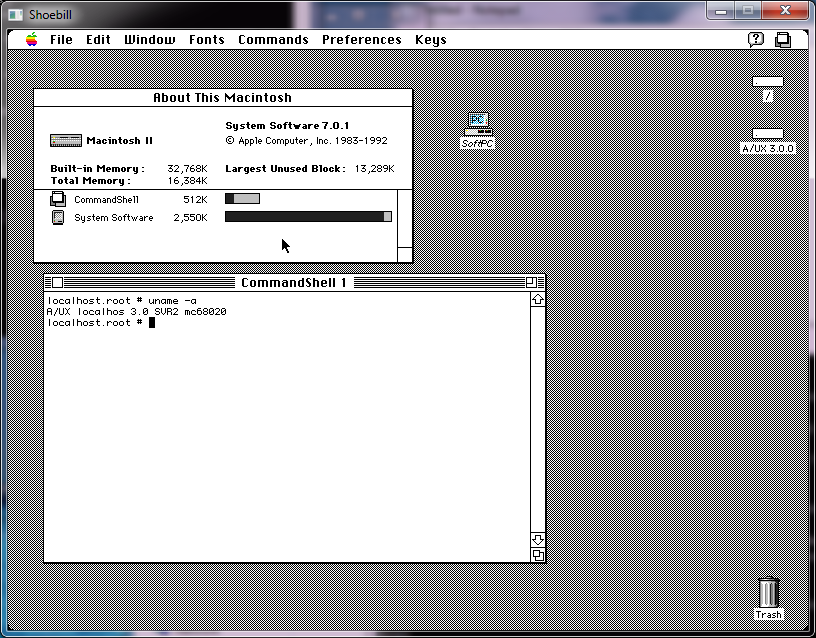
Putting it all together, I amazingly got this!

Shoebill on Windows

Shoebill on Windows

Phew!  So for those interested, here is the source code drop(Use the updated one here!), and here is the binary.

If you ever wanted to see the “OS X” of the 1980’s, now is your chance!

Qemu 1.6.0 for Win32

I updated my glib2 to the same version that works great on OS X, and it feels like the Win32 binaries are just slower than ever.  Now I am running this under VMWare, so maybe that is why it is so slow.

Can someone give this a shot?

Any and all feedback would be nice.

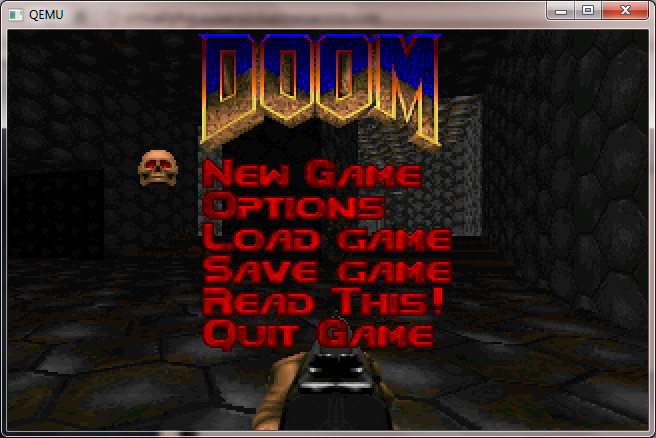
Oh I included the Doom 1.1 in there run it like this:

qemu-system-i386 -L pc-bios -m 16 -hda doom11.img -soundhw sb16,adlib

And you should be able to run doom with sound.

I’ve removed the fullscreen/resizing on Qemu 1.1.1

And now it is *MUCH* faster…

Next I’ll have to investigate better audio libraries, as winwave seems to leave a lot to be desired.

Basically the changes in ui/sdl.c were:


case 0x21: /* 'f' key on US keyboard */
// toggle_full_screen(ds);
// gui_keysym = 1;
break;
case 0x16: /* 'u' key on US keyboard */
// if (scaling_active) {
// scaling_active = 0;
// sdl_resize(ds);
vga_hw_invalidate();
vga_hw_update();
// }
// gui_keysym = 1;
break;

And


case SDL_VIDEORESIZE:
// sdl_scale(ds, ev->resize.w, ev->resize.h);
vga_hw_invalidate();
vga_hw_update();
break;

So now it keeps the correct video display size, so it isn’t going like crazy trying to scale the screen 30 times a second..

Doom now looks normal!

As you can see stuff like Doom now looks normal.  As mode changes are initiated by the video card, it keeps the scale to where it was in prior versions.  At least its not going 1:1 native as looking at a 320×200 window on a 1280×768 desk would be a tad hard..

And yes, even things like Windows 3.0 look correct when the screen changes resolution:

Windows 3.0 in 386 enhanced mode

Also I should add that if you are going to try to use disk images that are *NOT* 1.44 MB they will not work.  You’ll have add this flag to Qemu:

-global isa-fdc.check_media_rate=off

I’ve been told the new handling of disks is better in this version so I’ve left this setting where it was..

I have just updated the download link, but for those who missed it, you can download the i386  win32 version here.

Building Qemu 1.1.1-1 for Win32

I still can’t see how to build this for win64 … 🙁

The first major stumbling block on Win32 is glib, and again going back to the MinGW wiki there is a good laundry list of how to bootstrap Glib on MinGW.

Things you’ll need:

Be sure to run ming-get install for the following:

  • gcc
  • g++
  • libiconv
  • zlib
  • libz
  • gettext
  • msys
  • msys-perl
  • msys-m4

Install Python.. Nothing to fancy from what I gather Qemu still requires you have a level 2 Python, not 3 …

Build libffi

This should be the usual dance of configure & make / make install…  But sure to at least run configure like this:

./configure –prefix=/mingw

Build Glib without pkg-config

Be sure to add Python to your path..

PATH=/c/Python27:/c/Python27/DLLs:$PATH
export PATH

Glib is packed with something called ‘xz’ so hopefully you have xzcat .. Otherwise add it!

export LIBFFI_CFLAGS=’-I /mingw/lib/libffi-3.0.9/include’
export LIBFFI_LIBS=-lffi
export lt_cv_deplibs_check_method=”pass_all”
export CFLAGS=”-O0 -g -pipe -Wall -march=i486 -mms-bitfields -mthreads”
export CPPFLAGS=”-DG_ATOMIC_OP_USE_GCC_BUILTINS=1”
export LDFLAGS=”-Wl,–enable-auto-image-base”
configure –prefix=/mingw –with-pcre=internal –disable-static –disable-gtk-doc –enable-silent-rules

* You may have some weird issue where when running configure it tells you it cannot create executables, or you get a bunch of weird errors trying to paste in the CFLAGS line.. For me the MinGW prompt was stripping the quotes and the leading – to the -O0 (disable optimization) bit.  I don’t know what on earth its issue was, but I had to type that line in manually.

Then do the make/make install dance. This will take a WHILE. At least with -pipe it’ll run each stage of GCC on multiple processors… But yeah.. This is intense to build.  Good thing we get to do it twice.

I also ran into some weird error in the GIO directory where it couldn’t find my Python, and was looking for python2.5 .. So I copied python.exe to python2.5.exe …

PYTHON = /usr/bin/env python2.5

pkg-config

Naturally pkg-config depends on Glib2, and pkg-config to build… Which of course is a circular problem, much like Glib2 requires pkg-config to build.   So to configure it, it goes something like this now that we’ve built a Glib2 ..

export GLIB_CFLAGS=”-I/mingw/include/glib-2.0 -I/mingw/lib/glib-2.0/include”
export GLIB_LIBS=”-lglib-2.0″
configure –prefix=/mingw

At the same time I can’t help but wonder if this version of pkg-config can use it’s own Glib with the following config:

configure –prefix=/mingw –with-internal-glib

Anyways with any luck we can now build & install pkg-config.  This only takes a few seconds..

Glib2 (again)

From this point you should open a new MinGW prompt window, as you don’t want the old CFLAGS screwing things up.  Re-eport the Python path/dll vars and now we can get on to building glib2 (again!) …

configure –prefix=/mingw;make;make install


SDL

This should be somewhat straightforward …

configure –prefix=/mingw;make;make install

In the old days we built zlib, but now we can just quickly add in the package (as we did way above) so we should.. now be ready for the main event!


And now we can finally build Qemu 1.1.1-1!!!

Now there is a few things I like to tweak, the first is in the configure script, I like to add in AdLib support.  Look for the line

audio_card_list=”ac97 es1370 sb16 hda”

and add adlib into the list

audio_card_list=”ac97 es1370 sb16 hda adlib”

Next I like to modify hw/pc.c and alter the ISA NE2000, as Qemu doesn’t like to share IRQ 9 with the card, so it is just easier to remove the 0x300/IRQ 9 definition.

static const int ne2000_io[NE2000_NB_MAX] = { 0x300, 0x320, 0x340, 0x360,
0x280, 0x380 };
static const int ne2000_irq[NE2000_NB_MAX] = { 9, 10, 11, 3, 4, 5 };

to this:

static const int ne2000_io[NE2000_NB_MAX] = { 0x320, 0x340, 0x360,
0x280, 0x380 };
static const int ne2000_irq[NE2000_NB_MAX] = { 10, 11, 3, 4, 5 };

The next tweak deals with the ability to use older qcow2 disk images… I guess converting them to RAW with an older version of Qemu, then using the new version of Qemu to convert them back into qcow2’s may be a “good ideaâ„¢” but for now modifying the source is a quicker fix.

Comment out the “return -EINVAL;”  in block/qcow2.c

if (ext.len > end_offset – offset) {
error_report(“Header extension too large”);
//return -EINVAL;
}

Now one fun thing I’ve noticed is that building with the default O2 flags Qemu will crash out the moment you access a hard disk image.  It appears that coroutine-win32 is at issue (again?).  So the “easy” way I address it is to first build qemu as normal, and verify that if you attach a hard disk image (any kind) and try to access it, partition it etc, it should crash.  Next remove the file coroutine-win32.o , and edit the file config-host.mak and change the CFLAGS that specify

CFLAGS=-O2 -g

to

CFLAGS=-O1 -g

Now run make again, and it *should* just rebuild coroutine-win32.o with the lesser optimization flags, and relink all the exe’s.  If I’ve done this right, you should now have a working Qemu.

You can go ahead and strip the binaries if you so please, but that should be it.

PHEW.  For anyone who wants my build, but doesn’t want to go through this ‘exciting’ process, you can find the Win32 i386 build here.
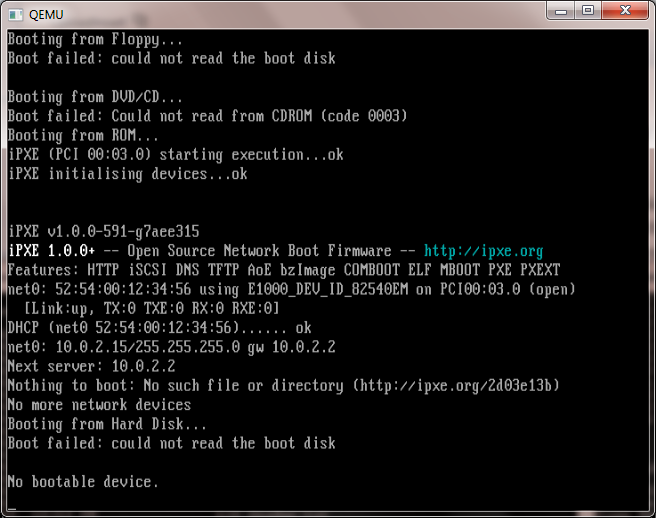
Weird scaling in action .. Control+ALT+u kind of undoes it, but it just doesn’t look right and it is far too slow.

In preliminary testing I’ve found this version to be MUCH slower than 0.15.1 .. I think it has something to do with it wanting to scale the SDL window.  Also I’ve had issues with various network cards not initializing with the BIOS that ships with this version of Qemu so I’ve included the bios directory from 0.15.1 .  And lastly yes the disk images… I’ve had major issues with my qcow2 disks, and disk corruption with this build.  I’ve gone ahead and  included the qemu-img tool from 0.15.1 so you can convert qcow2 to raw, then use the 1.1.1 tool to take them from raw back into qcow2 … But I’d probably only do it as a test.

You may want to kick the tires on this version but 0.15.1 really blows this one away…

Horror of Horrors, Neko98 nearly lost!

Building Neko

It came to my attention that the site in.sert.co.in no longer exists! And worse, that the files on the page are long gone.  Thankfully the internet archive did snag A page from there, but the downloads are all gone!

Thankfully I have a 1TB disk (lol so small now!) and I downloaded the source code, so all is not lost.  I don’t know why I didn’t mirror it before but there you go.  For all the diehard neko fans download the source, and keep hold of it….!

And of course, an upload to a project page on github.com.

So that being said, I fired up Visual Studio 97 (I knew buying that was a good idea!) and built an i386 Win32 version…  I also rescued the cat sounds, but no luck on the rest of the files.

So once more again, neko has been saved!

Running Qemu as a Windows service …

Long story short I’m doing some work with a network that suffers a lot of ‘you can’t get there from here’.  They’ve given me VPN access and yet even the VPN cannot get to a lot of stuff.

The solution for them is to use this old server and ssh out from there to the rest of everything.  Which for the most part works fine, but if more than 2 people need to leapfrog suddenly you are waiting in line, or constantly knocking people off.

So, I figured I’d do something different, install a QEMU virtual machine on the server during my allotted hour, and then launch it as a service so that I could leap in/out through the VM leaving the console free.

While I am going to add Qemu as a service, it is still somewhat stealthy as I don’t need device drivers, and I can run it nested as I know this machine is slated to be migrated to VMWare ESX.  And the best part of that is that it’ll continue to run.

So how do we set this kind of thing up?

The first thing you’ll need is srvany.exe instsrv.exe which both can be found in the Windows 2003 resource kit. (what it used to look like)

Installation is very straightforward, just remember to use complete paths for your Qemu, BIOS, and disk files.  Installation goes like this from the command line:

InstSrv qemu c:\qemu-0.15.0\srvany.exe

This will create a service entry named Qemu, which will in turn kick off the srvany executable from the resource kit.  Now I know what you are thinking, what about Qemu?  Well we have to specify that using regedit.  Also remember that because you are going to run this as a service you don’t want the SDL display popping up and scaring some poor hapless user.  So the first thing I’d recommend is to work out the flags that you want to start with.  Something like this:

c:\qemu-0.15.0\qemu -L c:\qemu-0.15.0\qemu\pc-bios -hda mydisk -net nic -net user -redir tcp:2222::22 -vnc w.x.y.z:2223

This will redirect tcp port 2222 into the VM for ssh, and sits the VNC display on port 2223 …

So we fire up regedit and navagate to HKEY_LOCAL_MACHINE\SYSTEM\CurrentControlSet\Services\Qemu

There we add a new key “Parameters”.  Then add an ASCII key of “Application” then just paste in all of the qemu flags as mentioned above (or changed as needed by you).

Then you can simply start/stop the thing using the net start/net stop.

I suppose this is a little subversive (lol) but sometimes you’ve got work to do and the best way through it to piggyback on someone else’s computer.  Also I really fail to see the ‘wisdom’ in creating ACLs that only permit you to access your routers/switches from your desktop when you could easily *NOT* be in the office.  Or this guy just likes the excuse of not being able to work from home.

Anyways not to ramble but that’s how I ‘fixed’ the issue without ruffling too many feathers.

Qemu 0.14.0 rc2 released!

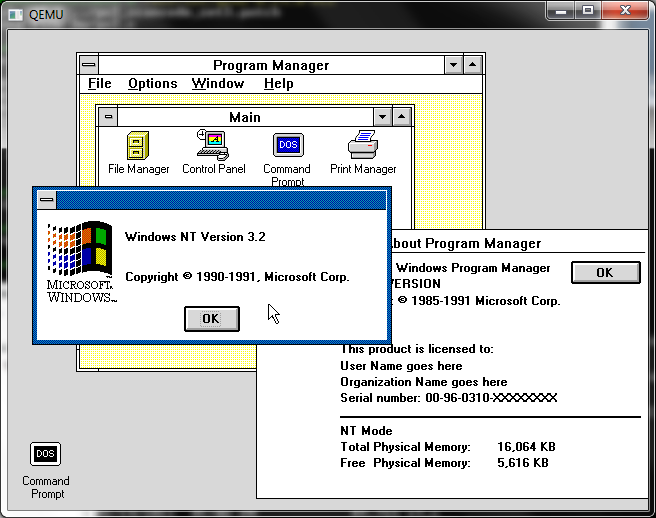
Qemu 0.14.0 rc2 and Windows NT December 1991

Qemu 0.14.0 rc2 and Windows NT December 1991

Well this one compiles clean under MinGW so that’s a nice touch. the ISAPC machine type is still broken. 😐

I’ve built the usual set with soundblaster & adlib enabled, and the NE2000 set to 0x300 irq 3 so old crusty things ought to have some hope of working. I’ve also included the PS/2 mode 3 keyboard patch for some really old stuff.

So here we go the x86 / x86_x64 builds that 99% of you want/need.

And here for the rest of the stuff for the 1% that need/want sparc/arm/powerpc/mips etc…

Qemu 0.14.0 rc1 released!

Back on the heels of the 0.14.0 rc0 release, it’s rc1!

Still nothing on the official changelog

Also I ran into this snag while building under windows..

LINK i386-softmmu/qemu.exe
../qemu-timer.o: In function `host_alarm_handler’:
C:/msys/1.0/src/qemu-0.14.0-rc1/qemu-timer.c:188: undefined reference to `qemu_next_alarm_deadline’

I moved the “#ifndef _WIN32” below the definition of `qemu_next_alarm_deadline’, and all was well.

So here is the x86, x86_x64 build, what 99% of you want. And here is the RISC version for the 0.01%.

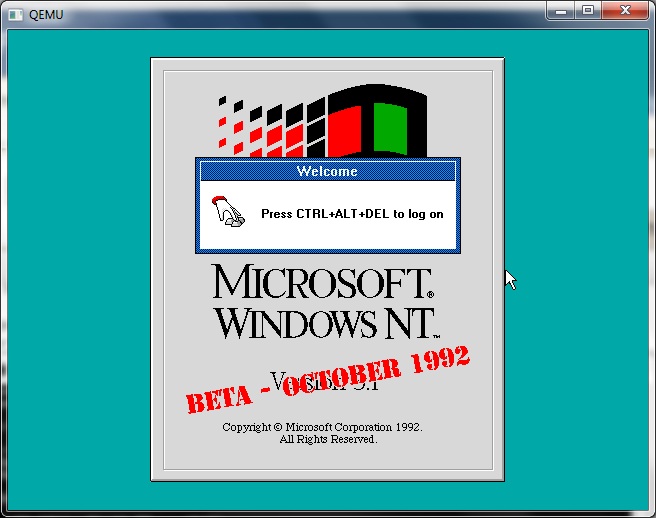
Qemu 0.14.0 rc1 and Windows NT October 1992

Qemu 0.14.0 rc1 and Windows NT October 1992

I know this may not look like much, or seem different from much of any version of Qemu but it’s 0.14.0 rc!!!!

SHOWSTOPPER!

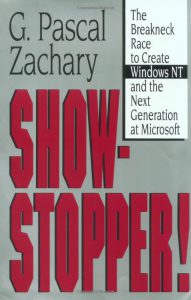
show-stopper-coverI was browsing around at a book store, and I came across the book “SHOWSTOPPER” the breakneck race to create Windows NT and the next generation at Microsoft.

If you have ever lived through the Windows NT 3.x days you’ll find this a very interesting read. It goes into the big personalities, and of course covers the working habits of Dave Cutler… Although it does paint him in some really odd colors, mostly as an antisocial kind of dictator pushing people to produce the largest program Microsoft had ever produced at the time.

But there is no doubt, Cutler could not have written Windows NT at Digital, as DEC was too fond of hardware lockins (look at VMS & Ultrix/True64). And it does cover the major animosity of Cutler towards DEC with the cancellation of the Prisim/Mica projects, and then the later “I told you so” moment when DEC licensed Windows NT from Microsoft (although other reports claim that DEC threatened MS with a lawsuit, and MS gave them access to NT, along with some money…). Apparently the mantra was “Dec could have had NT for free”..

There is also coverage of the culture clash of what happened when Microsoft had absorbed the Prisim & Mica engineering teams from DEC, and how they did not get along with Microsoft staff, and even did their best to poke holes in the current offerings of MS-DOS & OS/2 as either a toy, or a joke.

One thing I found interesting, is that the book mentions the WLO project, as the foundation for what would be the ‘Win32’ system. WLO if you remember was a port of the Windows Libraries to OS/2. It was very interesting in that Windows, OS/2 and even MS-DOS & Win16 via WOW were all not part of the main Windows NT group, but rather ‘tacked on’.

However it is quite interesting that the design decisions made for a very portable and modular operating system, that survived it’s original CPU & platform being changed 1/4th the way through development, and then the removal of the primary API.

Another thing that was interesting was some of the ‘fixes’ for the too slow, too big that would plague the early versions of NT, was the idea of demand paging portions of the kernel.. I for one would go insane with the blue screens about paging non page-able areas or some other VM error… But the truth was NT was written by people who came from a minicomputer world, and as the book made evident from time to time, they did NOT use PC’s.

Needless to say, the book was somewhat spot on, in that it’d take 10+ years for computers to catch up to what Windows NT was written for. I for one can remember trying to run this on a 386sx-16 and it was horrible… But if you install it on a Pentium II the 3.x series simply FLIES… And in emulation on modern machines it has incredible performance.

While Windows NT 3.1 was no doubt a 1.0 release, 3.5 was a 2.0. The x86 optimizations really payed off, and kicking out the Spider TCP/IP stack, and bringing in the new MS stack helped a LOT. There is no doubt back in 1994 as SLIP & PPP accounts were becoming more common place, Windows NT 3.5’s networking was the easiest to configure and use. Linux back then really was in it’s infancy, and the dialup scripts for pap/chap/pppd were… a nightmare.

“Dogfooding” was another interesting, and necessary thing as once NT was able to start running programs it was important to make people start using it as quickly as possible to shake out bugs in the system. Its also interesting to note the reluctance of the kernel team to deal with the graphical part of NT, and how the first versions were text only. Another weird part was how the security in Windows NT was an after effect, of the internal networking group cooking up what eventually became the domain & trust model. Not to mention how NTFS almost didn’t make it because the filesystem people (all two of them!) were so busy making sure HPFS worked correctly.

There is no doubt that such a ‘ground up’ OS of this magnitude hasn’t been attempted since 1988. It took Microsoft 5 years to get Windows NT out the door, but there is no doubt looking around in the year 2010, Windows NT has a long life ahead of it.

For those interested, you can find it on amazon.

Microsoft eMbedded Visual C++ 4.0

Well I was looking for a way to cross compile to the MIPS and also if I could use my old Platform builder 2.11… Anyways Platform builder has cross compilers, but no libraries, I figured you need the eMbeded Visual C++.. And as luck has it, you can download it right here!. Also you’ll probably want service pack 4.(local mirror), and don’t forget the code TRT7H-KD36T-FRH8D-6QH8P-VFJHQ

System Requirements

  • Supported Operating Systems: Windows 2000; Windows XP
  • Microsoft Windows® 2000 Professional SP2, Microsoft Windows 2000 Server SP2, or Microsoft Windows XP Professional
  • A desktop computer with a Pentium-II class processor, 450 MHz or faster
  • 96 MB (128 MB recommended) memory for Windows 2000 Professional or Windows XP Professional. 192 MB (256 MB recommended) memory for Windows 2000 Server.
  • 200 MB hard disk space
  • CD-ROM drive
  • VGA or higher-resolution monitor. A Super VGA (800 x 600 or larger) monitor is recommended.
  • Mouse or compatible pointing device

If your machine is NOT up to this kind of capability, then you can download the older eMbedded Visaul C++ 3.0, that will run on Windows NT 4.0 (i386 of course). Purdue also had a nice walkthrough on installing the 3.0 tool kit.

I DO recommend that you install IIS on your cross compiling machine, as it’s an easy way to move your object files to the MIPS host for linking.

It is worth noting that Visual C++ 4.0’s emulator will NOT run under Virtual PC.. They use the same call set, and it thinks VPC is Windows CE… I know it’s confusing.

I would imagine everyone could run this. Well if they were so inclined.. Well the installation is pretty simple but now for the ‘fun’ stuff.

First let’s download the source code to Quake.. ID software has been most kind to provide the Quake engine under the GPL!. So we can use it for a MIPS cross compile test.. (As far as I know there is no Dec Alpha cross compiler, but there is a PowerPC.. Anyone use a PowerPC NT machine?). You can download it here. .This went nowhere, as it turns out WindowsCE and Windows NT use different models for floating point, and are incompatible.

Ok with your embedded tools installed, we are now going to merge our Visual C++ MIPS CD so we use it for libraries & include files.. Since we are all going to use the same compiler it’ll be somewhat easy.. I’m using the tools out of “C:\Program Files\Microsoft eMbedded C++ 4.0\EVC\WCE400”

11/27/2001. 03:00 AM........ 1,073,152 C1XX_MP.DLL
11/27/2001. 03:00 AM.......... 581,632 C1_MP.DLL
11/27/2001. 03:00 AM........ 1,056,768 C2_MP.DLL
11/27/2001. 03:00 AM........... 69,632 CLMIPS.EXE
06/13/2001. 03:00 AM.......... 180,276 MSPDB60.DLL

To make it “feel” like visual c++ 2.0 I’m going to put them in the c:\msvc20\bin directory on my HOST pc (Vista Pro x64).. Then I simply copy the include & lib directory from the MIPS Visual C++ CD into the corresponding directories on my host.. We are ALMOST there.

The next thing I did was to grab an intel copy of Visual C++ 2.0 (I almost be dammed near all of them can do this..) and take it’s linker.. The linker out of the embedded tools is obsessed with the WindowsCE subsystem which won’t help us at ALL.

09/16/1994. 01:00 PM........... 67,584 DBI.DLL
09/16/1994. 01:00 PM........... 12,980 LINK.ERR
09/16/1994. 01:00 PM.......... 420,352 LINK.EXE

Go ahead and place those files into the c:\msvc20\bin directory.

Now we just need to create a simple batch file to keep our environment in order:

set LIB=c:\msvc20\lib
set PATH=c:\msvc20\bin;%path%
set include=c:\msvc20\include

Save that to something like mipvars.cmd, and run it & we should be ready to start compiling!

To test the cross compiler I’m going to build a SIMPLE program that has 2 files.

hi.c


#include <stdio.h>

extern int bob(void);

void main(void)
{
printf("%d",bob());
}

bob.c

int bob(void)
{
return 3;
}

Ok, now we compile it like so:

C:\msvc20>clmips *.c -o bob.exe
Microsoft (R) C/C++ Optimizing Compiler Version 12.20.9419 for MIPS R-Series
Copyright (C) Microsoft Corp 1984-2001. All rights reserved.

bob.c
hi.c
Generating Code...
Microsoft (R) 32-Bit Incremental Linker Version 2.50
Copyright (C) Microsoft Corp 1992-94. All rights reserved.

/out:bob.exe
/out:bob.exe
bob.obj
hi.obj
LINK : error LNK1104: cannot open file "corelibc.lib"

Oh no trouble!. Because this was all ripped from the embeded tools it wants to think it has corelibc not libc.. But we can cheat, just copy libc.lib to corelibc.lib and I’ve also copied rpcndr.lib to coredll.lib to satisfy the linker.. Now when we re-compile:

C:\msvc20>clmips *.c -o bob.exe
Microsoft (R) C/C++ Optimizing Compiler Version 12.20.9419 for MIPS R-Series
Copyright (C) Microsoft Corp 1984-2001. All rights reserved.

bob.c
hi.c
Generating Code...
Microsoft (R) 32-Bit Incremental Linker Version 2.50
Copyright (C) Microsoft Corp 1992-94. All rights reserved.

/out:bob.exe
/out:bob.exe
bob.obj
hi.obj

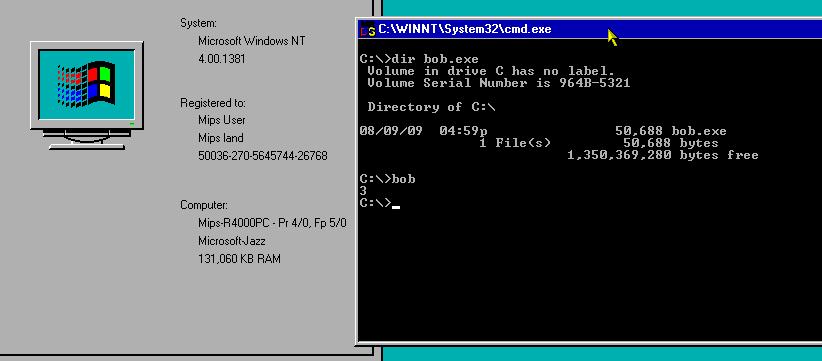
That’s right, we got an executable!. Now if you run it on your x86(or x64) host you’ll get this:

c:\msvc20\bob.exe is not a valid Win32 application.

And of course, since you installed IIS on your HOST (or cross compiling VM) you can connect to it from your MIPS VM, download the exe & run it.

MIPS cross compile
MIPS cross compile

I’m kind of surprised it worked.. It does go to show though, that somewhere inside Microsoft they have some COOL cross compiler technology, it’s just too bad they didn’t make it into an easy package for the RISC stuff.. But now that the MIPS is coming back to life via Qemu, and NT 4.0 can be had for $5 a retail box on ebay, I figure it’s worth this much for those people who can find Visual C++ for MIPS/RISC.