So yeah I got DDOS’d …

I don’t think it was me specifically but my hosting company got hit hard.

Needless to say I’m finally up right now.  I had a monthly backup scheme going, clearly I’ve got to get something going daily ….

I’ve also found a company down the road from me that can colo for ~ $100 a month which I may jump on as I’d like to host a bunch of stuff in a semi reliable manner, and having an 8 core / 16GB machine to do it would be nice.

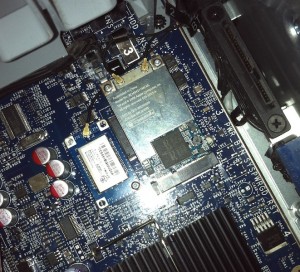
Upgraded my Mac Pro to include Wifi & Bluetooth!

There! Done!

Trust me if you’ve ever attempted this, then you know not only just how difficult this whole process is, but to not only get it working was a major accomplishment!

And I only lost ONE of the screws.. Sigh they are just too small, I finally broke down and got an eye glass repair kit after losing one of them (no idea where it went to, I shook the case like crazy then it stopped rattling, so its either wedged somewhere good, or I’ve thrown it somewhere around here….).  The trick was to use a small plastic sleeve to jam the screw almost all the way in, with enough of the stem showing so I could carefully get a few twists of the tread into the hole…

But of course I didn’t start it out that way, instead I thought it’d be easier to clip on the antennas to the wifi card (BCM94311MCAG) first, then slip it into its slot, then screw it down, but since it goes in at an angle, it forces itself up & out so you end up fighting it.  This is where I lost the one screw during installation.  The ‘trick’ was to use my iphone’s camera light so I could see what I was doing, then try to press down on the wifi card while trying to screw in the board using one of the plastic sleeve things from the repair kit.  Surprisingly after enough false starts I got it to thread and was able to finish screwing it in with the driver.

The Bluetooth module (A1115) was much easier, as it is just a simple daughter card, that you just push onto the board, then screw in.  Because its not actively resisting you, it was much easier to get into place, and screw in…. I just hope mine lasts ok as its only got the one screw.

As always have a clean work area, and take your time.  Working with stuff this insanely small is going to take longer than you expect..

How do you plug an RJ45 into an Etherlink II (3c503)

So on the heels of my prior post, someone was asking me, where do you exactly plug in an RJ-45 style cable to something like an Etherlink II?  It had never occured to me that many people today would have no idea what thicknet/thinnet were, or what the magical world of the AUI port is.. Sure there are transceivers still in use, but typically in larger networking equipment, and more so to choose what king of fiber optics to use (single mode? multimode? etc..).

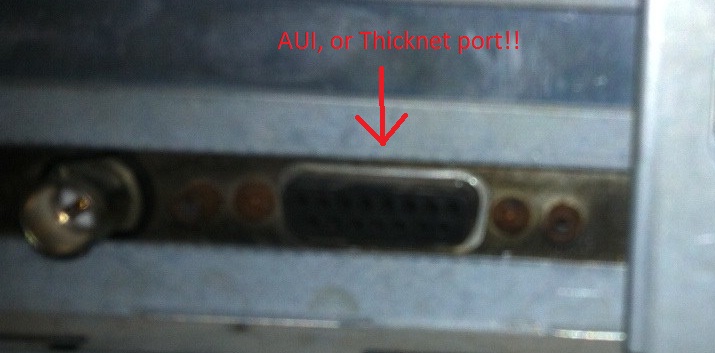
So looking at the back of the card, we see this:

It’s not a joystick port!

Sorry for the poor quality but.. thems the breaks.  So anyways back in the day ethernet revolved around this big bulky cabling lovingly called Thicknet.  And you had to use these ‘vampire’ taps to plug into the cable, and the cable had markings that you could only tap into it a certain points.  So luckily for us, the transceiver component of Thicknet was external, letting us in the future plug in different transceivers for different media types.

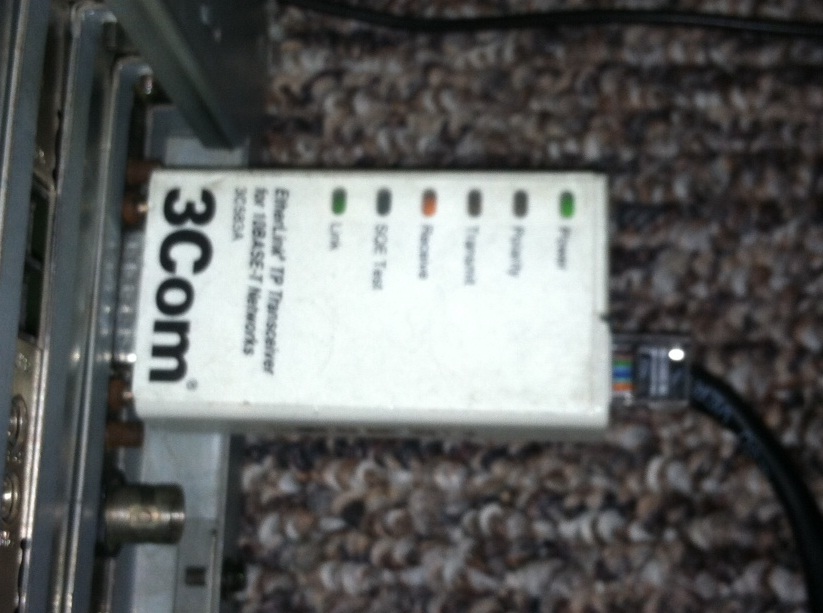
Say something like this:

3Com rj45 transceiver

And that is how you can plug a cable into a card that is older than the rj45 ethernet standard!

As part of the retrochallenge 2012, there is a PDP-11 running 2.11 BSD out there!

No, really!

You can get an account, just sign up here!

Sander Reiche has setup a MicroPDP-11/83 with the following specs:

So far there are FOUR users.. which means you can get in on the action for sure!

For those of you who want a sandboxed version at home, you can download my install here, which of course I touched on a while back.

For those unfamiliar, here is what retrochallenge is all about!

  1. RetroChallenge commences July 1st, 2012 and runs until July 31st, 2012.
  2. In order to qualify, computer systems must by approximately 10 years old (or older!)… in general, this means 486 or below, 680×0 and pretty much everything with an 8-bit processor, but we’ll also let you in if you have an old Cray kicking about, and exceptions can always be made for exotica!
  3. Gaming consoles and PDAs qualify if they were made in the previous century.
  4. Where appropriate, replica hardware and emulators may be used.
  5. Entrants are responsible for adequately documenting their projects and submitting occasional updates during the contest.
  6. Projects may encompass any aspect of retro-computing that tickles the fancy of the individual entrant.
  7. Winners will be carefully selected and thoughtfully chosen prizes presented (hopefully before the next challenge commences).
  8. Have fun!

Sadly I don’t have anything physical around here that really qualifies.  A G5 mac is too new, and I recently picked up a Pentium 150 based IBM Aptiva, but its too new apparently….

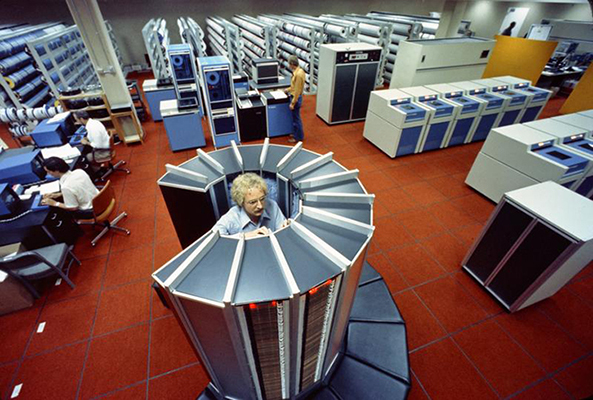
Three tonnes of mini computers

It looks almost religious doesn’t it?

I just received this note from the HECnet mailing list, and I thought I’d broadcast it out..

This is a shameless plug for something I and the Update Computer Club 
have been working on this spring and opened yesterday.

The exhibition "Three Tons of Minicomputers" at Museum Gustavianum in 
Uppsala, Sweden.

http://www.gustavianum.uu.se/node13

We have collected computers primarily used by the university at some 
point in time. Highlights include a Linc-8 and a DECSYSTEM-2060 with 
peripherals.

Here are some pictures from the opening:

http://www.update.uu.se/~jeppe/tmp/vernissage/

I strongly recommend anyone nearby Uppsala this summer to take a swing 
by Gustavianum. If you want a guided tour, let me know and we'll figure 
something out.

It's only open for a few months, so don't wait to long.

Regards,
Pontus.

I don’t know when I’ll be in Europe next, but now I really want to go to Sweden!