SPARC NetBSD on Qemu 0.14.0

I came across this link, in some kind of vain search to see if NetBSD Sparc could run on Qemu.  And the answer is a resounding yes!

I have to admit it was pretty simple to setup too. I did a network install, so all I needed in a minimal config was a GENERIC kernel, and the miniroot. I did it this way because booting with the inserted kernel lets me easily choose my root…

First I created a 2GB data disk, then start up Qemu like this…

qemu-system-sparc.exe -kernel netbsd-GENERIC -L pc-bios -hda sparc.disk -hdb miniroot.fs -net nic -net user

And it’ll boot up!

I specify the root to be sd1c, I’m not sure if it’d pick up on sd1, or sd1a but at any rate sd1c certainly works. The other gotcha I found was the keyboard, sun-type4 worked best. I also had to configure the network manually (maybe I missed something?) but the settings are simple for NAT.

address 10.0.2.15
mask 0xffffff00
gateway 10.0.2.2
dns 8.8.8.8

Any attempt to ping the gateway will fail. But it’s nothing to worry about, and the install can continue normally. I pulled the rest of NetBSD down via HTTP, and it booted up!

I should also add that the CD-ROM iso install works as well. And the NetBSD site has lots of ways of getting the install ISO for the sparc.

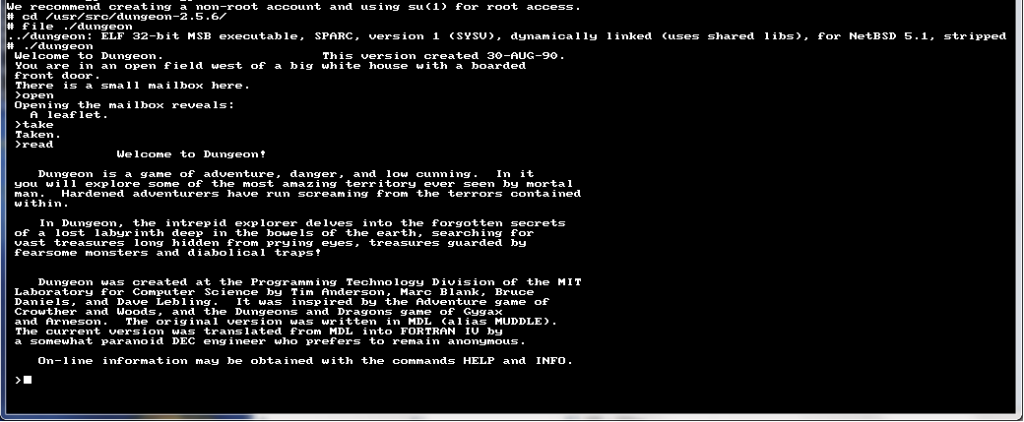
And of course, will it run Zork?

Yes it does!

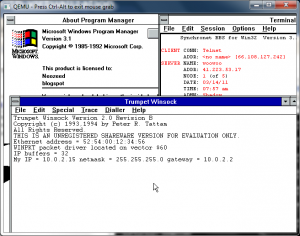
Trumpet Winsock 2.0b

So while browsing around k7tty, I came across this file, internet.zip, that pretty much has everything you need for a windows 3.1 machine to get into the internet using Trumpet Winsock.

I used a packet driver, along with Qemu’s built in ne2000 and it works pretty well!

While I never used Trumpet back in the day, setting it up for LAN access was pretty easy, and while Trumpet 1.0 loads on Windows 3.0 I never could find any applications that actually work with it. Trumpet 2.0 seems more along the line of the finalized Winsock 1.1 stacks, with applications abound to run with it and Windows 3.1

Twinsock and early windows internet usage

A friend of mine let me know that there is a current drive by former users of trumpet winsock to actually send the author the $25 ($35 in adjusted money) that he had asked for the shareware program. While I’ve seen Trumpet, it required a SLIP or PPP connection which I just didn’t have back in 1993/1994 timeline. Sure there was SLiRP, but it was far more involved to compile on the Ultrix machine university gave us access to, or the pay internet connection (sefl.satelnet.org!) that ran IRIX. So I ran Troy Rollo’s Twinsock.

Besides being GPL’d twinsock proxied the socket access from your Windows 3.1 computer, and ran the requests on the Unix host you connected to. The best part is that they didn’t have to know that you even ran it. Twinsock transformed the internet from being a Unix shell account that kept many people away, into a graphical experience with windows applications executing on our desktop. Since it wasn’t a real TCP/IP stack, it effectively firewalled us, and seeing we were running Windows 3.1 that was a good thing.

So to make this experence more… realistic, I took the 386BSD 0.1 image from sourceforge, and made one tweak into how it runs. I added the following to the Qemu execution:

-serial tcp:127.0.0.1:4445,server,nowait

Then I installed MS-DOS, Windows 3.1, a terminal program, and some tcp/ip programs to test into another Qemu virtual machine. I then connected the two Qemu instances like a null modem like this:

-serial tcp:127.0.0.1:4445

This way COM1 on both machines now talk together. The only major downside I’ve seen is that if the client VM is killed re-starting it doesn’t get the serial connection working, both VM’s have to be restarted from the command line.

The cool thing was I was able to use a dos terminal program and zmodem to transfer the source to 386BSD to build. Surprisingly this part went pretty smooth on all the versions of Twinsock that I tested, but version 1.3 and higher was the version that actually worked.

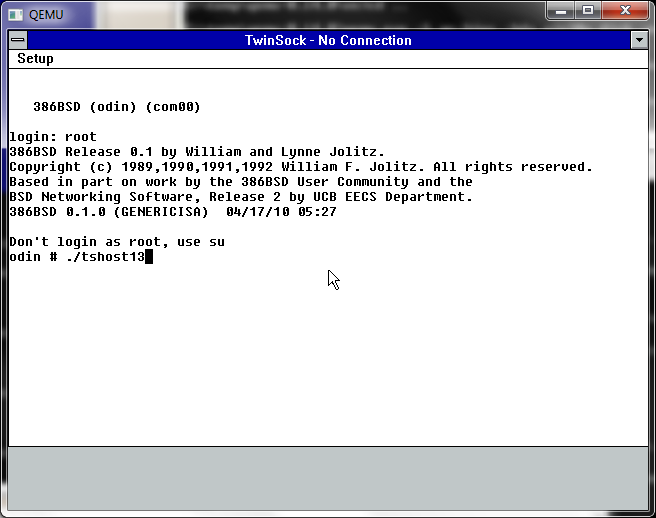
So with the executable built on the Unix machine, you launch the windows program, which included a minimal terminal program. And from there you can dial up, login to your Unix account, then launch the twinsock Unix component and the window minimizes and now you are ‘connected’.

Launching Twinsock

WinVN

One of the most popular programs & protocols of the “early” internet was NNTP or Net News. Net News transitioned the world from BBS’s and Forum Software. The topics were incredibly diverse, and the system was distributed by nature. And news traversed the internet in a semiquick fashion. Especially the nodes that had T1 or faster access at the time. Unlike down stream UUCP BBS’s that may only take a small feed once a day, now with Twinsock you could get whatever groups and feeds you wanted, and as fast as your little modem could download it.

So for this fun experiment, I downloaded a suitably old version of WinVN, 0.92.1. The first thing I went looking around for was a public NNTP server. A great resource for locating various news servers that have certain groups is newzbot.

So with a suitable server in hand, I was able to connect up and check a news group. It was slow and clunky like it was in the old days, but it was neat in that client server feel to know that it was running on my desktop.

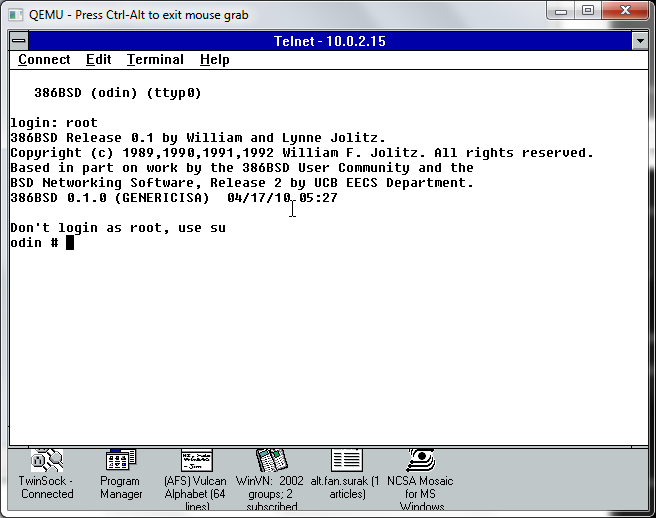
MS Telnet

Naturally it wouldn’t be the internet if you still telneted all over the world for MUD’s, and even access to compilers, different systems, and school work. I had a chore of a time finding a ‘good’ telnet client, so I ended up settling with the one that Microsoft had released their own stack, ‘Wolverine’ as part of a TCP/IP protocol update for Windows for Workgroups. This stack was also significant in that this was the first time a ‘full’ and ‘real’ TCP/IP stack had been released for free. As mentioned above with Trumpet winsock, and the rest, you had to buy the network stack. This free stack was only meant for LAN access, though I’ve heard of people trying to hack PPP/SLIP stuff at the dos level, but again it wouldn’t help me, since I couldn’t SLiRP. But this was the forshadowing of how the internet was going to finally take off, and the short thriving window of 3rd party TCP/IP stacks for Windows was about to slam shut in the next release of Windows.

Mosaic 0.7

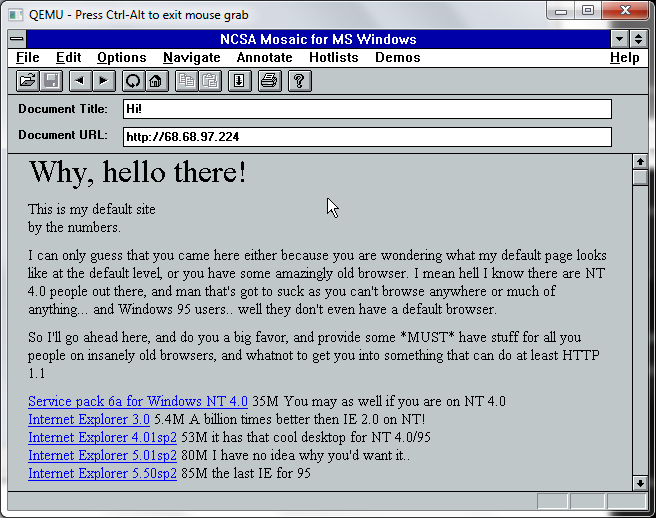
And finally we come the program that basically changed the way we do everything – Mosaic. The first web browser only worked on the NeXTSTEP, and I don’t think that Mosaic was the first PC browser, but at the time it certainly was the best. I loaded up an old version to see if it could at least hit a site by IP address, and it worked. Sadly downloading files causes the browser to crash. Mosaic was rather touchy back in the day too. Because Mosaic came from the Unix world of browsers it was a 32bit program, and needed large amounts of memory. It also was a large exe too, around 2MB! Which is far larger then doom & the dos extender! So Mosaic was the first program I can recall that needed the magical Win32s add on. I’ve mentioned Win32s before so I won’t go on and on, but like the TCP/IP from Microsoft, this also basically killed the DOS Extender market.

The first time I saw Mosaic, I was blown away, we left the world of terminals and archie/gopher/veronica to something you could use a mouse with, and enter in your own URL! It was amazing, but at the same time I thought the internet was doomed to failure as you had to READ. Oh how wrong I was to be shown later. But in the time between Windows NT 3.1 and Windows 95, there was a lot of reading expected to be done. Much like everyone at the time would reply with RTFM in the news groups for stupid questions, why there even was the “Big Dummies Guide to the Internet“, thankfully made available online, put on various shovelware CD’s and saved thanks to cd.textfiles.com.

I couldn’t get MiRC to work.. I forget what other IRC programs would actually work with Twinsock. But I didn’t spend that much time on IRC.

Oh well, that is how the internet stood in that pre Windows 95, pre wide scale PPP world. It really was amazing how fast things changed.

Xenix 286 on Qemu

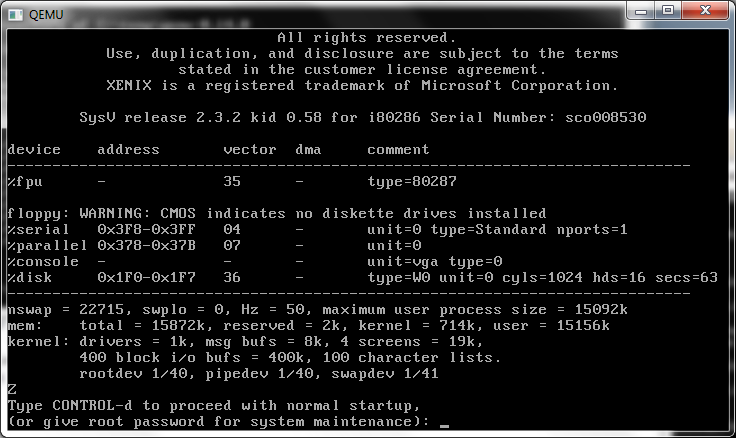
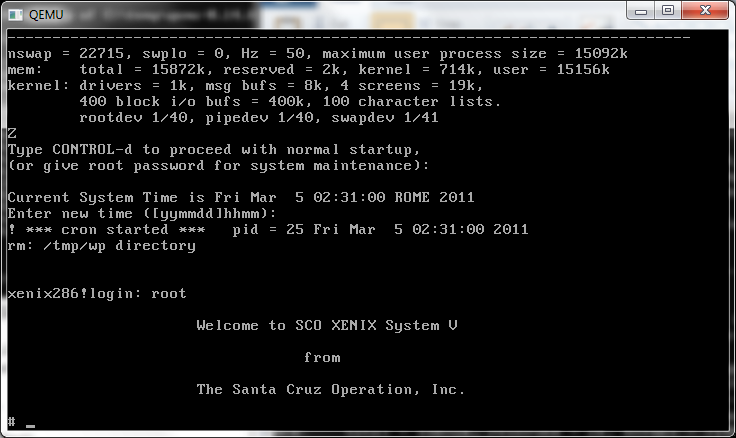
I nearly forgot to mention this… But a friend had some issues with an ancient 486 box running Xenix 286 and made a disk image of it. The box finally died, and he lost his copy with some disk accident (double trouble!) but he did send me a copy to see if it’d work under Qemu… At the time it didn’t.

So while I was transferring his disk image back to him, and looking around on ebay for a 286 board, I figured I’d try Qemu 0.14 to see how badly it failed…

xenix 2.3.2 286 on Qemu 0.14

And…

xenix 2.3.2 286 on Qemu 0.14 pt2

It worked!

I can’t say I’ve thoughtfully tested it, but it seems pretty workable.. I have no idea about what editions work, and which do not… I have no idea if this version knows it’s on a 386 and uses a 386 friendly method to switch to protected mode, or what.. Then again it being Xenix, it won’t need to constantly pop between real & protected modes, unlike, say Windows 3.0 / windows 3.1 or OS/2 1.x ..

Qemu 0.14.0 rc2 released!

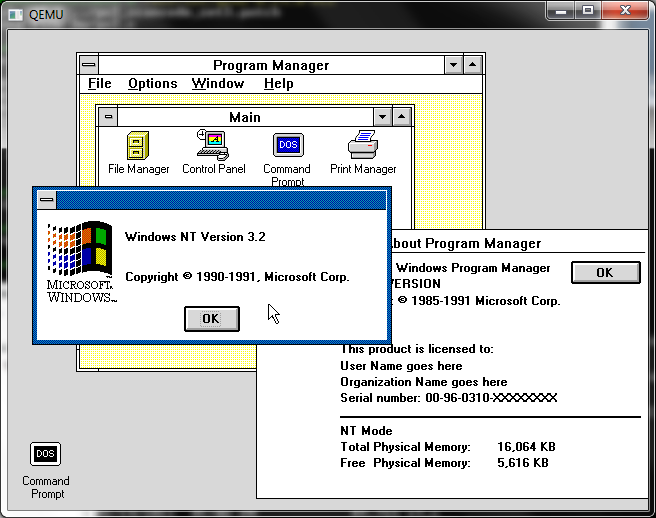
Qemu 0.14.0 rc2 and Windows NT December 1991

Qemu 0.14.0 rc2 and Windows NT December 1991

Well this one compiles clean under MinGW so that’s a nice touch. the ISAPC machine type is still broken. 😐

I’ve built the usual set with soundblaster & adlib enabled, and the NE2000 set to 0x300 irq 3 so old crusty things ought to have some hope of working. I’ve also included the PS/2 mode 3 keyboard patch for some really old stuff.

So here we go the x86 / x86_x64 builds that 99% of you want/need.

And here for the rest of the stuff for the 1% that need/want sparc/arm/powerpc/mips etc…

Qemu 0.14.0 rc1 released!

Back on the heels of the 0.14.0 rc0 release, it’s rc1!

Still nothing on the official changelog

Also I ran into this snag while building under windows..

LINK i386-softmmu/qemu.exe
../qemu-timer.o: In function `host_alarm_handler’:
C:/msys/1.0/src/qemu-0.14.0-rc1/qemu-timer.c:188: undefined reference to `qemu_next_alarm_deadline’

I moved the “#ifndef _WIN32” below the definition of `qemu_next_alarm_deadline’, and all was well.

So here is the x86, x86_x64 build, what 99% of you want. And here is the RISC version for the 0.01%.

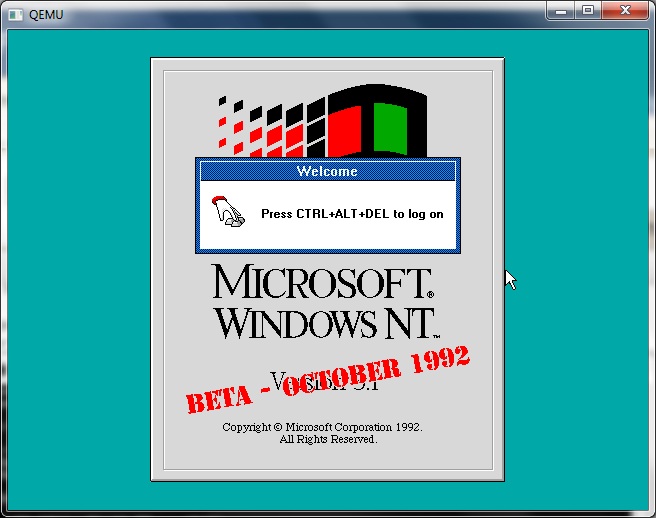
Qemu 0.14.0 rc1 and Windows NT October 1992

Qemu 0.14.0 rc1 and Windows NT October 1992

I know this may not look like much, or seem different from much of any version of Qemu but it’s 0.14.0 rc!!!!

Qemu 0.14.0 rc0 released!

Whoa I didn’t see that coming along so quick…

I was anxiously awaiting some VM/386 diskettes I ordered from Amazon to show up.

The main changelog hasn’t been updated since 0.12.5 so I really don’t know what to expect in this release.

One thing that is new, is QMP, the The QEMU Monitor Protocol.

Another interesting thing at a glance, is that 0.14 seems to have far more modes for the i386-softmmu..

pc         Standard PC (alias of pc-0.14)

pc-0.14    Standard PC (default)

pc-0.13    Standard PC

pc-0.12    Standard PC

pc-0.11    Standard PC, qemu 0.11

pc-0.10    Standard PC, qemu 0.10

isapc      ISA-only PC

The NE2000 still has a conflict on 0x300 IRQ 9, so removing it from hw/pc.c will allow the ISA NE2000 to function…

I also see the addition of the Intel HD Audio Controller, or hda, not to be confused with the first hard disk.

So for those of you who wish to give it a shot, here is the x86/x86_64 only version (what 99% of you want), and for the 1% crowd, the ‘other’ version which has all the OTHER cpu’s (mips,m68k,sh4,ppc).

And for some shameless google juice, here is the options for the new version of qemu-i386softmmu:

QEMU emulator version 0.13.90, Copyright (c) 2003-2008 Fabrice Bellard
usage: qemu [options] [disk_image]

‘disk_image’ is a raw hard disk image for IDE hard disk 0

Standard options:
-h or -help display this help and exit
-version display version information and exit
-M machine select emulated machine (-M ? for list)
-cpu cpu select CPU (-cpu ? for list)
-smp n[,maxcpus=cpus][,cores=cores][,threads=threads][,sockets=sockets]
set the number of CPUs to ‘n’ [default=1]
maxcpus= maximum number of total cpus, including
offline CPUs for hotplug, etc
cores= number of CPU cores on one socket
threads= number of threads on one CPU core
sockets= number of discrete sockets in the system
-numa node[,mem=size][,cpus=cpu[-cpu]][,nodeid=node]
-fda/-fdb file use ‘file’ as floppy disk 0/1 image
-hda/-hdb file use ‘file’ as IDE hard disk 0/1 image
-hdc/-hdd file use ‘file’ as IDE hard disk 2/3 image
-cdrom file use ‘file’ as IDE cdrom image (cdrom is ide1 master)
-drive [file=file][,if=type][,bus=n][,unit=m][,media=d][,index=i]
[,cyls=c,heads=h,secs=s[,trans=t]][,snapshot=on|off]
[,cache=writethrough|writeback|none|unsafe][,format=f]
[,serial=s][,addr=A][,id=name][,aio=threads|native]
[,readonly=on|off]
use ‘file’ as a drive image
-set group.id.arg=value
set parameter for item of type
i.e. -set drive.$id.file=/path/to/image
-global driver.property=value
set a global default for a driver property
-mtdblock file use ‘file’ as on-board Flash memory image
-sd file use ‘file’ as SecureDigital card image
-pflash file use ‘file’ as a parallel flash image
-boot [order=drives][,once=drives][,menu=on|off]
‘drives’: floppy (a), hard disk (c), CD-ROM (d), network (n)
-snapshot write to temporary files instead of disk image files
-m megs set virtual RAM size to megs MB [default=128]
-mem-path FILE provide backing storage for guest RAM
-k language use keyboard layout (for example ‘fr’ for French)
-audio-help print list of audio drivers and their options
-soundhw c1,… enable audio support
and only specified sound cards (comma separated list)
use -soundhw ? to get the list of supported cards
use -soundhw all to enable all of them
-usb enable the USB driver (will be the default soon)
-usbdevice name add the host or guest USB device ‘name’
-device driver[,prop[=value][,…]]
add device (based on driver)
prop=value,… sets driver properties
use -device ? to print all possible drivers
use -device driver,? to print all possible properties
File system options:
-fsdev local,id=id,path=path,security_model=[mapped|passthrough|none]
Virtual File system pass-through options:
-virtfs local,path=path,mount_tag=tag,security_model=[mapped|passthrough|none]

-name string1[,process=string2]
set the name of the guest
string1 sets the window title and string2 the process name (on Linux)
-uuid %08x-%04x-%04x-%04x-%012x
specify machine UUID

Display options:
-nographic disable graphical output and redirect serial I/Os to console
-no-frame open SDL window without a frame and window decorations
-alt-grab use Ctrl-Alt-Shift to grab mouse (instead of Ctrl-Alt)
-ctrl-grab use Right-Ctrl to grab mouse (instead of Ctrl-Alt)
-no-quit disable SDL window close capability
-sdl enable SDL
-spice enable spice
-portrait rotate graphical output 90 deg left (only PXA LCD)
-vga [std|cirrus|vmware|qxl|xenfb|none]
select video card type
-full-screen start in full screen
-g WxH[xDEPTH] Set the initial graphical resolution and depth
-vnc display start a VNC server on display

1 target only:
-win2k-hack use it when installing Windows 2000 to avoid a disk full bug
-no-fd-bootchk disable boot signature checking for floppy disks
-no-acpi disable ACPI
-no-hpet disable HPET
-balloon none disable balloon device
-balloon virtio[,addr=str]
enable virtio balloon device (default)
-acpitable [sig=str][,rev=n][,oem_id=str][,oem_table_id=str][,oem_rev=n][,asl_co
mpiler_id=str][,asl_compiler_rev=n][,data=file1[:file2]…]
ACPI table description
-smbios file=binary
load SMBIOS entry from binary file
-smbios type=0[,vendor=str][,version=str][,date=str][,release=%d.%d]
specify SMBIOS type 0 fields
-smbios type=1[,manufacturer=str][,product=str][,version=str][,serial=str]
[,uuid=uuid][,sku=str][,family=str]
specify SMBIOS type 1 fields

Network options:
-net nic[,vlan=n][,macaddr=mac][,model=type][,name=str][,addr=str][,vectors=v]
create a new Network Interface Card and connect it to VLAN ‘n’
-net user[,vlan=n][,name=str][,net=addr[/mask]][,host=addr][,restrict=y|n]
[,hostname=host][,dhcpstart=addr][,dns=addr][,tftp=dir][,bootfile=f]
[,hostfwd=rule][,guestfwd=rule] connect the user mode ne
twork stack to VLAN ‘n’, configure its
DHCP server and enabled optional services
-net tap[,vlan=n][,name=str],ifname=name
connect the host TAP network interface to VLAN ‘n’
-net socket[,vlan=n][,name=str][,fd=h][,listen=[host]:port][,connect=host:port]
connect the vlan ‘n’ to another VLAN using a socket connection
-net socket[,vlan=n][,name=str][,fd=h][,mcast=maddr:port[,localaddr=addr]]
connect the vlan ‘n’ to multicast maddr and port
use ‘localaddr=addr’ to specify the host address to send packets
from
-net dump[,vlan=n][,file=f][,len=n]
dump traffic on vlan ‘n’ to file ‘f’ (max n bytes per packet)
-net none use it alone to have zero network devices. If no -net option
is provided, the default is ‘-net nic -net user’
-netdev [user|tap|socket],id=str[,option][,option][,…]

Character device options:
-chardev null,id=id[,mux=on|off]
-chardev socket,id=id[,host=host],port=host[,to=to][,ipv4][,ipv6][,nodelay]
[,server][,nowait][,telnet][,mux=on|off] (tcp)
-chardev socket,id=id,path=path[,server][,nowait][,telnet],[mux=on|off] (unix)
-chardev udp,id=id[,host=host],port=port[,localaddr=localaddr]
[,localport=localport][,ipv4][,ipv6][,mux=on|off]
-chardev msmouse,id=id[,mux=on|off]
-chardev vc,id=id[[,width=width][,height=height]][[,cols=cols][,rows=rows]]
[,mux=on|off]
-chardev file,id=id,path=path[,mux=on|off]
-chardev pipe,id=id,path=path[,mux=on|off]
-chardev console,id=id[,mux=on|off]
-chardev serial,id=id,path=path[,mux=on|off]

Bluetooth(R) options:
-bt hci,null dumb bluetooth HCI – doesn’t respond to commands
-bt hci,host[:id]
use host’s HCI with the given name
-bt hci[,vlan=n]
emulate a standard HCI in virtual scatternet ‘n’
-bt vhci[,vlan=n]
add host computer to virtual scatternet ‘n’ using VHCI
-bt device:dev[,vlan=n]
emulate a bluetooth device ‘dev’ in scatternet ‘n’

Linux/Multiboot boot specific:
-kernel bzImage use ‘bzImage’ as kernel image
-append cmdline use ‘cmdline’ as kernel command line
-initrd file use ‘file’ as initial ram disk

Debug/Expert options:
-serial dev redirect the serial port to char device ‘dev’
-parallel dev redirect the parallel port to char device ‘dev’
-monitor dev redirect the monitor to char device ‘dev’
-qmp dev like -monitor but opens in ‘control’ mode
-mon chardev=[name][,mode=readline|control][,default]
-debugcon dev redirect the debug console to char device ‘dev’
-pidfile file write PID to ‘file’
-singlestep always run in singlestep mode
-S freeze CPU at startup (use ‘c’ to start execution)
-gdb dev wait for gdb connection on ‘dev’
-s shorthand for -gdb tcp::1234
-d item1,… output log to /tmp/qemu.log (use -d ? for a list of log items)
-hdachs c,h,s[,t]
force hard disk 0 physical geometry and the optional BIOS
translation (t=none or lba) (usually qemu can guess them)
-L path set the directory for the BIOS, VGA BIOS and keymaps
-bios file set the filename for the BIOS
-enable-kvm enable KVM full virtualization support
-xen-domid id specify xen guest domain id
-xen-create create domain using xen hypercalls, bypassing xend
warning: should not be used when xend is in use
-xen-attach attach to existing xen domain
xend will use this when starting qemu
-no-reboot exit instead of rebooting
-no-shutdown stop before shutdown
-loadvm [tag|id]
start right away with a saved state (loadvm in monitor)
-option-rom rom load a file, rom, into the option ROM space
-clock force the use of the given methods for timer alarm.
To see what timers are available use -clock ?
-rtc [base=utc|localtime|date][,clock=host|vm][,driftfix=none|slew]
set the RTC base and clock, enable drift fix for clock ticks (x86 only)
-icount [N|auto]
enable virtual instruction counter with 2^N clock ticks per
instruction
-watchdog i6300esb|ib700
enable virtual hardware watchdog [default=none]
-watchdog-action reset|shutdown|poweroff|pause|debug|none
action when watchdog fires [default=reset]
-echr chr set terminal escape character instead of ctrl-a
-virtioconsole c
set virtio console
-show-cursor show cursor
-tb-size n set TB size
-incoming p prepare for incoming migration, listen on port p
-nodefaults don’t create default devices
-prom-env variable=value
set OpenBIOS nvram variables
-semihosting semihosting mode
-old-param old param mode
-readconfig
-writeconfig
read/write config file
-nodefconfig
do not load default config files at startup

During emulation, the following keys are useful:
ctrl-alt-f toggle full screen
ctrl-alt-n switch to virtual console ‘n’
ctrl-alt toggle mouse and keyboard grab

When using -nographic, press ‘ctrl-a h’ to get some help.
And because some people wanted it, here is *every* version of qemu I’ve found… in source!

NetBSD 0.8 built and booted!


There it is, all done, NetBSD 0.8!

While it still says 386 BSD all over the place, trust me, I’ve built it from the NetBSD 0.8 CVS (with lots of donations for missing parts from 386 BSD).

Anyone interested can download it from sourceforge.

And no I didn’t bother doing the f2c thing, so many files were lost to the great bitbucket this isn’t a 100% restoration but considering the state it was in a few days ago, this is as good as it gets.

NetBSD 0.8 kernel boots!

Well, ok it’s not 100% the NetBSD 0.8 kernel, as a good chunk of the files have been intentionally removed from CVS. However from the announcement, it does make it clear that NetBSD 0.8 is 386 BSD pl22 with some pre pl23 changes thrown in. Since patch level 22 is lost, however patch level 23 is still around, then it wasn’t to hard to install a 386 BSD system, patch it to level 23, then unpack the NetBSD 0.8 sources, and fill in the missing parts.

I guess this is the Jurassic Park of kernels?

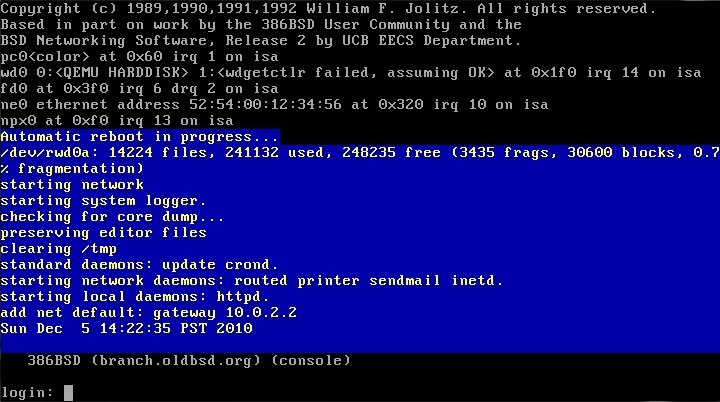
386bsd-pl22 booted

Anyways, here is the 386 BSD pl 23 kernel booting up

And now..

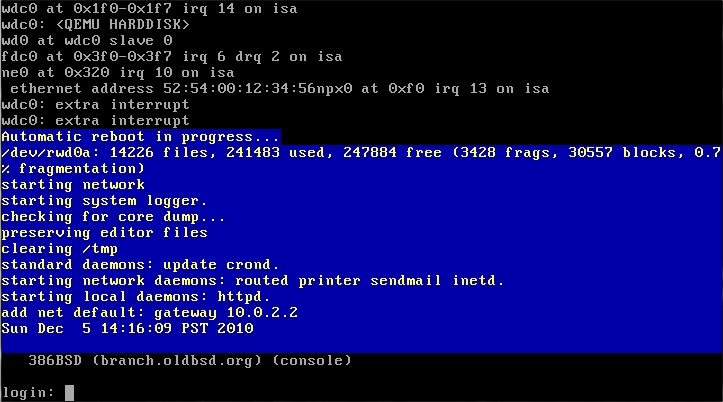
NetBSD 0.8 booted

NetBSD 0.8 booted

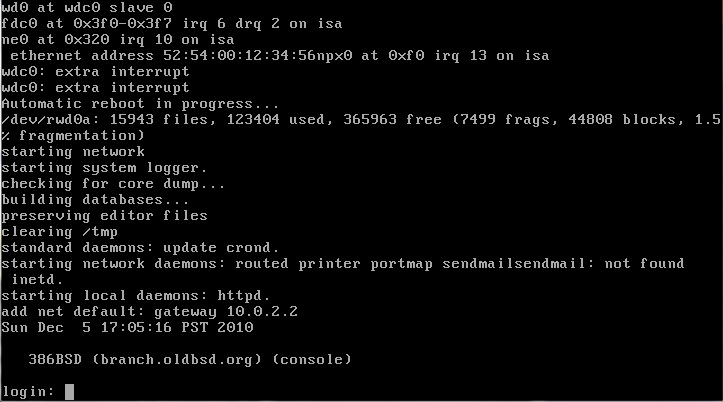
As you can see there is some differences in the boot strings, but at the same time, because so many files were just pulled in from 386 BSD, and I’m still using a 386 BSD userland, it reports itself as 386BSD.

dmesg’s were so small back then, here is the whole thing from the kernel:

386BSD 0.1 (GENERICISA) #2: Sun Dec  5 13:30:14 PST 2010
 [email protected]:/usr/src/sys.386bsd/arch/compile/J
real mem  = 67104768
avail mem = 64663552
pc0 at 0x60-0x6f irq 1 on isa
pc0: color
wdc0 at 0x1f0-0x1f7 irq 14 on isa
wdc0: 
wd0 at wdc0 slave 0
fdc0 at 0x3f0-0x3f7 irq 6 drq 2 on isa
ne0 at 0x320 irq 10 on isa
 ethernet address 52:54:00:12:34:56
npx0 at 0xf0 irq 13 on isa

Oh well it was moderately interesting.

For the insane, the merged source is here. I’ll provide a snapshot of my build environment, under Qemu here.