Build your own Apple DTK and save a fortune!

AI Slop

I am not a cool person.

I don’t get invited to all the cool people events.

I never get to bask in the glory of FOMO Apple glory.

It’ll be 20 years ago the rumors were insane that Apple was going to dump the beloved PowerPC for intel. Darwin (the open-source core to OS X) was publicly available on Intel processors, and the scene was set for one of the most exciting transitions of the time:

The WWDC 2005 announcement

At the 2005 WWDC the bomb was dropped.

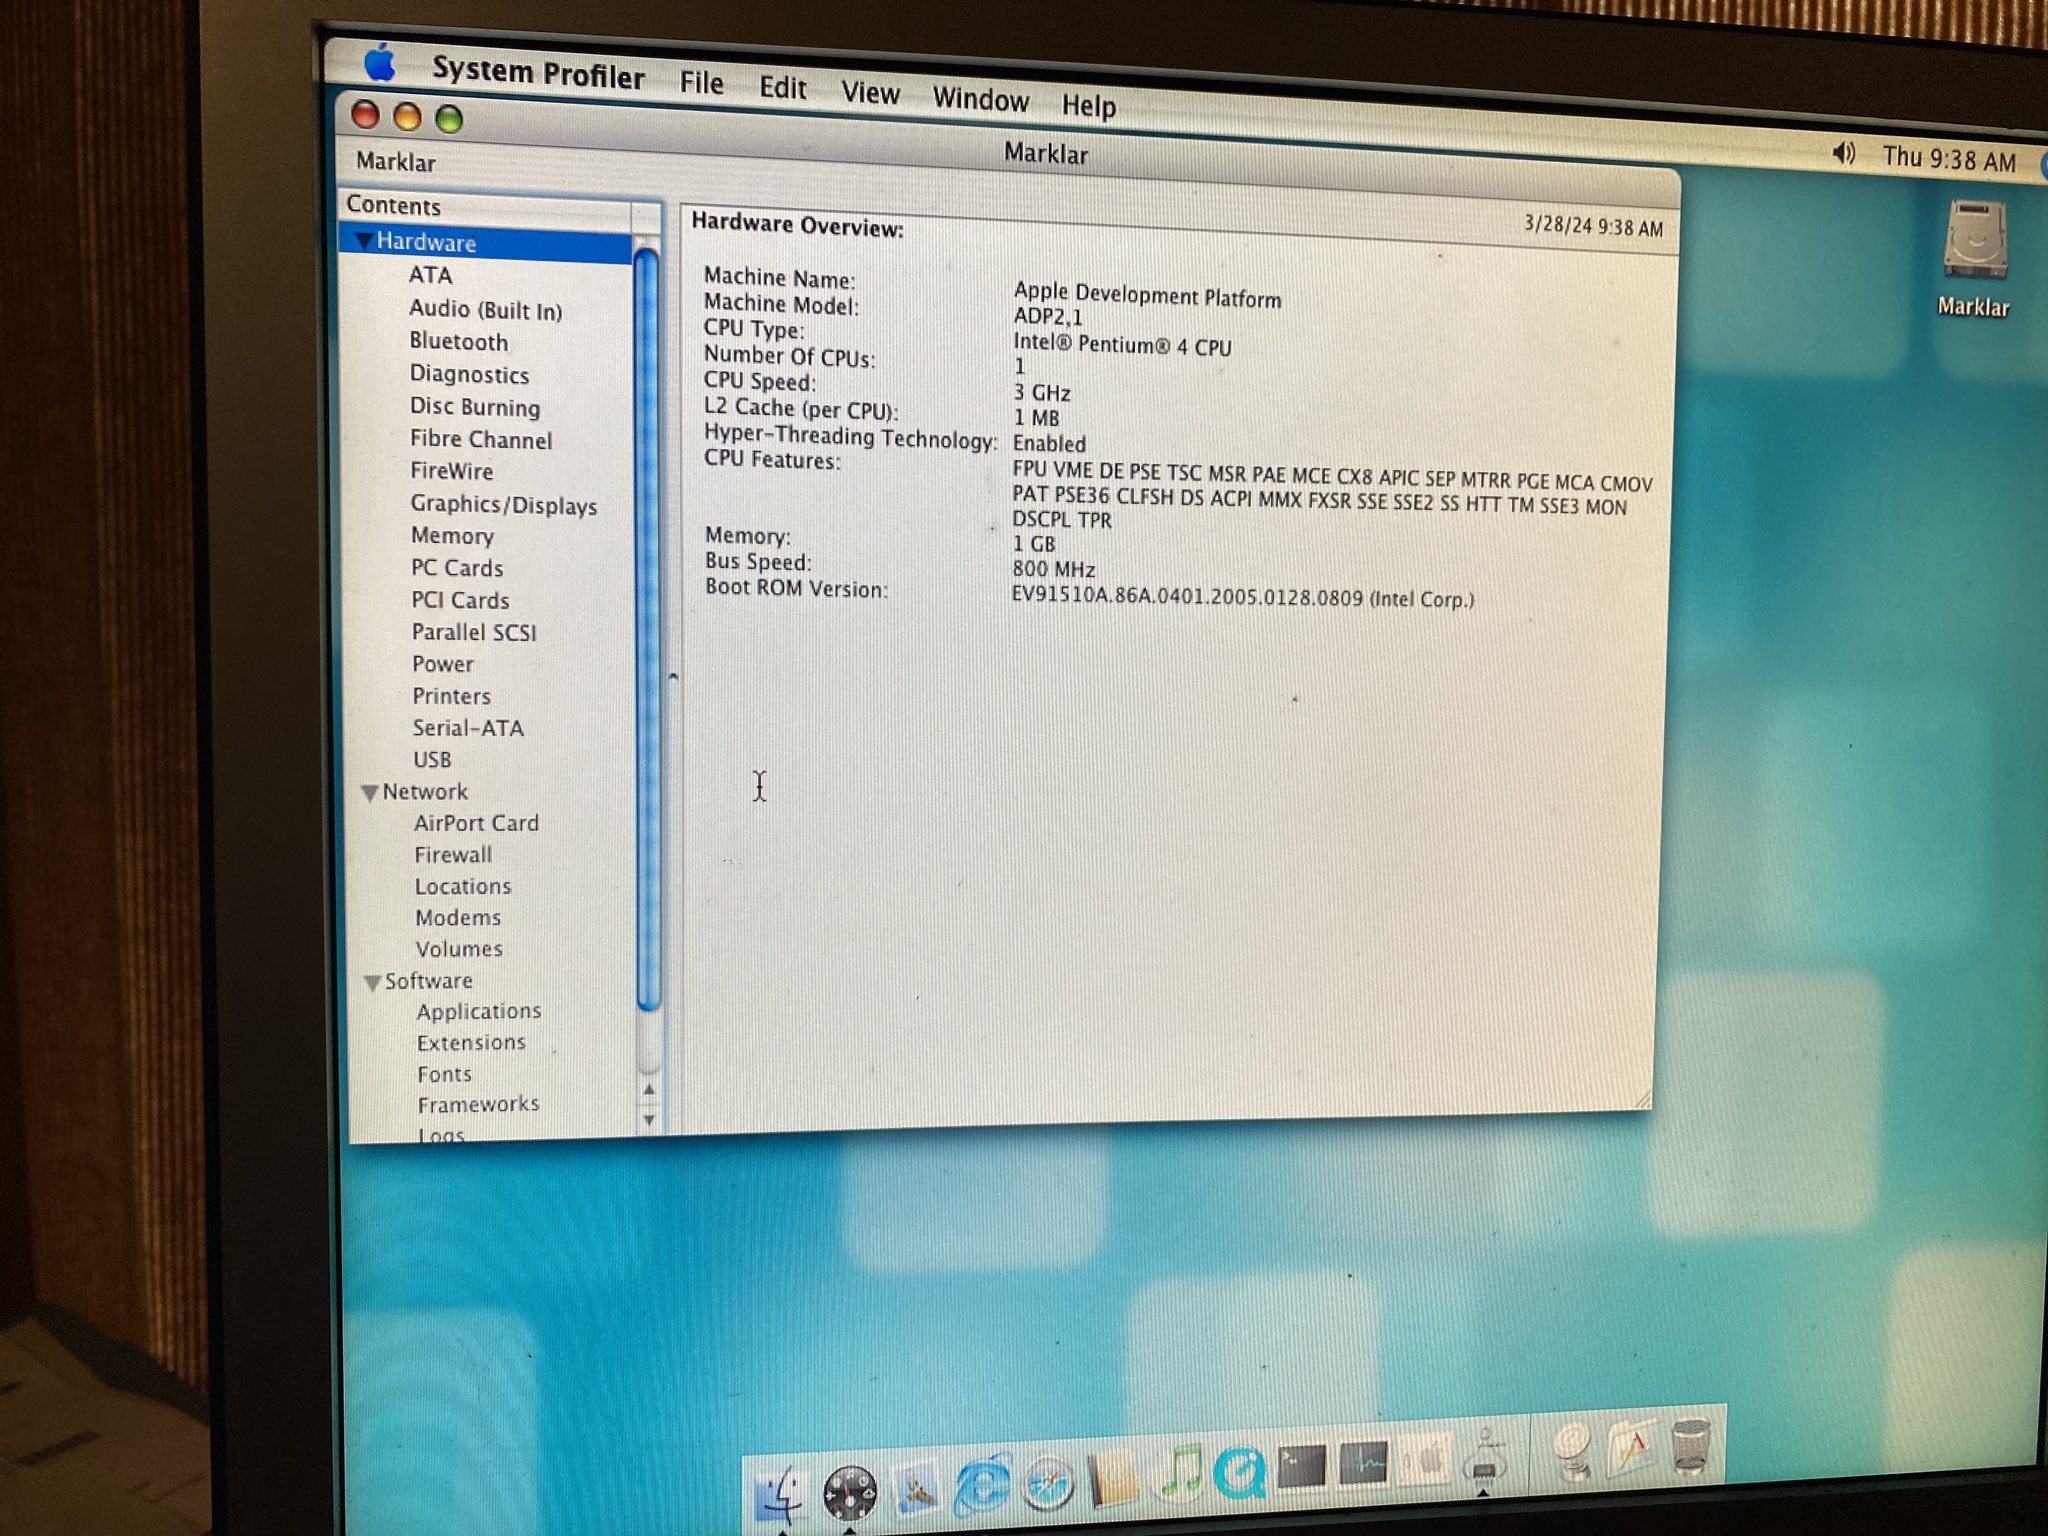
The star of the show, of course is that the entire OS X 10.4 Tiger demo was on the intel machine, and for a low price of being invited, belonging to the club & $999 USD you too could be part of the next big FOMO.

So as the big reveal went, not only was OS X on intel now a thing, it “secretly” was always a thing, and had always been the escape hatch from being locked in. And it’s no surprise, it saved NeXT as the i386 “white box” was the cheapest and fastest NeXT ever, just as further transitions to 64 bit then ARM64 would necessitate.

So how does one reasonably acquire one of these mythical beasts, 20 years after the fact? Well basically unless you are a cool kid in the know, you don’t.

however as mentioned in a few places the ATK was quickly out together with standard parts. And if this sounds like the genesis of the IBM 5150 PC, you’d be right! The star of the show is the late SSE3 enabled Pentium 4 processors and the Intel 915 chipset with onboard GMA 900 video.

Thankfully intel sold these parts to whomever basically wanted them, so they were sold on a bunch of partner boards, OEM, and even Intel fabricated boards. It may be my fault as typical board/processor/ram setups can be had for £5 in the UK, the magical 915 chipset has jumped these well north of £100. However, from my searching there are a few OEM systems with the needed chips, and that is the Dell Dimension 3100.

She’s ugly, but she works!

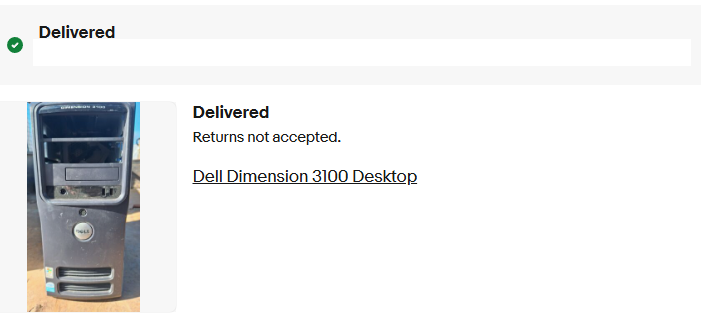
Now I know I got lucky as I got mine for £0.99 + £9 shipping! A huge shout out to my patreons for financing stuff like this! The unit was shown in pictures absolutely filthy, missing an optical drive and “untested”. We all know that it’s code for it was tested, it didn’t work, and it wasn’t worth their time to clean up and fix.

Opening the system up, revealed an ancient mechanical SATA disk, a bunch of dust bunnies, and empty memory sockets where the ram should go. Since I had purchased 7 other boards over the last 2 years (yes! Really! 7!!!), I have ample spare ram, gave it 2x512MB sticks, a new cr2032 CMOS battery, and the hard disk failed to spin or detect, but the machine powered up, did the POST test with no issues! I’ve got to say I was super happy so far! I have a £6 SSD I picked up from CeX, so I placed that into the machine, and now for the OS install.

My first choice was to create a Linux bootable USB stick and just copy the deadmoo image to the SSD. Of course, this came with the caveat that the disk is in the VMDK format which needed to convert using Qemu’s qemu-img utility to a raw disk image, then to compress it with gzip, as the Ubuntu install image seems to only understand gzip. I guess the next pro move is to see about a static standalone iSCSI target, or maybe even rsync? I think there is even Qemu network disk protocols by now, so it may be a way to get around the lack of optical media…? Anyways!

The deadmoo image can be decompressed and copied to the hard disk easily! It’s about 2gb compressed and 6GB uncompressed. A reboot, and we’re quickly and semi glitched in as Curtis to their desktop!

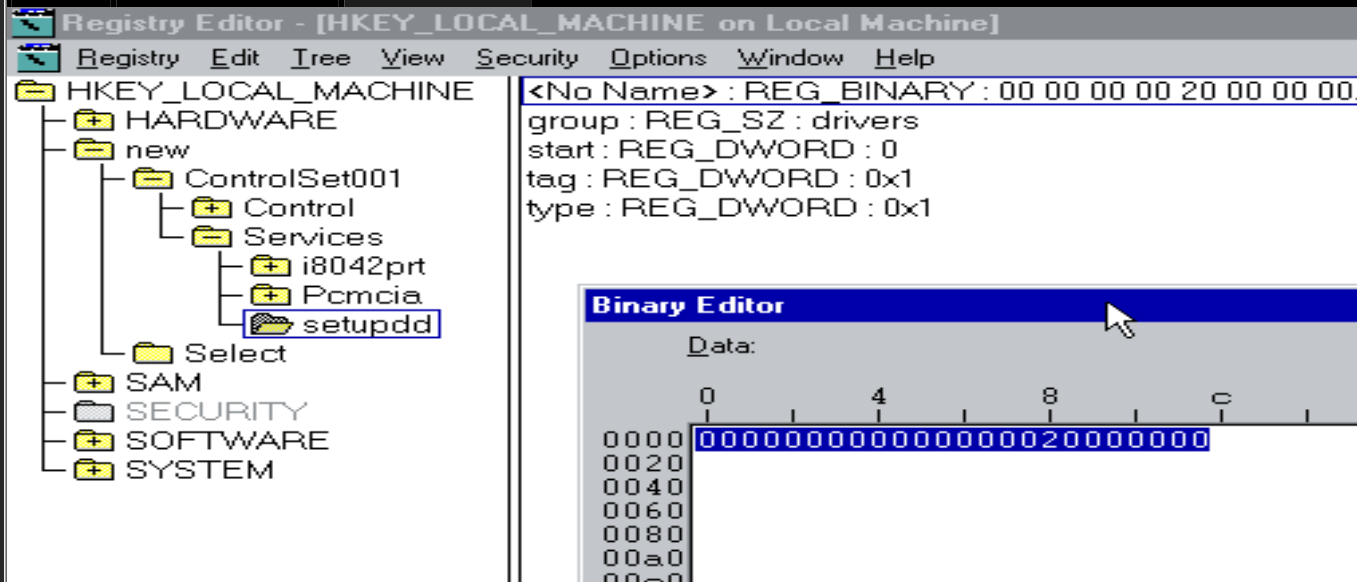
there is a pre-installed driver causing issues which drops us back to the fallback SVGA buffer, and I’m happy to report that the artificing you see under emulation is also present on physical hardware. Delete the TPM driver AppleTPMACPI.kext (the root password is ‘bovinity’), and reboot again. This time there won’t be any further glitches in the video, but there is another change to make, the core graphics needs to be replaced with the SSE3 variant so that after yet another reboot again Rosetta is fully working, giving us access to PowerPC applications (that don’t require Altivec! That wouldn’t arrive until 10.4.4 just in time for the public release!). This lets the screen savers run, and important applications like iTunes and Internet Explorer 5 for Max OS X.

As Steve had demo’d it’s pretty amazing at how much just works. You can really get an appreciation at just how truly portable C is, and how LIBC is the real cross platform winner is. The company behind Rosetta transitive, had a bright future ahead of them as you can’t get a better public endorsement that Steve Jobs at a WWDC! SGi had licensed them for Itanium IRIX, and if the other Unix vendors didn’t partner there was also a Linux path. Honestly, I’m surprised SUN didn’t buy them and do the same thing as Apple and jettison the SPARC, as they can sell a LOT more 1u servers, desktops and laptops than giant E10ks, but IBM equally scared and trapped on their AIX / UnixWare Itanium merge Monterey that sold like 5 units, instead bought the company and quickly disappeared the technology.

What a shame for the industry, but x86_64 still is an unstoppable force. Well at least until someone seriously challenges them.

Getting back to OS X, this is meant for developers, and the deadmoo image has X code installed, although I prefer to use the cli tools. This is a weird time in history as many things may support OS X, but they make really bad platform assumptions, and force endian directions breaking the given stance of all OS X is big endian – even though Intel Darwin has been around the entire time.

Ive had good luck with stuff that is much later than vintage 2005, as I’m lazy and it’s 2025. The fun stuff id built were:

  • SDL 1.15
  • DOSBox SVN
  • Qemu 0.10
  • Classic Cube
  • ssystem-1.6

I had thought that the performance using GCC 3 would be better than GCC 4 for Qemu, but after a lot of work I’d benched it with DooM v1.1 that V4 is faster.

Ssystem-1.6

Compatibility with OpenGL games is atrocious, but I’m pretty sure by the time 10.4.4 went public compatibility was better, although I doubt contemporary machines did all that well as there is a reason there was a rush to get intel versions out.

Building your own:

Intel 915G/915GV/910GL PCI Accelerated SVGA BIOS

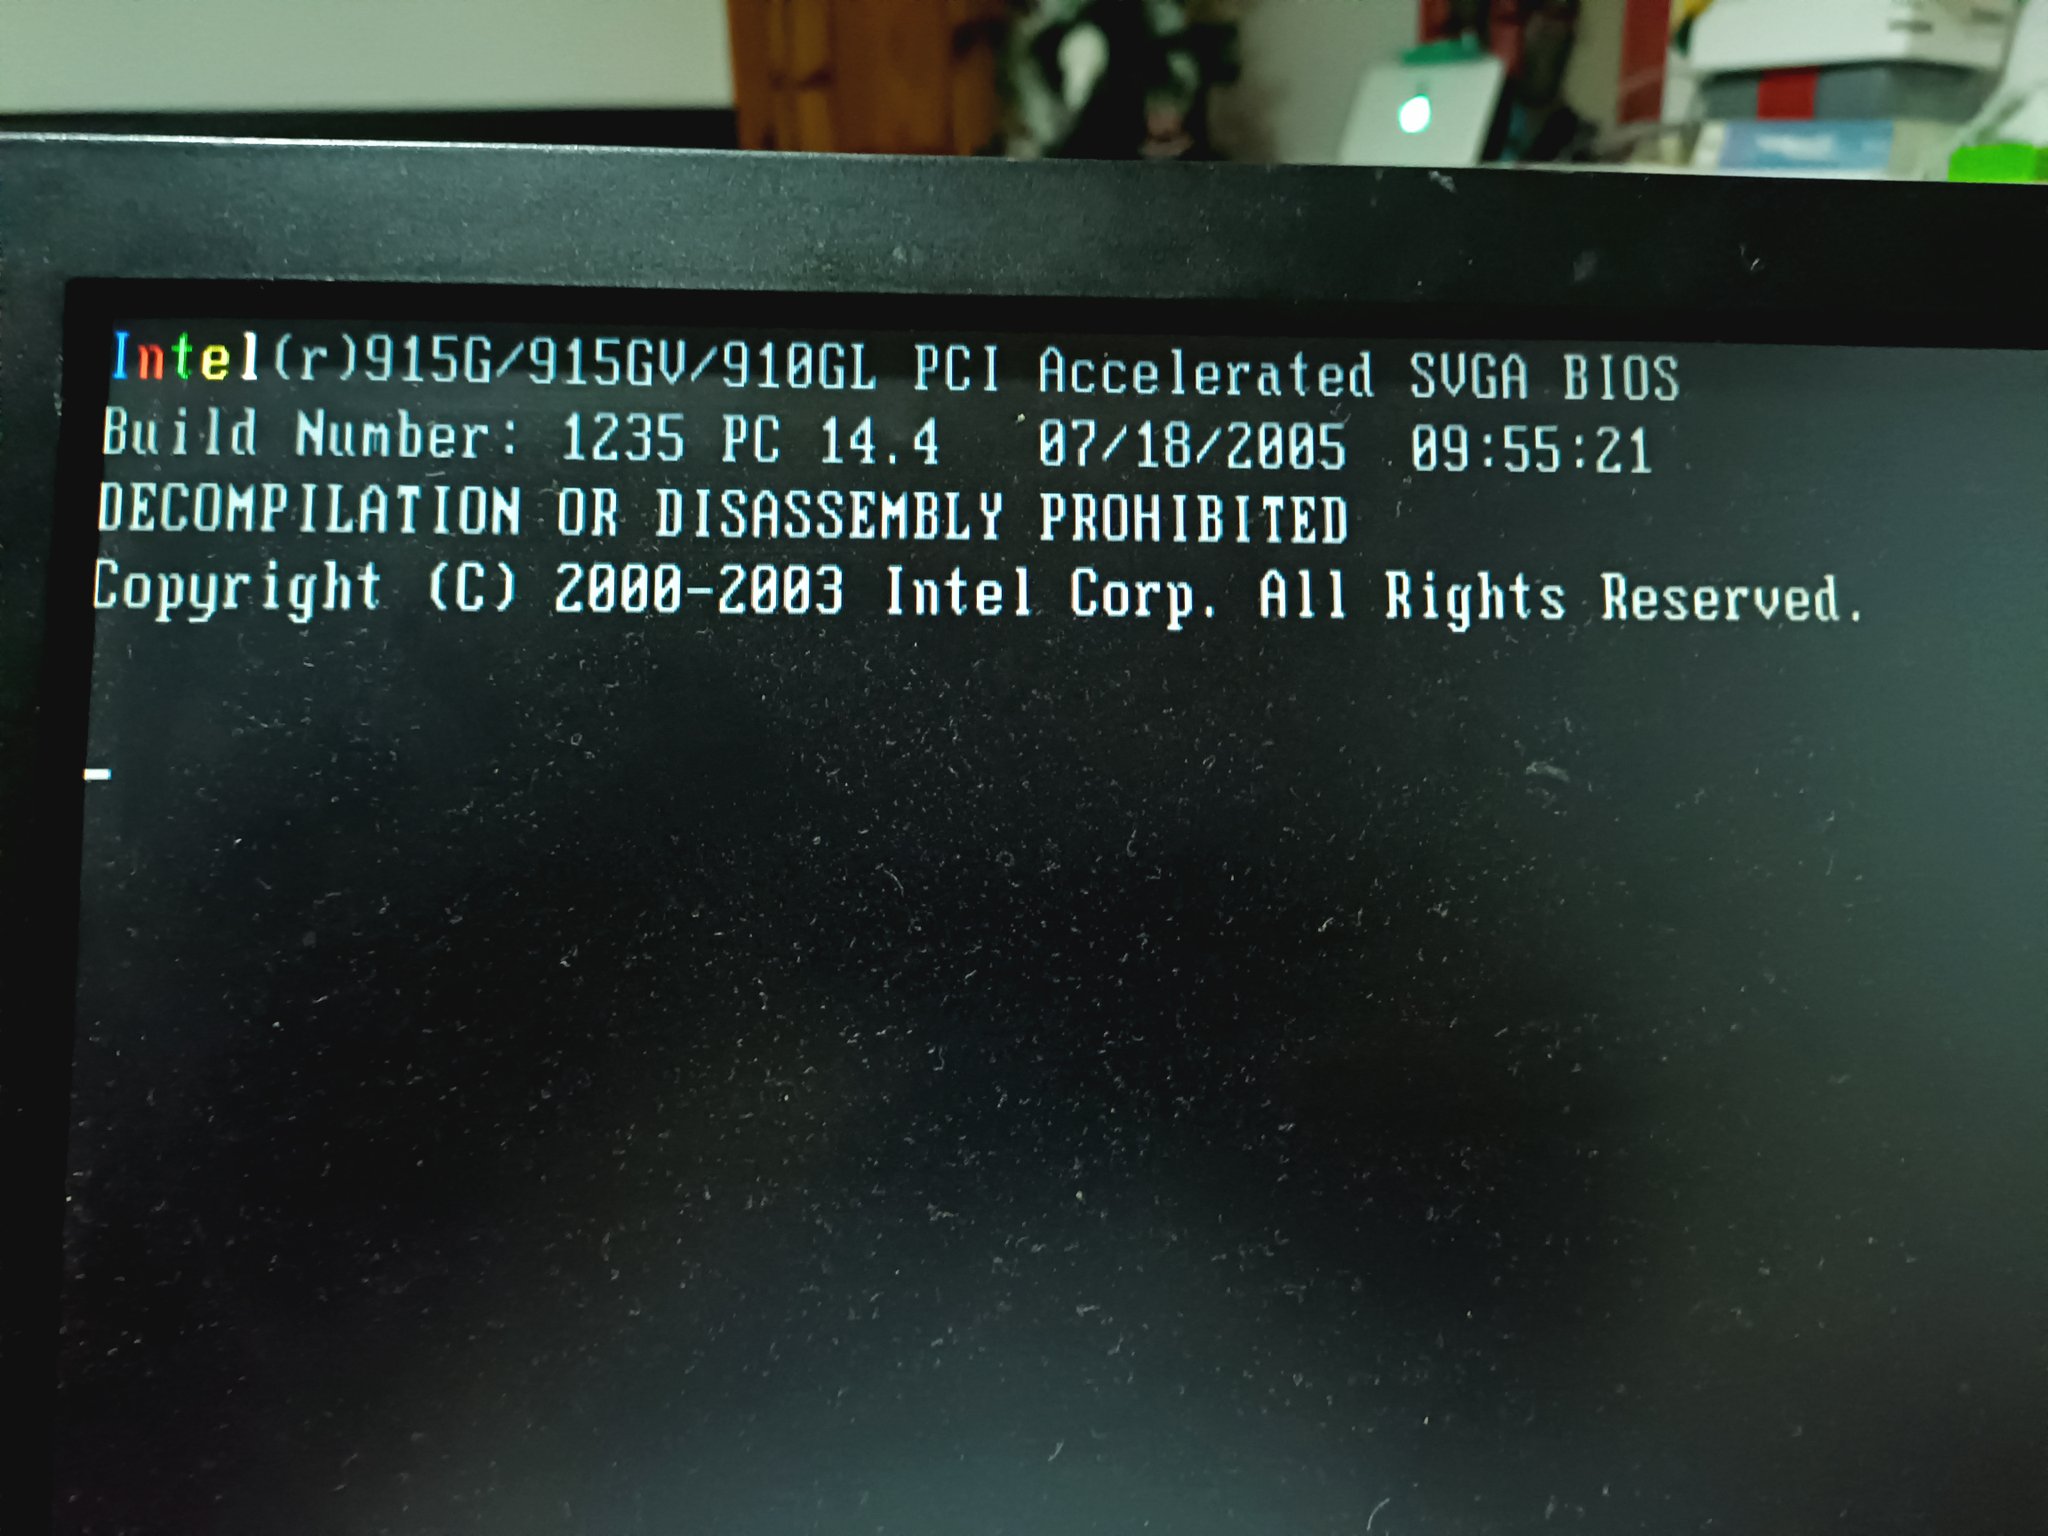
The primary ingredient here is a board with the Intel 910/915 Graphics chips, which limits us to the late Intel Pentium 4 boards, with that terrible integrated video. It’s not the best video chipset in the world, but the only one that 10.4.1 had 3d acceleration for.

Apple Development Platform ADP 2,1

I had found out that the Dell 3100 pre-built tower has the supported chipset & CPU, however it doesn’t have the correct onboard network card.

Intel Desktop Board D915PSY

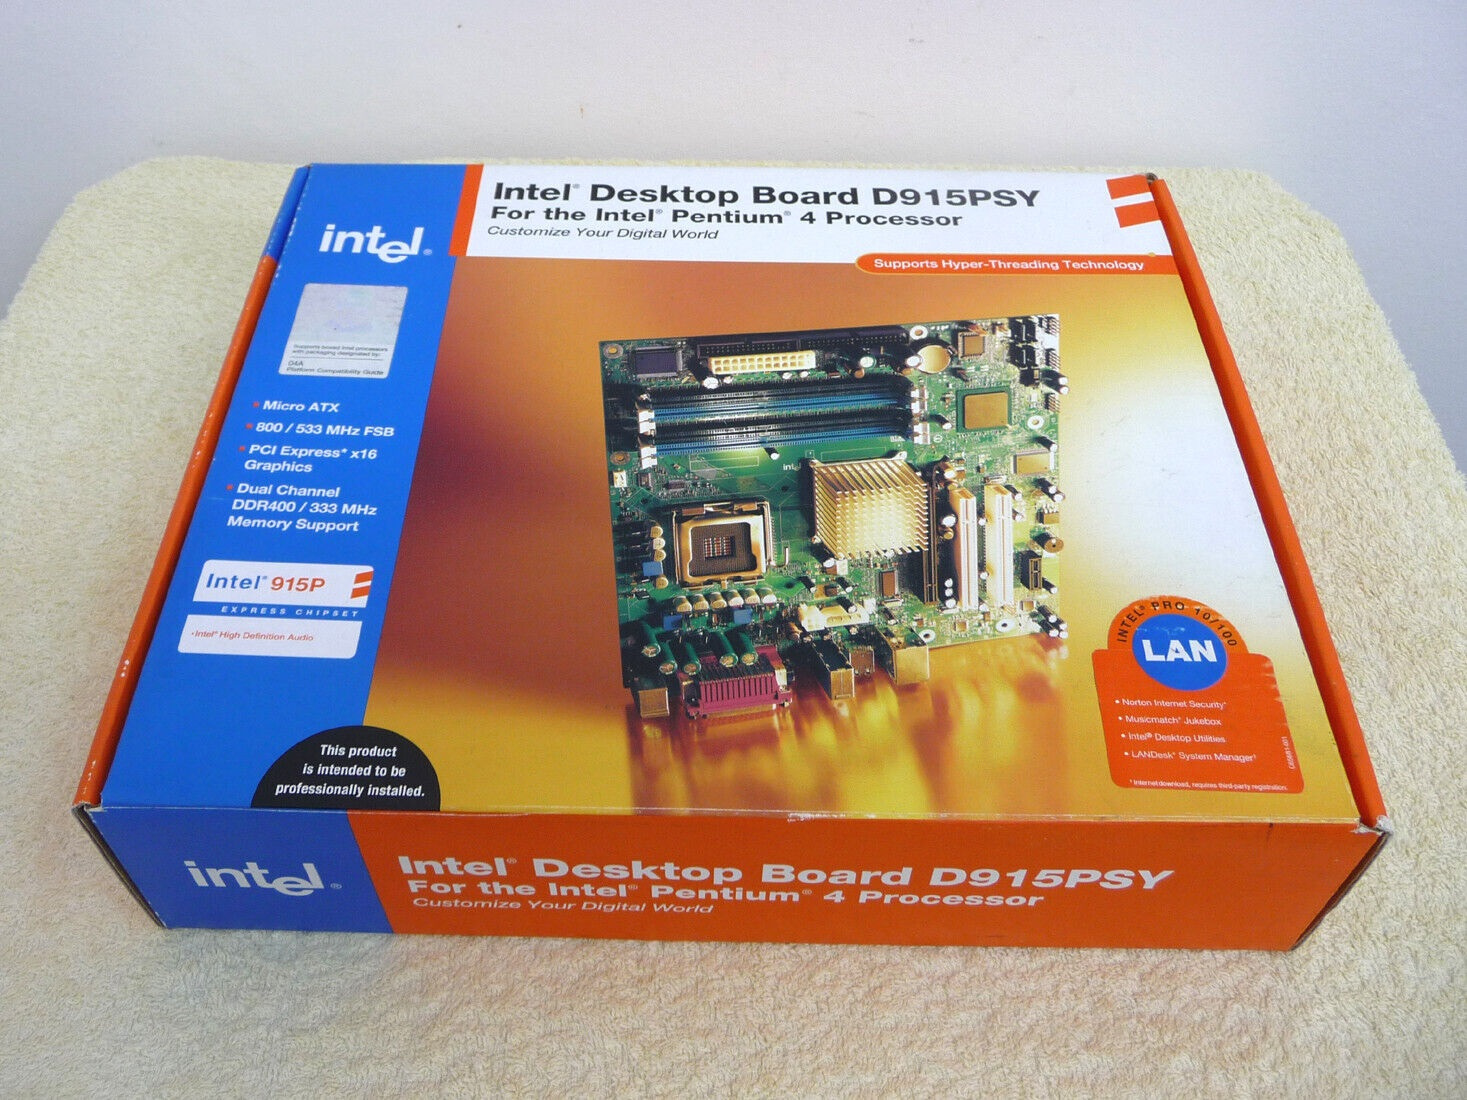
The Intel LAN boards of the era with the 915 moniker & Pentium 4 should be fine enough.

I don’t know why they are so expensive either.

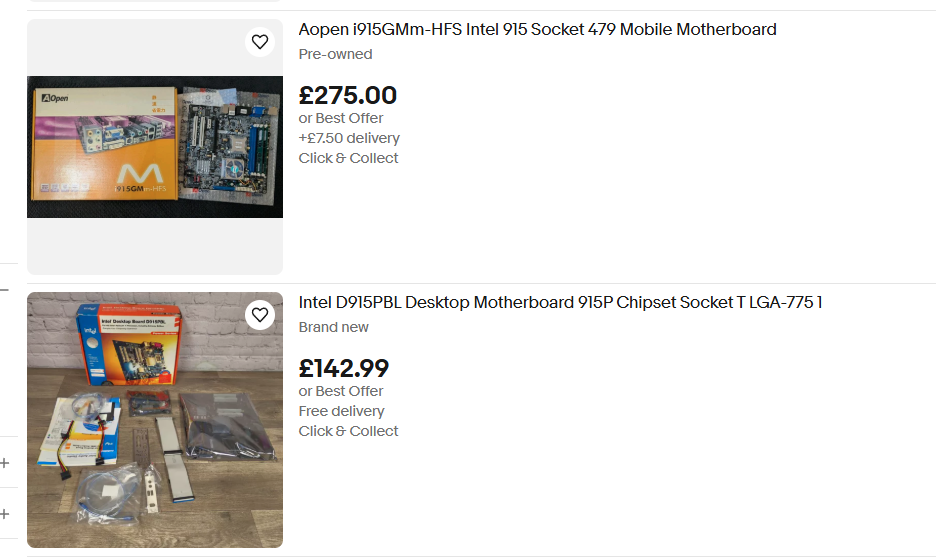
Although in the recent years these boards have gotten rather expensive. I can’t imagine why, as they absolutely suck for retro gaming as you’d 100% use a GPU, Other than 10.4.1 I can’t imagine why anyone would want a P4/915 combo.

While you could dd a deadmoo image onto 2 disks, then play partition games, it’s far easier to use the converted ISO with 10.4.1 to just boot up and install if that is an option.

If you don’t have a 910/915 based board, you can run this under emulation well enough. The weird graphical glitches you’ll experience are present on real hardware as well.

While not terribly useful, it is an interesting glimpse as at least x86 is available to the masses.

Hacking Windows NT 4.0 SMP for more than 2 CPUs

While trying to index a massive dataset, I found that the whole AltaVista process was kind of slow. And what better way to hope to speed it up, than to add some more processors. The catch is that the indexer only works on the Workstation SKU, and as such it’ll limit you to two processors. But what if one of those ‘one simple trick’ tricks actually can unlock all your cores?

From Rairii:

load the registry hive setupreg.hiv from i386 folder
in ControlSet001\Services\setupdd
default registry value
at offset 8, replace the value thats there (probably 00) with 20, ie decimal 32
then when reinstalling it should set up the registry to allow 32 cpus
ControlSet001-Services-setupdd

I didn’t want to bother trying to make a ‘correct’ NT 4 CD, so I just did the dos bootable disk image thing, and the old school “winnt /b” setup from within DOS on VMWare Workstation 17, and yeah behold!

NT 4.0 Workstation on VMware Workstation Pro 17

Although I should add that it’s not all sunshine and rainbows, it fails to boot about 50% of the time with a stop 0x00000078 PHASE0_EXCEPTION. I don’t know what is up with that, if it’s my AMD processor, something with VMware…

PHASE0_EXCEPTION

Sadly, for anyone wondering, it didn’t help my use case. The fundamental issue being that AltaVista tries to actually use filters to interpret the data, and Microsoft Word documents with the .txt extension, or anything with 90’s L337 ascii art just straight up trip up the indexer halting all progress.

ASCII ART BAD!!

Obviously, this is building up to something else, something I think is kind of exciting, but even as a ‘distraction’ adding more cores to NT 4.0 Workstation is always a good thing!

Expanding Windows drives

Granted this isn’t fun. But it’s virtual. We live in an era of exciting expandable disks!

first off start with a full disk. That’s great. In this case the host was proxmox. It doesn’t matter. You apparently have to shut down the VM to expand the disk. Other virtualizers don’t need that. But whatever.

now for the predictable fun. That recovery partition is in the way. Not sure why NTFS needs to be contiguous but here we are.

So now we are stuck. You Google how to expand NTFS drive, how to move recovery partition, how to make disk bigger!! All in vain as everyone is pushing these nifty partition mover programs that don’t run on server. Do you just nuke the partition and hope for the best?

No, we can back it up, delete it, expand our disk and recreate it!

Capture the partition

Dism /Capture-Image /ImageFile:C:\my-system-partition.wim /CaptureDir:S:\ /Name:"My system partition"
Microsoft DiskPart version 10.0.19041.3636

Copyright (C) Microsoft Corporation.
On computer: KOMPUTER

DISKPART> list disk

  Disk ###  Status         Size     Free     Dyn  Gpt
  --------  -------------  -------  -------  ---  ---
  Disk 0    Online          250 GB   200 GB

DISKPART> select disk 0

Disk 0 is now the selected disk.

DISKPART> list partition

  Partition ###  Type              Size     Offset
  -------------  ----------------  -------  -------
  Partition 1    Primary             50 MB  1024 KB
  Partition 2    Primary             49 GB    51 MB
  Partition 3    Recovery           522 MB    49 GB

DISKPART> select partition 3

Partition 3 is now the selected partition.

DISKPART> delete partition OVERRIDE

DiskPart successfully deleted the selected partition.

restore the partition

dism /Apply-Image /ImageFile:c:\my-system-partition.wim /Index:1 /ApplyDir:w:\

Then tag the partition back to being a Recovery partition.

DISKPART> list partition

  Partition ###  Type              Size     Offset
  -------------  ----------------  -------  -------
  Partition 1    Primary             50 MB  1024 KB
  Partition 2    Primary            249 GB    51 MB
  Partition 3    Primary            600 MB   249 GB

DISKPART> select partition 3

Partition 3 is now the selected partition.

DISKPART> set id=27

DiskPart successfully set the partition ID.

DISKPART> list partition

  Partition ###  Type              Size     Offset
  -------------  ----------------  -------  -------
  Partition 1    Primary             50 MB  1024 KB
  Partition 2    Primary            249 GB    51 MB
* Partition 3    Recovery           600 MB   249 GB

DISKPART>

depending on the version the command may fail setting type 27, so try:

set id="de94bba4-06d1-4d40-a16a-bfd50179d6ac" 

and there we go!

One big happy drive! 🎉

Qemu / GCC / Tiger aka assumptions on GCC v3 performance

Well this took a shocking turn;

I’d always seen on Windows that Qemu built with GCC 3.4.5 was not only faster, but more stable than GCC 4.x when regarding version 0.10 (I’m not even going to entertain later versions, as this is about old software).

I’ll have to post more, but I’ve basically learned nothing from all my other Pentium 4 / i915 chipset disasters, and now have my 8th system up and running!

by default it has GCC 4.0.0 for i386, and a GCC 3.x for PowerPC building. Natrually, with assumption in hand, how do you build GCC 3 for Intel?

Thankfully, the question was asked on Mac OS X Hints a few decades ago:

https://web.archive.org/web/20070610073818/http://www.macosxhints.com/article.php?story=20060423105014540

And it was saved in the wayback machine, because, preserving the past is hard.

The steps are pretty simple:

$ tar -zxf gcc_os-1819.tar.gz

3. Fix a line that causes it to not compile: in the file gcc_os-1819/gcc/gcc.c, on line 5883, change the line to look like this:

(char ) v[q - vt] = 0;

4. Make a build directory and run configure. I installed my compiler in /opt/gcc3, and I only built the C compiler. This would not work for building C++ or Cocoa applications.
$ mkdir build
$ cd build
$ ../gcc_os-1819/configure --prefix=/opt/gcc3 --enable-languages=c

Which was great except where on earth am I going to find this old GCC?

In retrospect there are 2 places, naturally, archive.org kept a copy of the Apple pages, the other being github.

For the 2-3 people who will be interested in this kind of thing 20 years from now I went ahead and did the single patch, and built binaries and put them on github over at gcc_os-1819_Marklar.

For testing, I’m using a VMDK with MS-DOS 5.00 no config.sys and DooM v1.1 running the timedemo both with no sound. (gametics/realtics)*35=fps. and in this case, demo1 of DooM v1.1 is 1077 gameticks.

GCC 3.5     gcc version 3.5.0 20041003 (Apple Computer, Inc. build 3506)
GCC 4.0     gcc version 4.0.0 (Apple Computer, Inc. build 5026)

no draw (ticks)

GCC 3.5       6/7/7
GCC 4.0       6/7/6

draw-16bit screen depth (ticks)

GCC 3.5       1074/1074/1077
GCC 4.0       948/947/949

And now for the bad news, it turns out that GCC 4.0 is just slightly faster than GCC 3.3

I couldn’t believe it either.

For anyone that cares, DOSbox SVN builds more or less okay on Tiger with some small fix to the MIDI compatibility code (#ifdef stuff, the MIDI works fine!) and it’s timings are for no draw

DOSBox          566/560/565

and drawing on a 32bit screen (16bit is incompatible)

DOSBox          22/26/25

The takeaway is that the CPU is much faster on Qemu, but screen rendering is much faster with DOSBox. DOSBox uses SDL, so let’s go one further, and rebuild Qemu with SDL instead of it’s Cocoa support! So how we doing in the tick department?

GCC 3.5       1005/999/1000
GCC 4.0       885/886/882

The real killer would of course be trying a newer version of GCC. Which I tried several, but Apple had done something really strange to them, where they product self-modifying code by default. And the assembler in 10.4.1 can’t handle that.

unknown section attribute: self_modifying_code

No really, it’s a thing!

Obviously, I updated my cc-tools to 622.9, and guess what?

I tried :

  • gcc-5247
  • gcc-5250
  • gcc-5370

All give the following:

Illegal instruction

Is this some DTK Pentium 4 thing? Or a Tiger 10.4.1 thing?

verbose output for the curious:

Viglen:~/tmp2 jsteve$ gcc -v hi.c -o hi
Using built-in specs.
Target: i686-apple-darwin8.1.0
Configured with: ../gcc-5247/configure --prefix=/opt/gcc-5247 --enable-languages=c
Thread model: posix
gcc version 4.0.1 (Apple Computer, Inc. build 5247)
 /opt/gcc-5247/libexec/gcc/i686-apple-darwin8.1.0/4.0.1/cc1 -quiet -v -D__DYNAMIC__ hi.c -fPIC -quiet -dumpbase hi.c -auxbase hi -version -o /var/tmp//ccq5CJ5D.s
ignoring nonexistent directory "/opt/gcc-5247/lib/gcc/i686-apple-darwin8.1.0/4.0.1/../../../../i686-apple-darwin8.1.0/include"
#include "..." search starts here:
#include <...> search starts here:
 /usr/local/include
 /opt/gcc-5247/include
 /opt/gcc-5247/lib/gcc/i686-apple-darwin8.1.0/4.0.1/include
 /usr/include
 /System/Library/Frameworks
 /Library/Frameworks
End of search list.
GNU C version 4.0.1 (Apple Computer, Inc. build 5247) (i686-apple-darwin8.1.0)
        compiled by GNU C version 4.0.0 (Apple Computer, Inc. build 5026).
GGC heuristics: --param ggc-min-expand=100 --param ggc-min-heapsize=131072
Compiler executable checksum: 8944321fb1b2a413196eb995bbfd7ab0
hi.c: In function 'main':
hi.c:3: warning: return type of 'main' is not 'int'
 as -arch i386 -force_cpusubtype_ALL -o /var/tmp//ccFyDIlr.o /var/tmp//ccq5CJ5D.s
 /opt/gcc-5247/libexec/gcc/i686-apple-darwin8.1.0/4.0.1/collect2 -dynamic -arch i386 -weak_reference_mismatches non-weak -o hi -lcrt1.o /opt/gcc-5247/lib/gcc/i686-apple-darwin8.1.0/4.0.1/crt2.o -L/opt/gcc-5247/lib/gcc/i686-apple-darwin8.1.0/4.0.1 -L/opt/gcc-5247/lib/gcc/i686-apple-darwin8.1.0/4.0.1/../../.. /var/tmp//ccFyDIlr.o -lgcc -lSystem
Viglen:~/tmp2 jsteve$ ./hi
Illegal instruction

I’m not entirely sure.

I need a Snow Leopard machine.

Also DosBox SVN wasn’t too hard to build, and runs great.

Happy 2025!

With large language models being all the rage, I found this tweet (x?) on twitter (x?), from Alex Cheema, discussing Andrej Karpathy’s port of a LLM, to C llma2.c, and then converting it to build with Borland C v5 as llma98.c .

Well naturally I had to take that source code, and make it more C89 happy!

I found this magical sed recipe over on stack overflow:

  sed -e 'sX// *\(.*[^ ]\) *$X/*  */X' < oldfile > newfile 

Thanks Preston Crow!

llamma 89 on OS/2 6.78

So, with some really minor hacking, and my port of GCC 1.40 to OS/2, I was shockingly up and running in no time! I should add again that I do kind of enjoy the much older GCC since it was capable of being built with ‘vendor’ tools, in this case the December 1991 Windows NT pre-release C compiler.

I didn’t bother ‘fixing’ the timing code, as honestly it doesn’t matter, running this on my PS/2 Model 60 with the SLC50 upgrade card is incredibly slow.

Seriously, this is me running the llama for 3 hours!

At best it’s about a word every two minutes, getting this far was over 3 hours of runtime.

I have a feeling much like MP3, where the ideas are significantly older than when they found mainstream success, there is a lesson here to the impatient ones, that just because something doesn’t work today, or seem incredibly unwieldy, it doesn’t mean decades later it’ll be incredibly popular.

For anyone wondering, I also built one that uses the TNT extender, and it seems to require 4MB of RAM. Absolute beast of a 32bit machine for 1987, but here we are.

So yeah, Happy 2025!