Revisiting a UnixWare 7.1.1 install on Qemu/KVM

So after nearly 8 years ago from messing around with UnixWare, I wanted to confirm something from a SYSV Unix that has a C compiler that isn’t GCC, and I remembered I have UnixWare 7.1.1 from a long time ago.  Anyways I have long since lost the virtual machine I had installed onto, but I still have media and of course the more important licenses.

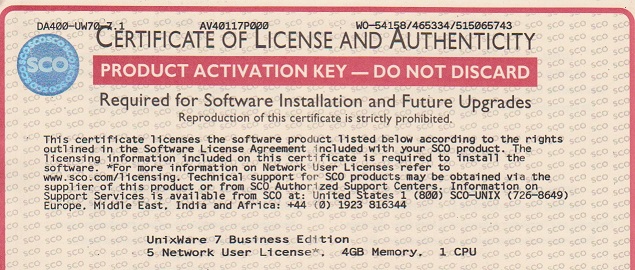
unixware certificate of license and authenticity

UnixWare licenses. the dread of fixing things 20+ years later

Yep it’s the real thing.  So with my certs in hand I do an initial install in Qemu and on reboot the system basically has bricked itself.

WARNING: System is in an unreliable state.

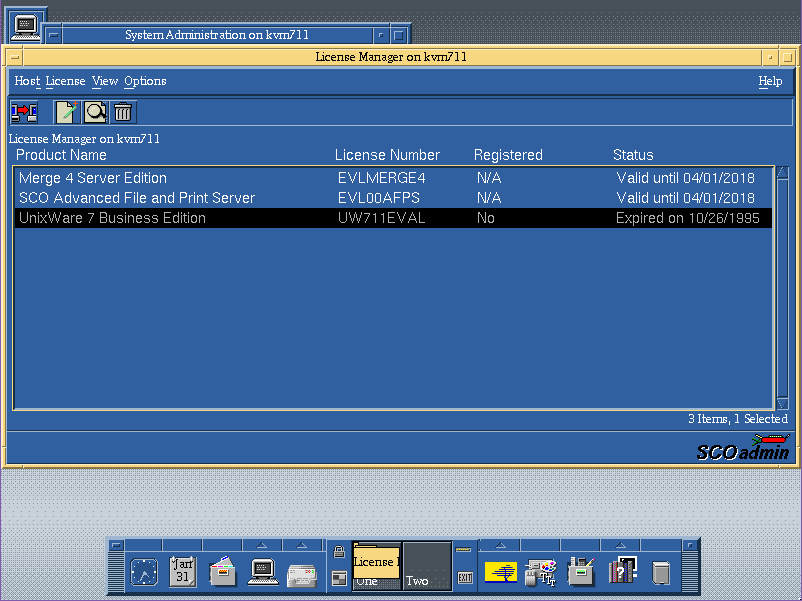
And then looking at the licenses it turns out that my license has expired.  What?

Somehow I got lucky before, but it turns out that the installation process for ancient UnixWare is NOT Y2K compliant!  And this actually turned out to be a known issue.  I can’t find the original article, but a mirror is here: ischo.net

So basically install using an eval license, which will of course expire on install, and then use your actual license after the installation, remove the eval, reboot and all will be well.

License Number: UW711EVAL
License Code: airhorpx
License Data: d60;m7hjbtt

Now isn’t that great.

The OS install license immediately expires.

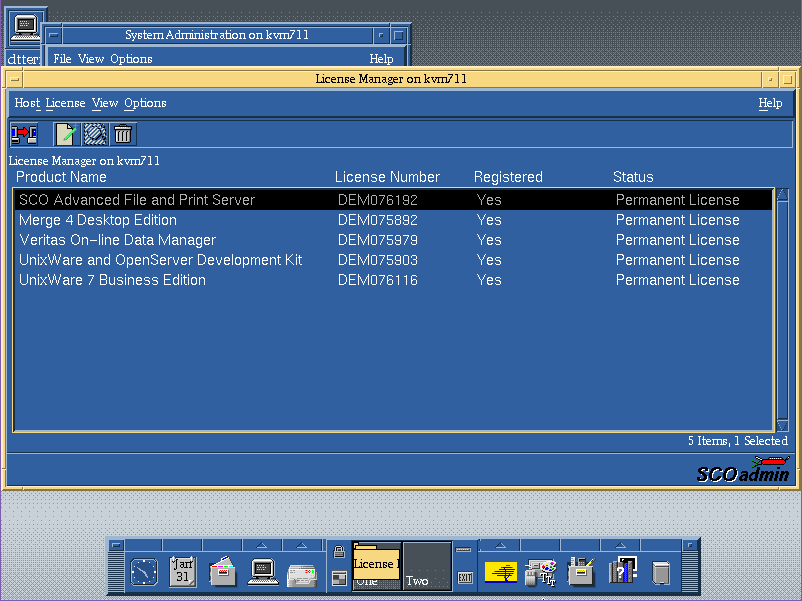
Although you can’t boot up in any real useful state, the networking will kick people off, and it’ll constantly complain that you are in license violation, you can at least bring up the SCO Admin tool, and add in your actual licenses, and then delete the evals.

And now we’re good!

Ok, now for the real fun part, flags and how to run with kvm/qemu.  Since I was loading this onto a server for remote access something like this works fine for me as I’m using the VNC remote console.

qemu-system-x86_64 -enable-kvm -m 1024 -smp 4 -hda UnixWare.vmdk -cpu pentium -net none -monitor telnet::444,server,nowait -curses -vnc 10.12.0.1:11 -cdrom iso/SCO_UnixWare711.iso

So the key things are to restrict the CPU level, and I’ve deferred the network configuration so I can update network drivers, and the OS.  I’ve found that by doing the networking during the install resulted in an OS that crashed with an integer divide by zero after installing the fixpack 5.

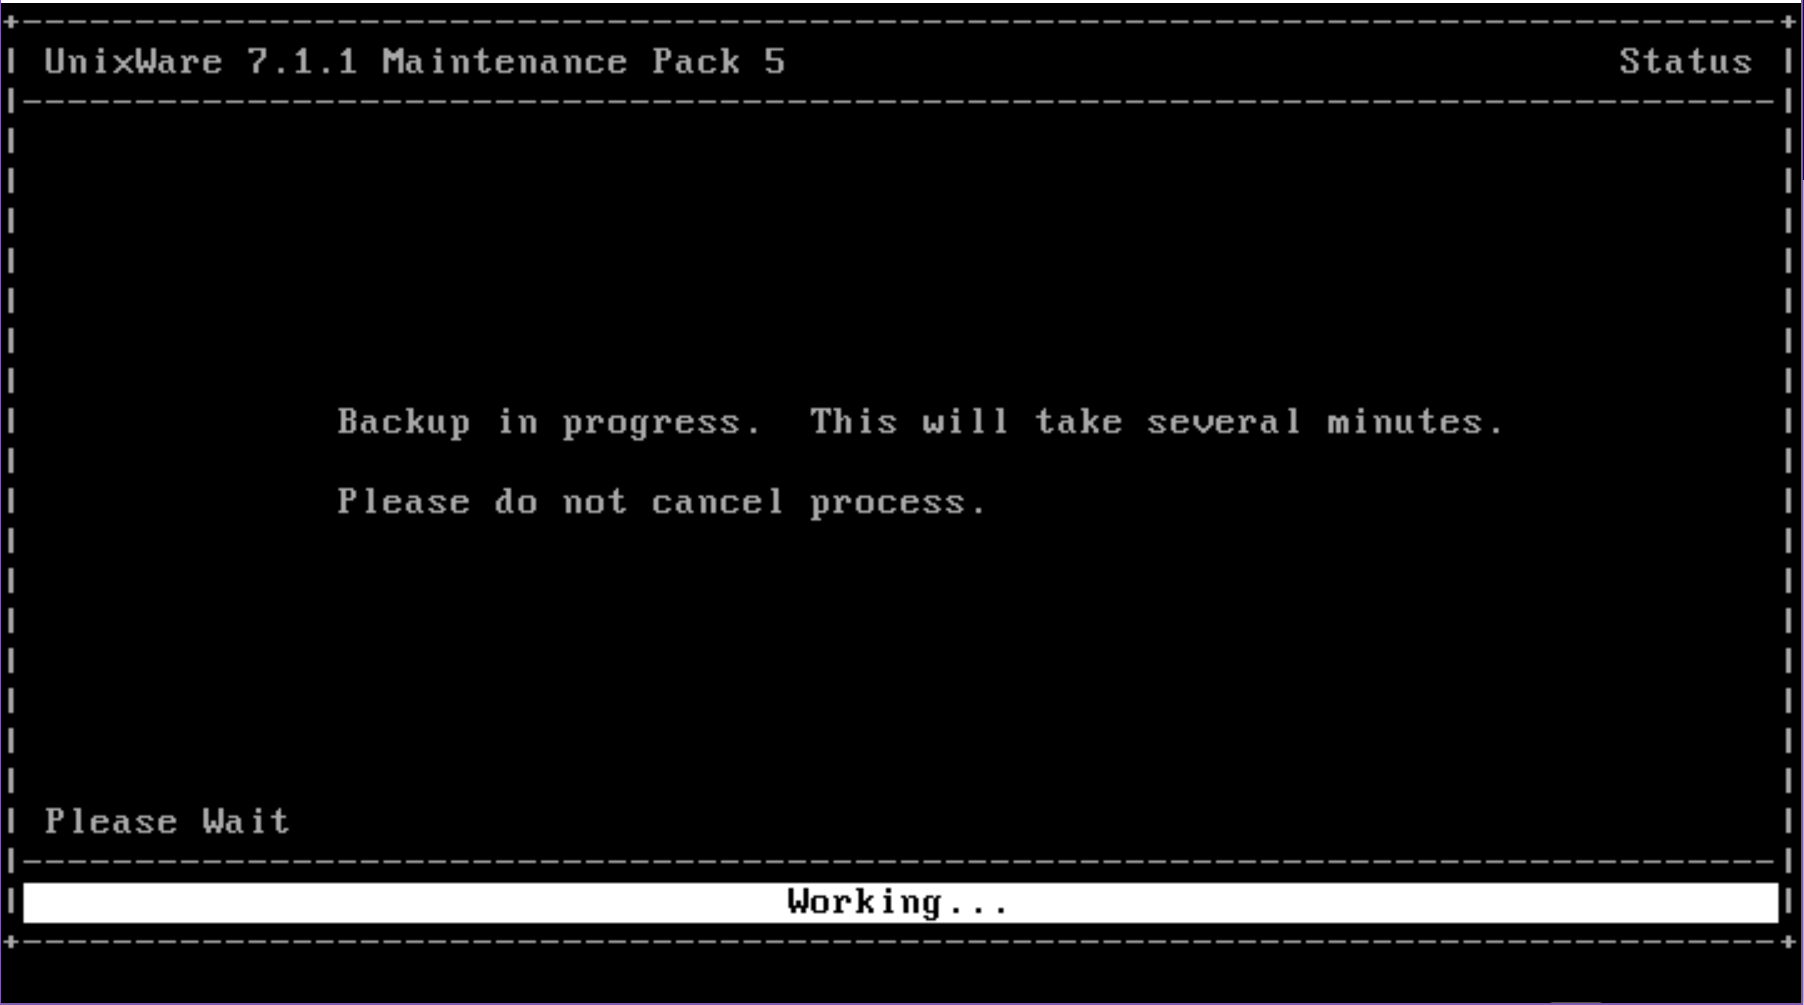
Once you have UnixWare 7.1.1 installed, be sure to install Maintenance Pack 5, which is thankfully still online over at sco.com  I’d also recommend to do this in single user mode, you can enter single user mode by hitting a key during the boot logo and typing in:

INITSTATE=S
boot

And you’ll boot in single user mode, and can install the Maintenance pack with ease.  Until the maintenance pack is installed, expect poor stability, and the system won’t actually listen to the real time clock device, and it’ll accelerate the clock like crazy where I was passing an hour every minute or two.

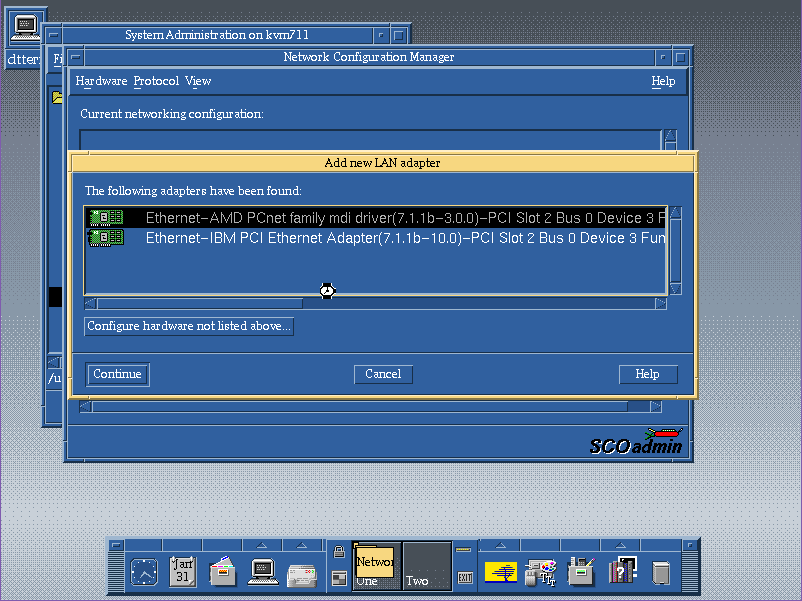
Adding the AMD PCnet on UnixWare

Once the install and update is done, I just added a PCI network card (So older versions of Qemu work well with the ne2k_isa, but newer work much better with the AMD PCNet card.), which is a popular choice for both machines and VM’s of the era.  Although you can use SLiRP the built in NAT for Qemu/KVM alternatively you can also use tun/tap.  I tried to enable SMP, however it has issues binding to the other processors, although it does see them.  And this is better to give full access to the network stack for fun things like FTP, NFS and whatnot.

qemu-system-x86_64 -enable-kvm -m 1024 -smp 4 -hda UnixWare.vmdk -cpu pentium -monitor telnet::444,server,nowait -curses -vnc 10.12.0.1:11 -device pcnet,netdev=net0 -netdev tap,id=net0,ifname=tap10,script=/etc/qemu-ifup

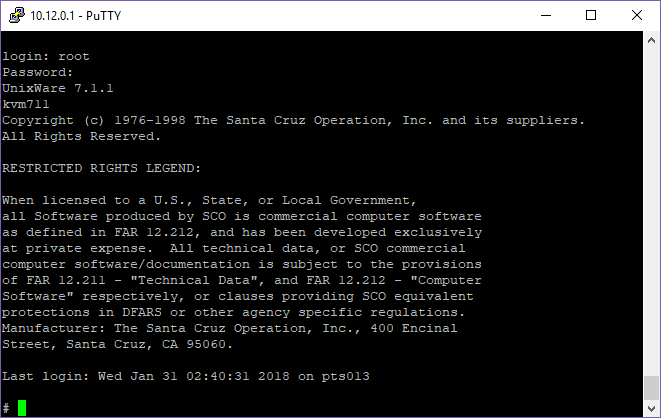
Telnet access

And just like that I can now access the VM.

And for fun…

# uname -a
UnixWare kvm711 5 7.1.1 i386 x86at SCO UNIX_SVR5
# uname -f
architecture=IA32
bus_types=PCI2.10,ISA,PnP1.0
hostname=kvm711.joes.local
hw_provider=Generic AT
hw_serial=DEM076116
kernel_stamp=04/11/11
machine=Pentium
num_cg=1
num_cpu=1
os_base=UNIX_SVR5
os_provider=SCO
release=5
srpc_domain=
sysname=UnixWare
user_limit=5
version=7.1.1

Oh yeah so I don’t forget years from now I’m using the following OS & Qemu version:

# qemu-system-x86_64 -version
QEMU emulator version 2.8.1(Debian 1:2.8+dfsg-6+deb9u3)

# cat /etc/issue
Debian GNU/Linux 9 \n \l

Also I found an eval serial for SMP, but it doesn’t recognize the second processor after the boot.

# psrinfo -v
Status of processor 0 as of 01/31/18 16:40:07
Processor has been on-line since 01/31/18 16:13:57.
The Pentium processor has a i387 floating point processor.
The following conditions exist:
Device drivers are bound to this processor.

I’ll try apparently this as for some reason it doesn’t detect the MP in Qemu/KVM so it never installed the osmp driver.

pkgadd -d cdrom1 osmp

Add the following line to the file /stand/boot:
ACPI=Y

Date and Time on UNIX V7

(This is a guest post by xorhash.)

Introduction

I’ve recently defeated one of my bigger inconveniences, broken DEL as backspace on the UNIX®† operating system, Seventh Edition (commonly known as UNIX V7 or just V7). However, I’ve had another pet peeve for a while: How much manual labor is involved in booting the system. Reader DOS found out that SIMH recently added support for SEND/EXPECT pairs to react to output from the simulator. Think of them like UUCP chat scripts, effectively. This can be used to automate the bootup procedure.

Yet DOS’s script skips over a part of the bootup procedure that can be fully automated with some additional tooling. Namely, setting the date/time to the current time as defined by the host system. As per boot(8), the operator is meant to set the date/time every time the system is brought up. This should be possible to automate, right?

Setting the Date Automatically

date(1) itself does not support setting years past 2000, so we need custom code in any case. SIMH, fortunately, also provides a way to get the current timestamp in the form of %UTIME%, which is interpreted in any argument to any command. I’ve thus written a utility called tsdate that takes a timestamp as argument and sets the current time to be that timestamp. I put the executable in /etc/tsdate, but there’s really no reason to do so other than not wanting to accidentally call it. Once tsdate is in place, changing DOS’s script slightly will already do the trick:

expect "\n\r# " send "/etc/tsdate %UTIME%\r\004"; c

This approach already has a minor amount of time drift ab initio, namely the difference between the actual time on the host system and the UNIX timestamp. In the worst case, this may be very close to 1. If for some reason you need higher accuracy than this, you’ll probably have a fairly hard time. I could imagine some kind of NTP-over-serial, but you’d need support for chat scripts to get past the authentication due to getty(8) spawning login(1).

The system is not suitable for usage past the year 2038. However, you can at least push it back until around 2100 by changing the internal representation of time to be an unsigned long instead of simply a long. time_t was not used systematically. Instead, everything assumed long as the type for times. This assumption is in a lot of places in userspace and even the man pages use long instead of time_t.

If you overflow tsdate’s timestamp, you’ll just get whatever happens when atol(3) overflows. There’s nothing in the standard library for parsing strings into unsigned long and the year 2038 is far enough away that I didn’t want to bother. stime(2) would presumably also need to be adjusted.

Year 2000 Compatibility in the System

V7 is surprisingly good at handling years past 2000. Most utilities can print years up to and including 2099 properly. Macros for nroff(1)/troff(1), however, are blissfully unaware that years past 1999 may exist. This causes man pages to be supposedly printed in the year 19118. The root cause for this is that the number register yr only holds the current year minus 1900. Patches to the -ms and -man macros are required. Similarly, refer(1) only considers years until 2000 to be actual years, though I did not bother patching that since it should only affect keyword matching.

Leap year handling is broken in two different places due to wrong leap year handling: at(1) and the undocumented dysize() function, used by date(1) as well as inside /usr/src/libc/gen/ctime.c for various purposes. This affects the standard library, so recompiling the entire userland is recommended. Because the calculation is just a naïve division by four, it actually works on the year 2000 itself. A year is a leap year, i.e. has February 29, if a year is:

  1. a multiple of 4, and
    1. not a multiple of 100, or
    2. a multiple of 400.

Leap seconds are also not accounted for, but that comes to nobody’s surprise. Leap seconds just add a second 60 to the usual 00-59, so they don’t hurt doing date calculations on timestamps unless precisely on a leap second. For my purposes, they can be ignored.

Note that I haven’t gone through the system with a fine-toothed comb. There can always be more subtle time/date issues remaining in the system. For my purposes, this works well enough. If other things crop up, you’re welcome to put them in the comments for future generations.

The Good Stuff

There’s really not much to it. Applying diff and recompilation of the affected parts is left as an exercise for the reader.

Files:

  1. tsdate.c
  2. tsdate.1m
  3. y2kpatches.diff

† UNIX is a trademark of The Open Group.

Updated my DooM port


x68000 still won’t build on this, lots more to either separate out or just fork out.  No biggie.

The big plus is for GCC 2.x and higher that use DJGPP v2 runtimes is that the allegro music and sound work.  It tests faster than Watcom 10/11 or Open Watcom ..  probably DMX vs Allegro I suspect …

Things to do..

  • Upload my GCC 2.7.2.1 cross toolchain
  • Upload the Freedoom build chain (again)
  • Test on real machines, the 486 and the P3

So yeah.  Limited progress.

Also it’s nice being able to cross build Allegro 3.12 in 10-15 seconds vs the hour+++ in emulation.

Project is in the djgppv1 cross thing

https://sourceforge.net/p/crossdjgppv1/DooM/ci/master/tree/

git access to clone

git clone git://git.code.sf.net/p/crossdjgppv1/DooM crossdjgppv1-DooM

make with:

make -f makefile.djgpp_v2

and you should be good to go

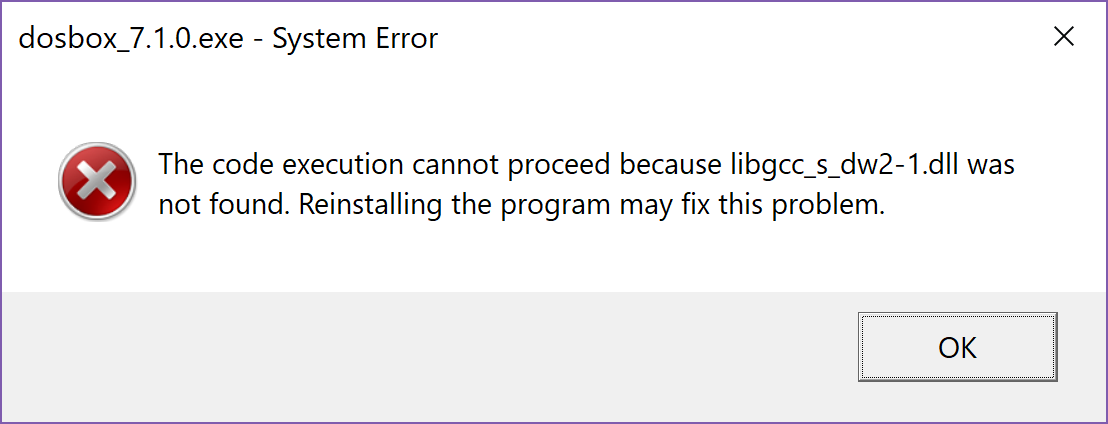
MinGW and missing DLL’s

UGH

Stuff like this drives me crazy.  Once upon a time everything was statically linked, there were no DLL’s, and all exe’s had a lot of the same code in them, and people realized that the majority of a hard disk could literally contain the same thing over and over.  Not to mention that if you were to fix some bug in say, LIBC you would have to re-compile everything.  So we entered the brave new world of dynamic linking where we now live in the proverbial DLL hell, that although we did save space, we have things where slight variations in the same DLL can break things in unforeseen ways.  People have tried various things such as weak linking, Side by side assemblies, Frameworks, and all kinds of things to try to keep things together.

Honestly it’s just easier to go back, and statically link things, and just re-build as needed.

common culprits of MinGW based stuff always include:

  • libwinpthread-1.dll
  • libgcc_s_dw2-1.dll
  • libstdc++-6.dll

ugh.

The hard one is the pthread library.  If you try to link it statically it’ll try to link everything else statically and not every DLL can link statically (SDL* keep reading).  But GCC / Binutils does have the option to turn various features on and off through the link string

-static-libstdc++ -static-libgcc -Wl,-Bstatic -lstdc++ -lpthread -Wl,-Bdynamic

As you can see, everything after “-Wl,-Bstatic” will be linked statically, while everything after “-Wl,-Bdynamic” will go back to being dynamically linked.

Ok, that is great but what about SDL, you may ask.  Well sure it’s a DLL, but even DLL’s come from somewhere.  Download the source, build it yourself and you can directly link the objects that make up the DLL.  In version 1.2.15 they live in the .libs directory.

SDL-1.2.15\build\.libs\*.o

And on Windows, if you get weird errors like:

SDL_dx5events.o: In function `DX5_DInputInit’:
SDL-1.2.15/./src/video/windx5/SDL_dx5events.c:183: undefined reference to `IID_IDirectInputDevice2A’

Just add the -ldxguid library and you can link this too.  I’m sure once upon a time people may not have had DirectX 5 or higher, but this isn’t 1997.

And please at least test your programs with no path, so that way you are aware of what is needed for re-distribution.

set path=.
D:\dosbox-code-0-4068\dosbox\trunk\src>dosbox.exe

DOSBox SVN

It gets so old when people never test.  And people freak out trying to download DLL’s from weird sites, and you know that never ends well.

Oh yeah, and a static version of DOSBox is 4MB.

4,033,550 dosbox.exe

I know that was massive a long long time ago, but today?

Teaching an old IRC dog some new tricks

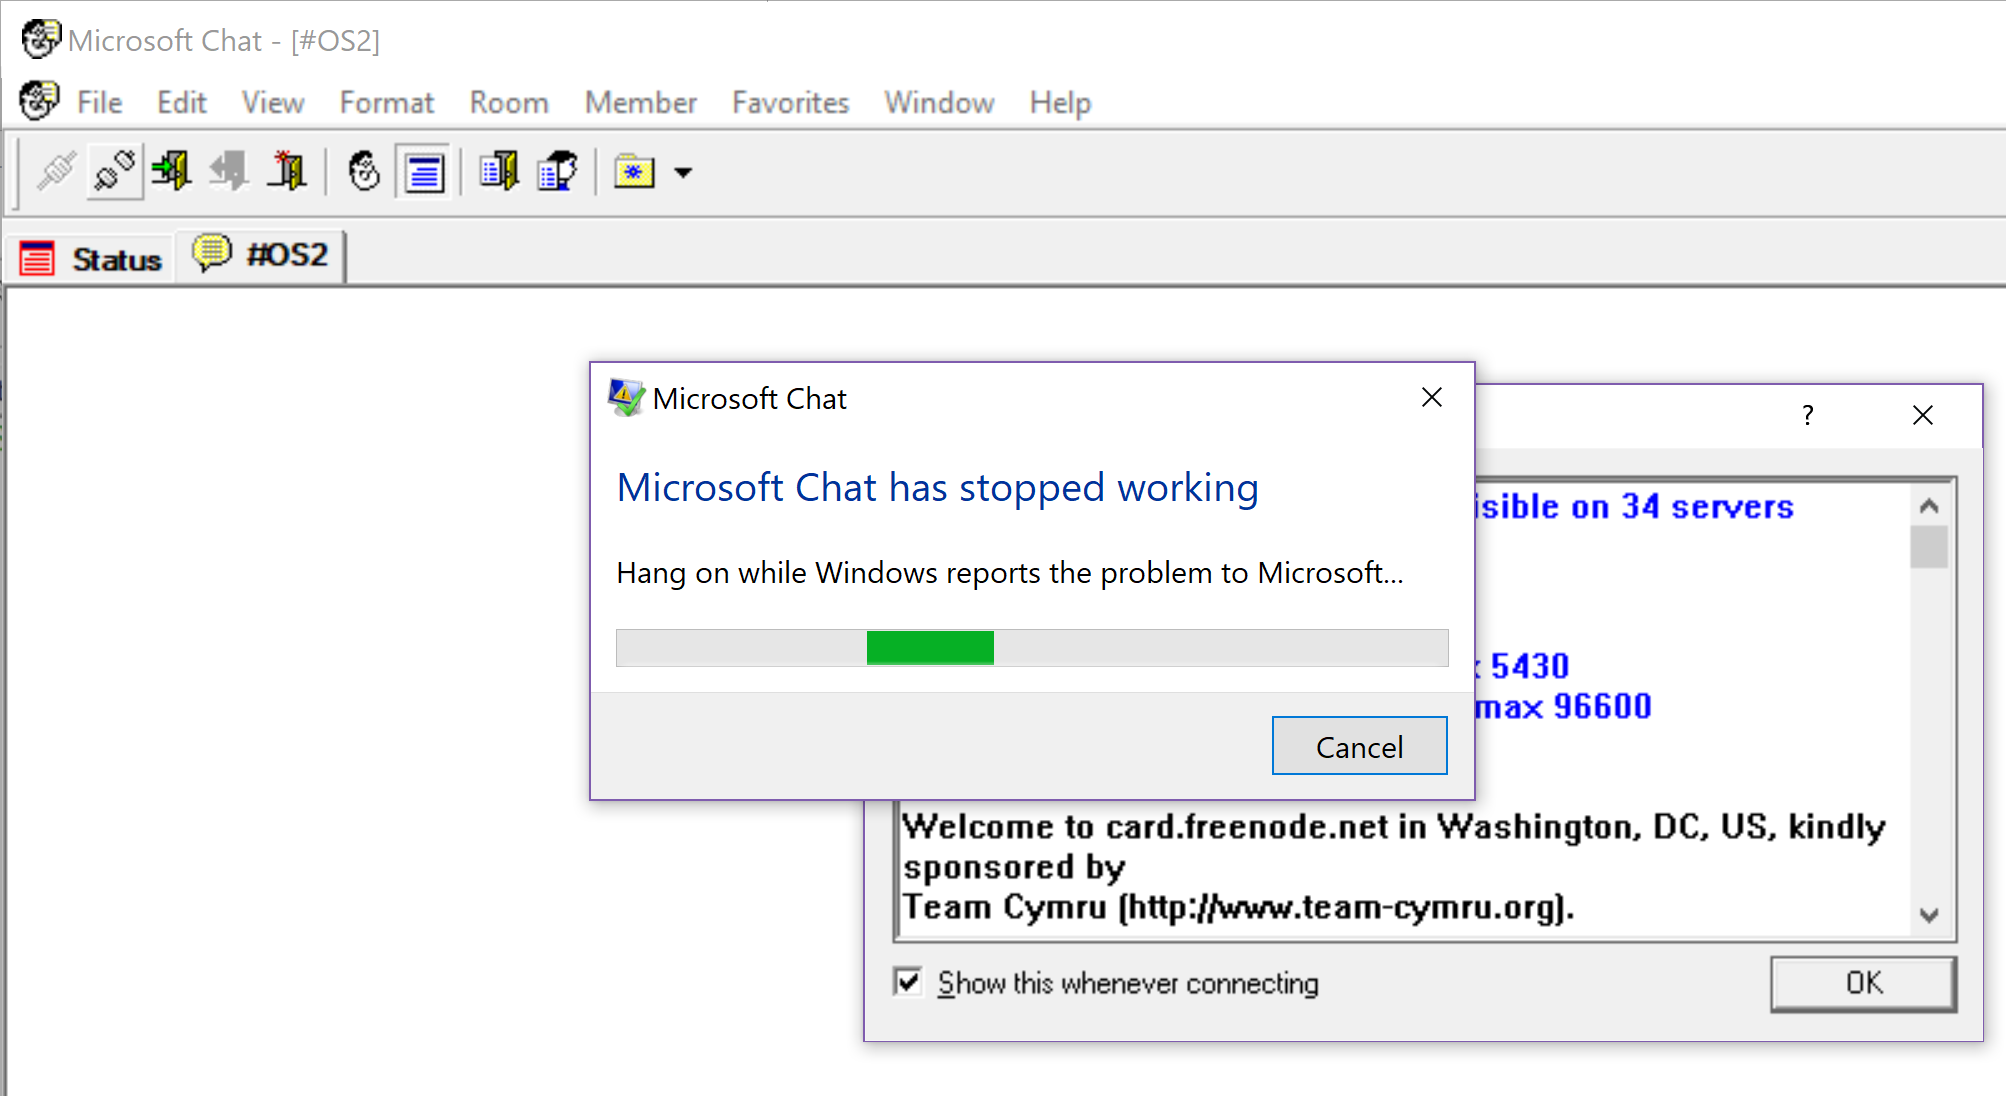
I don’t know why, but I’ve always liked the ancient Microsoft Comic Chat IRC client.  Even though it has well deserved a really poor reputation for not strictly adhering to any standard, and being very ‘noisy’ and … poorly behaved.  But I find it works pretty well.  Or at least it did.

crash

Somewhere in the mists of time a lot of IRC servers slightly changed how they work, and lots of ancient IRC clients were left broken.  I’d fixed IRC II on Xenix, but without source, fixing Comic Chat was out of the question.

But naturally the real solution was a proxy.  And here is richardg867’s proxy.py.  And it offers three great features, namely it’ll fix the way Comic Chat joins a channel, and how users are displayed so everyone isn’t a channel op.  The best part is that it also includes the ability to connect to servers via SSL, meaning you can encrypt your connection to the IRC network

It’s a tiny Python server, and the Linux Subsystem for Windows can happily run it with zero modifications.

python proxy.py -p 6667 chat.freenode.net +6697

Running it like this will listen on port 6667 aka the default IRC port, and then connect to chat.freenode.net using SSL on port 6697.  And it works great!

Comic Chat Connected!

One thing to keep in mind is that initially the client is set to BOLD for some reason.  Just as you have to tell it to not spam channels with Comic Chat info, hitting control+b will end the bold and now you can message the NickServ, and unless someone hits up your info nobody will be the wiser.

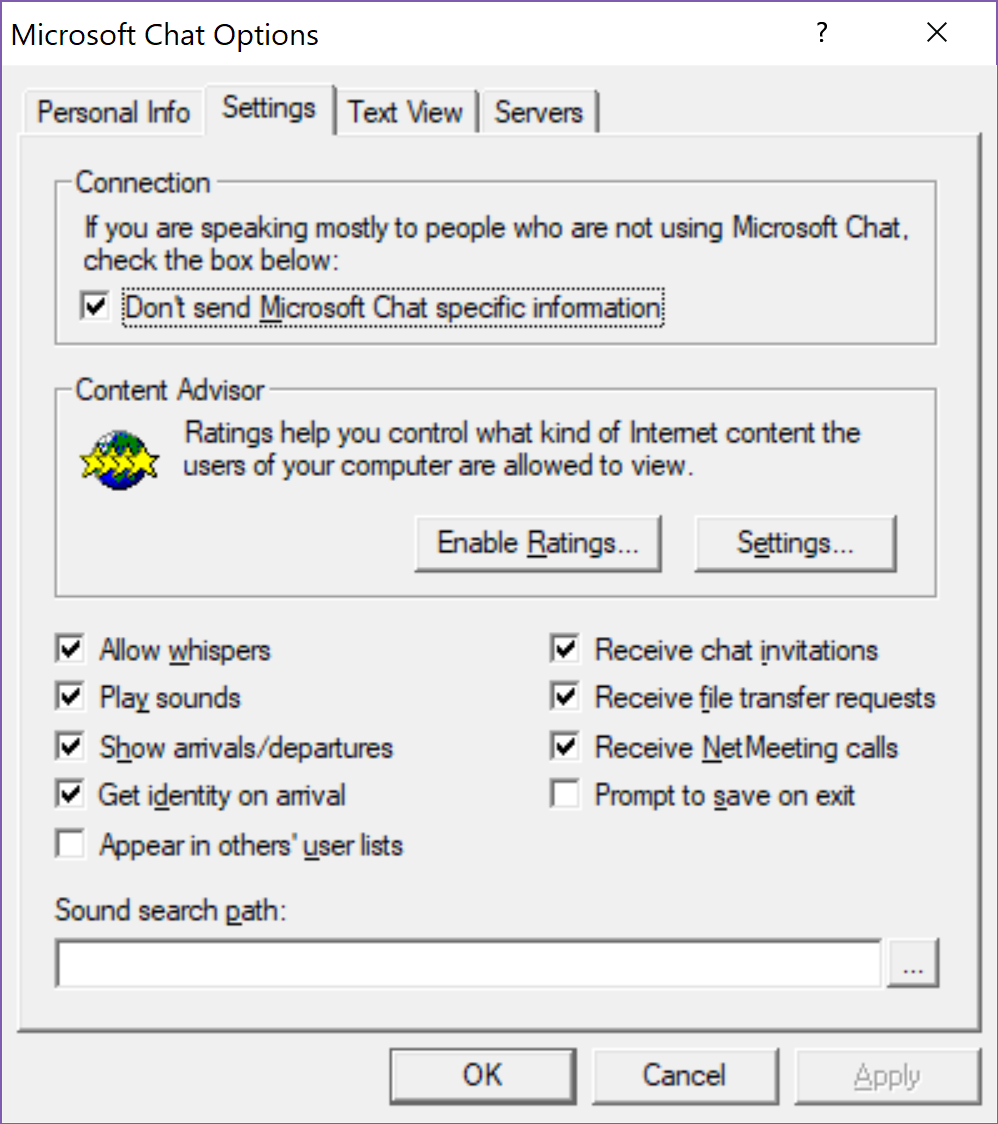
It’s vital to NOT send Comic Chat specific information

People get really annoyed at the whole OMG it’s a Microsoft IRC client from 1996-1998 but yeah established protocols only slightly drift, with a little bit of help you too can keep using ancient software in a dangerous and scary modern world!


Teaching an Almost 40-year Old UNIX about Backspace

(This is a guest post by xorhash.)

Introduction

I have been messing with the UNIX®† operating system, Seventh Edition (commonly known as UNIX V7 or just V7) for a while now. V7 dates from 1979, so it’s about 40 years old at this point. The last post was on V7/x86, but since I’ve run into various issues with it, I moved on to a proper installation of V7 on SIMH. The Internet has some really good resources on installing V7 in SIMH. Thus, I set out on my own journey on installing and using V7 a while ago, but that was remarkably uneventful.

One convenience that I have been dearly missing since the switch from V7/x86 is a functioning backspace key. There seem to be multiple different definitions of backspace:

  1. BS, as in ASCII character 8 (010, 0x08, also represented as ^H), and
  2. DEL, as in ASCII character 127 (0177, 0x7F, also represented as ^?).

V7 does not accept either for input by default. Instead, # is used as the erase character and @ is used as the kill character. These defaults have been there since UNIX V1. In fact, they have been “there” since Multics, where they got chosen seemingly arbitrarily. The erase character erases the character before it. The kill character kills (deletes) the whole line. For example, “ba##gooo#d” would be interpreted as “good” and “bad line@good line” would be interpreted as “good line”.

There is some debate on whether BS or DEL is the correct character for terminals to send when the user presses the backspace key. However, most programs have settled on DEL today. tmux forces DEL, even if the terminal emulator sends BS, so simply changing my terminal to send BS was not an option. The change from the defaults outlined here to today’s modern-day defaults occurred between 4.1BSD and 4.2BSD. enf on Hacker News has written a nice overview of the various conventions.

Changing the Defaults

These defaults can be overridden, however. Any character can be set as erase or kill character using stty(1). It accepts the caret notation, so that ^U stands for ctrl-u. Today’s defaults (and my goal) are:

Function Character
erase DEL (^?)
kill ^U

I wanted to change the defaults. Fortunately, stty(1) allows changing them. The caret notation represents ctrl as ^. The effect of holding ctrl and typing a character is bitwise-ANDing it with 037 (0x1F) as implemented in /usr/src/cmd/stty.c and mentioned in the stty(1) man page, so the notation as understood by stty(1) for ^? is broken for DEL: ASCII ? bitwise-AND 037 is US (unit separator), so ^? requires special handling. stty(1) in V7 does not know about this special case. Because of this, a separate program – or a change to stty(1) – is required to call stty(2) and change the erase character to DEL. Changing the kill character was easy enough, however:

$ stty kill '^U'

So I wrote that program and found out that DEL still didn’t work as expected, though ^U did. # stopped working as erase character, so something certainly did change. This is because in V7, DEL is the interrupt character. Today, the interrupt character is ^C.

Clearly, I needed to change the interrupt character. But how? Given that stty(1) nor the underlying syscall stty(2) seemed to let me change it, I looked at the code for tty(4) in /usr/sys/dev/tty.c and /usr/sys/h/tty.h. And in the header file, lo and behold:

#define	CERASE	'#'		/* default special characters */
#define	CEOT	004
#define	CKILL	'@'
#define	CQUIT	034		/* FS, cntl shift L */
#define	CINTR	0177		/* DEL */
#define	CSTOP	023		/* Stop output: ctl-s */
#define	CSTART	021		/* Start output: ctl-q */
#define	CBRK	0377

I assumed just changing these defaults would fix the defaults system-wide, which I found preferable to a solution in .profile anyway. Changed the header, one cycle of make allmake unixcp unix /unix and a reboot later, the system exhibited the same behavior. No change to the default erase, kill or interrupt characters. I double-checked /usr/sys/dev/tty.c, and it indeed copied the characters from the header. Something, somewhere must be overwriting my new defaults.

Studying the man pages in vol. 1 of the manual, I found that on multi-user boot init calls /etc/rc, then calls getty(8), which then calls login(1), which ultimately spawns the shell. /etc/rc didn’t do anything interesting related to the console or ttys, so the culprit must be either getty(8) or login(1). As it turns out, both of them are the culprits!

getty(8) changes the erase character to #, the kill character to @ and the struct tchars to { '\177', '\034', '\021', '\023', '\004', '\377' }. At this point, I realized that:

  1. there’s a struct tchars,
  2. it can be changed from userland.

The first member of struct tchars is char t_intrc, the interrupt character. So I could’ve had a much easier solution by writing some code to change the struct tchars, if only I’d actually read the manual. I’m too far in to just settle with a .profile solution and a custom executable, though. Besides, I still couldn’t actually fix my typos at the login prompt unless I make a broader change. I’d have noticed the first point if only I’d actually read the man page for tty(4). Oops.

login(1) changes the erase character to # and the kill character to @. At least the shell leaves them alone. Seriously, three places to set these defaults is crazy.

Fixing the Characters

The plan was simple, namely, perform the following substitution:

Function Old Character Old Character
ASCII (Octal)
New Character New Character
ASCII (Octal)
erase # 043 DEL 0177
kill @ 0100 ^U 025
interrupt DEL 0177 ^C 003

So, I changed the characters in tty(4), getty(8) and login(1). It worked! Almost. Now DEL did indeed erase. However, there was no feedback for it. When I typed DEL, the cursor would stay where it is.

Pondering the code for tty(4) again, I found that there is a variable called partab, which determines delays and what kind of special handling to apply if any. In particular, BS has an entry whose handler looks like this:

	/* backspace */
	case 2:
		if (*colp)
			(*colp)--;
		break;

Naïve as I was, I just changed the entry for DEL from “non-printing” to “backspace”, hoping that would help. Another recompilation cycle and reboot later, nothing changed. DEL still only silently erased. So I changed the handler for another character, recompiled, rebooted. Nothing changed. Again. At that point, I noticed something else must have been up.

I found out that the tty is in so-called echo mode. That means that all characters typed get echoed back to the tty. It just so happens that the representation of DEL is actually none at all. Thus it only looked like nothing changed, while the character was actually properly echoed back. However, when temporarily changing the erase character to BS (^H) and typing ^H manually, I would get the erase effect and the cursor moved back by one character on screen. When changing the erase character to something else like # and typing ^H manually, I would get no erasure, but the cursor moved back by one character on screen anyway. I now properly got the separation of character effect and representation on screen. Because of this unprintable-ness of DEL, I needed to add a special case for it in ttyoutput():

	if (c==0177) {
		ttyoutput(010, tp);
		ttyoutput(' ', tp);
		ttyoutput(010, tp);
		return;
	}

What this does is first send a BS to move the cursor back by one, then send a space to rub out the previous character on screen and then send another BS to get to the previous cursor position. Fortunately, my terminal lives in a world where doing this is instantaneous.

Getting the Diff

For future generations as well as myself when I inevitably majorly break this installation of V7, I wanted to make a diff. However, my V7 is installed in SIMH. I am not a very intelligent man, I didn’t keep backup copies of the files I’d changed. Getting data out of this emulated machine is an exercise in frustration.

Transmission over ethernet is out by virtue of there being no ethernet in V7. I could simulate a tape drive and write a tar file to it, but neither did I find any tools to convert from simulated tape drive to raw data, nor did I feel like writing my own. I could simulate a line printer, but neither did V7 ship with the LP11 driver (apparently by mistake), nor did I feel like copy/pasting a long lpr program in – a simple cat(1) to /dev/lp would just generate fairly garbled output. I could simulate another hard drive, but even if I format it, nothing could read the ancient file system anyway, except maybe mount_v7fs(8) on NetBSD. Though setting up NetBSD for the sole purpose of mounting another virtual machine’s hard drive sounds silly enough that I might do it in the future.

While V7 does ship with uucp(1), it requires a device to communicate through. It seems that communication over a tty is possible V7-side, but in my case, quite difficult. I use the version of SIMH as packaged on Debian because I’m a lazy person. For some reason, the DZ11 terminal emulator was removed from that package. The DUP11 bit synchronous interface, which I hope is the same as the DU-11 mentioned /usr/sys/du.c, was not part of SIMH at the time of packaging. V7 only speaks the g protocol (see Ptbl in /usr/src/cmd/uucp/cntrl.c), which requires the connection to be 8-bit clean. Even if the simulator for a DZ11 were packaged, it would most likely be unsuitable because telnet isn’t 8-bit clean by default and I’m not sure if the DZ11 driver can negotiate 8-bit clean Telnet. That aside, I’m not sure if Taylor UUCP for Linux would be able to handle “impure” TCP communications over the simulated interface, rather than a direct connection to another instance of Taylor UUCP. Then there is the issue of general compatibility between the two systems. As reader DOS pointed out, there seem to be quite some difficulties. Those difficulties were experienced on V7/x86, however. I’m not ruling out that the issues encountered are specific to V7/x86. In any case, UUCP is an adventure for another time. I expect it’ll be such a mess that it’ll deserve its own post.

In the end, I printed everything on screen using cat(1) and copied that out. Then I performed a manual diff against the original source code tree because tabs got converted to spaces in the process. Then I applied the changes to clean copies that did have the tabs. And finally, I actually invoked diff(1).

Closing Thoughts

Figuring all this out took me a few days. Penetrating how the system is put together was surprisingly fairly hard at first, but then the difficulty curve eased up. It was an interesting exercise in some kind of “reverse engineering” and I definitely learned something about tty handling. I was, however, not pleased with using ed(1), even if I do know the basics. vi(1) is a blessing that I did not appreciate enough until recently. Had I also been unable to access recursive grep(1) on my host and scroll through the code, I would’ve probably given up. Writing UNIX under those kinds of editing conditions is an amazing feat. I have nothing but the greatest respect for software developers of those days.

Here’s the diff, but V7 predates patch(1), so you’ll be stuck manually applying it: backspace.diff

† UNIX is a trademark of The Open Group.

Converting a Physical disk to a Virtual disk with Qemu’s qemu-img on Windows

Just because even, I forget from time to time.

You need to do this as administrator, even better if the disk doesn’t have a drive letter or mounted in any way under Windows.

Fujitsu MPB3021AT

In my case I picked up a 486SX with an aging Fujitsu disk.

qemu-img.exe convert -f raw -O qcow2 \\.\PhysicalDrive2 fujitsu_MPB3021AT.qcow2

And as fast as your machine can read the disk, you’ll have your Qcow2 disk image. As of Qemu 2.9.0 the formats include:

  • blkdebug
  • blkreplay
  • blkverify
  • bochs
  • cloop
  • dmg
  • luks
  • nbd
  • null-aio
  • null-co
  • parallels
  • qcow
  • qcow2
  • qed
  • quorum
  • raw
  • replication
  • sheepdog
  • vdi
  • vhdx
  • vmdk
  • vpc
  • vvfat

Which is quite a list.  Obviously since I’m reading a physical disk, the format is RAW.  I just output it to Qemu for my personal ease.

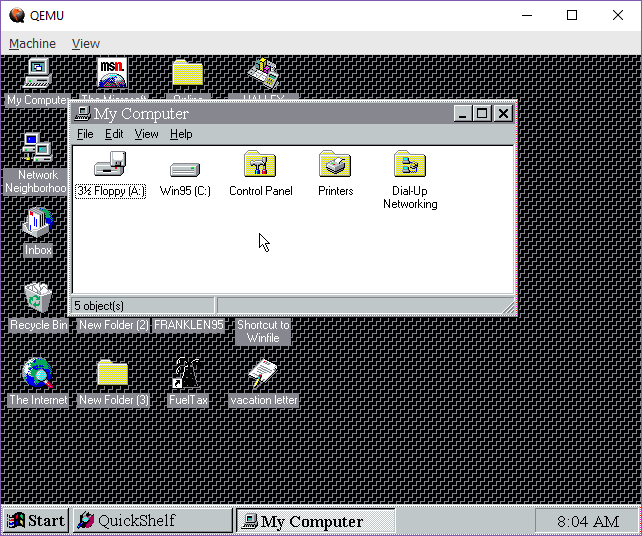
Also, once the image was created, I could quickly run it under Qemu, and discover that yes this was a machine running Windows 95.

qemu-system-i386.exe -hda fujitsu_MPB3021AT.qcow2 -soundhw es1370 -vga cirrus

So, there you go from a “dead system” to at least fully recovered data in minutes.  KVM may get all the press excited but it’s nothing without the awesome support of Qemu!

Life in UNIX® V7: an attempt at a simple task

(This is a guest post by xorhash.)

1. Introduction

ChuckMcM on Hacker News (https://news.ycombinator.com/item?id=15990351) reacted to my previous entry here about trying to typeset old troff sources with groff. It was said that ‘‘you really can’t appreciate troff (and runoff and scribe) unless you do all of your document preparation on a fixed width font 24 line by 80 column terminal’’.

‘‘Challenge accepted’’ I said to myself. However, it would be quite boring to just do my document preparation in this kind of situation. Thus, I raised the ante: I will do my document preparation on a fixed width font 24 line by 80 column terminal on an ancient UNIX . That document is the one you are reading here.

2. Getting an old version of UNIX

While it would have been interesting to run my experiment on SIMH with a genuine UNIX , I was feeling far too lazy for that. Another constraint I made for myself is that I wanted to use the Internet as little as possible. Past the installation phase, only resources that are on the filesystem or part of the Seventh Edition Manual should be consulted. However, if I have to work with SIMH, chances are I’d be possibly fighting the emulator and the old emulated hardware much more than the software.

2.1. FreeBSD 1.0

My first thought was that I could just go for FreeBSD 1.0 or something. FreeBSD 1.0 dates from around 1993. That was surprisingly recent, but I needed a way to get the data off this thing again, so I did want networking. As luck would have it, FreeBSD 1.0 refused to install, giving me a hard read error when trying to read the floppy. FreeBSD 2.0 was from 1995 and already had colorful menus to install itself (!). That’s no use for an exercise in masochism.

2.2. V7/x86

I turned to browsing http://gunkies.org/wiki/Main_Page for a bit, hoping to find something to work with. Lo and behold, it pointed me to http://www.nordier.com/v7x86/! V7/x86 is a port of UNIX version 7 to the x86. It made some changes to V7, among those are:

1.

including the more pager,

2.

including the vi editor,

3.

providing a console for the screen, rather than expecting a teletype, and

4.

including an installation script.

The version of vi that ships with it is surprisingly usable, even by today’s standards. I believe I would’ve gone mad if I’d had to use ed to write this text with.

3. Installing V7/x86

The V7/x86 installer requires that a partition exists with the correct partition type. It ships with a tool called ptdisk to do that, but because /boot/mbr does not exist on the installation environment, it cannot initialize a disk that does not already have a partition table (http://www.nordier.com/v7x86/files/ISSUES). Thus I used a (recent) release of FreeBSD to create it. At first, FreeBSD couldn’t find its own CD-ROM, which left me quite confused. As it turns out, it being unable to find the CD-ROM was a side effect of assigning only 64 megabytes of RAM to the virtual machine. Once I’d bumped the RAM to 1GB, the FreeBSD booting procedure worked and I could create the partition for V7/x86. V7/x86 itself comes packaged on a standard ISO file and with a simple installation script. It seems it requires an IDE drive, but I did not investigate support for other types of hard drives, in particular SATA drives, much further. There seem to be no USB drivers, so USB keyboards may not work, either.

During the installation, my hard drive started making a lot of scary noises for a few minutes, so I aborted the installation procedure. After moving the disk image to a RAM disk (thank you, Linux, for giving me the power of tmpfs), I restarted the installation and it went in a flash. The scary noises were probably related to copying data with a block size of 20, which I assume was 20 bytes per block: The virtual hard disk was opened with O_DIRECT, i.e., all writes got flushed to it immediately. Rewriting the hard drive sector 20 bytes at a time must’ve been rather stressful for the drive.

4. Using V7/x86

I thought I knew my UNIX , but the 70s apparently had a few things to teach me. Fortunately, getting the system into a usable state was fairly simple because http://www.nordier.com/v7x86/doc/v7x86intro.pdf got me started. The most important notes are:

1.

V7 boots in single-user mode by default. Only when you exit single-user mode, /etc/rc is actually run and the system comes up in multi-user mode.

2.

Using su is recommended because root has an insane environment by default. To erase, # is used, rather than backspace (^H). The TERM variable is not set, breaking vi. /usr/ucb is not on the path, making more unavailable.

3.

The character to interrupt a running command is DEL, not ^C. It does not seem possible to remap this.

more is a necessity on a console. I do not have a teletype, meaning I cannot just ‘‘scroll’’ by reading the text on the sheet so far. Therefore, man is fairly useless without also piping its output to more.

Creating a user account was simple enough, though: Edit /etc/passwd, run passwd for the new user, make the home directory, done. However, my first attempt failed hard because I was not aware of the stty erase situation. I now have a directory in /usr that reads ‘‘xorhash’’, but is definitely not the ASCII string ‘‘xorhash’’. It’s ‘‘o^Hxorhash’’. The same problem applies to hitting the arrow keys out of habit to access the command history, only to butcher the partial command you were writing that way.

Another mild inconvenience is the lack of alternative keyboard layouts. There is only the standard US English keyboard layout. I’m not used to it and it took me a while to figure out where some relevant keys ($, ^, &, / and – in particular) are. Though I suppose if I really wanted to, I could mess around with the kernel and the console driver, which is probably the intended way to change the keyboard layout in the first place.

5. Writing a document

Equipped with a new user, I turned to writing this text down before my memory fails me on the installation details.

5.1. The vi Editor

I am infinitely thankful for having vi in the V7/x86 distribution. Truly, I cannot express enough gratitude after just seeing a glimpse of ed in the V7/x86 introduction document. It has some quirks compared to my daily vim setup, though. Backspacing across lines is not possible. c only shows you until where you’re deleting by marking the end with $. You only get one undo, and undoing the undo is its own undo entry. And of course, there’s no syntax highlighting in that day and age.

5.2. troff/nroff

And now for the guests of this show for which the whole exercise was undertaken. The information in volume 2A of the 7th Edition manuals was surprisingly useful to get me started with the ms macros. I didn’t bother reading the troff/nroff User’s Manual as I only wanted to use the program, not write a macro package myself. The ms macro set seemed to be the way to go for that. In this case, nroff did much more heavy lifting than troff. After all, troff is designed the Graphic Systems C/A/T phototypesetter. I don’t have one of those. M. E. Lesk’s Typing Documents on the UNIX System: Using the −ms Macros with Troff and Nroff and Brian W. Kernighan’s A TROFF Tutorial proved invaluable trying to get this text formatted in nroff.

The ‘‘testing’’ cycle is fairly painful, too. When reading the nroff output, some formatting information (italics, bold) is lost. more can only advance pagewise, which makes it difficult to observe paragraphs in their entirety. It also cannot jump or scroll very fast so that finding issues in the later pages becomes infuriating, which I solved by splitting the file up into multiple files, one for each section heading.

5.3. The refer program and V7/x86

Since I was writing this in roff anyway, I figured I might as well take advantage of its capabilities – I wanted to use refer. It is meant to keep a list of references (think BibTeX). Trying to run it, I got this:

$ /bin/refer
/bin/refer: syntax error at line 1: ‘)’
unexpected

The system was trying to run the file as shell script. This also happens for tbl. It was actually an executable for which support got removed during the port (see https://pastebin.com/cxRhR7u9). I contacted Robert Nordier about this; he suggested I remove the -i and -n flags and recompile refer. Now it runs, exhibiting strange behavior instead: https://pastebin.com/0dQtnxSV For all intents and purposes, refer is quite unusable like this. Fixing this is beyond my capacity, unfortunately, and (understandably) Robert Nordier does not feel up to diving into it, either. Thus, we’ll have to live without the luxury of a list of references.

6. Getting the Data off the Disk

I’m writing this text on V7/x86 in a virtual machine. There are multiple ways I could try to get it off the disk image, such as via a floppy image or something. However, that sounds like effort. I’ll try to search for it in the raw disk image instead and just copy it out from there. Update: I’ve had to go through the shared floppy route. The data in this file is split up on the underlying file system. Fortunately, /dev/ entries are just really fancy files. Therefore, I could just write with tar to the floppy directly without having to first create an actual file system. The host could then use that “floppy” as a tar file directly.

Even when I have these roff sources, I still need to get them in a readable format. I’ll have to cheat and use groff -Thtml to generate an HTML version to put on the blog. However, to preserve some semblance of authenticity, I’ll also put the raw roff source up, along with the result of running nroff over it on the version running on V7/x86. That version of nroff attributes the trademark to Bell Laboratories. This is wrong. UNIX is a registered trademark of The Open Group.

7. Impressions

ChuckMcM was right. When you’re grateful for vi, staring at a blob of text with no syntax highlighting and with limited space, you start appreciating troff/nroff much more. In particular, LaTeX tends to have fairly verbose commands. Scanning through those without syntax highlighting becomes more difficult. However, ‘‘parsing’’ troff/nroff syntax is much easier on one’s mind. Additionally, the terse commands help because

\section{Impressions}

stands out much less than

.NH
Impressions
.PP

That can be helped by adding whitespace, but then you remove some precious context on your tiny 80×24 screen. troff/nroff are very much children of their time, but they’re not as bad as I may have made them look last time. Having said that, there’s no way you’ll ever convince me to actually touch troff/nroff macros.

As for the system as a whole, I was positively surprised how usable it was by today’s standards. The biggest challenge is getting the system up and shutting it down again, as well as moving data to and from it. I did miss having a search function whenever I was looking for information on roff in volume 2A of the manual.

I have the greatest of respect for the V7/x86 project. Porting an ancient operating system that hardcoded various aspects of the PDP-11 in scattered places must have been extremely frustrating. The drivers were written in the ancient version of C that is used on V7 (see /usr/sys/dev).


dosdoom 0.2 recovered

While cruising around at doomworld.com looking for something else, I saw this thread: ‘Recovered’ DOSDoom 0.2.

So I quickly built it with my MinGW32-DJGPP using GCC 3.4.5.  And this version needs the Allegro library as it has sound effects audio!  Although building Allegro needed GCC 2.7.2.1 and Binutils 2.8.1.  Using other versions just led to nothing but trouble.  I ended up just installing DJGPP on DOSBox to build Allegro which took … a whlie to build.  Although being able to cross compile dosdoom from Windows was far far far quicker.

So yeah, it runs.  With sound.  It’s great.  Allegro integration isn’t anywhere as near complete at this point it’s just the sound files.  I took a much later version of dosdoom’s MIDI code, which required the Allegro timer, which interfered with my older timer IRQ hook.  Converting the whole thing to use the Allegro timer, and keyboard wasn’t too difficult, and that gives my DooM source fork a really full feeling when using DJGPP v2.

Although I’m having issues uploading from China at the moment.

Imagemagick really is.. Magic!

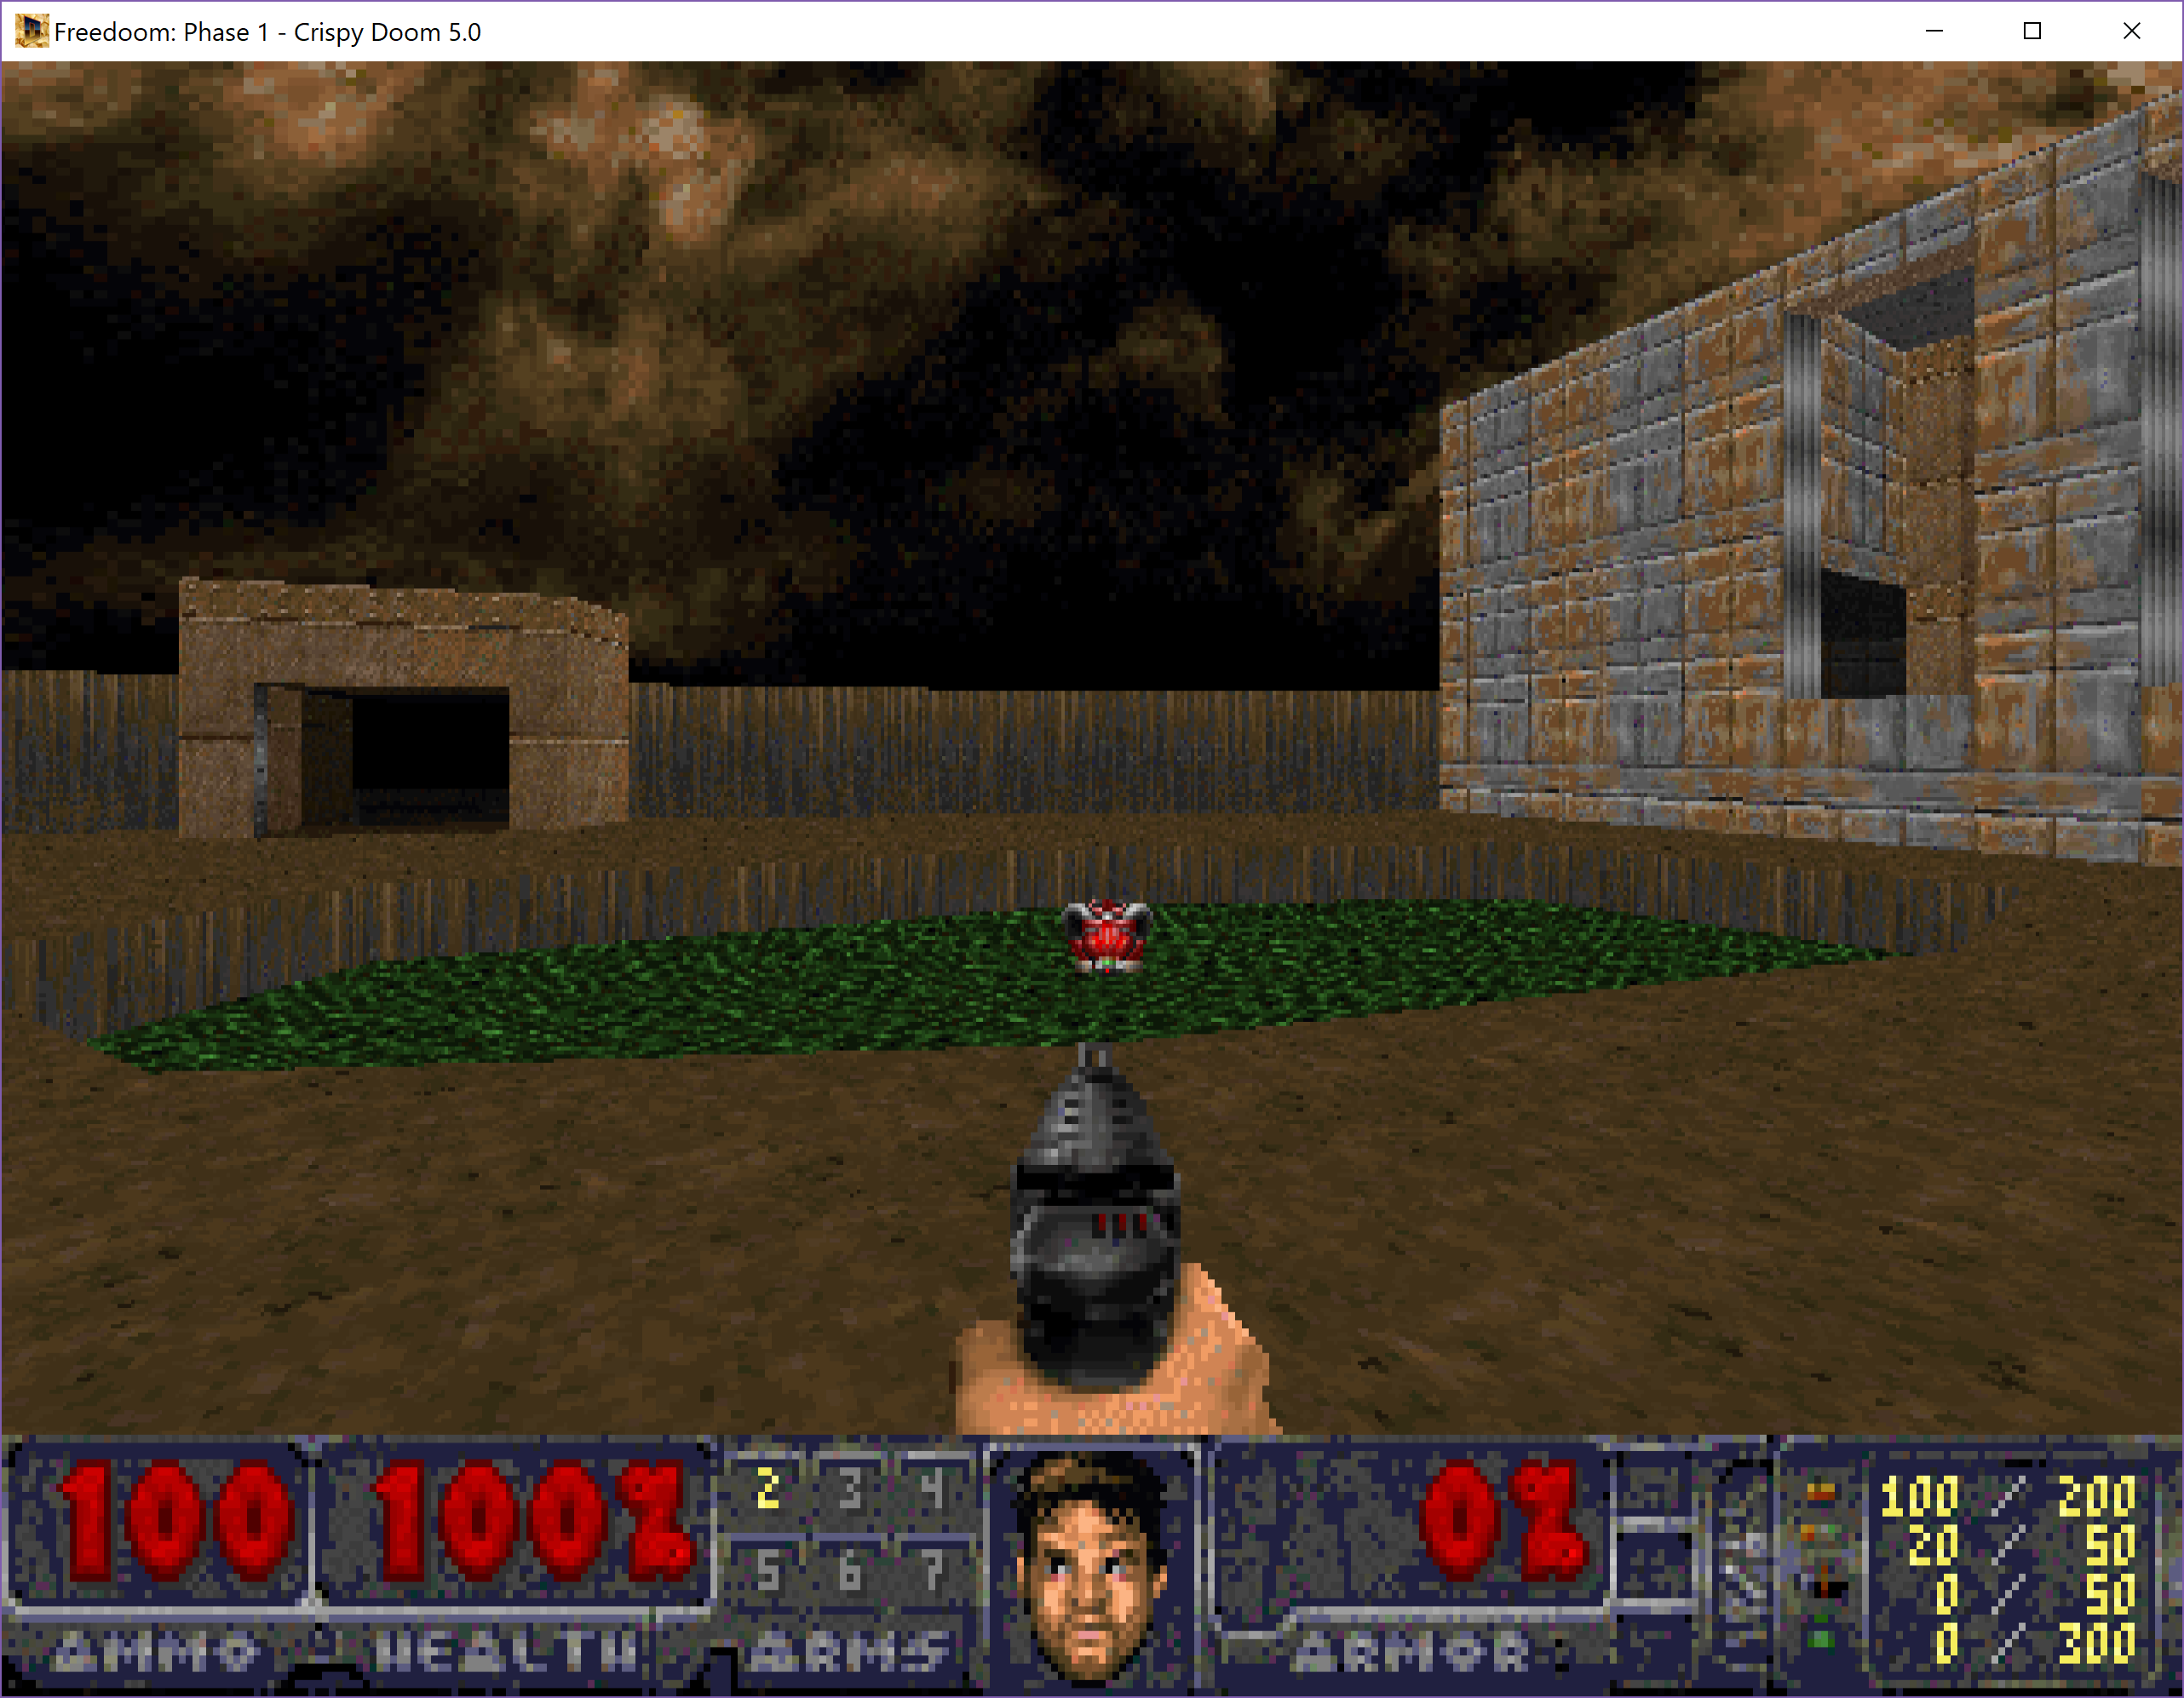
Ok, so since I’ve been playing around with the Freedoom assets, I wanted to process all the assets and then make them into an iwad.  And for the graphics this meant generating a simple color cube palette and then transforming all of the images to match that palette.  And the results were, while recognizable as DooM, they are drab.

Gray world

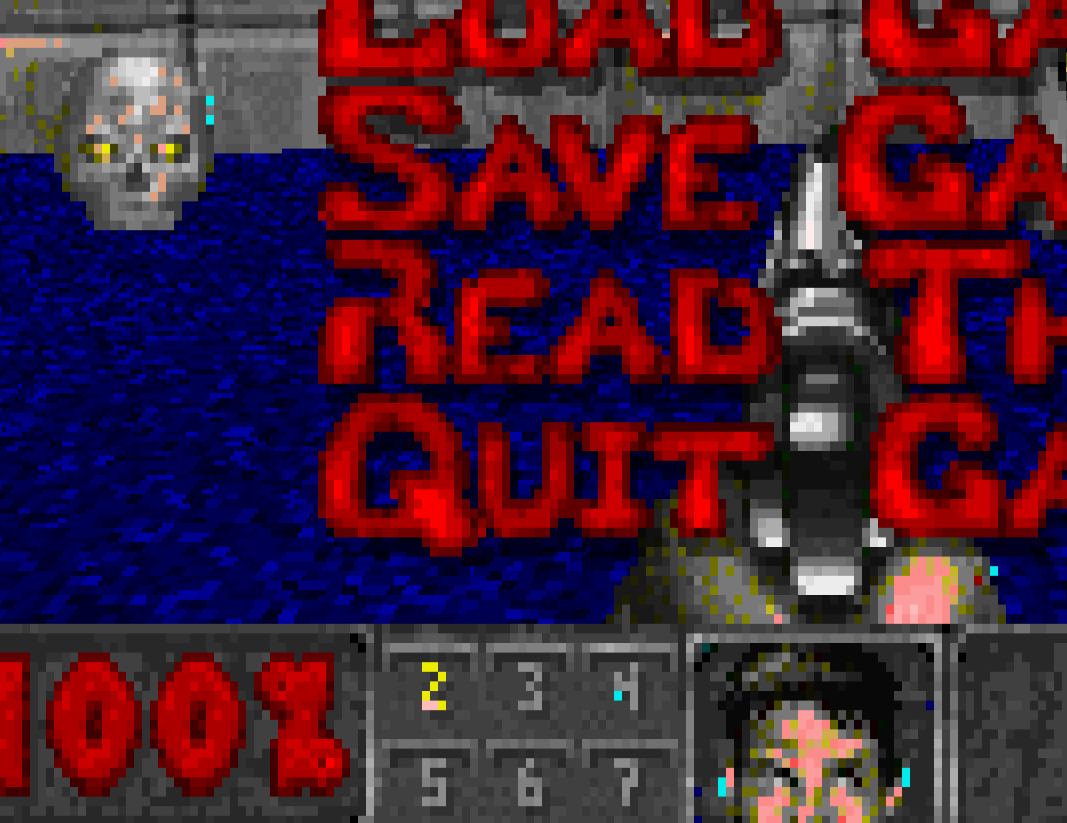
And yes, it’s gray, and drab.  So UK.  And there is another problem, many of the ‘graphics’ assets were a mix of PNG and GIF, and it turns out that in the GIF format you usually have a single color set as your transparent color, and it’ll get cut out automatically.  In this case the transparent color is cyan.  However there is some cyan still in the image!

Cyan artifact

So the best way I figured to ‘fix’ this was to do a straight conversion using Imagemagick.  So I loaded up paintbrush of all things and noticed that for some reason the colors had bled on the gif’s I had from the Freedoom pack I’d downloaded.  And that there were actually 3 cyan colors that needed to be purged.  In this case in hex they are 0x00fefe, 0x00f2f2, 0x02f6f5, and the one that they should have been, 0x00ffffff

convert ..\graphics_freedoom\old\wia20200.gif -transparent #02f6f5 -transparent #00fefe -transparent #00f2f2 -transparent #00ffff oldpng\wia20200.png

So I had to run convert like this against all the GIFs that I needed to fill in the graphics that I’m currently not processing in Python.  Now the images actually look right, no surprise cyan, but my palette still sucks

Although the Freedoom team has told me that it’s far easier to just use the DooM palette as their assets use that palette and it’ll just work.  But I’m too stupid for that.  One great feature of Imagemagick is that you can hand it an image, and ask it to reduce it to any arbitrary number of colors, and it’ll do a great job of it.  And while that is great for a single image, that doesn’t help me when I’m talking about thousands of images.  Except Imagemagick also has another great ability which is to paste a new image to the right of an existing one.  So with a little creative use of the make command I can then build a single giant image that contains all of the artwork.  Isn’t that great?

Although great care and detail went into the original DooM palette selection we can throw all of that away, and let a program stitch everything together, and then have it analyze the entire mess, and come up with the ‘ultimate palette’ that works best with everything.  Although one word of warning it takes well over an hour on an i7 to just stitch the images together (I should have setup a RAM disk) but it only took about 10 minutes for Imagemagick to process the blob image to come up with 255 colors that work best across the entire image set.

With the reduction done, the next thing to do is to create a ‘palette image’, which is one pixel for each color.  This is the palette that we will use to ‘reduce’ all the images against.  It’s more so to let Imagemagick do the hard work of selecting a palette.

convert slug256.png -unique-colors -scale 100% slug256_table.png

Imagemagick optimal palette

And the next thing is to extract the RGB set, which DooM uses for it’s palette.  In this case each color is is represented by three bytes.

convert -size 256×1 -depth 8 slug256_table.png -append rgb:playpal-base256.lmp

And then the next step is to process this palette with dmutils dcolors.  While it is primarily designed to use the LMB file format from Amiga fame, it wasn’t too hard to modify it to read a palette file directly, and let it add in the ‘red pain’ color shift, along with the green ‘bio hazard suit’ effect.  The color map it generates is totally corrupt at the moment, so I’m using the old perl program to generate one based off of the palettes.

Indeed it is something so crazy that I really don’t want to even do it a second time to make sure my process was reproducible.  However compared to before, I think the results speak for themselves:

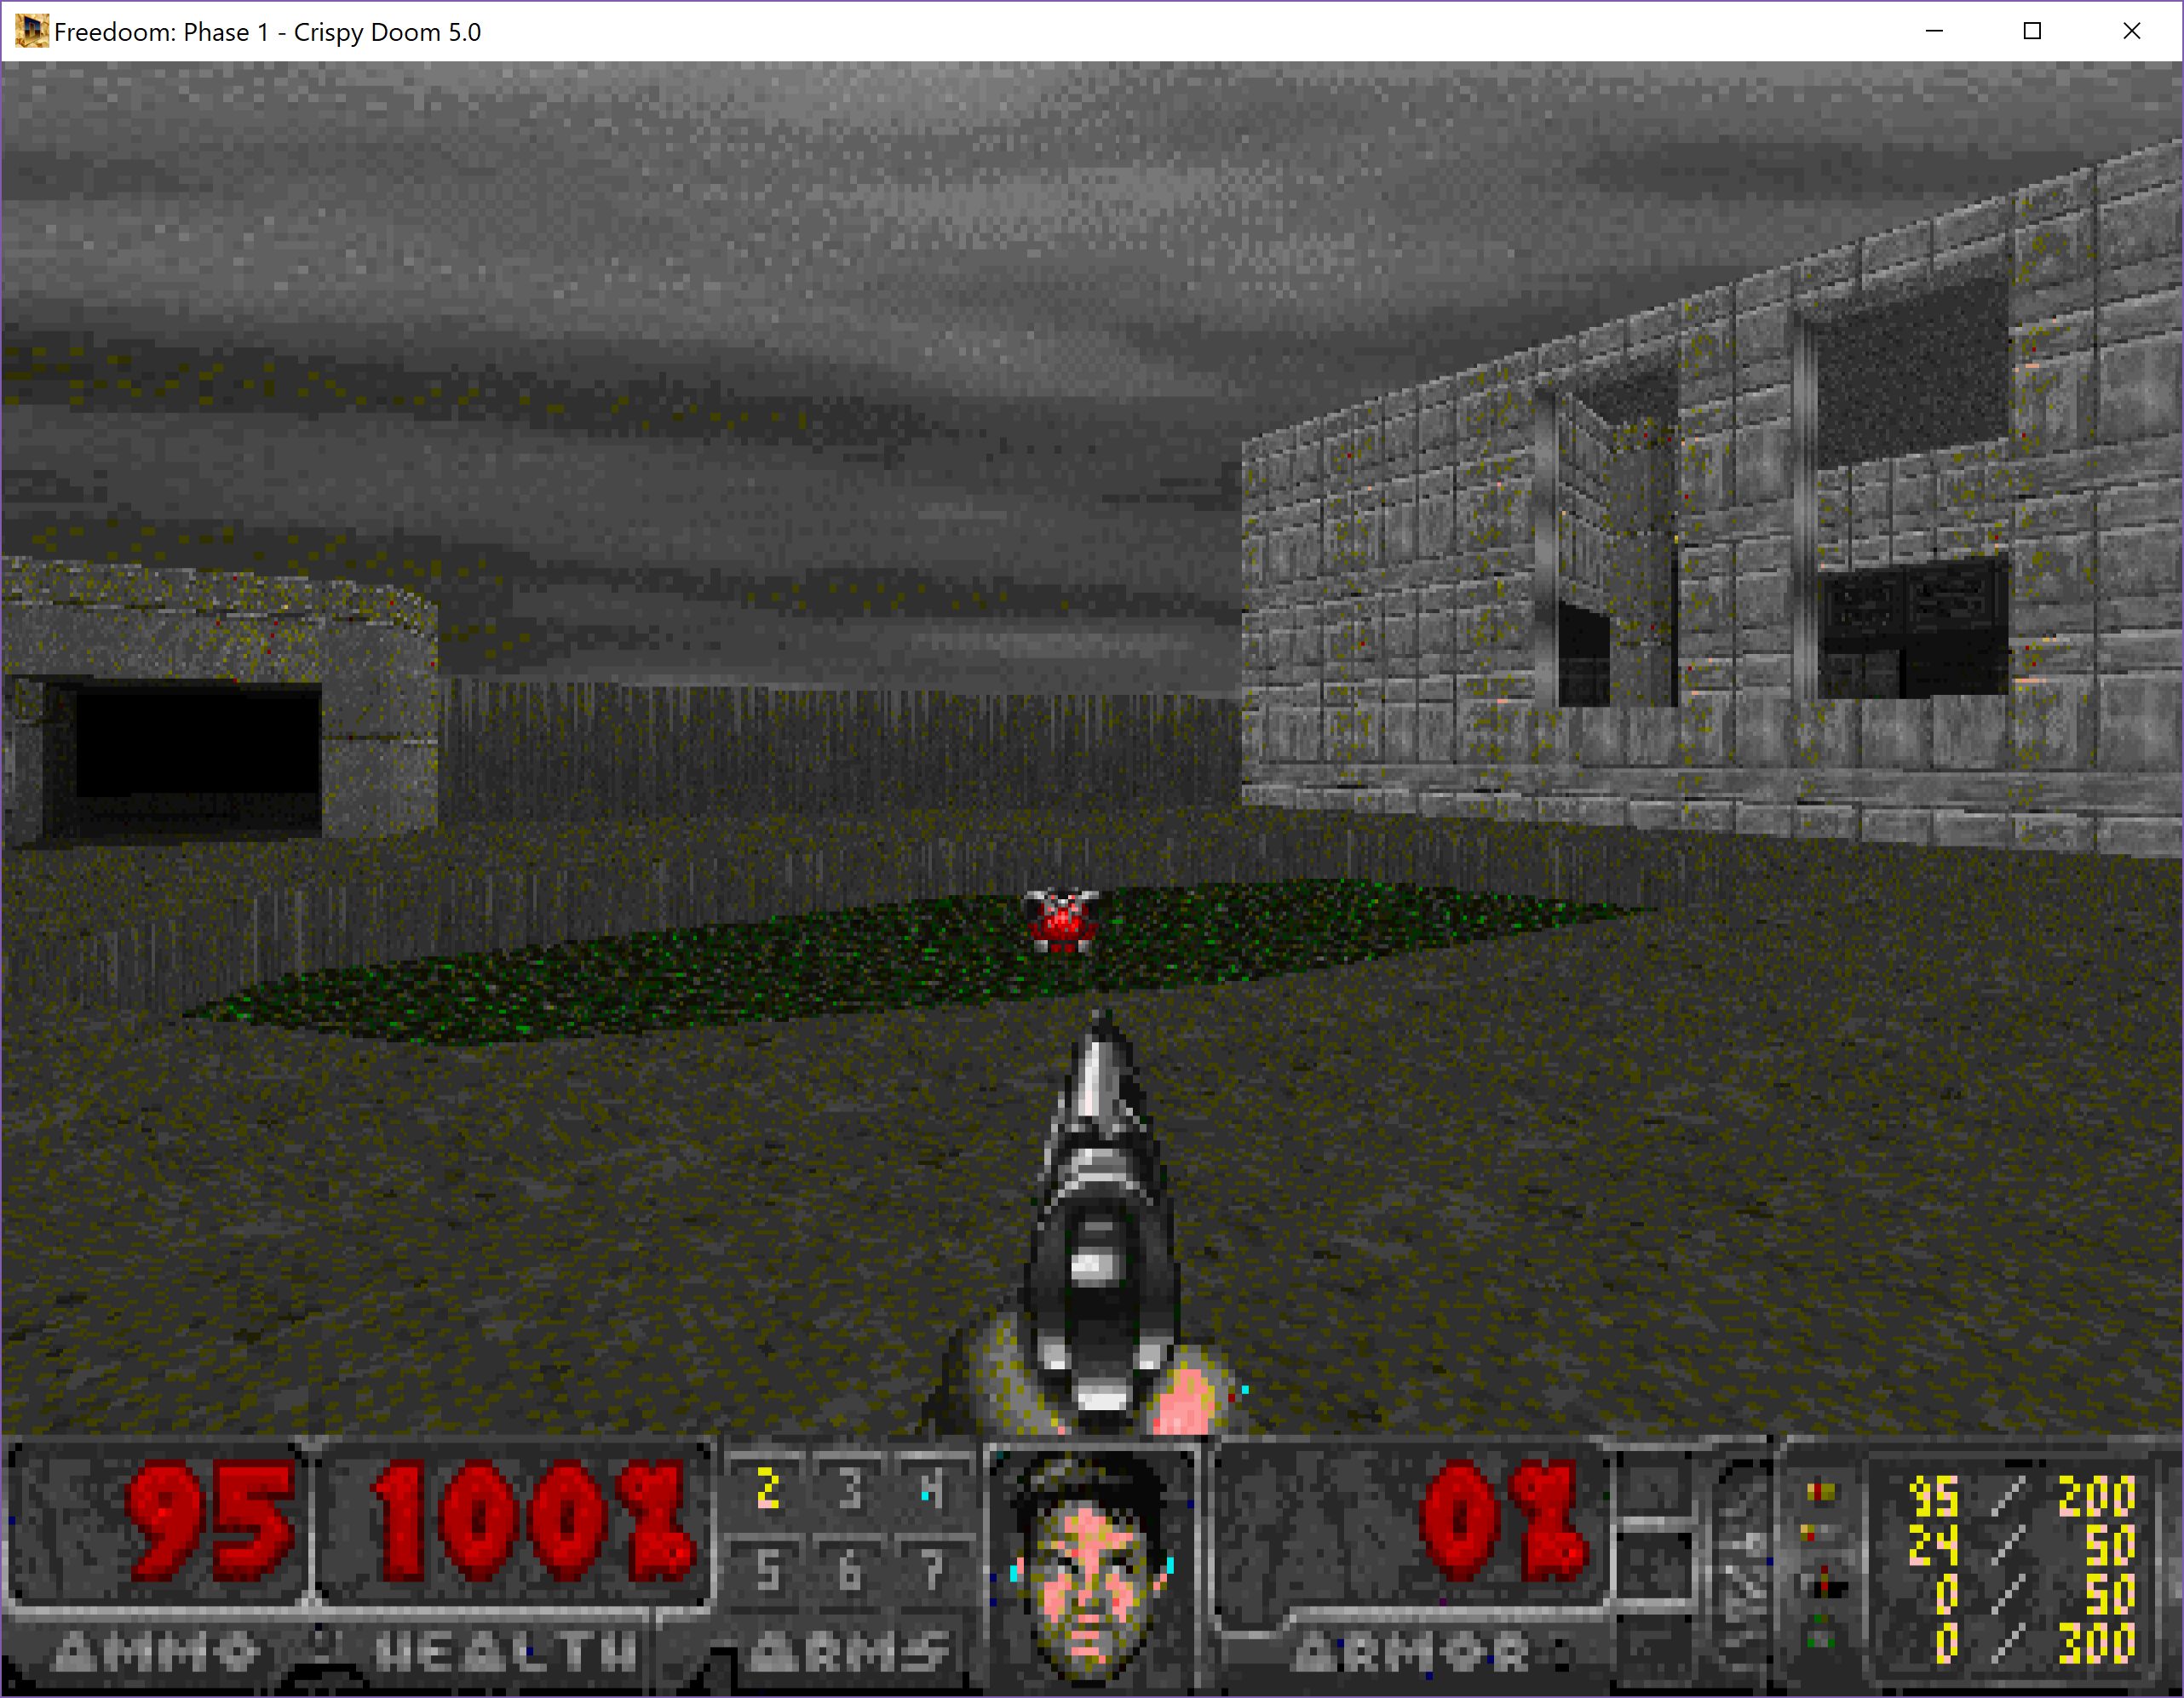
new palette

So while it does take the better part of forever to go through all the images like this, it certainly gives zeeDoom a little more ‘building the world from scratch’ type feel.