Updated Darwin 0.3

Darwin03_29_4_2017.7z

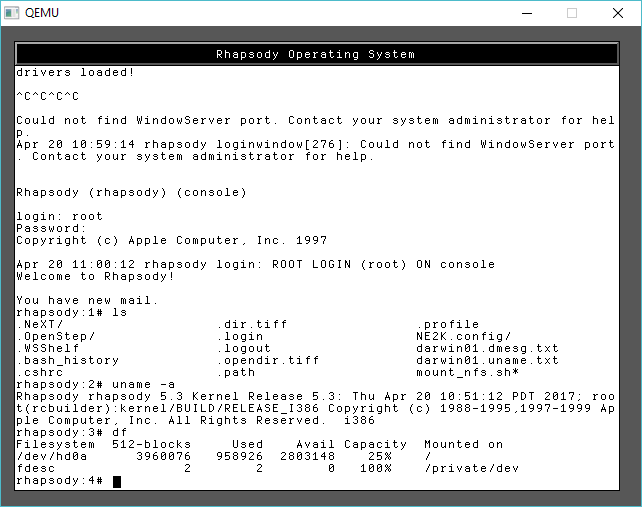
It still boots single user mode, one of the source projects has a nice rm -rf $DSTROOT so it nuked what little progress I made during the week.

But I have the compiler running and lots more.  It has issues with netinfo which is really the only thing blocking it from multiuser boot.  Some syscall not found, and I need to dig into the kernel to see if it even exists…

I’ll re-build all the libs and headers.  Oddly enough the disk image I can build libraries and programs can’t build driverkit or the kernel…

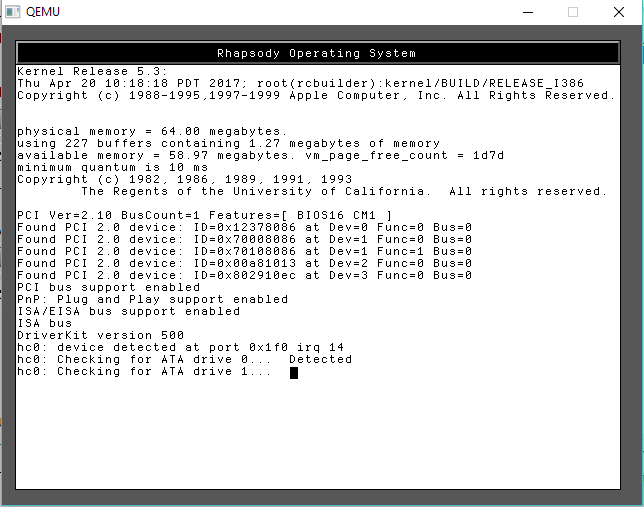
Darwin 0.3 single user mode test drive

So I asked around for some old Darwin CD’s and I got lucky!

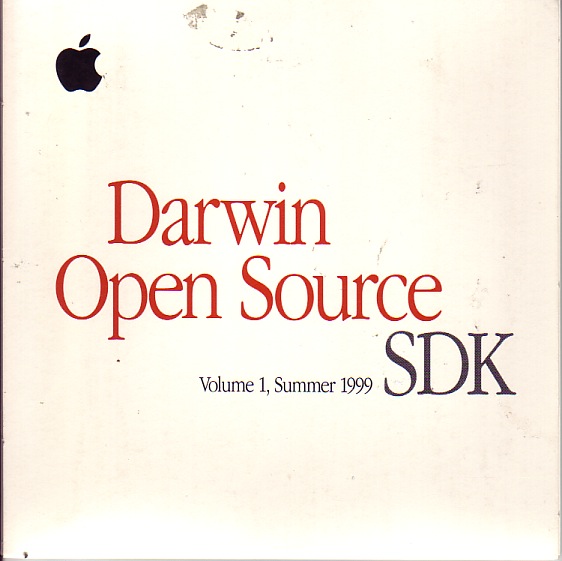
Darwin 0.3 Front

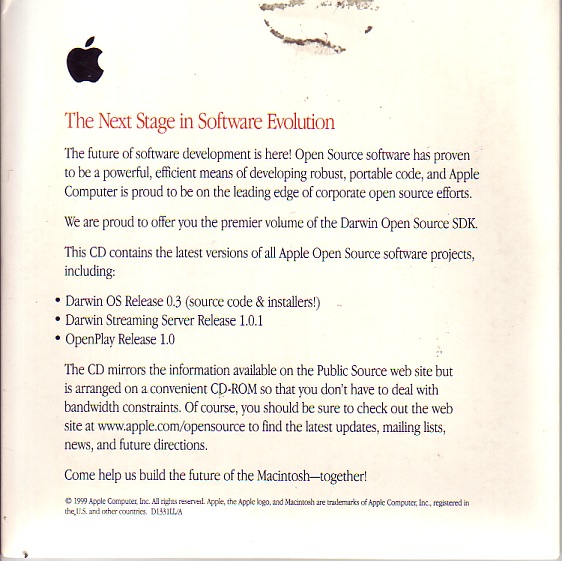
Volume 1, Summer of 1999!  Although the back doesn’t really give it justice:

Darwin 0.3 back

As you can guess, when they talk about binary and installers, it’s for the PowerMa computers of the era, and not x86.

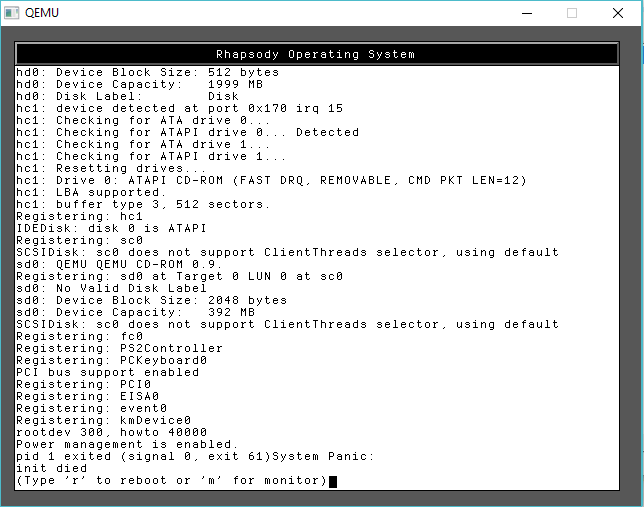
So once more again, I was able to rebuild a kernel, and build some of the OS.  There isn’t really anything to see, it’s not even slightly usable.  However at the boot loader type in

-s

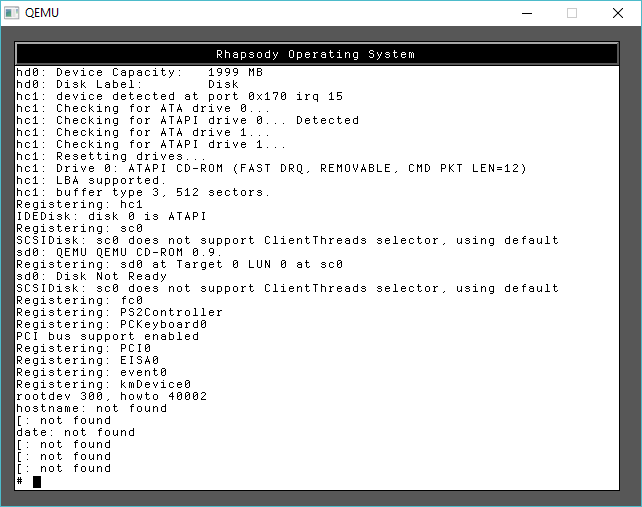
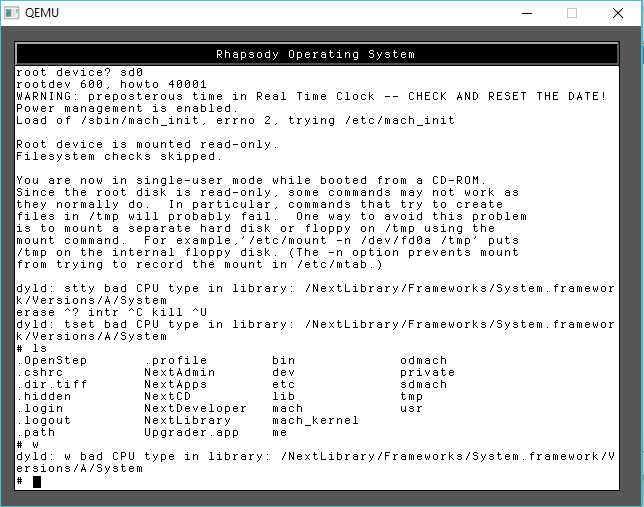
hit enter, and it’ll boot up in single user mode.

Darwin 0.3 single user mode

Darwin03_qemu090_24_4_2017.7z

There is no games, nothing fun to do, I didn’t even build a compiler.  It’s just enough to show that it’ll boot up.  If you manually conifgure the loop back you can ping yourself, launch inetd you can even try to telnet in, but control break is .. broken, and there is no NetInfo running so no passwords.

Of course for anyone finding this site today there are more newer, and capable images on my sourceforge page:

aapl-darwin/files/qemu-images/

Reading .toast image files

Well I put out a cry for help all over the place, looking for Darwin 0.3

And much to my amazement, when I woke up, I not only got a reply but a link to a toast image.  Great, what is toast?  Well simply put toast is a format made popular by then Adaptec Toast.  Obviously the sane thing to do is to find Toast, install it, and mount the disk image inside of a Macintosh.

Adaptec toast 4.0

But, honestly, where is the fun in that?

Instead let’s have Cockatrice III do it!  Now I never did get around to writing proper CD-ROM emulation, nor integrating it, but that doesn’t matter!  Instead I’m going to rely on Daemon tools Lite, to do all the heavy lifting.  DTL will create a virtual SCSI adapter, add in a SCSI CD-ROM device, and mount the image.  Needless to say, I’m on Windows and that is where that part of the adventure ends, as Windows 10 cannot read HFS.

Now back to Cockatrice!

All I had to do was assign the SCSI 6 position to the mounted drive letter, and I’m set!  Just add this to the CockatriceIII_Prefs file:

scsi6 \\.\e:

And now I can mount the image from within Cockatrice III

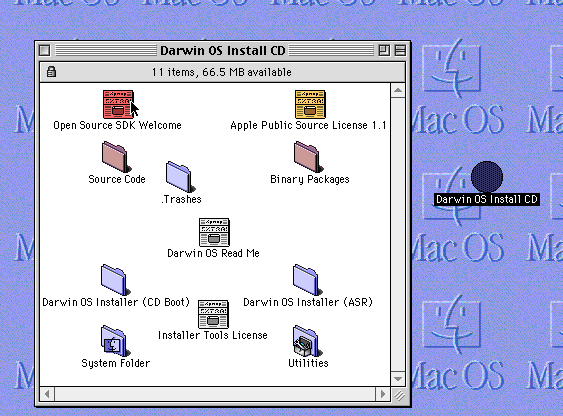
Darwin 0.3 toast mounted

And there we go, now I can copy the files of just like having a real Mac.


Darwin 0.1 + Rhapsody DR 2 booted!


Following up from yesterday, here we go!

Rhapsody 1.0 booting

So I finally got it running, after some inspiration from NCommander over at nextcomputers.org forums, that the Darwin 0.1 kernel is in fact build-able, I went ahead and took a stab at it.  While he was trying to start from OPENSTEP, I tried it from something as close as I could to the target, which was Rhapsody DR2.

Back in the days of the NeXT / Apple merger, there was hope that OPENTSTEP could become the next great OS for the Apple Macintosh.  It had been a while since NeXT had the OS running so things had rotten somewhat, as time had passed on.  However, the first and most viable platform would of course be the x86.  Back in 1993 while feeling increased pressure in the hardware space, NeXT was forced to start porting away from their black m68k based hardware, and this was an opportunity to get their software running on different platforms.  And sadly in 1993, the NRW aka NeXT RISC Workstation that was in development with dual m88000 processors was killed along with all hardware projects. In the end it didn’t matter as much as the only processor from the early 90’s that has a vibrant future is the i386.

So back again to this transitional time before OS X 10, there were developer versions of this OS seeded out that required you to have an intel machine as OPENSTEP was being ported to the PowerPC machines that Apple was selling.

So, on May 14, 1998, the last public version for the Intel processor was released, DR2.

However, two interesting things happened along the way to what would become OS X Server 1.0 .  The first is that Apple gave up on the ‘yellow box‘ portable API, and to satisfy the GPL requirement to release changes to source code, Apple would go one further and release the source code to many of the internal system utilities, along with the kernel in what was known as Darwin.

This was a big deal for many of us, as the cost of getting the source code to any UNIX was incredibly prohibitive, and OS’s like Linux, NetBSD/OpenBSD/FreeBSD were picking up steam, OPENSTEP being awaken from it’s cryonic hibernation but with the promise of being free and open software was pretty great!  Back in the day it sure looked promising!

Obviously, things didn’t work out as everyone had hoped as Apple either straight up ignored anyone on the outside, or they hired people who showed promise, made them sign NDA’s and were basically never heard from again.

So the recently recovered source code to Darwin 0.1 corresponds with the release of the PowerPC only OS X Server 1.0.  However, as we all found out, Darwin will still built and maintained on Intel, as it was a very secretive plan B, in case something went wrong with the PowerPC platform.  Being portable had saved NeXT before, and now it would save Apple.

So with this little background, and a lot of stumbling around in the dark, I came up with some steps, that have permitted me to build the Darwin 0.1 kernel under DR2.

However, it was not perfect, and the biggest glaring issue was due to the software that was recovered, the layer known as driverkit, (driverkit-139.1-1.tar.gz) turns out to be from another, later release of Darwin, the 0.2 release, which the only thing surviving is the driver kit. Â It doesn’t build cleanly, and In order to get it to build I had to break the mach PCI bus. Â This means that yes, PCI devices will not load at runtime, only at boottime by sald.

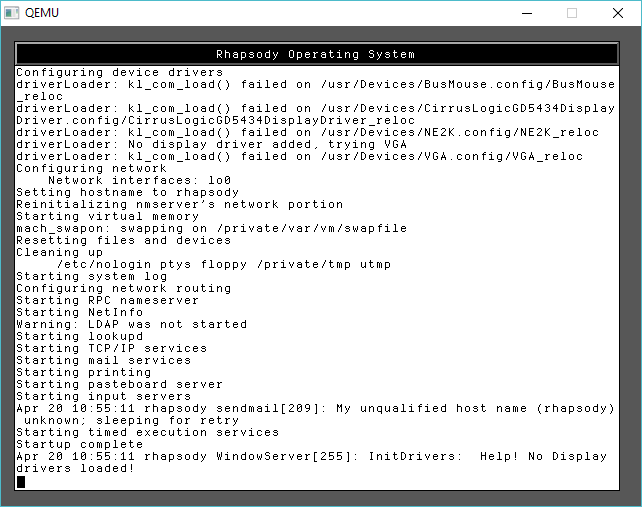
After a lot of fighting, I was able to produce a system that could boot into both single user and multiuser mode, although it was unable to load drivers so there was no networking, and no UI.

In a fit of boredom, I built a bunch of the command line tools for Darwin, and a few libraries, and then went to see why the driverkit had a problem finding the reason why KernBus was undefined, or even with some attempts at helping all the methods were unknown, I stumbled onto the fact that during compilation it will generate new headers, and in those headers are the correct interface for driverkit to call into the KernBus.  So, I was able to quickly rebuild driverkit, then re-link into the kernel and now I could load drivers!  Thrilled with this much, I did something more aggressive, I made a dump of my install ‘target’ and then restored it onto an image of my dev VM.  And much to my amazement it booted up to the graphical login.  I now had PCI working correctly.

Darwin 0.1

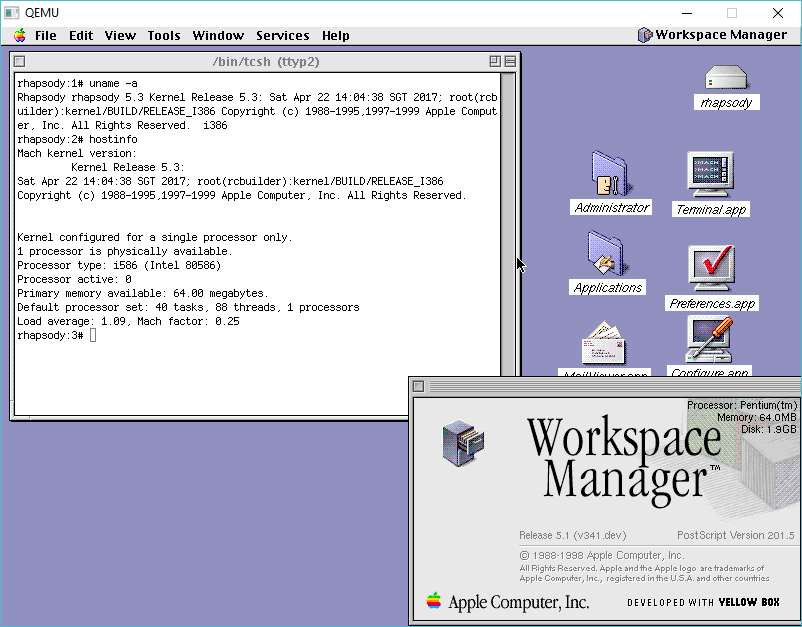
This kind of thing is not for casual users, but if you install DR2 into a VM, you ought to be able to then use this ISO image, and follow these instructions, and you will then have a DR2 OS from 1998 with the OS X 1.0 kernel from 1999 running. The biggest difference I’ve noticed is that the newer kernel can use 512MB of RAM, a nice bump up from 192 which was the prior limit.

Obviously, there is a lot more work to be done, it’d be nice to find some source to an IDE or other block controller and modify it to work with the massive disks of today, along with the filesystem code to handle partitions larger than 2GB.

Maybe it will be possible to port in the driverkit to XNU, so we can get things like existing drivers, and SMP, massive filesystems etc.. It’s great to see we are going the right way.

For fans, here is a qemu 0.90 image+exe that can run Darwin 0.3 into single user mode.

EDIT and for people still hitting this, here is a multiuser bootable image.  I’ll keep updating on the source forge page.

Getting the first side of Dark Side of the Moon onto a floppy diskette

Back in 1995, 2 really neat things happened.  First is that 32bit computing to the masses finally happened.  The second is that lousy audio compression started to really really take off.

And like many other people, who weren’t lucky enough to have a SUN or NeXT workstation, we got our first taste through Real Audio.

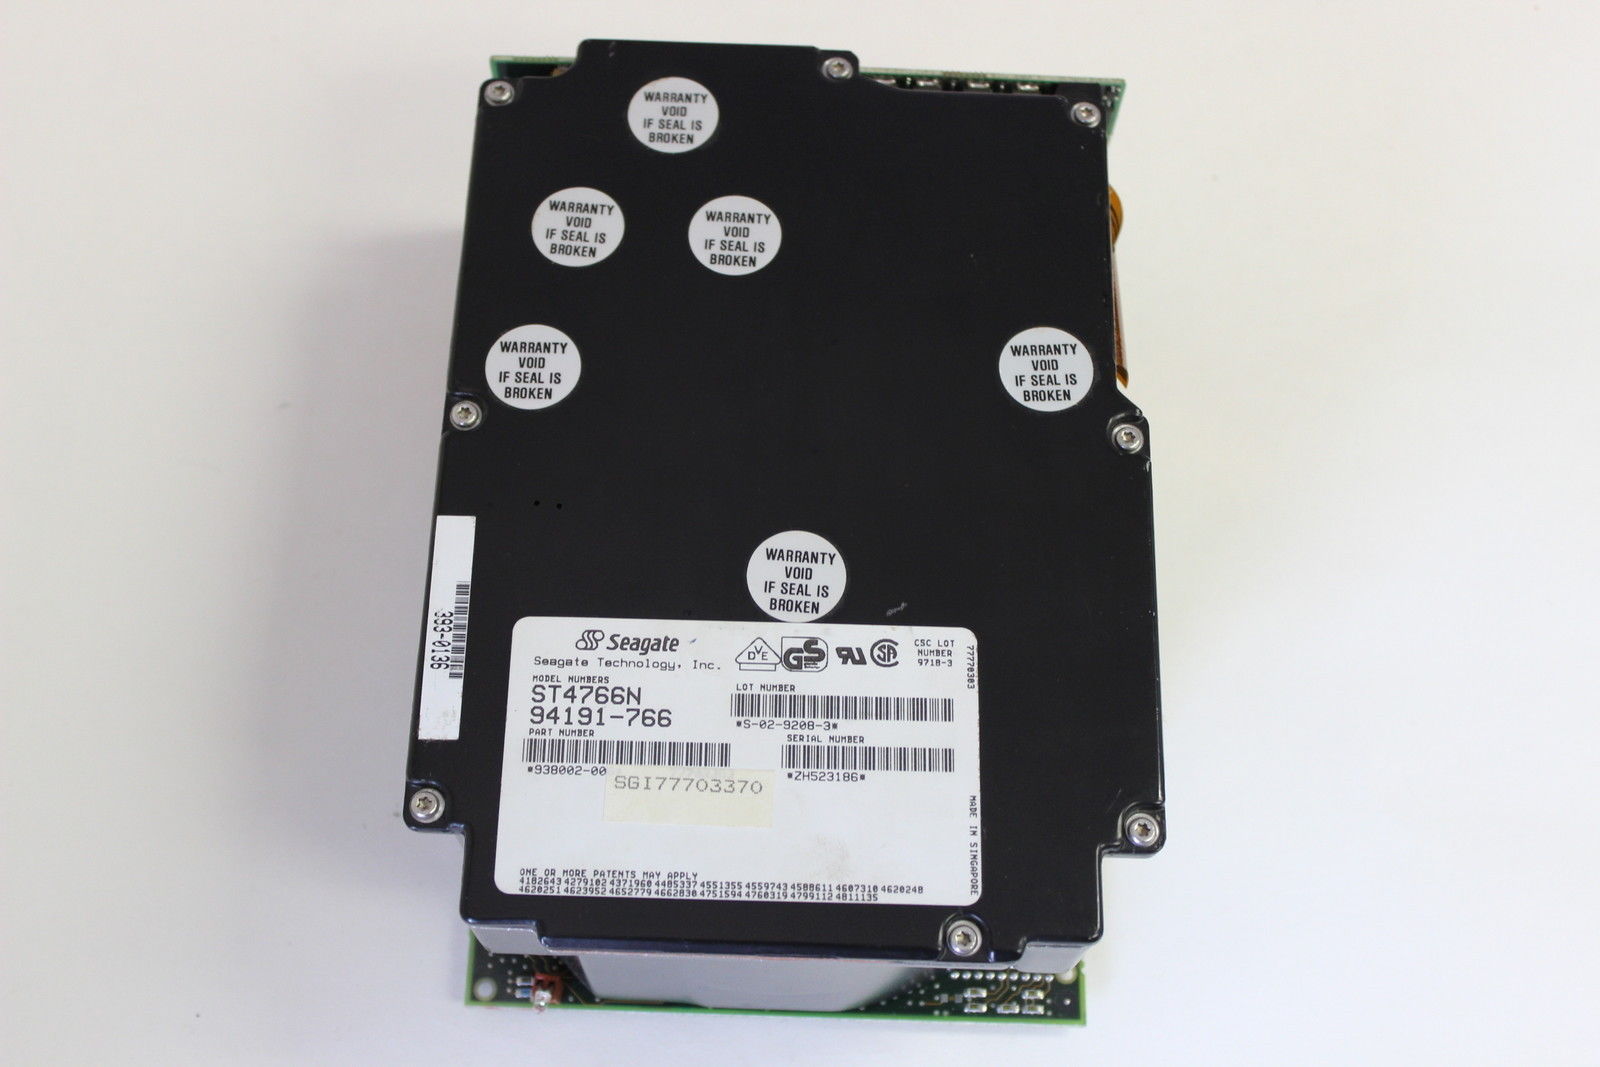
Back in the day, I was lucky enough to have a ST4766N 676MB SCSI disk, that was actually large enough to decompress a CD-ROM audio disc to, which in the mid 90’s was a rarity!

Big disks making transcoding possible

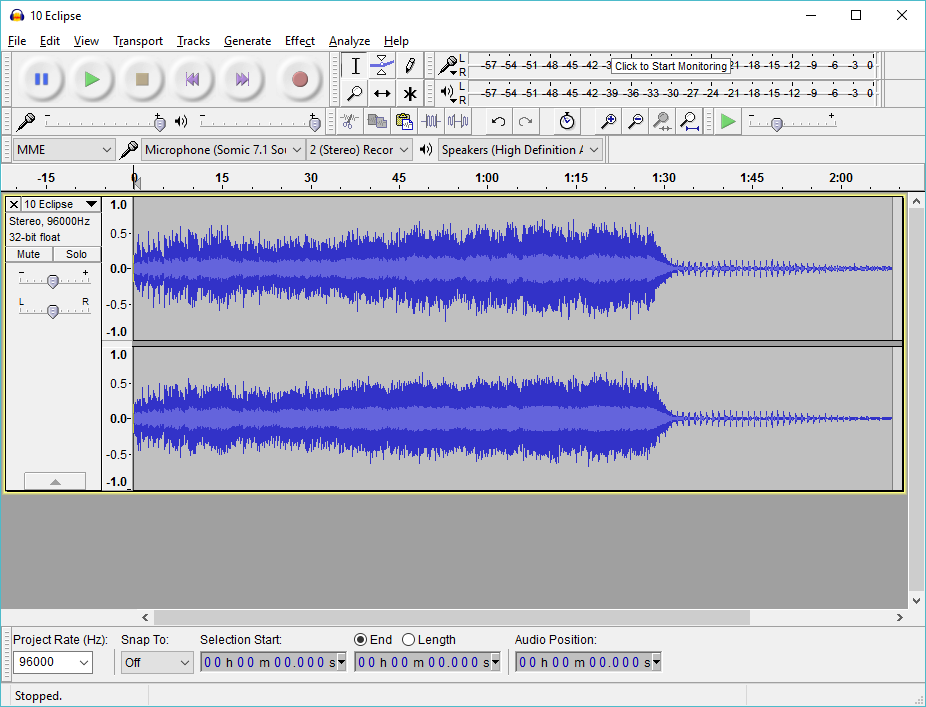
So with enough disk space, I was able to rip the CD-ROM to uncompress WAV files.  Oddly enough today, this is a trival thing to do.  In this day and age to re-create it, however I’m going to take a FLAC, and downsample it to a 44100Hz WAV file using Audacity.

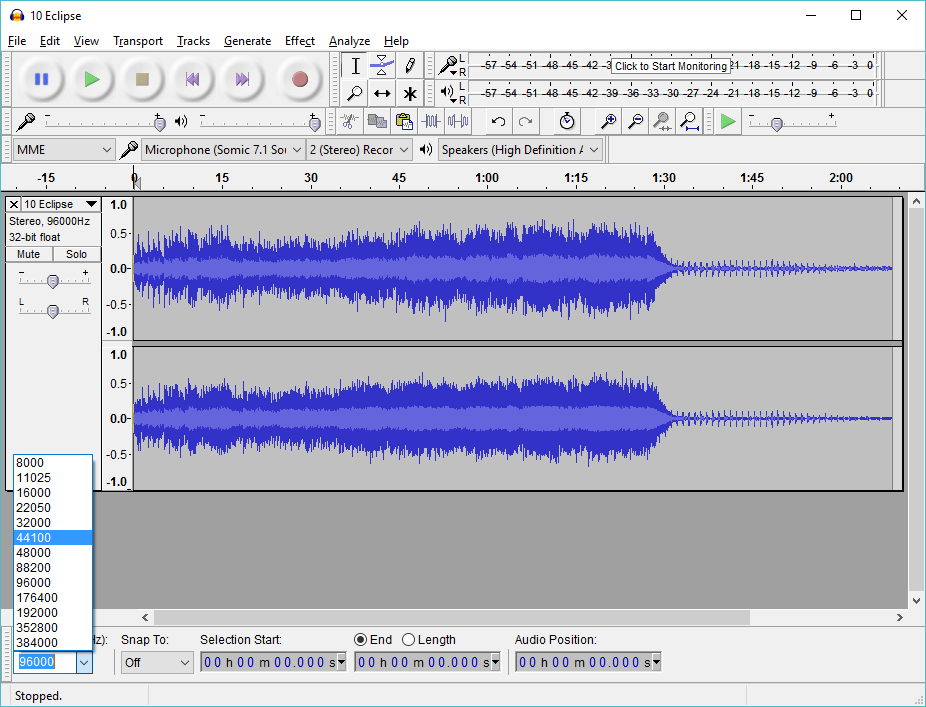
Once you’ve opened up your source material, in the bottom left drop it down to 44100…

And this will let you start the export process

And this let’s you set it to a signed 16-bit PCM WAV which Real Audio can happily transcode.

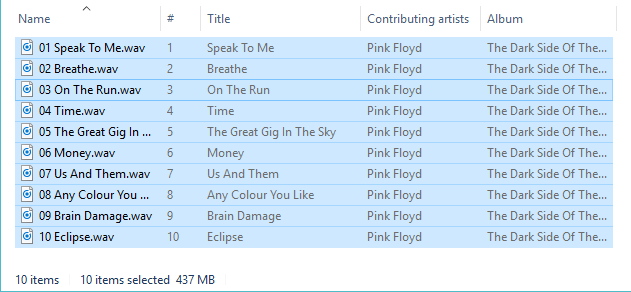
437MB of uncompressed audio

And this is why for most people transcoding a CD-ROM would be out of reach, as ripping a CD-ROM would require an enormous amount of hard disk space for someone circa 1995.

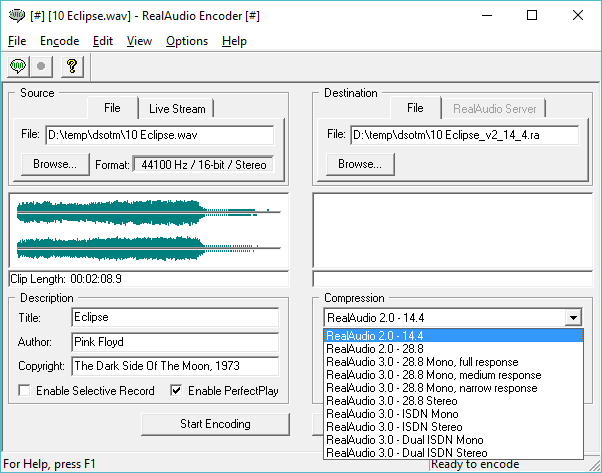
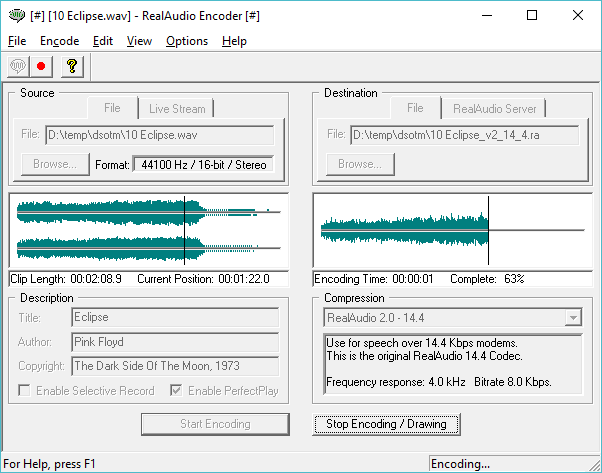
Using the encoder, it’s a simple matter of opening up the WAV file, select a destination name, and set the encoder.  In this case I want the smallest file possible, so Im using RealAudio version 2, suitable for 14.4 modem.

And just hit the ‘Start Encoding’ button, and you are good to go!  In the day this whole process would take HOURS and HOURS… I think the encoding ran over night.  But today this only takes a few seconds.

And now it’s super easy to load it up on a player, and listen to it’s…. semi awesomeness.

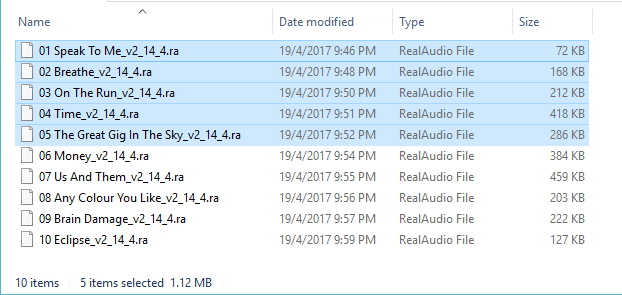
Side 1 in under 1.44MB

And just as I recalled, I was able to transcode the first 5 tracks in under 1.2MB, enough to fit onto a 5 1/4″ diskette, or a 3 1/2″ disk.

Once Windows 95 was a shipping thing, things like the media player started to get better and more versatile codecs to support u-law, a-law, MPEG-2, and even MP3.  But thanks to an early start Real Audio was up there with flash as one of the first ‘must have’ programs to unleash the new and exciting.  Real couldn’t make the jump to mobile devices, and once MP3 streaming via shoutcast and other ‘DIY’ free solutions took over the market and obliterated the very expensive and proprietary RealAudio servers.  While progressive networks is still around, they are the Yahoo of audio.

One minor thing of interest is that VLC, can play RealAudio files.  I thought it was interesting, although I guess not all that practical.

For anyone who wants to play along, you too can try these files:

Running Netware 3.12 on Qemu / KVM 2.8.0

So yeah, let’s build a NetWare 3.12 server! I’ve covered this over and over and over, but heh let’s do it again!

First things first, the default position of the NE2000 card at 0x300/IRQ 9 does NOT WORK.  This is the biggest stumbling block, and time waster right there.  I loaded a PCnet driver, and it didn’t lock, but it didn’t work.  I loaded 2 ne2000’s thinking the second would come up in the correct position but that didn’t work either.  The solution of course is to dive into the parameters for QEMU to drive devices.

So for the fun of it, here is how I’m going to run this in a nested VM.  It’s also why I didn’t bother enabling the ‘-enable-kvm’ flag.  Although on a real machine I would.

qemu-system-i386 -m 16 \
-cpu 486 \
-net none \
-vnc :1 \
-device ne2k_isa,mac=00:2e:3c:92:11:01,netdev=lan,irq=11,iobase=0x320  \
-netdev vde,id=lan,sock=/tmp/local \
-hda netware312.qcow2 \
-hdb netware312_data.qcow2 \
-parallel none \
-monitor tcp::4400,server,nowait

So the key portion here is the iobase & irq.  This let’s me sidestep the IRQ 9, port 0x300 issue.  Talking to the monitor and running ‘info qtree’ I’m able to look at the parameters that I can pass the network card:

bus: isa.0
type ISA
dev: ne2k_isa, id ""
  iobase = 800 (0x320)
  irq = 11 (0xb)
  mac = "00:2e:3c:92:11:01"
  vlan = 
  netdev = "lan"
  isa irq 11

As you can see there is actually a few further things I could have set, but the key ones here being the iobase, the irq, the mac address, and then assigning it to a netdev, in this case I then bind it to a VDE.

Now the fun part goes back to the old days of Netware when your network could run several possible frame times.  If you have 2 machines with different frames, they will not see each-other.  it was a cheap way to hide networks well until the wide spread availability of sniffers.  Naturally cisco and Novell have different terms for the same things.  Below are the ones that are relevant to Ethernet:

[table id=1 /]

So in my case on my Netware server I simply load my NE2000 like this:

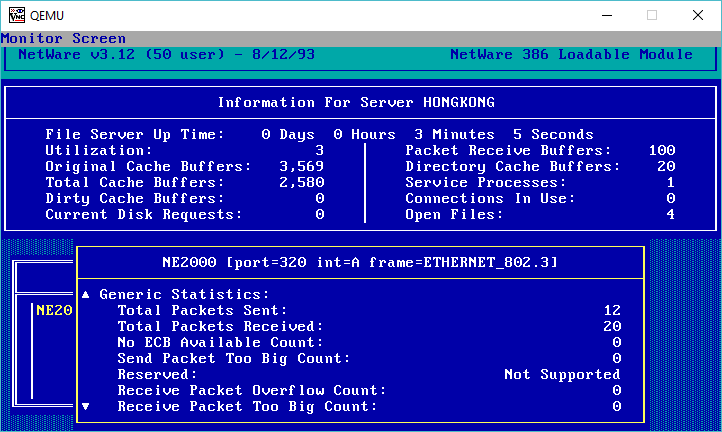
LOAD NE2000 PORT=320 INT=A FRAME=ETHERNET_802.3
BIND IPX TO NE2000 NET=800852

Next on my cisco router I simply need:

ipx routing ca00.06a3.0000

interface FastEthernet0/0
ipx network 800852

And now I can see my server from the router:

HKOffice#sho ipx servers
Codes: S - Static, P - Periodic, E - EIGRP, N - NLSP, H - Holddown, + = detail
U - Per-user static
1 Total IPX Servers

Table ordering is based on routing and server info

Type Name Net Address Port Route Hops Itf
P 4 HONGKONG 852.0000.0000.0001:0451 2/01 1 Fa0/0
HKOffice#

And the interface looks busy on NetWare

NetWare 3.12

NetWare servers advertise their internal networks, much like how people should be using loopback adapters in OSPF, or EIGRP … So if you check the IPX routing table, you’ll see the wire route to the internal network:

HKOffice#sho ipx route
Codes: C - Connected primary network, c - Connected secondary network
S - Static, F - Floating static, L - Local (internal), W - IPXWAN
R - RIP, E - EIGRP, N - NLSP, X - External, A - Aggregate
s - seconds, u - uses, U - Per-user static/Unknown, H - Hold-down

2 Total IPX routes. Up to 1 parallel paths and 16 hops allowed.

No default route known.

C 800852 (NOVELL-ETHER), Fa0/0
R 852 [02/01] via 800852.002e.3c92.1101, 150s, Fa0/0

Just like that!

One thing to note, on VDE, I had an issue where the NetWare server takes about a minute before it’ll see traffic.  It could be my IOS for all I know…..

4.3BSD syslogd for Windows

Continuing from my TACACS adventure, I also thought it would be nice to capture syslogs, and save them. Oddly enough this is a big business, with even low end products like Kiwi Syslog server costing some $295 USD!

Well that’s too much for me, so I figured that the most wide spread at the time must have been the 4.3BSD syslogd, so I’ll start with that.

Just as before this was a pretty straight forward port, I had to remove all the /dev/kmem and UNIX socket stuff, as they obviously don’t exist on Windows.  Just as the same, you can’t “write to users” to send messages, so by default output is a file.  I suppose I could use the net send functionality to pop up a message, but I find it just as annoying today as it was then.

At any rate in no time I was able to setup a simple config file, and then get my router to turn on full logging & enable full debugging to get a continuous stream of messages.  The only ‘gotcha’ is that this sylogd wants to be able to do reverse lookups, so you really ought to have a DNS with reverse entries, or a good hosts file.

syslogd_win32 -d
off & running....
init
cfline(*.emerg;*.alert;*.crit;*.err;*.warning;*.notice;*.info;*.debug   log.txt)
7 7 7 7 7 7 7 7 7 7 7 7 7 7 7 7 7 7 7 7 7 7 7 7 X FILE: log.txt
0 0 0 0 0 0 0 0 0 0 0 0 0 0 0 0 0 0 0 0 0 0 0 0 0 UNUSED:
logmsg: pri 56, flags 8, from jaderabbit, msg syslogd: restart
Logging to FILE log.txt
syslogd: restarted
cvthname(192.168.254.10)
logmsg: pri 277, flags 0, from testcisco, msg 2458: 00:24:19: SNMP: HC Timer 619E3D1C fired
Logging to FILE log.txt
cvthname(192.168.254.10)
logmsg: pri 277, flags 0, from testcisco, msg 2459: 00:24:19: SNMP: HC Timer 619E3D1C rearmed, delay = 5000
Logging to FILE log.txt
cvthname(192.168.254.10)
logmsg: pri 277, flags 0, from testcisco, msg 2460: 00:24:21: IP: s=192.168.254.1 (FastEthernet0/0), d=239.255.255.250, len 202, dispose ip.hopcount
Logging to FILE log.txt
cvthname(192.168.254.10)
logmsg: pri 277, flags 0, from testcisco, msg 2461: 00:24:21: IP: s=192.168.254.1 (FastEthernet0/0), d=239.255.255.250, len 202, dispose ip.hopcount
Logging to FILE log.txt
cvthname(192.168.254.10)
logmsg: pri 277, flags 0, from testcisco, msg 2462: 00:24:21: IP: s=192.168.254.1 (FastEthernet0/0), d=239.255.255.250, len 202, dispose ip.hopcount
Logging to FILE log.txt
cvthname(192.168.254.10)
logmsg: pri 277, flags 0, from testcisco, msg 2463: 00:24:21: IP: s=192.168.254.1 (FastEthernet0/0), d=239.255.255.250, len 202, dispose ip.hopcount
Logging to FILE log.txt
cvthname(192.168.254.10)
logmsg: pri 277, flags 0, from testcisco, msg 2464: 00:24:22: SNMP: HC Timer 61875370 fired
Logging to FILE log.txt
cvthname(192.168.254.10)
logmsg: pri 277, flags 0, from testcisco, msg 2465: 00:24:22: SNMP: HC Timer 61875370 rearmed, delay = 20000
Logging to FILE log.txt
cvthname(192.168.254.10)
logmsg: pri 277, flags 0, from testcisco, msg 2466: 00:24:22: IP: s=192.168.254.1 (FastEthernet0/0), d=192.168.254.255 (FastEthernet0/0), len 159, rcvd 3
Logging to FILE log.txt
cvthname(192.168.254.10)
logmsg: pri 277, flags 0, from testcisco, msg 2467: 00:24:22: UDP: rcvd src=192.168.254.1(17500), dst=192.168.254.255(17500), length=139
Logging to FILE log.txt
cvthname(192.168.254.10)
logmsg: pri 277, flags 0, from testcisco, msg 2468: 00:24:22: IP: s=192.168.254.1 (FastEthernet0/0), d=192.168.254.255, len 159, dispose udp.noport
Logging to FILE log.txt

As you can see, running it in debug mode tells me what is going on.  And the log.txt file contains a nicely formatted log file, just the way that it was done on BSD:

Apr 13 13:11:04 jaderabbit syslogd: restart
Apr 13 13:11:17 testcisco 2458: 00:24:19: SNMP: HC Timer 619E3D1C fired
Apr 13 13:11:17 testcisco 2459: 00:24:19: SNMP: HC Timer 619E3D1C rearmed, delay = 5000
Apr 13 13:11:27 testcisco 2460: 00:24:21: IP: s=192.168.254.1 (FastEthernet0/0), d=239.255.255.250, len 202, dispose ip.hopcount
Apr 13 13:11:27 testcisco 2461: 00:24:21: IP: s=192.168.254.1 (FastEthernet0/0), d=239.255.255.250, len 202, dispose ip.hopcount
Apr 13 13:11:27 testcisco 2462: 00:24:21: IP: s=192.168.254.1 (FastEthernet0/0), d=239.255.255.250, len 202, dispose ip.hopcount
Apr 13 13:11:27 testcisco 2463: 00:24:21: IP: s=192.168.254.1 (FastEthernet0/0), d=239.255.255.250, len 202, dispose ip.hopcount
Apr 13 13:11:27 testcisco 2464: 00:24:22: SNMP: HC Timer 61875370 fired
Apr 13 13:11:27 testcisco 2465: 00:24:22: SNMP: HC Timer 61875370 rearmed, delay = 20000
Apr 13 13:11:34 testcisco 2466: 00:24:22: IP: s=192.168.254.1 (FastEthernet0/0), d=192.168.254.255 (FastEthernet0/0), len 159, rcvd 3
Apr 13 13:11:34 testcisco 2467: 00:24:22: UDP: rcvd src=192.168.254.1(17500), dst=192.168.254.255(17500), length=139
Apr 13 13:11:34 testcisco 2468: 00:24:22: IP: s=192.168.254.1 (FastEthernet0/0), d=192.168.254.255, len 159, dispose udp.noport


I’m sure it’s full of other bugs, but all I tested was that I could log to a file, and it’s doing that much just fine.  If you feel so inclined you can download & compile it, the source is: syslogd_win32.c

TACACS for Windows

So, in my fun and excitement I was putting together a ‘cisco’ network using dynamips that spans a few sites across the world.  I’m using ancient copies of NT for some servers, although I plan on adding in some 386BSD, SunOS SPARC, and maybe even 68010 based, along with other stuff.

I have the routers running fine, but I felt like adding some kind of external authentication service, and TACACS certainly fits the bill!  And to be all vintage as usual, I’m not going to use TACACS+ as it’s simply too new, and too big.  So first things first, I need a copy of the source to TACACS as I’m certainly not going to write my own!  I found this directory on ftp.funet.fi which has a bunch of old cisco related material, and sure enough there is a tacacsd.c

Even better it’s from 1989 which suits my need for something positively ancient, and simple enough to be a single C file.

/*
 * TACACS daemon suitable for using on Un*x systems.
 *
 * Janruary 1989, Greg Satz
 *
 * Copyright (c) 1989 by cisco Systems, Inc.
 * All rights reserved.
 */

Porting it to run on Winsock, really wasn’t all that hard, I had it running as a standalone program within a few minutes, however there is no password file in NT, so as a simple test, I had simply short circutied the username lookup to always suceeded, along with a password compare.

Since I have VMWare Player installed on my machine, I can use the VMNet 8 connection to talk to my host computer.  The hard part of course is trying to figure out which NIC is which, but dynamips -e will give you a list like this:

Cisco Router Simulation Platform (version 0.2.16-experimental(merge uppc smips)Build-1-x86/MinGW stable)
Copyright (c) 2005-2011 Christophe Fillot.
Build date: Dec 15 2016 04:20:41

Pcap version [WinPcap version 4.1.3 (packet.dll version 4.1.0.2980), based on libpcap version 1.0 branch 1_0_rel0b (20091008)]
Network device list:

   \Device\NPF_{D3DF08C4-7A33-4FE2-9351-000153705A30} : VMware Virtual Ethernet Adapter
   \Device\NPF_{3FB194EF-F3A4-45F2-AFAB-A4ABA98E8FF7} : Qualcomm Atheros Ar81xx series PCI-E Ethernet Controller
   \Device\NPF_{C46B48B8-74E1-4938-9BFE-E407949A7940} : Microsoft
   \Device\NPF_{F72C65CD-C6BC-44FE-9019-C5057DB1D9AB} : VMware Virtual Ethernet Adapter
   \Device\NPF_{CE75B9C1-8189-4C8F-8EF6-6CEB0C6D0329} : Microsoft
   \Device\NPF_{737A8B62-9A87-4739-9CC2-BF05CDC315D0} : Microsoft

And with that information, we are good to go!  Since I’m doing a simple test here, I don’t need anything other than a single ethernet to talk to my host, so here is a VERY simple cli to run dynamips:

..\dynamips.exe -P 7200 ..\c7200-is-mz.19991126.bin -t npe-200 -p 0:C7200-IO-FE -s 0:0:gen_eth:\Device\NPF_{D3DF08C4-7A33-4FE2-9351-000153705A30}  –idle-pc 0x604f1da0 -X

And I’m off booting!

Cisco Router Simulation Platform (version 0.2.16-experimental(merge uppc smips)Build-1-x86/MinGW stable)
Copyright (c) 2005-2011 Christophe Fillot.
Build date: Dec 15 2016 04:20:41

Pcap version [WinPcap version 4.1.3 (packet.dll version 4.1.0.2980), based on libpcap version 1.0 branch 1_0_rel0b (20091008)]
Idle PC set to 0x604f1da0.
IOS image file: ..\c7200-is-mz.19991126.bin

ILT: loaded table "mips64j" from cache.
ILT: loaded table "mips64e" from cache.
ILT: loaded table "ppc32j" from cache.
ILT: loaded table "ppc32e" from cache.
vtty_term_init
CPU0: carved JIT exec zone of 64 Mb into 2048 pages of 32 Kb.
C7200 instance 'default' (id 0):
  VM Status  : 0
  RAM size   : 256 Mb
  IOMEM size : 0 Mb
  NVRAM size : 128 Kb
  NPE model  : npe-200
  Midplane   : vxr
  IOS image  : ..\c7200-is-mz.19991126.bin

Loading ELF file '..\c7200-is-mz.19991126.bin'...
ELF entry point: 0x80008000

C7200 'default': starting simulation (CPU0 PC=0xffffffffbfc00000), JIT enabled.
mips64_test.s ROMMON emulation microcode.

mips64_test.s Launching IOS image at 0x80008000...
Self decompressing the image : ####()## [OK]

              Restricted Rights Legend

Use, duplication, or disclosure by the Government is
subject to restrictions as set forth in subparagraph
(c) of the Commercial Computer Software - Restricted
Rights clause at FAR sec. 52.227-19 and subparagraph
(c) (1) (ii) of the Rights in Technical Data and Computer
Software clause at DFARS sec. 252.227-7013.

           cisco Systems, Inc.
           170 West Tasman Drive
           San Jose, California 95134-1706


Cisco Internetwork Operating System Software
IOS (tm) 7200 Software (C7200-IS-M), Experimental Version 12.0(20000110:181554) [otroan-thanksgiving-rel 175]
Copyright (c) 1986-2000 by cisco Systems, Inc.
Compiled Thu 20-Jan-00 15:07 by otroan
Image text-base: 0x60008900, data-base: 0x613D0000

cisco 7206VXR (NPE200) processor with 253952K/8192K bytes of memory.
R5000 CPU at 200Mhz, Implementation 35, Rev 1.2
6 slot VXR midplane, Version 2.1

Last reset from power-on
Bridging software.
X.25 software, Version 3.0.0.
1 FastEthernet/IEEE 802.3 interface(s)
125K bytes of non-volatile configuration memory.
4096K bytes of packet SRAM memory.

65536K bytes of ATA PCMCIA card at slot 0 (Sector size 512 bytes).
8192K bytes of Flash internal SIMM (Sector size 256K).

         --- System Configuration Dialog ---

Would you like to enter the initial configuration dialog? [yes/no]: no


Press RETURN to get started!

Next I need to take note of how VMWare & Windows have configured my VMNet8 adapter, and configure the router accordingly:

Ethernet adapter VMware Network Adapter VMnet8:

   Connection-specific DNS Suffix  . :
   Link-local IPv6 Address . . . . . : fe80::fcd4:2983:bcba:2d63%19
   IPv4 Address. . . . . . . . . . . : 192.168.254.1
   Subnet Mask . . . . . . . . . . . : 255.255.255.0
   Default Gateway . . . . . . . . . :

So Im using 192.168.254.1/24 so let’s setup the router.  Let’s give it a .10 for the heck of it.  Also I’m going to turn off DNS name resolution for the moment.

00:00:02: %DEC21140-3-DUPLEX_SPEED: FastEthernet0/0 doesn't support the configured duplexand speed combination
00:00:32: %LINK-5-CHANGED: Interface FastEthernet0/0, changed state to administratively down
00:00:32: %SYS-5-RESTART: System restarted --
Cisco Internetwork Operating Sys
Router>
Router>tem Software
IOS (tm) 7200 Software (C7200-IS-M), Experimental Version 12.0(20000110:181554) [otroan-thanksgiving-rel 175]
Copyright (c) 1986-2000 by cisco Systems, Inc.
Compiled Thu 20-Jan-00 15:07 by otroan
00:00:33: %LINEPROTO-5-UPDOWN: Line protocol on Interface FastEthernet0/0, changed state to down
Router>ena
Router#config t
Enter configuration commands, one per line.  End with CNTL/Z.
Router(config)#int fa0/0
Router(config-if)#ip address 192.168.254.10 255.255.255.0
Router(config-if)#no shut
Router(config-if)#exit
Router(config)#ip route 0.0.0.0 0.0.0.0 192.168.254.1
00:01:29: %DEC21140-3-DUPLEX_SPEED: FastEthernet0/0 doesn't support the configured duplexand speed combination 
00:01:31: %LINK-3-UPDOWN: Interface FastEthernet0/0, changed state to up
00:01:32: %LINEPROTO-5-UPDOWN: Line protocol on Interface FastEthernet0/0, changed state to up
Router(config)#no ip domain-lookup
Router(config)#exit
Router#wr
Building configuration...
[OK]
Router#
00:01:39: %SYS-5-CONFIG_I: Configured from console by console

And if everything is going well, I can now ping from Windows!

Microsoft Windows [Version 10.0.14393]
(c) 2016 Microsoft Corporation. All rights reserved.

C:\Users\neozeed>ping 192.168.254.10

Pinging 192.168.254.10 with 32 bytes of data:
Reply from 192.168.254.10: bytes=32 time=54ms TTL=255
Reply from 192.168.254.10: bytes=32 time=31ms TTL=255

Ping statistics for 192.168.254.10:
    Packets: Sent = 4, Received = 4, Lost = 0 (0% loss),
Approximate round trip times in milli-seconds:
    Minimum = 31ms, Maximum = 54ms, Average = 36ms

C:\Users\neozeed>

Awesome!  Pinging from the cisco however fails.

Router#ping 192.168.254.1

Type escape sequence to abort.
Sending 5, 100-byte ICMP Echos to 192.168.254.1, timeout is 2 seconds:
.....
Success rate is 0 percent (0/5)

This fails as Windows by default has it’s firewall on, which then blocks all incoming traffic. However to see that the ICMP would have succeded, you can look at the arp table, and the .1 address should have been learned:

Router#show arp
Protocol  Address          Age (min)  Hardware Addr   Type   Interface
Internet  192.168.254.1           0   0050.56c0.0008  ARPA   FastEthernet0/0
Internet  192.168.254.10          -   ca00.3730.0000  ARPA   FastEthernet0/0

We can either diable the firewall, or we can add a rule to permit ICMP. To do either you need to go to the firewall control panel in Windows.  In this quick example, I’m going to build a rule using the firewall control pannel.
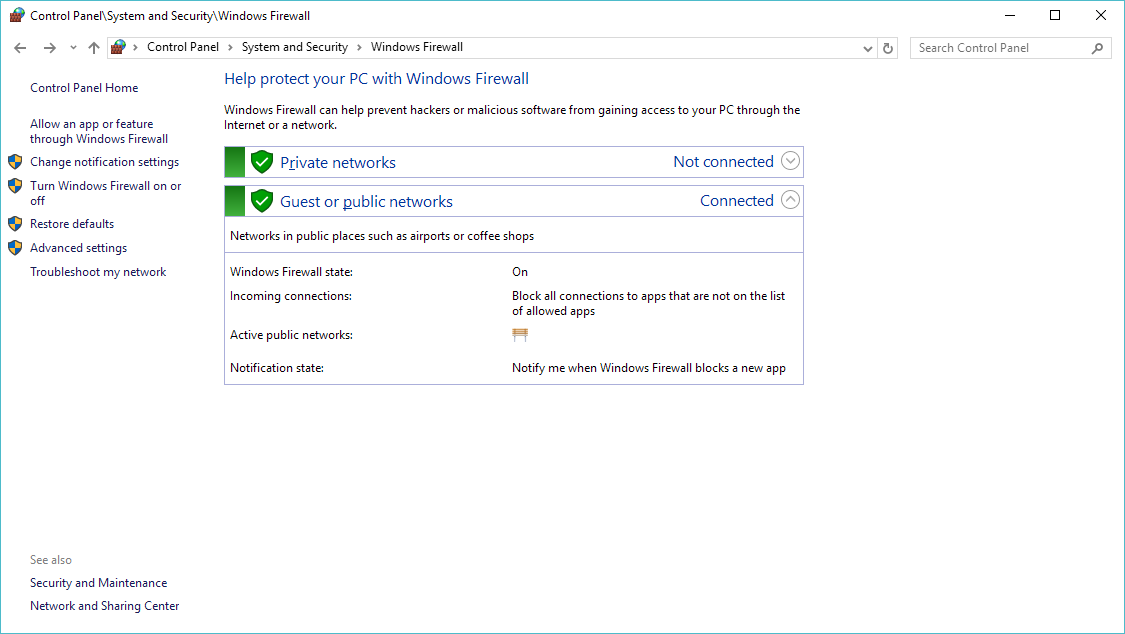
So hit the advanced settings to the left.
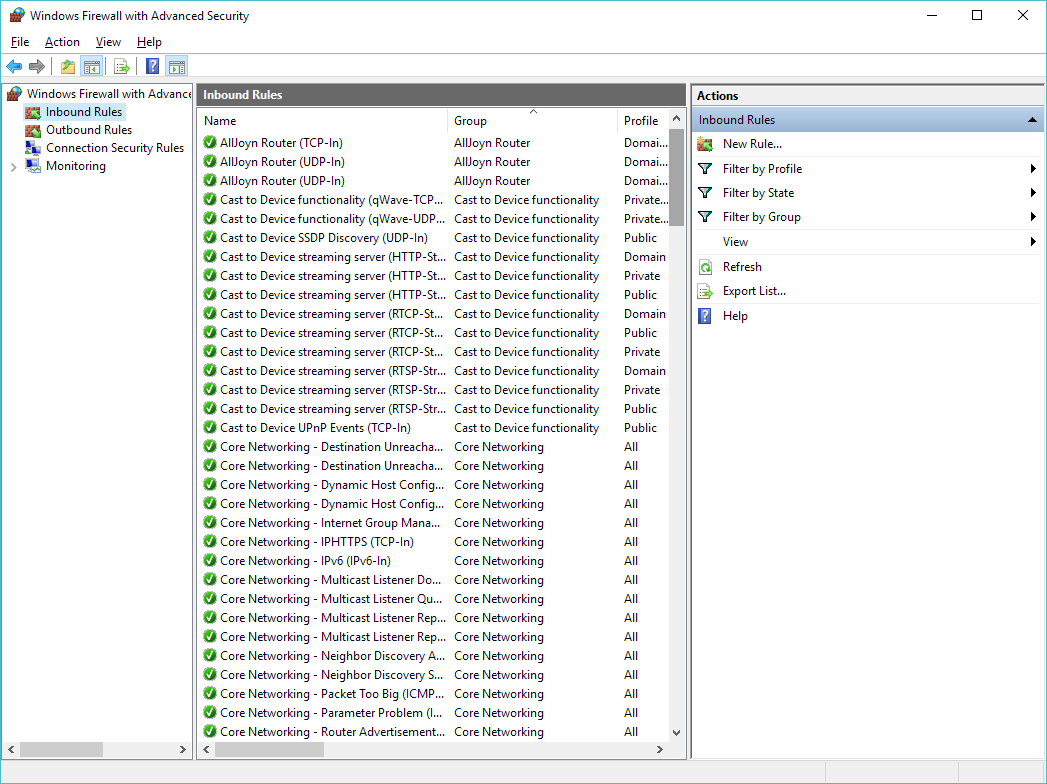
Click on the ‘Inbound Rules’, and now we are going to create a new rule.
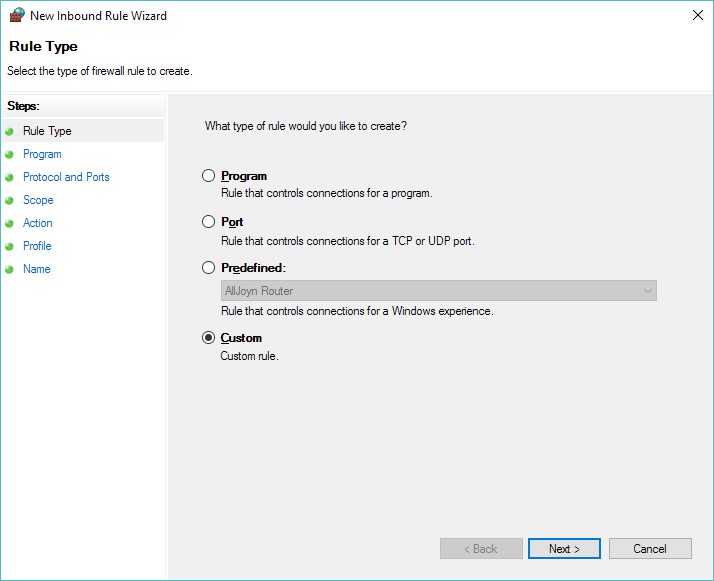
Select a Custom Rule
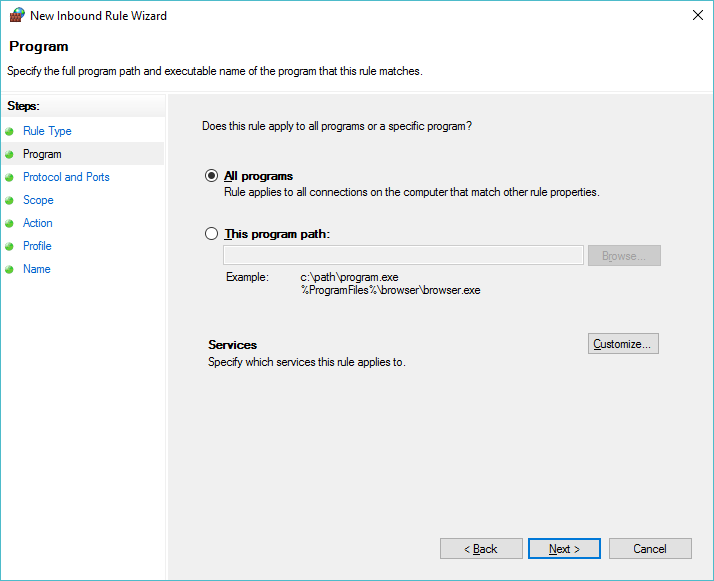
Allow ‘All Programs’
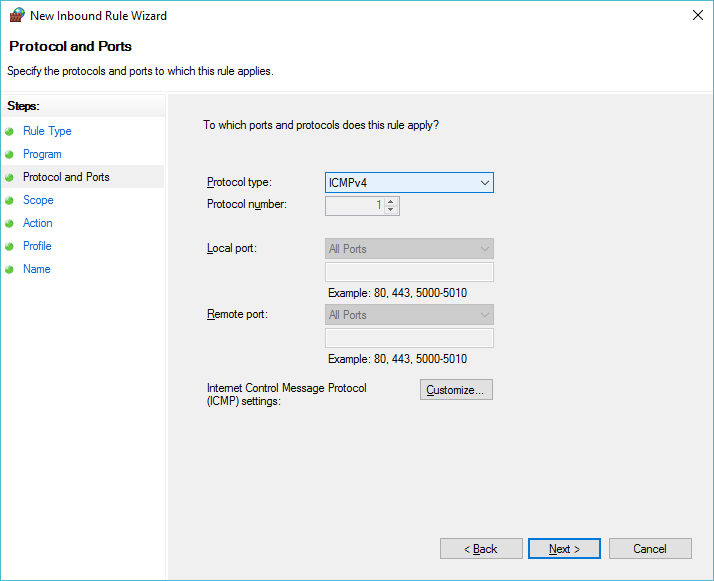
Then set the protocol to ICMPv4
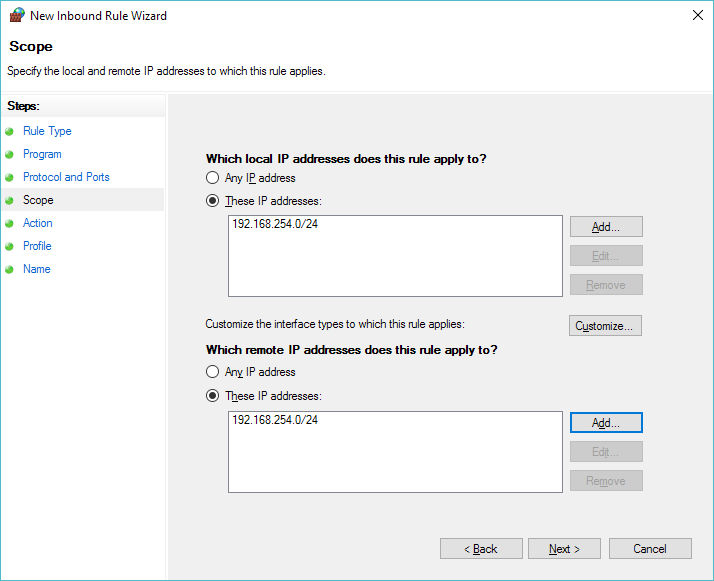
Now we can select the scope of the rule, in this case we are going to allow the 192.168.254.0/24 network to pass icmp traffic to us.  Add it as a source and destination.

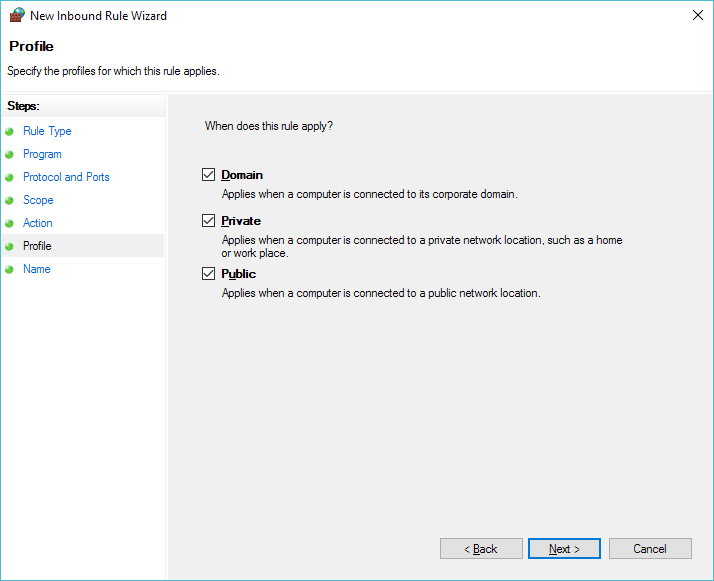
In this quick example I’m applying it everywhere.  I suppose a better  setup would be to make sure the VMNet 8 adapter is a ‘Private’ network, and ONLY apply this to the Private domain.
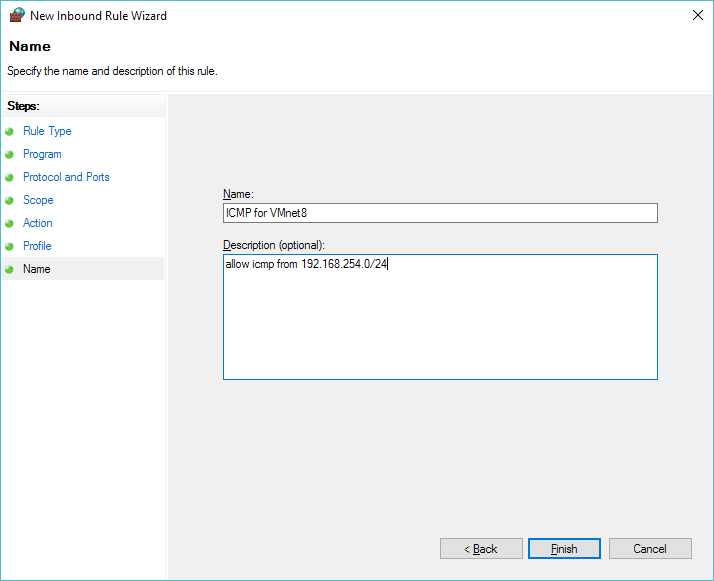
Then give it a name, something like ‘ICMP for VMnet8’

Router#ping 192.168.254.1

Type escape sequence to abort.
Sending 5, 100-byte ICMP Echos to 192.168.254.1, timeout is 2 seconds:
!!!!!
Success rate is 100 percent (5/5), round-trip min/avg/max = 20/30/36 ms

And now we can ping!

Now for the fun, I go ahead and compile my hacked up tacacsd.c, and run it, and then permit it to run on all networks:
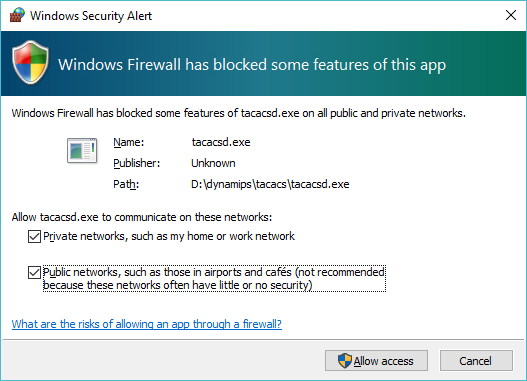
And now I can configure the router to use TACACS.  Keep in mind, once gain that this is *NOT* TACACS+ so this is done a little differently.  I’m going to simply set TACACS for telnet connections.

Router#config t
Enter configuration commands, one per line.  End with CNTL/Z.
Router(config)#tacacs-server host 192.168.254.1
Router(config)#line vty 0 4
Router(config-line)#login tacacs
Router(config-line)#exit
Router(config)#enable password 0 cisco
Router(config)#exit
Router#wr
Building configuration...
[OK]
Router#
00:01:28: %SYS-5-CONFIG_I: Configured from console by console

And now I’m ready to test!

User Access Verification

Username: user
Password:
Router>who
    Line       User       Host(s)              Idle       Location
   0 con 0                idle                 00:01:11
*  2 vty 0     user       idle                 00:00:00 192.168.254.1

  Interface  User      Mode                     Idle Peer Address

Router>

As you can see I logged in as ‘user’ … and keep in mind my TACACS simply permits anything. As for what tacacsd runs by default:

D:\dynamips\tacacs>tacacsd.exe
server starting
using port 12544
validation request from 192.168.254.10
query for user (pw->pw_gecos) accepted

It’s not exciting, but as you can see it is attempting to look through the gecos to verify the user, but in this case I just allow anything.  And besides just granting anyone the ability to login, let’s take a look on the wire:

WireShark capture of TACACS traffic

As you can see the username & password go over the wire in plain text.  Even the response is simple enough to decode:
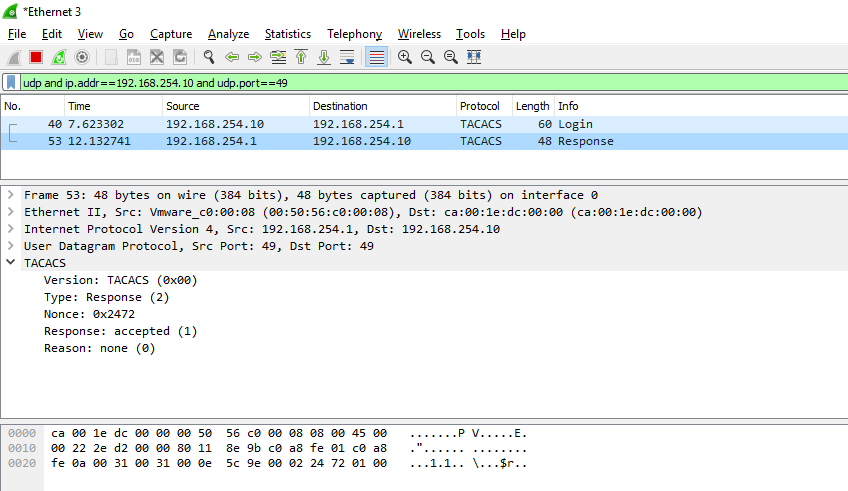
Access granted!

Needless to say this is something that you would NEVER EVER EVER run in a real network.  Of course a system that sits on telnet is vulnerable anyways, but I suppose a TACACS server that lets anyone log in, makes either a VERY trusting network, or a good honeypot.  Against my better judgement, here is tacacsd_win32.c  Naturally it could be easily made to verify passwords against pretty much anything.

cflow

This is just me rambling……

Anyways I was looking at some source, and instead of me trying to make heads or tails of it, it’d be more fun to have the machine try to do so, and in this endeavor I thought I’d try cflow.

So let’s try something terribly simply, like the fortune program from Unix 32v:

#include stdio.h

char line[500];
char bline[500];

main()
{
        double p;
        register char * l;
        long t;
        FILE *f;

        f = fopen("/usr/games/lib/fortunes", "r");
        if (f == NULL) {
                printf("Memory fault -- core dumped\n");
                exit(1);
        }
        time(&t);
        srand(getpid() + (int)((t>>16) + t));
        p = 1.;
        for(;;) {
                l = fgets(line, 500, f);
                if(l == NULL)
                        break;
                if(rand() < 2147483648./p)
                        strcpy(bline, line);
                p += 1.;
        }
        fputs(bline, stdout);
        return(0);
}

This is a simple program, to say the least.  So running cflow gives me this:

# cflow fortune.c
main() :
    fopen()
    printf()
    exit()
    time()
    srand()
    getpid()
    fgets()
    rand()
    strcpy()
    fputs()

Simple, right?  Now let’s add in the C pre-processor, and add in the 32v include paths….

# cflow --cpp='/usr/bin/cpp -nostdinc -I../../include -I../../include/sys -I.' -n fortune.c
    1 main() :
    2     fopen()
    3     printf()
    4     exit()
    5     time()
    6     srand()
    7     getpid()
    8     fgets()
    9     rand()
   10     strcpy()
   11     fputs()

OK same thing, I can’t say I was expecting anything else.  But now let’s add in libc:

# cflow --cpp='/usr/bin/cpp -nostdinc -I../../include -I../../include/sys -I.' -n fortune.c ../libc/gen/*.c ../libc/stdio/*.c
    1 main() [main () at ../libc/gen/ttytest.c:2]:
    2     fopen() [struct _iobuf fopen (file, mode) at ../libc/stdio/fopen.c:5]
    3     printf() [printf (fmt, args) at ../libc/stdio/printf.c:3]:
    4     exit()
    5     time()
    6     srand()
    7     getpid()
    8     fgets() [char *fgets (s, n, iop) at ../libc/stdio/fgets.c:4]
    9     rand() [rand () at ../libc/gen/rand.c:9]
   10     strcpy()
   11     fputs()
   12     ttyname() [char *ttyname (f) at ../libc/gen/ttyname.c:17]:
   13         isatty() [if (isatty (( & _iob[1]) _file)) at ../libc/stdio/flsbuf.c:24]:
   14             gtty() [gtty (fd, ap) at ../libc/gen/stty.c:13]:
   15                 ioctl()
   16         fstat()
   17         open()
   18         read()
   19         strcpy()
   20         strcat()
   21         stat()
   22         close()

Isn’t that cool?  Now what does the kernel do?

I went ahead and renamed the main function call in the 32v kernel so that way it doesn’t mesh the main’s but here is the call flow:

    # cflow --cpp='/usr/bin/cpp -nostdinc -I../../include -I../../include/sys -I.' -n  fortune.c ../libc/gen/*.c ../libc/stdio/*.c ../sys/sys/*.c
    1 main() [main () at ../libc/gen/ttytest.c:2]:
    2     fopen() [struct _iobuf fopen (file, mode) at ../libc/stdio/fopen.c:5]
    3     printf() [printf (fmt, args) at ../libc/stdio/printf.c:3]:
    4     exit() [exit (rv) at ../sys/sys/sys1.c:343]:
    5         closef()
    6         plock()
    7         iput()
    8         xfree() [xfree () at ../sys/sys/text.c:127]
    9         acct() [acct () at ../sys/sys/acct.c:51]:
   10             plock()
   11             compress()
   12             writei()
   13             prele()
   14         memfree()
   15         wakeup()
   16         setrun()
   17         swtch() [swtch () at ../sys/sys/slp.c:417]:
   18             save() [if (save (u u_ssav)) at ../sys/sys/text.c:253]
   19             resume()
   20             spl6()
   21             idle()
   22             spl0()
   23     srand()
   24     getpid() [getpid () at ../sys/sys/sys4.c:120]:
   25     fgets() [char *fgets (s, n, iop) at ../libc/stdio/fgets.c:4]
   26     rand() [rand () at ../libc/gen/rand.c:9]
   27     strcpy()
   28     fputs()
   29     ttyname() [char *ttyname (f) at ../libc/gen/ttyname.c:17]:
   30         isatty() [if (isatty (( & _iob[1]) _file)) at ../libc/stdio/flsbuf.c:24]:
   31             gtty() [gtty () at ../sys/sys/tty.c:90]:
   32                 ioctl() [ioctl () at ../sys/sys/tty.c:102]:
   33                     getf()
   34         fstat() [fstat () at ../sys/sys/sys3.c:18]:
   35             getf()
   36             stat1()
   37         open() [open () at ../sys/sys/sys2.c:80]
   38         read() [read () at ../sys/sys/sys2.c:12]:
   39             rdwr()
   40         strcpy()
   41         strcat()
   42         stat() [stat () at ../sys/sys/sys3.c:36]:
   43             namei() [struct inode namei (func, flag) at ../sys/sys/nami.c:21]
   44             uchar() [uchar () at ../sys/sys/nami.c:216]:
   45                 fubyte()
   46             stat1()
   47             iput()
   48         close() [close () at ../sys/sys/sys2.c:163]

For something more aggressive, check out the QuakeWorld Server, and UAE 0.4