GNS3 + VMWare +Netware 3.12

So continuing from where I left off, I thought I’d setup a small Netware network onto my GNS3 testbed.

Netware was once the big dog in the networking world, but now it’s just a footnote in obscurity.  Long gone are the days of syscon, rconsole, and all the frametypes that Netwaer supported in equally incompatible ways.  So maybe it’s a good thing.

But I digress, years ago I paid good money for a 50 user version of Netware 3.12.  I don’t know why either, but I occasionally like to get it running so I don’t feel like I completely wasted the thing.

With the right lan drivers, installation is a snap.  Or if you don’t have the right lan drivers, create a MS-DOS VM, so it’ll have an IDE hard disk.  You can install netware without lan drivers just fine.  I just installed netware by itself, then added in some patches for the network card & the idle program so it wouldn’t eat 100% of my CPU.  For the network though the command line was a little weird but I worked it out

file server name vmware
ipx internal net 538787d
mount all
load c:\server.312\nw4-idle.nlm
load c:\server.312\pcntnw slot=10001 FRAME=Ethernet_802.2
BIND IPX to pcntnw NET=cab2
load remote password
load rspx

Which gets me networking, and rconsole support.  With the server running, I just then had to enable IPX routing on my cisco routers.
R1

ipx routing ca00.1b00.0008
interface FastEthernet0/1
ipx encapsulation SAP
ipx network CAB1
interface Serial1/0
mtu 2000
ipx network CAB0

R2

ipx routing ca08.140c.0008
interface FastEthernet0/1
ipx encapsulation SAP
ipx network CAB2
interface Serial1/0
mtu 2000
ipx network CAB0

 Now with this all in place I can see the IPX routes from R1, including the one that goes directly into the server:

R1#show ipx route
Codes: C – Connected primary network, c – Connected secondary network
S – Static, F – Floating static, L – Local (internal), W – IPXWAN
R – RIP, E – EIGRP, X – External, A – Aggregate
s – seconds, u – uses, U – Per-user static/Unknown, H – Hold-down

4 Total IPX routes. Up to 1 parallel paths and 16 hops allowed.

No default route known.

C CAB0 (HDLC), Se1/0
C CAB1 (SAP), Fa0/1
R CAB2 [07/01] via CAB0.ca08.140c.0008, 56s, Se1/0
R 5383787D [08/02] via CAB0.ca08.140c.0008, 56s, Se1/0

And of course I can see the server!

R1#show ipx servers
Codes: S – Static, P – Periodic, E – EIGRP, H – Holddown, + = detail
U – Per-user static
2 Total IPX Servers

Table ordering is based on routing and server info

Type Name Net Address Port Route Hops Itf
P 4 VMWARE 5383787D.0000.0000.0001:0451 8/02 2 Se1/0
P 107 VMWARE 5383787D.0000.0000.0001:8104 8/02 3 Se1/0

Now if you remember from the bad old days of Netware, each service running on a server is advertised.  So in this case, type 4 is a file/print server, and 107 is a server running the ‘remote’ facility so you can rconsole into it.

Another thing to take note, is that because I configured IPX on serial interfaces is that their encapsulation is always HDLC.  Also because IPX cannot fragment like TCP/IP the MTU on the serial interface *MUST* be larger than ethernet’s 1500.  I like 2000 as I avoid all frame overhead this way.

Now I’m using the old netware client with the drivers I found here, and it works fine, as long as I had the MTU bumped up on the serial interface.  Now I could have used ethernet, and it’d achieve the same thing, except I’m not in some weird MTU war.

IPX network

IPX network

SA-COMP/1

SA-COMP/1

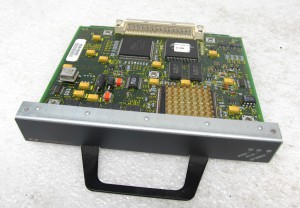
At the same time, it is very slow.  If you want to do anything reasonably fast, you really need to move your client to the same VNet as the server.  But if you want to feel like the old days when connections were slow, well you’ll enjoy a max 400k connection.  I tried enabling stacker compression on the interface, but it resulted in packet corruption.  I think it’s an IOS thing though, so if you play with this, you may have better luck.  Back before MPLS was everyone’s latest wan joy, I ran stacker compression, and the speed boost was really noticeable, with a 1.5:1 or 2:1 compression not being uncommon.  Although on lower routers it could be a killer (the 2500…) or a 7000 with multiple interfaces doing compression it could also bring a router to it’s knees.  Also looking at the support table for the  SA-COMP/1  SA-COMP/4 I doubt 12.4 would support stacker compression properly.

[table id=2 /]

Otherwise, yeah it works fine.  I also loaded up a Windows NT client, and it works too!

With all the truecrypt hysteria running around

truecrypt-logoI thought I’d go mining for old versions, and put them up on CVS web.  Turns out some old versions are missing, but oddly enough not the 1.0 stuff.

So here is the src2html version, and the raw tree view.

And for the really crazy, I dumped all versions into CVS.

I only briefly looked at it, and noticed the block driver has the ability to look at memory.. I don’t know why, but I don’t think I would want my block drivers being able to do that.  maybe it’s a good thing, I don’t know.  I haven’t tried to build it, and I’ve never used TrueCrypt so I really can’t comment on it.

Also pulling through archvie.org I found some old versions of scramdisk. But I never used that either.

BBS down. again.

LOL Maybe I’m just cursed at this point.

This is an email to follow up on the update on our social network accounts (twitter and facebook: @hosthatch) that we are investigating an issue on SSDNode15. Instead of fixing this server, we have chose to restore from 1 hour old backups to some of our other stable servers running for 3+ months with no downtimes. SSDNode15 has unfortunately had very bad luck and has failed 3 times in the past month, which is why we are going to take it out of production, replace most of the parts, burn test it and then put it back into production.

Although I had time to check the log, it turns out I had over 250 users, but a good 150 of them couldn’t figure out the synchronet mandatory send a letter to sysop thing so they abandoned the process.

I don’t know why, but I still liked the idea of being the last OS/2 sysop on the planet, but this year has been ridiculous.  Now that I have it running on VMWare, maybe it’s time I just buy a UPS, and run it on ESX from now on.  But at the same time, I did like the idea of it running in a datacentre.

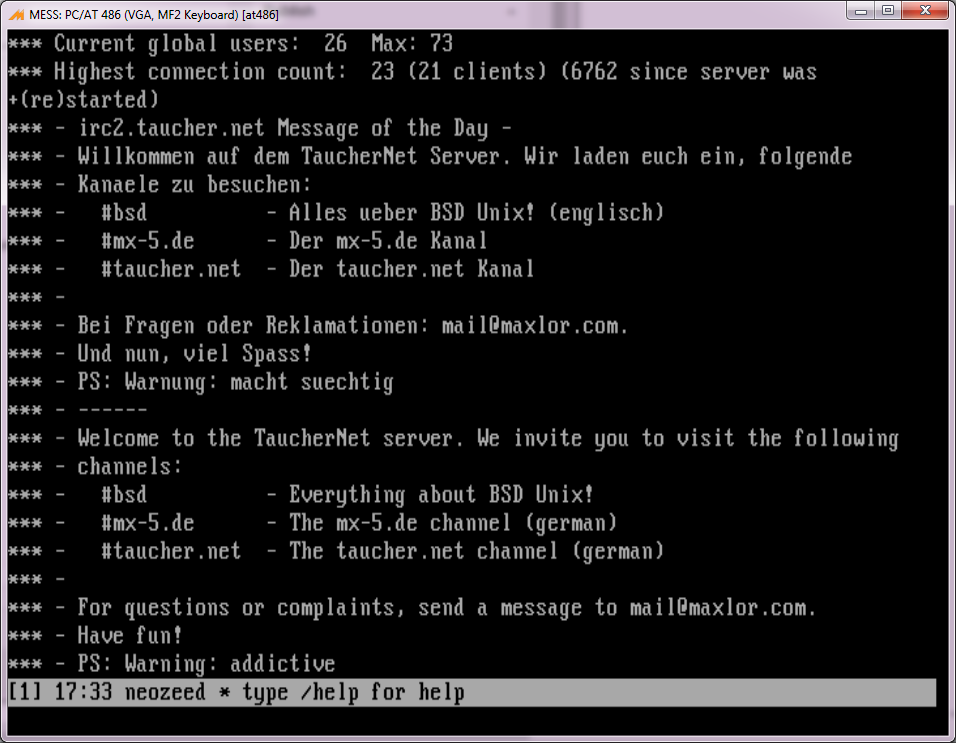
Not that I hang out on IRC anymore

But a ‘fixed’ version for Xenix was requested.

Apparently lots of IRC servers have slightly changed their syntax, which prevents ircII-4.4 from working.

It’s a simple fix.

In server.c, the the last line of the procedure login_to_server should be:

send_to_server(“USER %s 8 * : %s”, username,realname);

That’s it!

ircII-4.4 on Xenix 2.3.4

ircII-4.4 on Xenix 2.3.4

For Xenix users, you can download the binary tar here.

As for how you’ll get it working, well…

OS/2 2.0 on VMware Player

Well this has been driving me crazy for the longest time.  The ‘latest’ drivers for the AMD Pcnet card I can find for VMware is 4.08.  They load up on VMware like everything is normal but it doesn’t work.  But now I have my super awesome GNS3 test bed, so I can take a deeper look.

NDIS2 Driver for OS2 MSLANMAN
December 2000
NDIS2 driver for OS2 – Readme
Version 4.08

Changes made in this version 4.08:
The receive buffer size has been increased from 1518 to 1536.
Changes made in this version 4.07:
Slow network performance when using Interrupt Sharing has been fixed.
After heavy stress for a few hours, a drastic reduction in data transmission was observed. This problem has now been fixed.
The maximum number of Transmit Buffers that the driver can support has now been increased from 16 to 32.

I’m using OS/2 2.0 with the XR06100 fix, along with TCP/IP 2.0 with UN64092 fix and MPLS WR06000 (I never did find a fixpack for this).

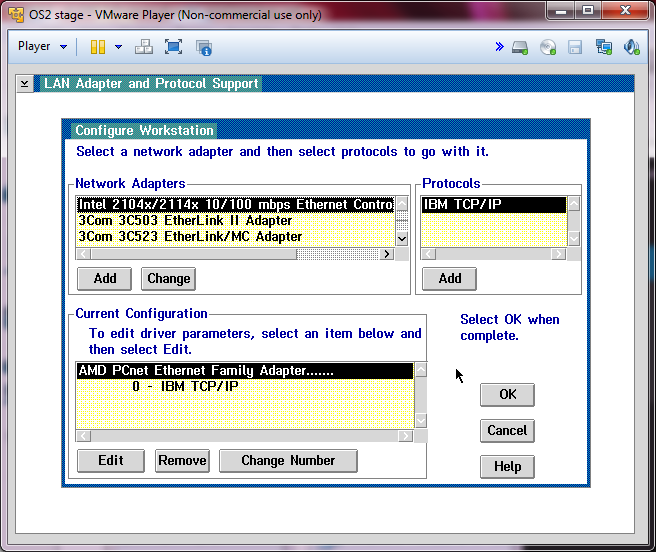
I installed AMD’s MSLANMAN OS2 driver, as MPLS picks this up, and lets me use the nice UI to add in the network card.  But it never seemed to matter, as the blasted thing didn’t work.

MPLS

MPLS all configured

Which is a pretty simple configuration.  It’s just a simple lan adapter with TCP/IP.  I’m not even going to try to do anything fancy, like trying to get the wildly incompatible NetWare client working

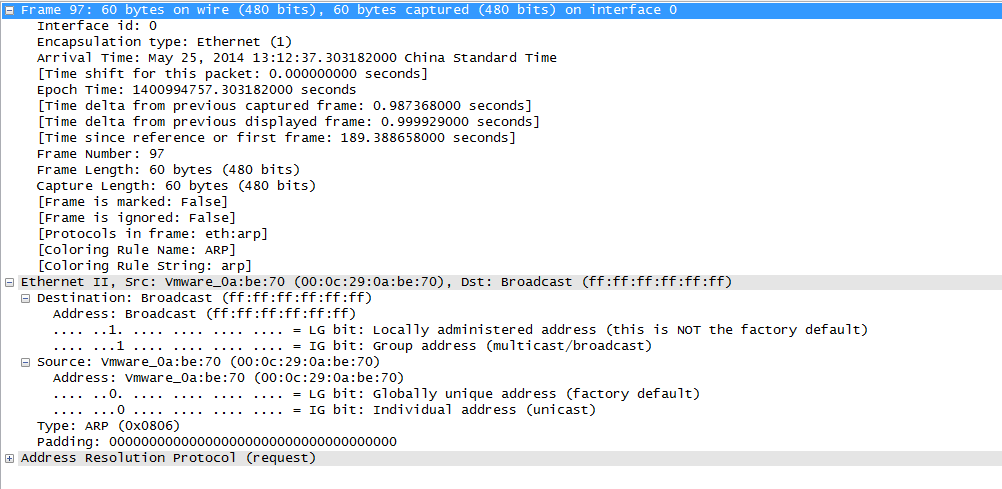
ARP

ARP

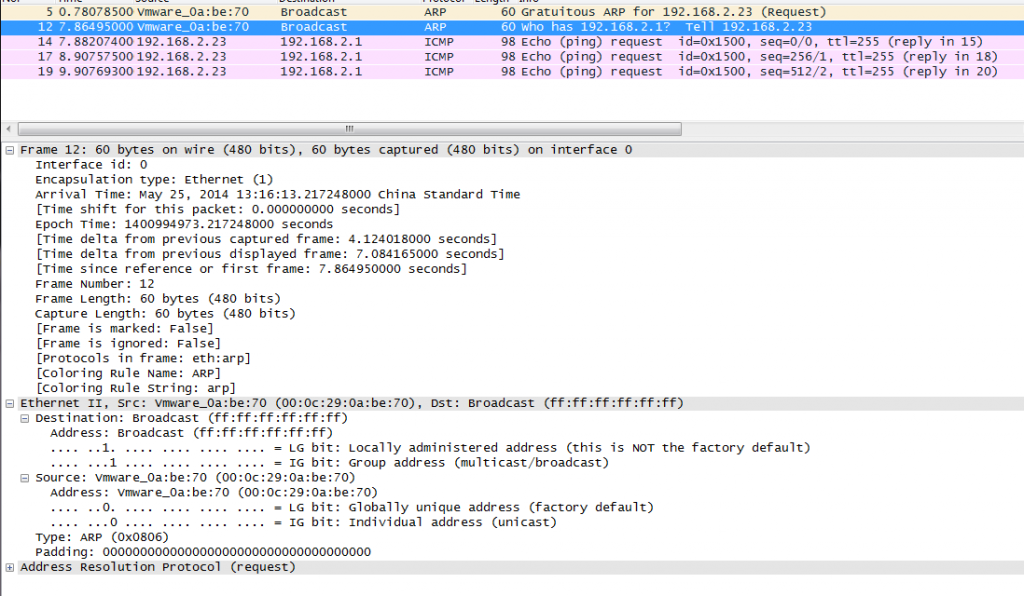
Now much to my surprise the machine does send gratuitous arp on the wire, to assert it’s ip address.  Well that is interesting.

Pinging the gateway

Pinging the gateway

And as you can see, there is no ARP reply. Very strange.

Broken Arp

Broken Arp

So messing around with every possible option, I tried changing “PermaNet Server feature” in the network card settings.

fix

Set PermaNet Server feature to TRUE

And much to my surprise, it worked!


h

Yay!

So yeah, this is pretty awesome!  Now I just have to decide what to do with my BBS, maybe bring it home, and run it on ESXi.

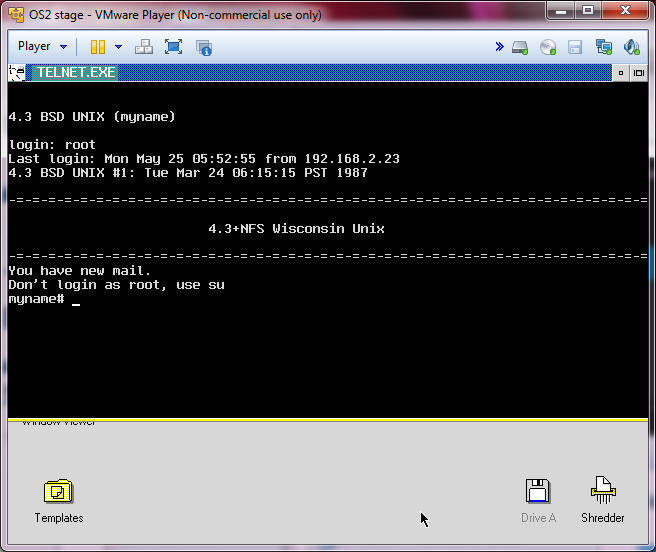
Talking to the SIMH Vax through GNS3

Talking to the SIMH Vax through GNS3

As a strange update, I upgraded from OS/2 2.0 to 2.11 and then applied XR_B108 update to OS/2 2.11, and amazingly the value psfeature in protocol.ini had to be set to false.  Obviously this later kernel in the XR06200 fixpack better supports PCI hooks.

I updated OS/2 because things like Qbasic were able to hang the system.  I even tried the MS-DOS version of Qbasic thinking that somehow it was trying some weird hook to the BIOS for ROMBASIC, but that wasn’t the case, as both Qbasic from MS-DOS 5.0 and 6.22 hung the system by hitting alt+f.  So with the upgrade in place it seems to be working fine now.

GNS3 & VMware

Well I’ve been back using GNS3 to simulate some networks professionally.  And well, I hit a roadblock of a strange kind.

In my “LAB” I want to have a ESXi host talking to vCenter, and I wanted to setup a custom logging program which logs to MSSQL, and Maybe Oracle.  For routing I need Junos and cisco IOS.

Now the problem is that takes a little bit of everything.  The Qemu bundled with GNS3 horribly ancient, and my attempt to drop in Qemu 1.6.0 just fails.  Also running things like Windows Server 2008r2 and ESXi run best under VMware.  The SQL server stuff can be any version, so even NT 4.0/SQL 7 is fine which GNS3’s Qemu can run, but it is kind of slow.  Which I know it isn’t fair to compare something like Virtual Box to VMWare.

So ideally the best  bet is to tie them all together, and I found a way.

First I’m using VMWare Player version 6.0.1 build-1379776.  The people financing this insane project have things like VMWare workstation but I have to download it through them, and their link is insanely slow, so I’m sticking with the player for now.  But I was able to persuade a user to extract “VMware Workstation 10.0.2 build 1744117”, and retrieve two files for me,  vmnetcfg.exe and vmnetcfglib.dll.  So this way I can setup VMWare network interfaces which GNS3 can then latch onto with pcap.

The feature was available in earlier versions of VMWare Player, but the needed files were removed in the latest version.  However I found if you have access to a new version of VMware Workstation you can just snag these two files, and run them like this (as administrator):

rundll32.exe vmnetcfglib.dll VMNetUI_ShowStandalone

And now you can setup some networks.
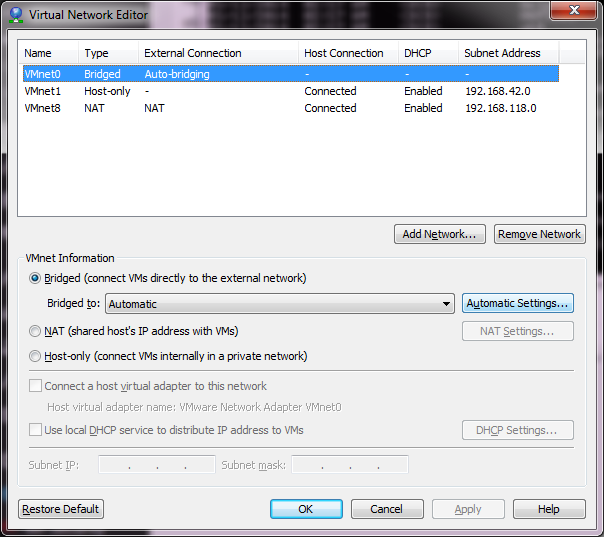
x

VMware’s default network setup

Now from what I have read online, the best thing to do is leave the default networks alone.  However I found that if I left VMNet0 to the defaults I was unable to join any VM’s to the different networks.  So I bind this to my physical Ethernet connection.

Now I want to have various network points to attach VMs onto.  The best part that I’ve found is that pcap works on these networks for both listening and injection, so these make better ‘hub’ inspection points IMHO.  Also this means you can run emulators that inject libpcap as a method of communication (SIMH, WinUAE, and even my ancient Qemu 0.9.0…)

The big thing is when adding networks, DISABLE DHCP.  You can leave the rest where it is, it really doesn’t matter.
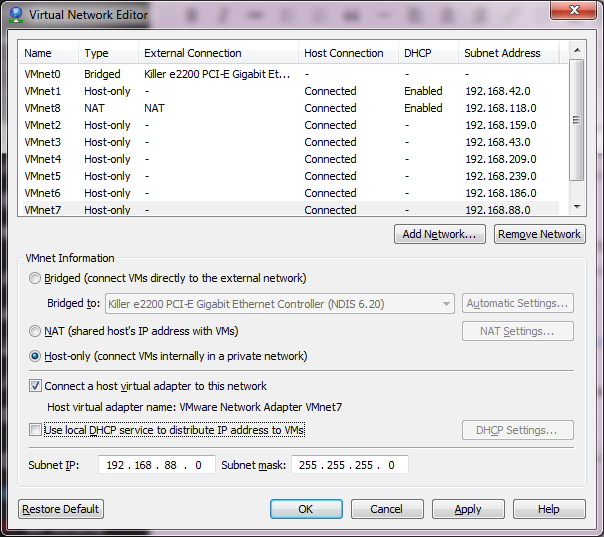
With Networks

With Networks

As you can see, I’ve now added VMnet2 – VMnet7.  This should give me enough user networks for now to play with.  I’ve also unchecked the local DHCP service, as I may want to run my own DHCP on an emulated server to make sure DHCP relay works through my virtual network.  Once you are happy, you can hit Apply and it will create the network interfaces on your computer.

So many networks!

So many networks!

Now going into the control panel, and looking at the network adapters (search for “view network connections”), and you will see there are a bunch of these VMWare Network Adapters.  The worst part is that they all have full networking enabled, which we don’t want. So starting with VMnet2, we need to unbind all high level access.
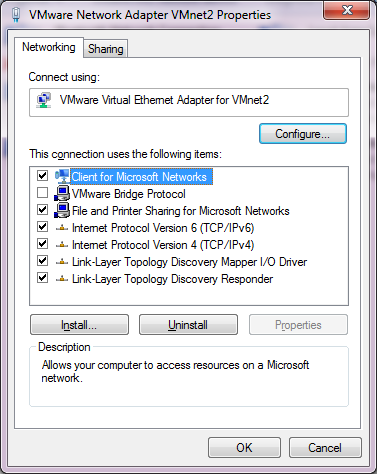
Before

Before

I unbind the ‘Client for Microsoft Networks’, ‘File and Printer Sharing for Microsoft Networks’, and TCP/IP version 4 and version 6. This the Link-Layer topology discovery stuff.  I also enabled the VMware Bridge Protocol.
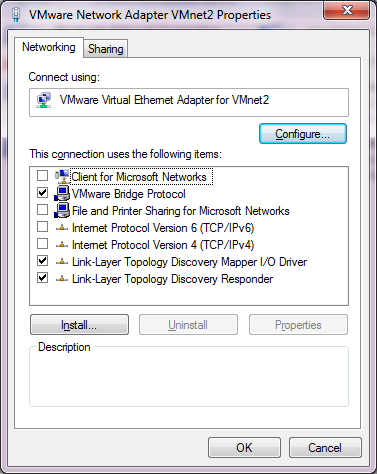
After

After

Now I just have to repeat this for each of the adapters that we installed, in this case VMNet2 – VMNet7.  Remember to leave VMNet0, VMNet1 and VMNet8 alone!

Now for the real fun, you have to reboot for the changes to take effect.

After a reboot, if you run Wireshark, you should now see all the interfaces!
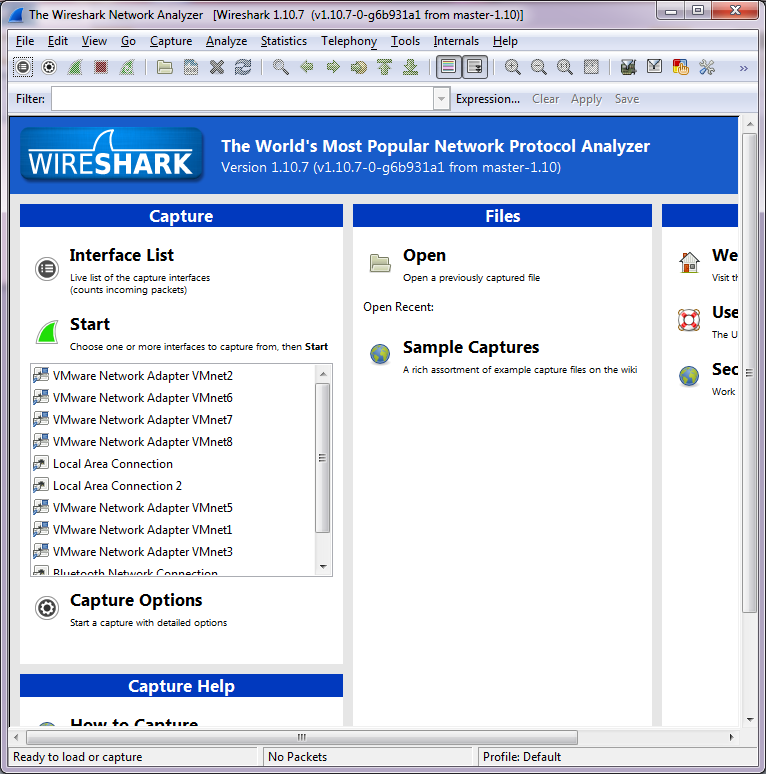
Wireshark  with the new interfaces

Wireshark with the new interfaces

Ok so far, so good, but let’s tie this mess together!
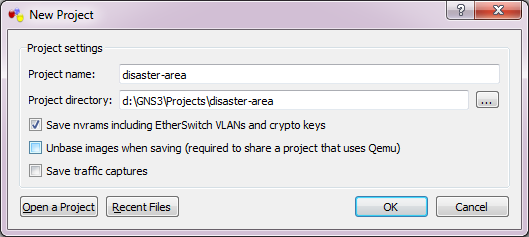
HHGTTG refrence

HHGTTG refrence

So let’s build a network.  Our “home” site will have a server network with the ESXi server serving some virtual servers, a user network which will contain our management workstation & a MS-DOS netware machine.  We will then have a remote network with different machine types, which will be a 4.3BSD VAX, and an Amiga running NetBSD.  We’ll also include a Novell Netware 3.12 server.  Add in an ‘internet’ router, and we should be good.
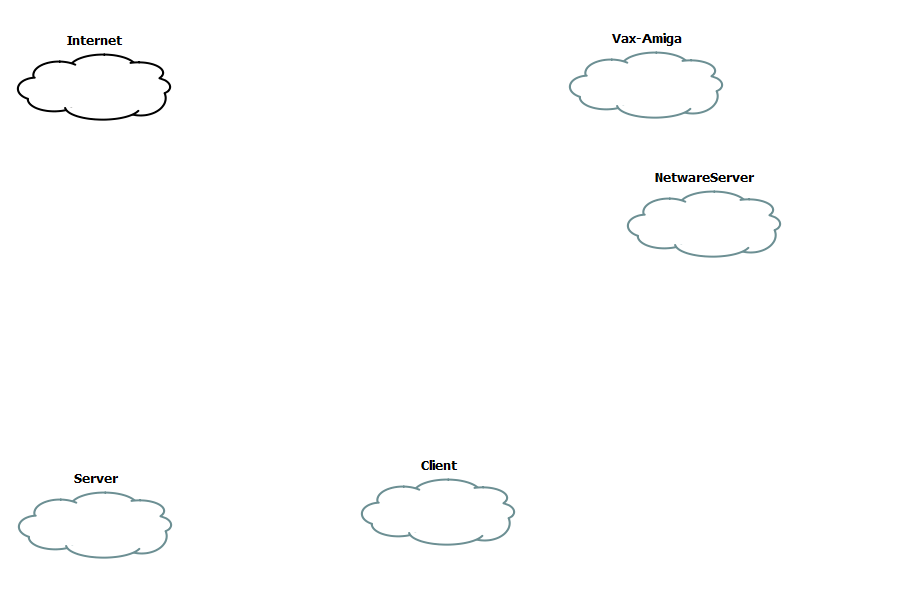
Clouds

Clouds

The first step is to create some clouds.  Each one of these will then be associated with a VMNetwork device.

[table]Network,Device
Server,VMNet2
Vax-Amiga,VMNet3
NetwareServer,VMNet4
Client,VMNet5
Internet,VMNet8[/table]

Now you’ll notice that I’m assigning VMNet8 to the ‘internet’.  If you remember the original VMWare table, the VMNet8 device is a ‘NAT’ device.  So we can use that to get to the internet (well anything else the base device can access).  Now I’ve gone ahead and added in two cisco routers, a single juniper router and a hub, as the juniper device cannot directly connect to the Internet cloud, but using the hub for the intermediary is ok.
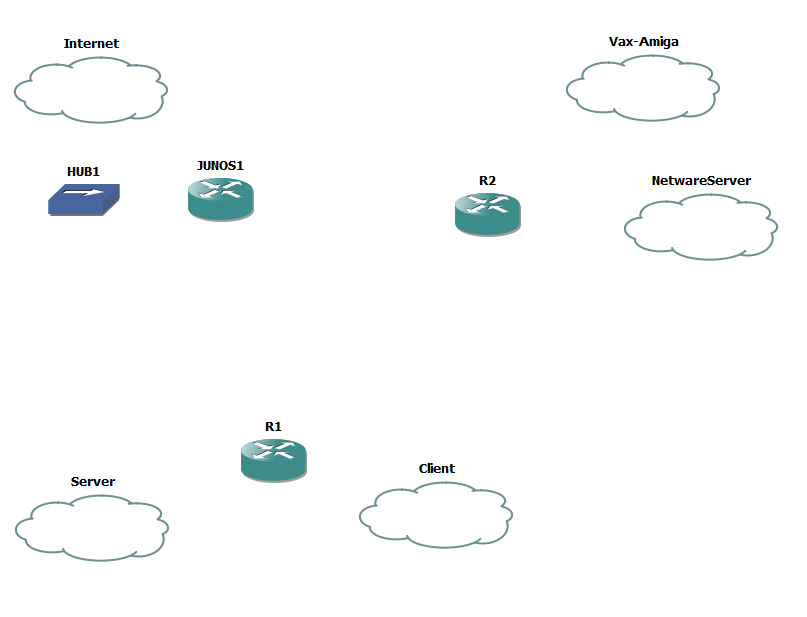
Add in the routers & hub

Add in the routers & hub

Now it’s time to add some interfaces to the routers.  I’m going to put the C7200-IO-2FE into both R1 & R2, along with a PA-4T+ serial adapter.  Because I want to pretend to have a fast internet connection I’m also going to place a PA-GE interface into R1 in slot 2.

Now we need to bind each cloud to the corresponding VMnet interface.
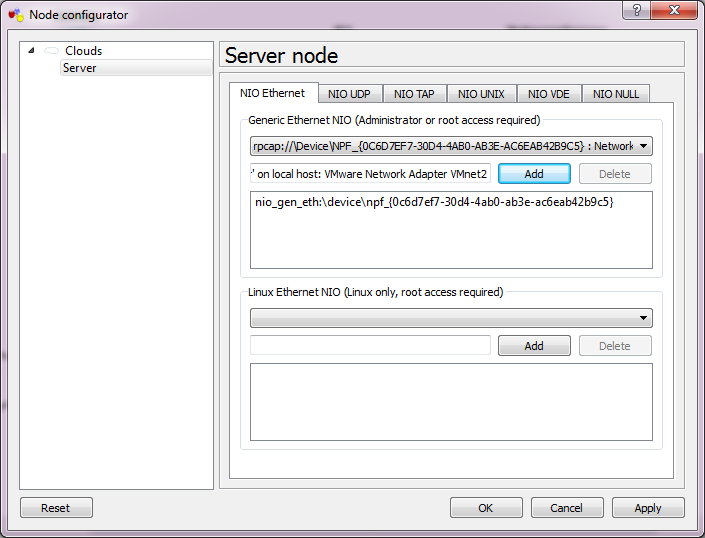
Server Network

Server Network

Simply double click on the cloud, and select the VMNet interface from the drop-down list, then add it and the interface is now bound.  Repeat for each of the clouds.

Now we can connect the interfaces.
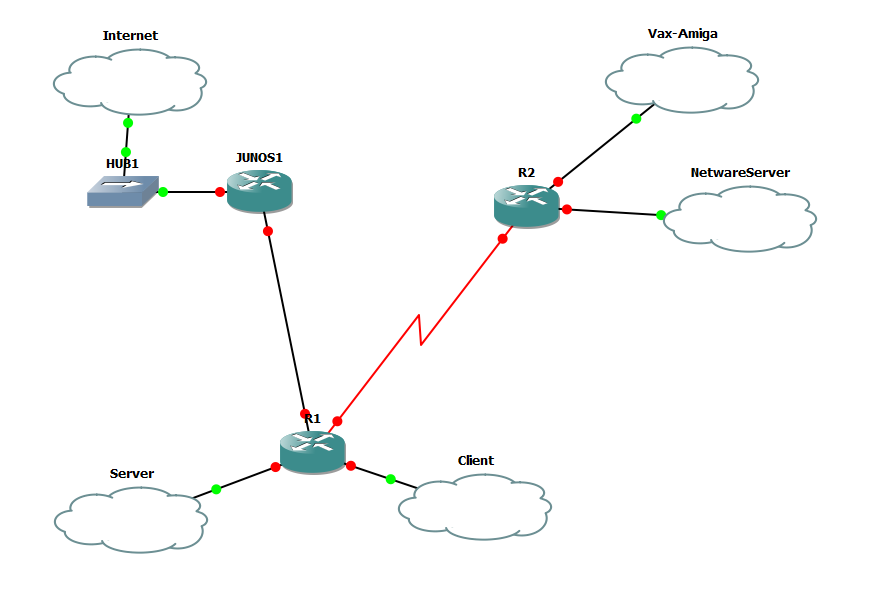
 

Now with Interfaces

Now with Interfaces

So R1’s FA0/0 is connected to the SERVER cloud, FA0/1 is connected to the CLIENT cloud. Serial 1/0 is connected to R2’s Serial 1/0 interface. the G2/0 interface is connected to Junos1’s e1 interface

R2’s FA0/0 is connected to the VAX-AMIGA cloud, and the FA0/1 is connected to the NETWARESERVER cloud.

Junos1’s e0 is connected to HUB1, which is then connected to the INTERNET cloud.

[table]
NAME,Interface,IPX,IP
Server,VMNet2,,192.168.0.0/24
Vax-Amiga,VMNet3,,192.168.1.0/24
NetwareServer,VMNet4,cab2,
Client,VMNet5,cab3,192.168.2.0/24
Internet,VMNet8,,DHCP
serial,none,cab0,192.168.255.0/30
GigE,none,,192.168.255.4/30
[/table]
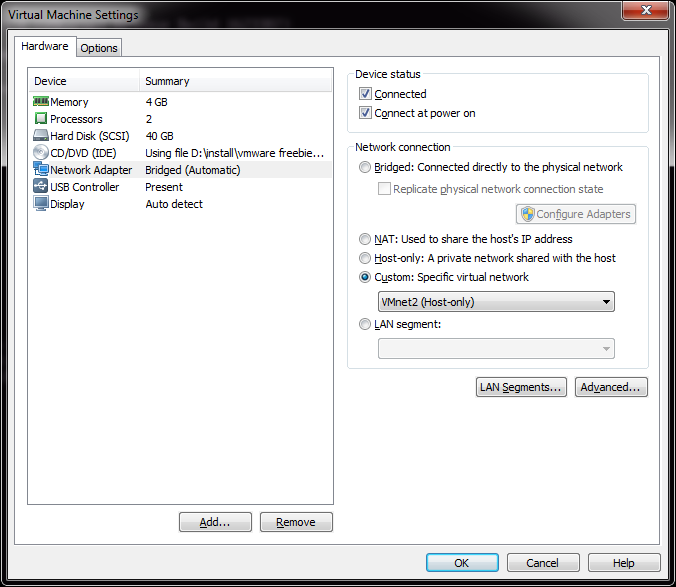
Configure the network interface in VMWare Player

Configure the network interface in VMWare Player

Since I already have an ESXi VM on Player, I’m going to use this for my illustration.  All I need to do here is change the existing network from being ‘bridged’ on my native network, to now being on VMnet2, which now places it inside of my GNS3 world.  Likewise I take a Windows XP client, and place it on VMnet3.

Now to configure R1 like the following:

[table]
Interface,IP-Address,OK?,Method,Status,Protocol
FastEthernet0/0,192.168.0.1,YES,manual,up,up
FastEthernet0/1,192.168.2.1,YES,manual,up,up
Serial1/0,192.168.255.1,YES,manual,up,up
GigabitEthernet2/0,192.168.255.5,YES,manual,up,up
[/table]

And R2 like the following:
[table]
Interface,IP-Address,OK?,Method,Status,Protocol
FastEthernet0/0,192.168.1.1,YES,manual,up,up
FastEthernet0/1,unassigned,YES,unset,up,up
Serial1/0,192.168.255.2,YES,manual,up,up
[/table]

And now I can connect from my Client PC, the VMware ESXi server!
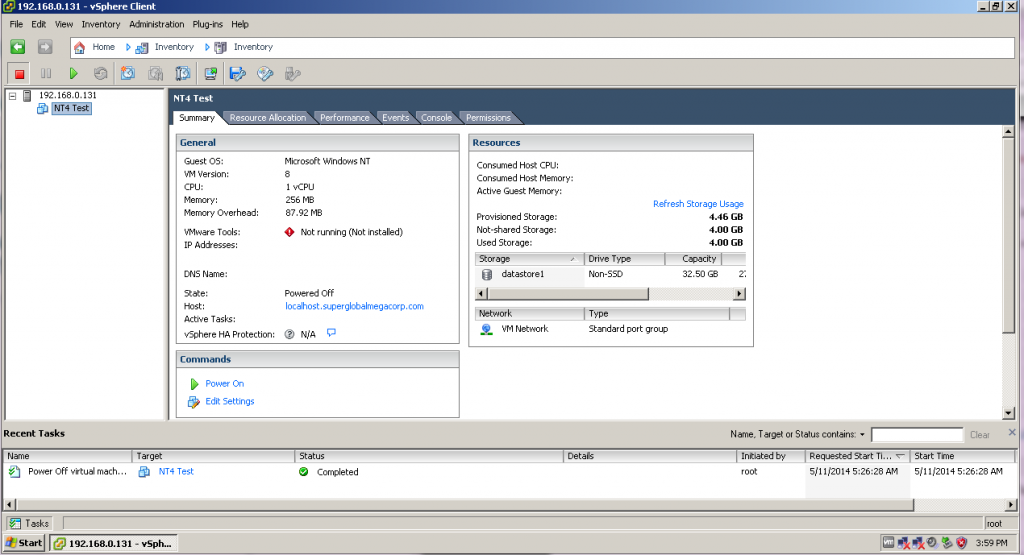
Connection

Connection

This gives me an easy way to ‘view’ into what is going on for my client to connect to the server.

Now some quick EIGRP to get R1 & R2 routing together..

R1:

router eigrp 1
network 192.168.0.0
network 192.168.2.0
network 192.168.255.0 0.0.0.3
no auto-summary

R2:

router eigrp 1
network 192.168.1.0
network 192.168.255.0 0.0.0.3
no auto-summary

And now we can check routs on R2, and see it’s learnt the routes from R1:

  192.168.255.0/30 is subnetted, 1 subnets
C 192.168.255.0 is directly connected, Serial1/0
D 192.168.0.0/24 [90/2172416] via 192.168.255.1, 00:15:50, Serial1/0
C 192.168.1.0/24 is directly connected, FastEthernet0/0
D 192.168.2.0/24 [90/2172416] via 192.168.255.1, 00:15:50, Serial1/0

I was a little disappointed though, that Olive can’t do any flow based stuff like security policies or NAT.

So onward with SIMH.  I’ve found that I have a LOT of Ethernet interfaces and some things cannot deal with that.  I had to make a trivial change to sim_ether.h:

#define ETH_MAX_DEVICE        32                        /* maximum ethernet devices */

SIMH had this value hard-coded to 10, and it crashed because I have… 11 interfaces.  So it just took a quick re-compile and now I can see my interfaces!

0 \Device\NPF_{0C6D7EF7-30D4-4AB0-AB3E-AC6EAB42B9C5} (VMware Network AdapterVMnet2)
1 \Device\NPF_{1A17F8DF-DC65-420E-9A7A-3F8D22EC0D12} (VMware Network AdapterVMnet6)
2 \Device\NPF_{5A889C62-8180-4DB5-8FFE-3B6B8B9DFFAF} (VMware Network AdapterVMnet7)
3 \Device\NPF_{A6B89C5C-C28C-424E-B795-F90F97FA0FE7} (VMware Network AdapterVMnet8)
4 \Device\NPF_{21FFD0D4-1B8B-47B7-B0DD-28CD67DF4080} (Local Area Connection)
5 \Device\NPF_{70AA2D26-7B96-42FB-9FA6-8A7386753099} (Local Area Connection 2)
6 \Device\NPF_{98F44EE6-626B-48CB-952D-9C890F44A4A5} (VMware Network AdapterVMnet5)
7 \Device\NPF_{D294A70E-07B3-4CA8-A88D-D6C392696E99} (VMware Network AdapterVMnet1)
8 \Device\NPF_{F746872D-7687-4867-958C-96A62BA5E284} (VMware Network AdapterVMnet3)
9 \Device\NPF_{783262C6-8B95-4F9E-B198-78E2D9B256BB} (Bluetooth Network Connection)
10 \Device\NPF_{D6726593-C290-4821-8D43-D180CF5631BA} (VMware Network AdapterVMnet4)

Wow!

So with SIMH I can now attach to eth8, which maps to VMnet3.

set xu ena
att xu eth8


Easy, right?

And even better, it works!

R2#ping 192.168.1.15

Type escape sequence to abort.
Sending 5, 100-byte ICMP Echos to 192.168.1.15, timeout is 2 seconds:
!!!!!
Success rate is 100 percent (5/5), round-trip min/avg/max = 8/15/28 ms
R2#

And the XP workstation can telnet to it…
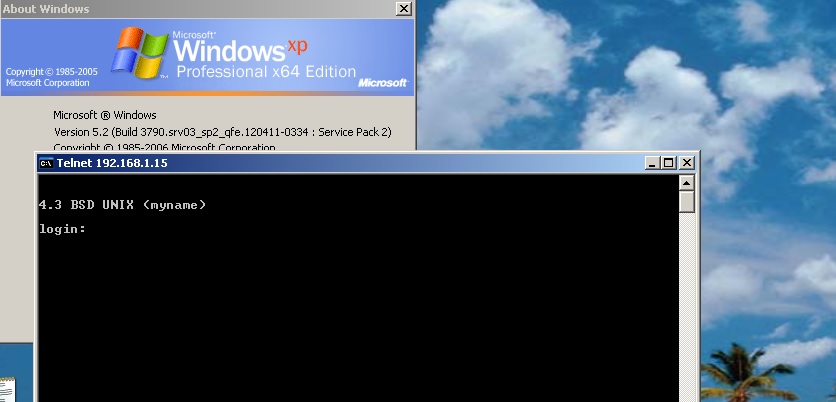
VMWare routed through GNS3

VMWare routed through GNS3

Next I’ll have to add in some NetWare fun.  For the heck of it.  Good news is that it works!

One caveat I’ve found is that sometimes the ARP response time isn’t so hot, and it seems like everything times out..  So you may want to tweek the default arp age on the cisco side (interface bla/arp timeout 600..?).

Philip Pemberton’s 3B1 emulator now Boots AT&T Unix!

No really, you read that right!  You may remember my post about this emulator a while back, with a small mention how it’ll boot the diagnostic disk, and fail from there.

Well now, thanks to Andrew Warkentin’s hard work, the system now boots!

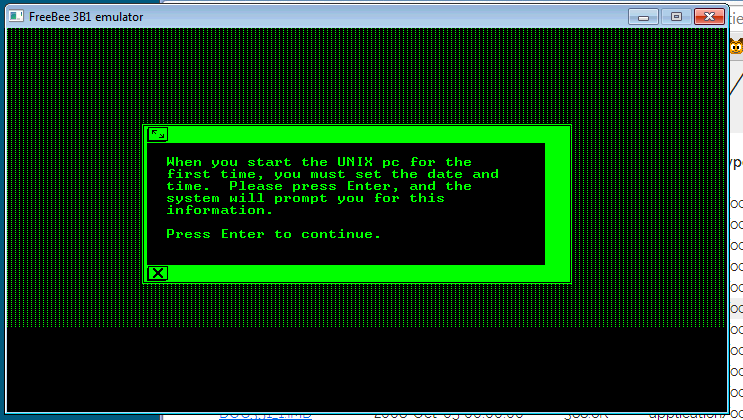
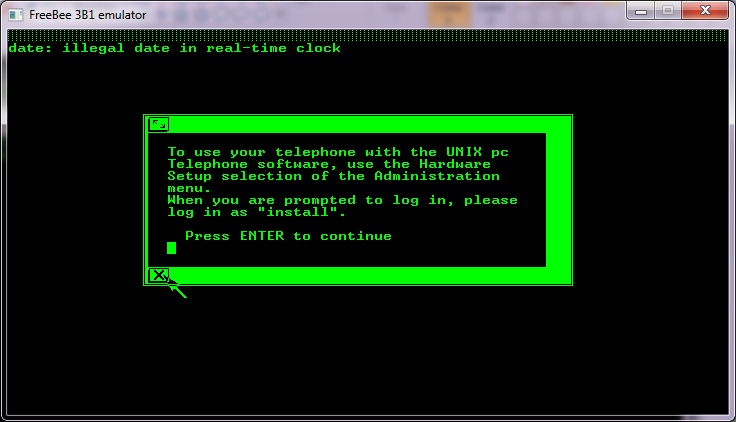
3B1 time check

3B1 time check

Using the 3.51 installation set from bitsavers, and the IMDU program to decompress the disk images the emulator can install UNIX onto a hard disk image (be sure to check the debug version, and the stderr.txt for the emulated geometry for your supplied hd.img).

I’ve got to say, it’s pretty cool!  Although building the exe for Windows needed a little nudge, but my compile seems to be working, although the ‘release’ version still outputs far too much information.

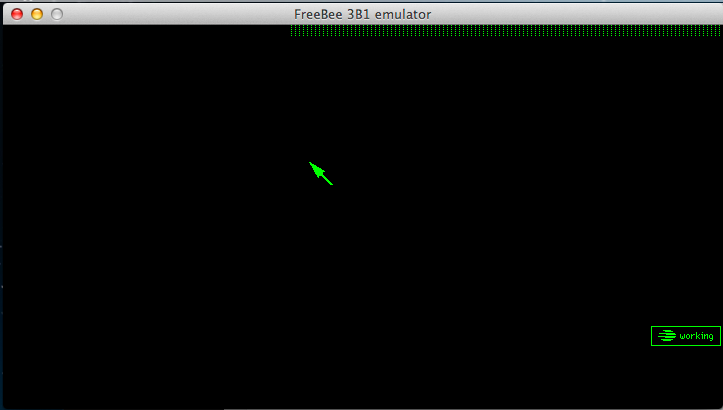
blank

blank

At this point it’s stuck “working” .. I thought it’d be able to do more, but it did take down the new root password, and then say it’s “setting up the screen”.  I ran a second copy on wine for the heck of it, and it’s doing the same thing.

xx

Apparently if you ‘X’ the modem panel, you’ll get a desktop

I’ll update as I can, but I wanted to get this out there.  For those who want to try, you can download my work here. Remember F10 will capture/uncapture the mouse.

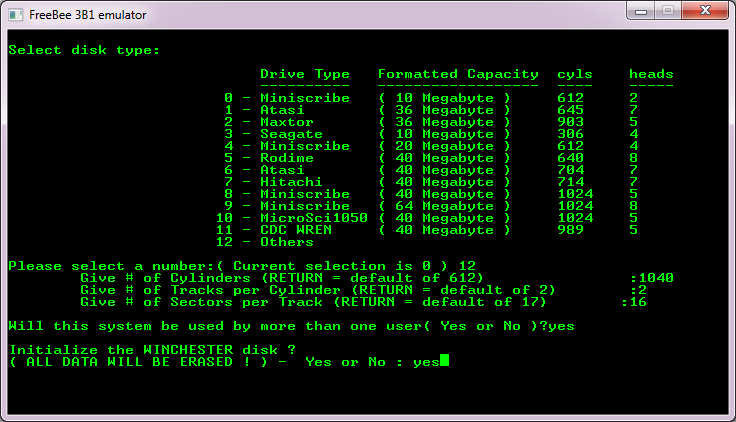
The floppy disk file is called ‘discim’.  Simply copy the RAW 409,600 byte file onto this filename, and freebee will pick this up as a disk change.  You can make a hard disk file by simply creating a blank file (I used qemu-img create -f raw hd.img 65M) by providing a file of that size called hd.img .  When freebee starts, if you look at stderr.txt it will tell you the geometry that it is going to use:

WD2010 initialised, 1040 cylinders, 8 heads, 16 sectors per trackDisc image loaded.

Which you then pass onto the diagnostic disk to format the hd.img.

(boot with the diagnostic/setup disk, 01.RAW)

Option #2 (Format Disk), then Option 12 (Others).  Then using my information, 1040 cylinders, 8 tracks, 16 sectors per track (I guess it figures out heads on it’s own from the tracks?)  I then let it setup the disk as multi-user and it’ll format the disk.  It should only take a few seconds.

Format the disk from the diagnostics floppy

Format the disk from the diagnostics floppy

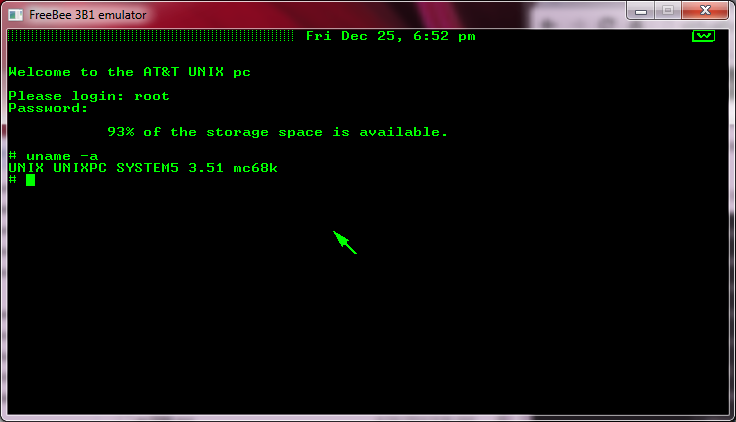
Installation of the OS starts with 02.RAW and it’s pretty self explanatory.

Apparently the best way to login the first time is to move the mouse frantically around, and it may let you into the system.  Logon as root and try doing this:

remove the /dev/ph0 and /dev/ph1 files

make a new /etc/inittab

is:2:initdefault:
rc::bootwait:/etc/rc > /dev/null 2>&1
vid:2:respawn:/etc/getty window 9600

remove the files

/etc/.modeminit
/etc/.phclr
/etc/.phinit

I did that to my disk (download), and I can now boot up.

3B1 booted up!

3B1 booted up!

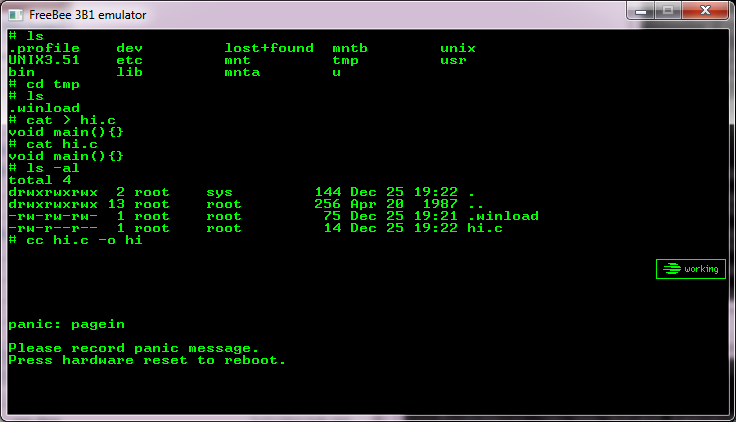
I found vi and the C compiler on the bitsavers archive, but the C compiler currently doesn’t work.

panic

panic: pagein

Which is no doubt something else up with the MMU.

My ‘vpsland’ thing is back online

I’m not to happy with my solution, but it’ll suffice for now.

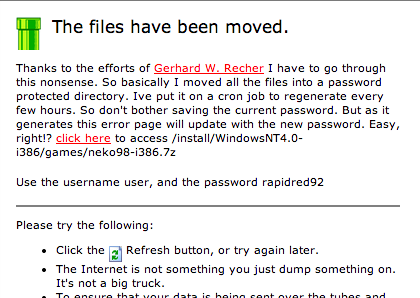
So every day, I have cron fetch me a new password from makeagoodpassword.com,  update some httpassword entry, and use PHP for a simple redirect.

So let’s say I wan to get neko for the i386, the link was http://vpsland.superglobalmegacorp.com/install/WindowsNT4.0-i386/games/neko98-i386.7z  Now when you click on the link you get a 404 looking page that has a link to the new directory structure, and includes the username & password (I’m not currently evil enough to generate a random user, but I may have to do that in the future…).

New password procedure

Click the click here link!

So the new path lives in the /old directory making the new location of neko98 http://vpsland.superglobalmegacorp.com/old/install/WindowsNT4.0-i386/games/neko98-i386.7z

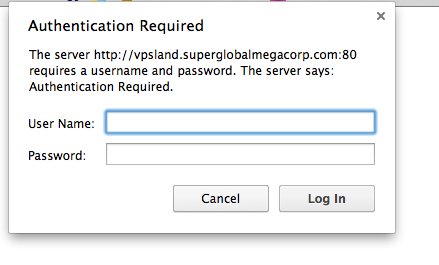
So use the username/password combo on the page, and you’ll be good to go.

Enter the username / password

For example user/rapidred92

Sorry about all this.

CP/M-68K Simulator

I found this last night, and thought it was worth sharing.

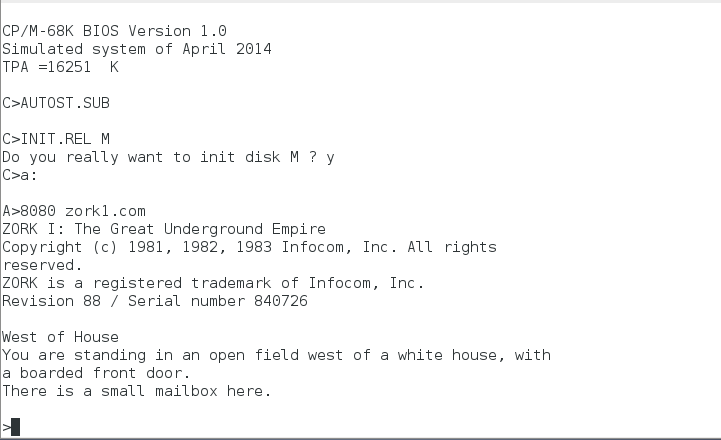
This simple CP/M-68K simulator, is built around the famous Musashi MC68000 simulator core.  So it’s a little more well debugged than the SIMH CP/M-68k. Namely that COM works!

COM running Zork1 on CP/M-68K

COM running Zork1 on CP/M-68K

I managed to build this under Window with MinGW, the only caveats were that it opens the disk files without explicitly in binary so on Windows it opens everything in ASCII and nothing works.  Also MinGW doesn’t emulate a vt100 or provide termios so all of that had to be commented out.  But for the full experience you’d want to run it on *NIX.

I suppose you could write an ANSI intercept, and manipulate the NT Console, but that is a lot of work.

On the plus side, this solution is more stable, faster and feels more robust with a 16MB hard disk, and a standard IBM 3740 floppy disk in the ‘a’ position.

One thing that was a snag to me, was the windows version of cpmtools is built to default to the apple-do type, aka Apple II CP/M skew for DOS 3.3 … So I was trying to setup a floppy image with too much work.  Also the default size of the 3740 disk is 256,256 bytes.

For example:


C:\temp\cpm\cpmtools>cpmls -f ibm-3740 zork1.cpm

0:
bye.com
zork1.com
zork1.dat

But if you find z80/8080 CP/M too mainstream, give the 68k a shot!

Now this reminds me of “turning the engine off and then back on again at 55 mph.”

the v86-64 patch, Allows you to enter v86 mode from long mode on a 64bit linux kernel.

Basically it works just like an old school DOS Extender, where it’ll switch from long mode, to 32bit compatible mode, then enter v86 mode run some code, then re-enter 32bit mode, to jump back into 64bit long mode.

From an old mailing list:

PERFORMANCE
This 64-bit DOSEMU compile runs substantially slower than the 32-bit compile
that I used previously on this computer.  I have several rather large
PowerBASIC/DOS programs that are, in fact, the main reason why I use DOSEMU.

Up until a couple of days ago, I had Fedora 7/i386 on this computer.  I just
happen to still have the numbers when compiling one of those programs with
PowerBASIC/DOS under DOSEMU:

With F7/i386:  1686600 lines per minute -- total time to compile the program:
0.2 seconds

With F8/x86_64:  230400 lines per minute -- total time to compile the program:
1.6 seconds.

The F8/x86_64 DOSEMU is running approximately 13 times slower.

Which I bet runs a bit faster than an old 386.