In this video I’ll be covering the circa 1985 MIT PC/IP stack running on 86box trying to connect to a user mode network library, SLiRP. After that fails I’ll show how to break the stack apart so we can use WireShark to inspect the traffic, then how to replace the direct connection to SLiRP by using Dynamips to emulate a cisco 7200 router.
Caution it’s all command line!
I’ll cover adding a loop back adapter, installing WireShark, how to find the GUID’s of the interfaces, how to configure a HecNET bridge, and set it up to relay to a stand-alone version of SLiRP, then how to setup a virtual cisco router to do NAT, and also forward to SLiRP, along with taking network captures to show what is really going on!
Software used (in no particular order)
- https://86box.net/
- https://www.7-zip.org/download.htm
- https://www.wireshark.org/download.html
- https://sourceforge.net/projects/dynamips-mingw/
- https://sourceforge.net/projects/hecnetnt/
- https://github.com/neozeed/dos211
- https://github.com/neozeed/8086pcc
Or for those who prefer the written way…

In 86box, you have the ability to use the SLiRP library directly from the emulator. Which is all find and good, but sadly it gives you no visibility when things go wrong. And with MIT PC/IP things go wrong. Looking at the data through Wireshark sure would be nice, but how to we get it into there?
Well the simplest way is to just break it apart.
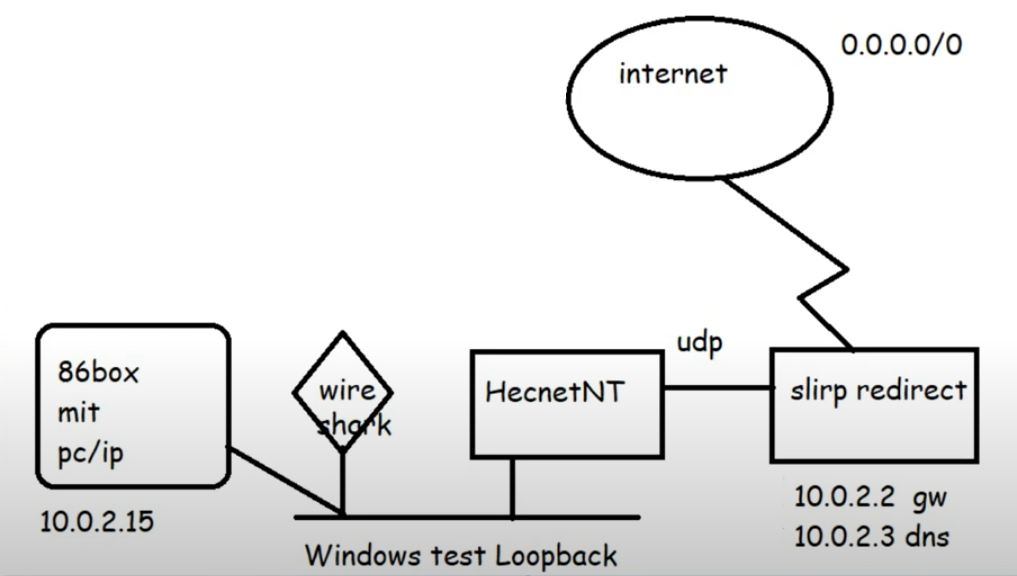
Adding in a KM TEST loopback adapter to Windows now gives us a private network we can now attach programs to via the pcap API. Hecnet is a l2 bridge that can inspect and look for l3 traffic and then forward it via udp to another program. In this case I had made a version of SLiRP that will communicate via UDP, perfect for stuff like this!
One thing to keep in mind is that the ‘GUIDS’ of the network interfaces are unique to each system, the ethlist program will show you which is which. It’s also why renaming interfaces only helps you when dealing with old libpcap stuff!

Becomes:
C:\hecnet>ethlist.exe
Network devices:
  Number       NAME                                     (Description)
  0  \Device\NPF_{E7EB72FA-7850-4864-B721-2A3B38737214} (KM-TEST)
  1  \Device\NPF_{649448CA-969D-486E-AAC8-99F1993C701A} (Ethernet0)
Press Enter to continue...

C:\hecnet>
With this information in hand, creating the bridge configuration is quite simple:
[bridge]
Loop \Device\NPF_{E7EB72FA-7850-4864-B721-2A3B38737214}
update 127.0.0.1:5001

[tcpip]
Loop
update
The bridge is for an uncompressed normal bridge connection between the KM TEST loopback interface and a UDP connection listening on port 5001 on localhost. Of note it’ll be forwarding TCP/IP related packets. Since we want the bridge to listen on UDP port 5000 we simply run it like this:
hecnet.exe 5000Running the SLiRP redirector is just a simple matter of telling it which port to listen on, and where to forward traffic. In this case we’ll listen on port 5001 and forward traffic to 5000 on the localhost
slirp_rdr.exe 5001 127.0.0.1 5000Thankfully, it’s that simple!
Running a ping fails (yet again) but this time we can see that they are doing ARP but for some reason PC/IP does not acknowledge the SLiRP library.

Just to verify, the HecnetNT bridge does see the source and destination address, and the SLiRP does indicate traffic in and out as expected.
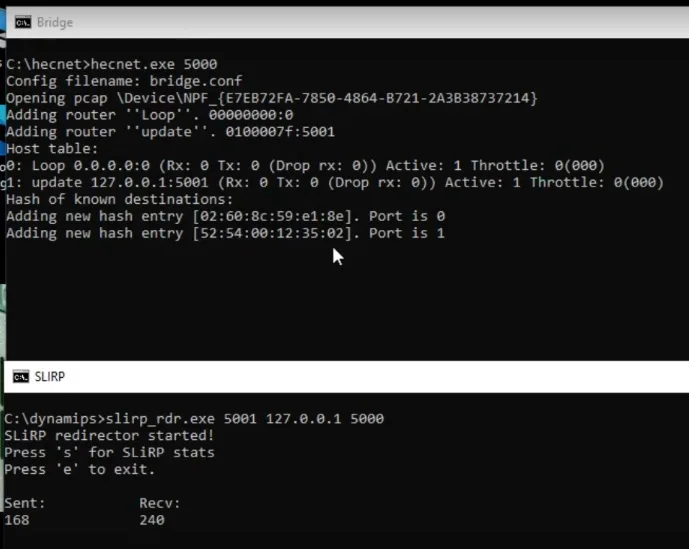
Clearly the fault is on the PC/IP side, and most likely because it’s so old.
I then decided to build another network, this time using Dynamips to add in a virtual router.
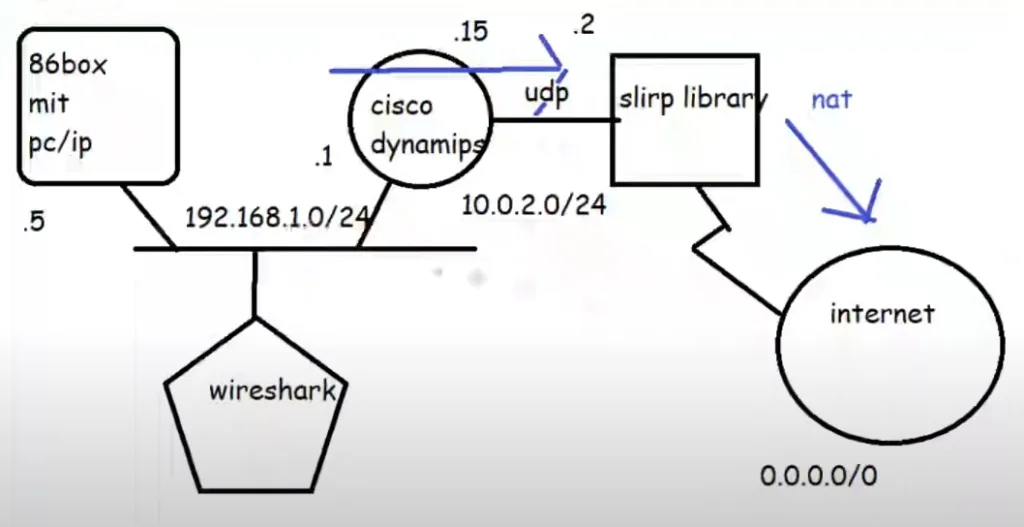
This complicates things as I’m not sure how to control the internal routing of the SLiRP library so the router has to NAT the PC/IP traffic to SLiRP, which in turn ‘NATs’ it to the internet. But rest assured double NAT (or even more) is quite common these days.
Configuring the router is somewhat straight forward, we are going to use pcap to listen on the KM TEST loopack, replacing the HecnetNT bridge. But it’s going to talk to the SLiRP redirector in the same manner:
set loopback=\Device\NPF_{E7EB72FA-7850-4864-B721-2A3B38737214}
set IOS=..\c7200-is-mz.19991126.bin
set NPE=npe-100
set RAM=64 -X

@attrib *.* -r
..\dynamips.exe -P 7200 %IOS%  ^
-m %RAM% ^
-t %NPE%  ^
-p 0:C7200-IO-FE ^
-p 1:PA-4E  ^
-s1:0:gen_eth:%loopback% ^
-s1:1:udp:5000:127.0.0.1:5001
This creates a basic 7200 router with a 4 port ethernet card, with one port connected to the KM TEST loopback, and the other connected to the SLiRP library.
Configuration of the router is not very complicated either:
!
no ip domain-lookup
!
interface Ethernet1/0
 ip address 192.168.1.1 255.255.255.0
 no ip directed-broadcast
 ip nat inside
!
interface Ethernet1/1
 ip address 10.0.2.15 255.255.255.0
 no ip directed-broadcast
 ip nat outside
!
ip default-gateway 10.0.2.2
ip nat inside source list 1 interface Ethernet1/1 overload
ip classless
ip route 0.0.0.0 0.0.0.0 10.0.2.2
no ip http server
!
access-list 1 permit 192.168.1.0 0.0.0.255
!
This defines our default route for both the routing table, and the management engine to the SLiRP library, defines the NAT inside/outside interfaces along with specifying the ‘overload’ address will be the 10.0.2.15 NAT’ing the PC/IP traffic behind the usual SLiRP user address.
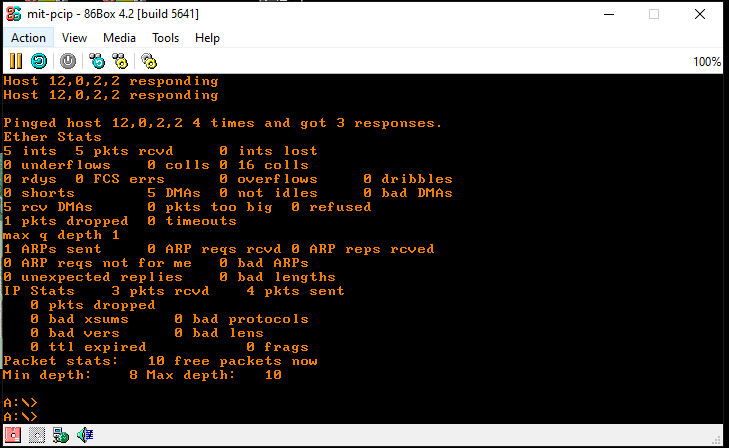
This allows us to ping SLiRP, and get the expected response.
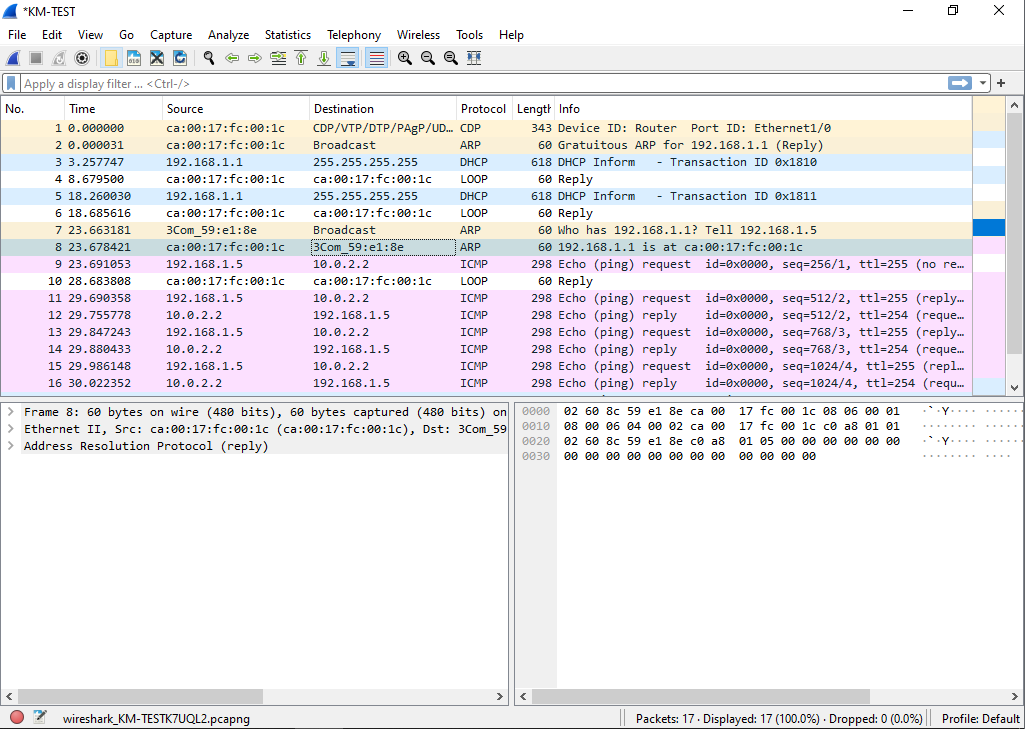
Checking the capture, we can see that yes ARP is working as expected, and the ping works without any issues.
On the router we can see the NAT translation.
Router#show ip nat translations
Pro Inside global      Inside local       Outside local      Outside global
tcp 10.0.2.15:4376     192.168.1.5:4376   71.95.196.34:23    71.95.196.34:23
Router#
And we can also check the SLiRP redirector for information on the current session.
SLiRP redirector started!
Press 's' for SLiRP stats
Press 'e' to exit.

Sent:           Recv:
stats!          4859

Proto[state]     Sock     Local Address, Port  Remote Address, Port RecvQ SendQ
tcp[ESTABLISHED]  632         10.0.2.15  4376    71.95.196.34    23     0   600
tcp[REDIRECT]     616         10.0.2.15    23        10.0.2.2 42323     0     0
Plus, we also have the Wireshark capture going showing the start of the TCP conversation
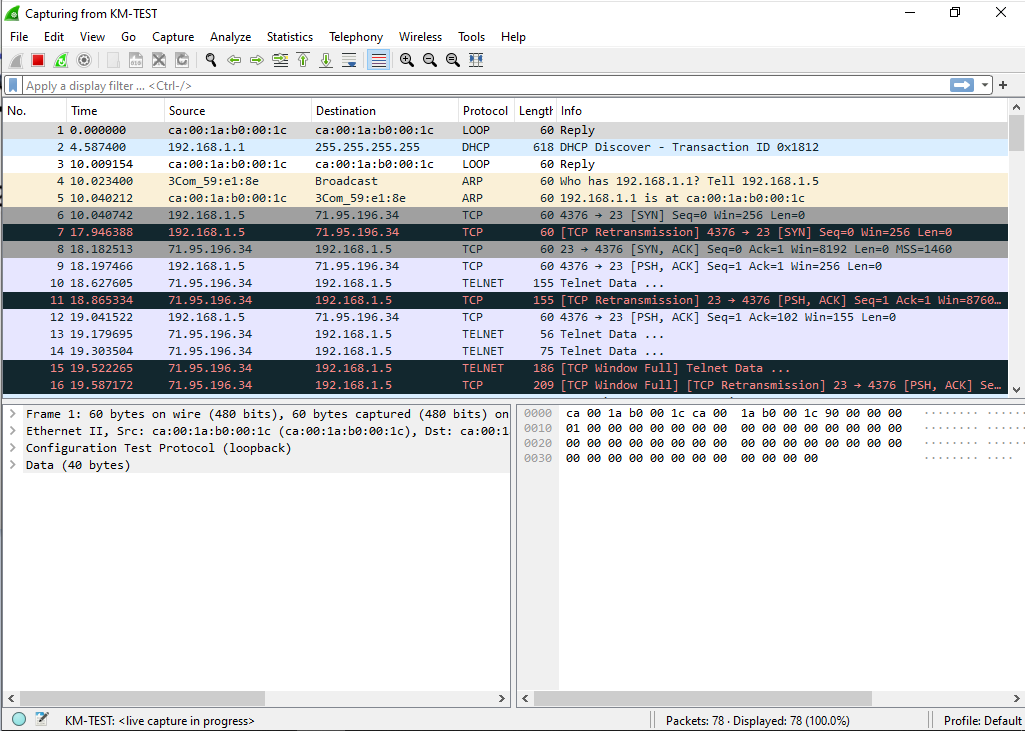
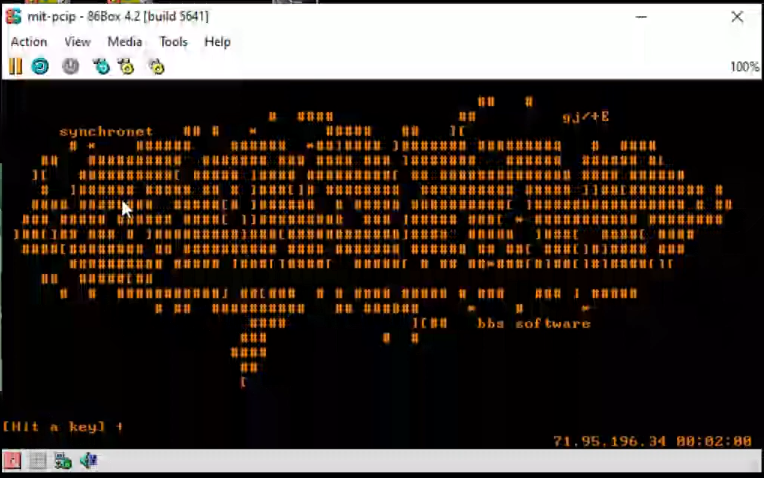
So now we’ve connected to the internet and by breaking the process appart we can now inspect what is going on, and made modifications like adding a cisco router.
I figured that this may be something that other people may be interested in, as you can build far more complex virtual networks this way!
