
This is a guest post by Antoni Sawicki (aka Tenox)
This is a guide on how to install Windows Server 2008 guest on HP Integrity VM. Yes, Itanium and HP-UX are involved. Unlike installing HP-UX or OpenVMS guests, this procedure is not widely documented (or at all) and rather an obscure process. I suppose Windows on HP-UX was never popular in first place and only maybe saw some use in the enterprise. Mid 2000, HP offered virtual labs where one could spawn their very own Win2k8 IA64 guest, but that is now long gone.
Lets say you have a HP Integrity server like rx1600, rx2600 or higher. You have HP-UX 11.31 installed on it and want to setup a Windows guest VM just for fun…
Firstly, if you have already installed Integrity VM from a recent Apps DVD, you will likely have 6.x version. This absolutely does not support Windows guests. You will need to downgrade to 4.x. To do that, start by removing the packages. You will need to uninstall the main HP VM package, as well as several others: Guest/Host AVIO, VMGuest*, VMKernel and VMProvider. You will also need to delete folders /opt/hpvm and /var/opt/hpvm. Otherwise you will run in to remains of some 6.x configs and databases that are unreadable to the older version.
Then you will need to install earlier version, for example 4.2.5, which is the last version that officially supports Windows guests. However HP VM 4.3 also works pretty well and has an added benefit of a “Virtual iLO” (but don’t get your hopes for a graphical console. Virtual iLO or not, all you get is a serial console to the guest. In case of Windows – SAC. (In practice ViLO only really provides telnet access to hpvmconsole) You can download earlier HP VM versions from here. The install is pretty straight forward, just unpack the tarball and point swinstall -s /path \* at it. I did encounter a small issue with 4.3 HPVM_1105. You need to create swlock file inside catalog directory of the extracted package to get past a lock error. Reboot and run this this to verify:
hpvminfo
hpvmstatus
If all good, the next step is to create a virtual switch and boot it up:
hpvmnet -c -S switch1 -n 0
hpvmnet -S switch1 -b
hpvmnet -v
In this case -n 0 indicates lan0 interface from ifconfig.
Then you create a blank disk image, like so:
hpvmdevmgmt -A -S 20G /vm/windows.fdFinally you create a VM and attach all the goodies:
hpvmcreate -P win64 -O windows -c 1 -r 2048
hpvmmodify -P win64 -a disk:scsi::file:/vm/windows.fd
hpvmmodify -P win64 -a dvd:scsi::file:/vm/w2k8.iso
hpvmmodify -P win64 -a network:lan::vswitch:switch1
hpvmmodify -P win64 -K x.x.x.x -L 255.255.255.0
The last bit with -K and -L is virtual iLO, only available in 4.3 and above. If using earlier version skip that part. The IP address can be on the same segment as vswitch / lan0.
Before you boot it up, I will remind you again that THERE IS NO GRAPHICAL CONSOLE. You can’t boot to the setup and click through the options. HP offers 3 types of text only mode installation:
Option A.
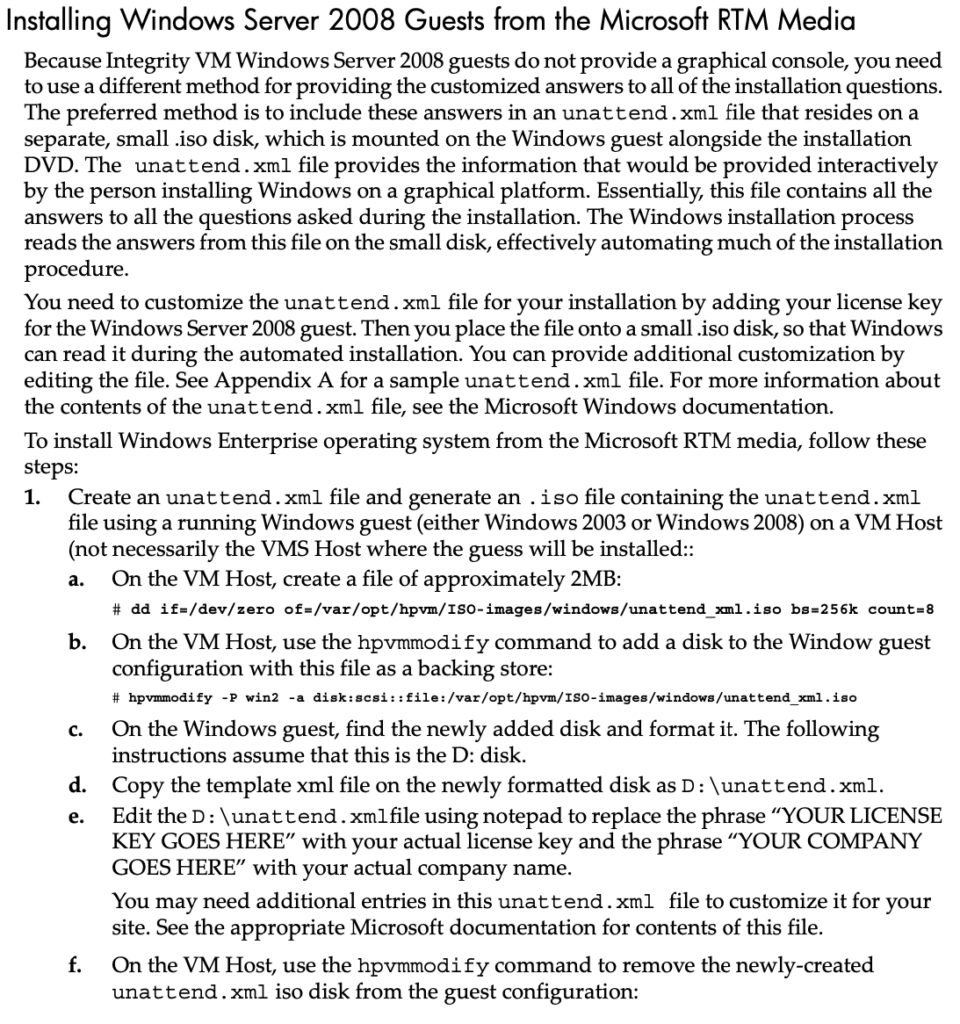
Using something called HP Smart Setup Media from HP Integrity Essentials Foundation Pack for Windows. I miraculously found it on HP Support Website and archived here. Insert this .iso image instead of w2k8.iso above:
hpvmmodify -P win64 -a dvd:scsi::file:/vm/smartcd.isoIf you ever need to remove it, the command is:
hpvmdevmgmt -d gdev:/path/file.isoThen boot it up:
hpvmstart -P win64
hpvmconsole -P win64
CO
If you have virtual iLO you can also telnet to the IP address configured earlier with -K.

In the EFI console you open shell, then navigate to fs0: and efi\boot folder then launch bootia64.efi file.
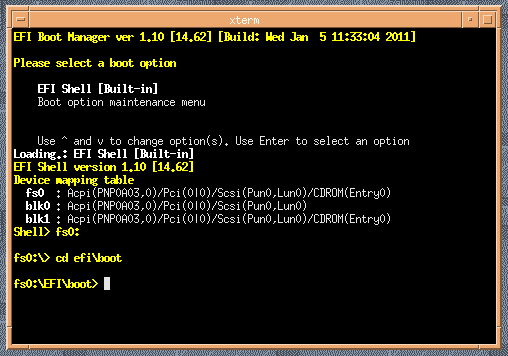
You will be presented with this lovely screen:
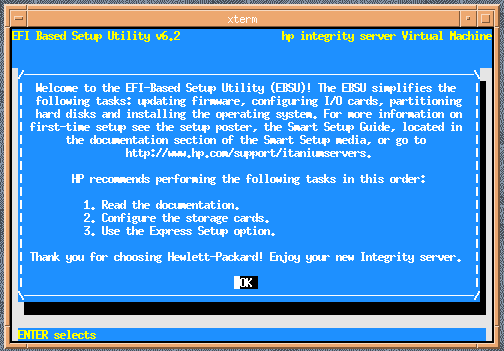
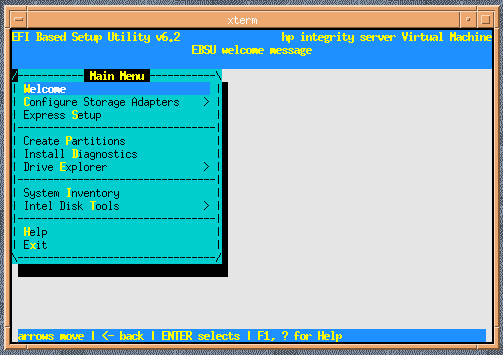
Pick the Express Setup option:
After few screens later you will be see this somewhat familiar form:
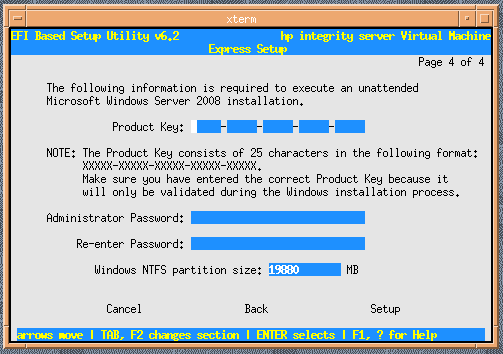
You will be asked to swap the iso image in to a Windows 2008 IA64 Install CD:
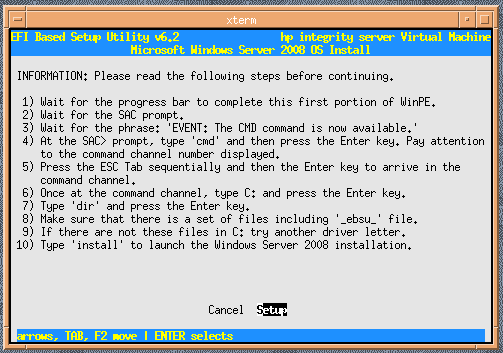
hpvmmodify -P win64 -m dvd:scsi:0,0,1:file:/vm/w2k8.isoOnce it loads up, you need to type some magic spells. Wait till you see a message that says “The CMD command is now available”, type cmd, enter, then press ESC+TAB to switch to it. Then navigate to drive C: and run install. This is the information screen for reference:
The install process takes quite a while. Fortunately you can play SimCity on HP-UX IA64 while you wait!
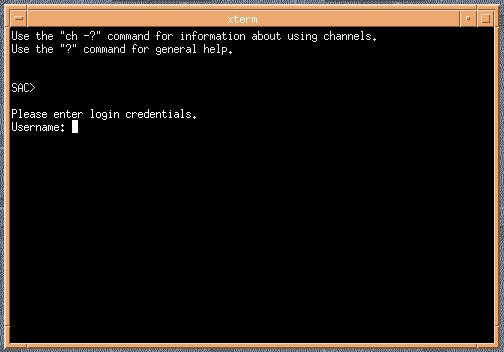
Eventually the VM will reboot and auto load to SAC prompt again. Repeat the process where you see cmd is available, launch it then switch using ESC+TAB. You will be able to login to Windows IA64 Guest VM!
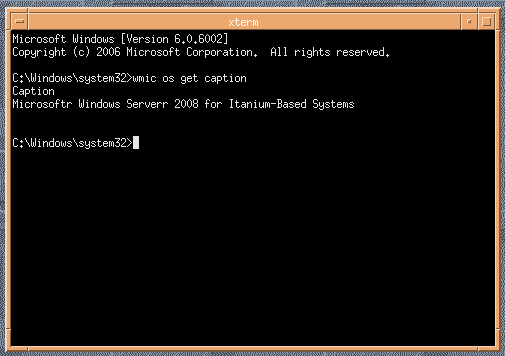
Hurray we have Windows IA64 VM Running!
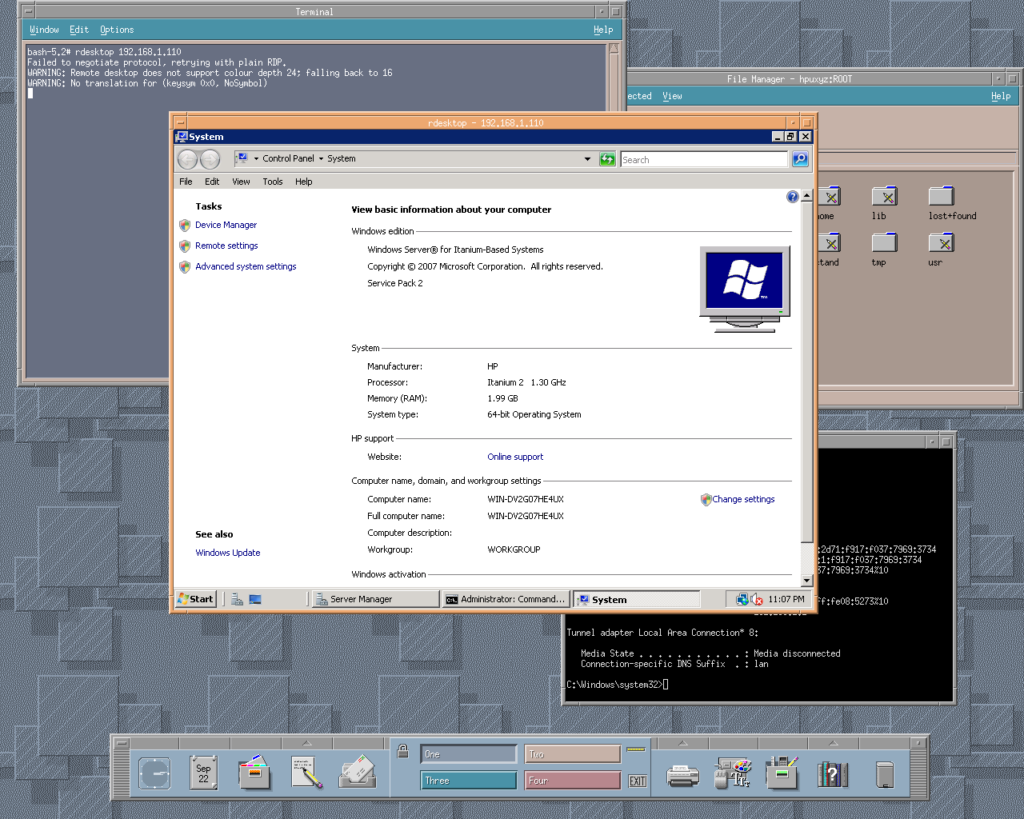
Next simply run ipconfig to get the IP address and you can RDP to it:
Option B
Using Windows RTM media + unattend.xml file. The HP VM admin guide provides a sample unattend.xml file in an appendix. I have extracted and archived it here.
This is the original instruction:
The above is complete bullshit as you need an existing VM to perform this. Starting from scratch this is no go. I have opted out to just adding the unattend.xml to the original iso image using PowerISO. Simple and easy.
The rest of the procedure is quite similar to option A.
hpvmstart -P win64
hpvmconsole -P win64
CO
If you have virtual iLO you can also telnet to the IP address configured earlier with -K.
In the EFI console you open shell, then navigate to fs0: and efi\boot folder then launch bootia64.efi file.
Then at some point you will get to the SAC prompt where you will have to type cmd then press ESC+TAB to switch to it. Then in cmd.exe prompt you launch setup /unattend:d:\unattend.xml. and wait for it to do it’s job.
Once the system reboots, you will have to do the cmd esc+tab thing again, but this time you will get a login prompt. Login as administrator with the password from unattend.xml.
You will need to enable remote desktop:
reg add "HKEY_LOCAL_MACHINE\SYSTEM\CurrentControlSet\Control\Terminal Server" /v fDenyTSConnections /t REG_DWORD /d 0 /fand allow it through the firewall:
netsh advfirewall firewall set rule group="remote desktop" new enable=yesThe Smart Setup CD does this automatically.
Option C
PXE+RIS etc. Which is not covered here.
Post Install Steps
You basically get the IP address either from your DHCP server or by running ipconfig in cmd.exe of SAC. Then RDP to the VM. Login in as administrator with password you set either in unattend.xml or EFI install tool.
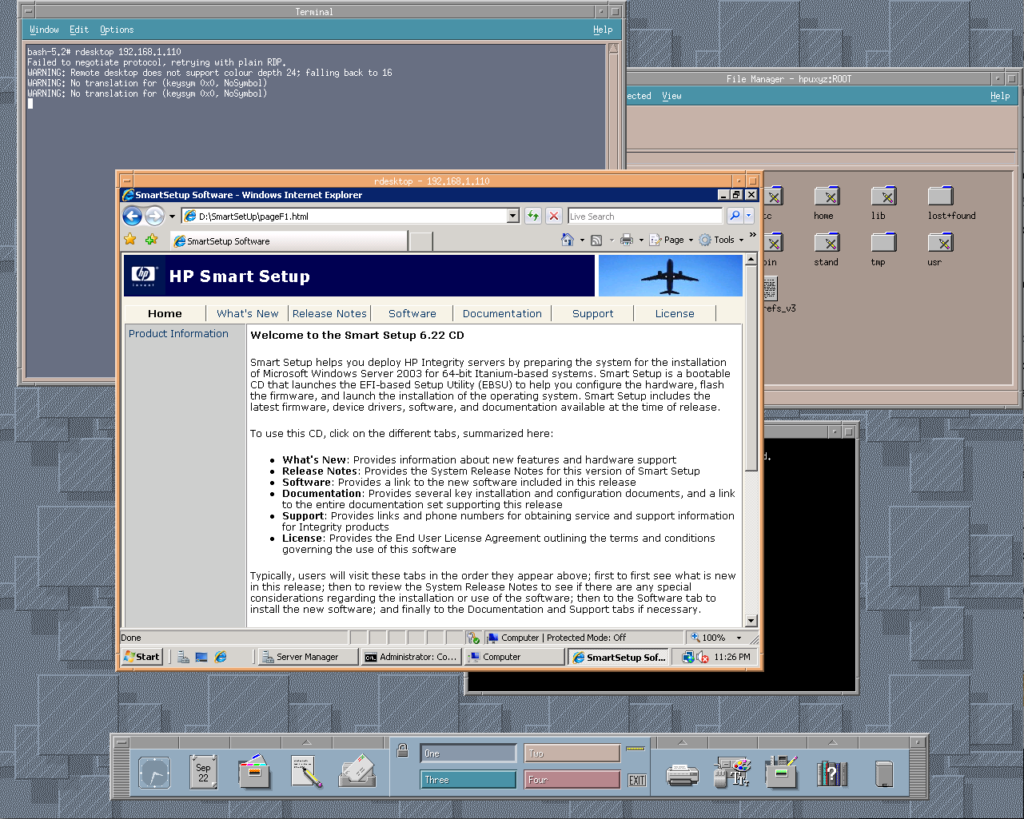
The Smart Setup CD has some drivers and components that can be installed on a VM.
What can you run on this?
Not much. From the “big apps” there’s MS SQL server, SAP and whatnot. 7zip and bunch of utilities from Sysinternals to C-Kermit. You can port more apps by installing Platform SDK and Visual Studio Tools. The latest known is Windows 7.1 SDK for IA64. It requires .NET 4.x to be installed. All archived here.
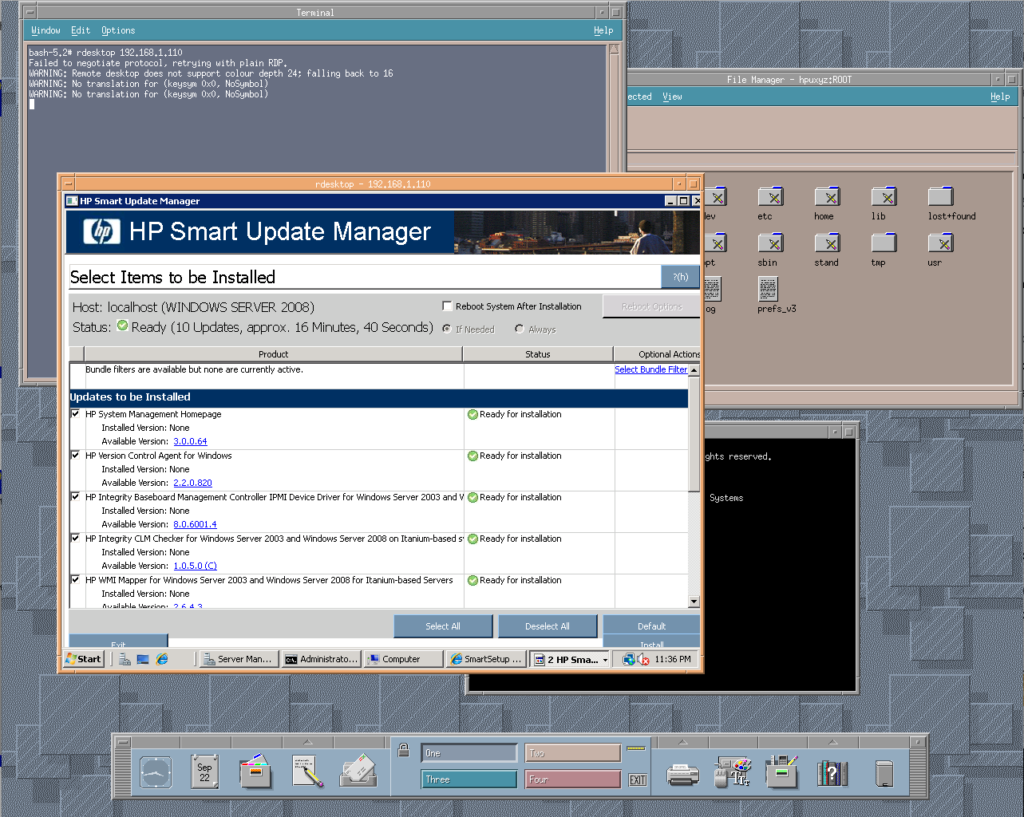
From lesser known items there’s Services For Unix, aka Interix, which has a cc wrapper around cl.exe and can be used to port posix apps:
Have Fun with Virtualization!
If you find or port some cool software for Windows IA64 let us know!
I was reading https://exquisite.social/@thomholwerda/113669895799250822 and it reminds me about that blog… and yes something intresting waiting here.
Got couple years ago Itanium blade (BL860c i2 with chassis) and of course installed HP-UX but quickly figured out that Integrity VM (6.3.5 i guess) is too new for other operating systems.
If i remember right there was something that BL860c i2 is not supported with older HP-UX’es (not sure if not supported means not working, didnt try) but downgrading IntegrityVM sounds intresting option. Wikipedia arcticle about Integrity VM says that IntegrityVM 4.3 support Itanium Tukwila, whatever it means “supported” but mine CPU is Tukwila 93xx quad-core.
Install over ILO is very painful slow process. Atleast mine generic USB DVD-ROM drive wont work with HP-UX (unable boot, dont remember if Windows 2008 R2 booting was working, Gentoo was booting also but dont remember was it over ILO or optical drive). I was also consider setting up ignite-ux server under Qemu (pa-risc, some older HP-UX) but never tried since HP-UX under Qemu is pretty slow anyway (with i5-12400 and Ryzen 7700X).
Atleast now http://osarchive.org/ site is down… pity.
Thanks intresting information, Since its winter and my storage room needs some heating so maybe its good time to turn on Itanium heating.
Yeah the Itanium is a pretty good heater! Hahaha. I will probably fire it up again soon and try to port more apps. Osarchive is up again!