Restoring the MIPS Magnum in Qemu 1.6.0

As many of you Windows NT MIPS fans may know (apparently there are more than 3 of us now!) the MIPS Magnum target is broken in the current build of Qemu.  The problem lies in the firmware as it accesses unassigned memory.  Luckily I just received an email from Hervé that details how to fix this!

The good news is that the fix is VERY easy, all you need to do is comment out a single line in target-mips/op_helper.c

In the function mips_cpu_unassigned_access:

void mips_cpu_unassigned_access(CPUState *cs, hwaddr addr,
bool is_write, bool is_exec, int unused,
unsigned size)
{
MIPSCPU *cpu = MIPS_CPU(cs);
CPUMIPSState *env = &cpu->env;

if (is_exec) {
helper_raise_exception(env, EXCP_IBE);
} else {
helper_raise_exception(env, EXCP_DBE);
}
}

Simply comment out the line

helper_raise_exception(env, EXCP_DBE);

And you’ll be able to boot up the NT PROM.

MIPS Firmware

MIPS Firmware

Remember you’ll want to run it something like this:

qemu-system-mips64el -L /tmp -M magnum -m 64 -cdrom WindowsNT4.0-MIPS.iso -hda MIPS.disk -net nic -net user -global ds1225y.filename=nvram  -global ds1225y.size=8200

Where I’m keeping my NT PROM is /tmp (although that is probably a bad idea…)  But you’ll need the NVRam stuff to add extra space for the ethernet MAC address.  The clock is always trashed but at least it is doing something this time!

For the uninitiated, some installation notes can be found here.

Installing Windows NT 4.0 on Proxmox/VE

Proxmox/VE

Proxmox/VE

Ok, Ok I know 99% of the world won’t care, but here we go.  I just setup a Proxmox/VE server on a friends PC, and felt like installing a NT 4.0 Terminal server.. So after getting the ISO onto the server, I went through the setup to get a quick blue screen.  Much like Qemu, KVM won’t work out of the box, you have to first nudge the CPU level down to ‘pentium’ or 486, and for the install you have to disable the KVM (accelerated) version, and use the generic Qemu installer.

Also I would alter the config file, along with a global config to turn on the AMD PCNet network adapter.

In the  /usr/share/pve-manager/ext4/pvemanagerlib.js file, just go ahead and add in your NIC’s entries:

[‘rtl8139’, ‘Realtec RTL8139’],
[‘e1000’, ‘Intel E1000’],
[‘pcnet’, ‘AMD PcNet’],
[‘ne2k_pci’, ‘NE2k PCI’],
[‘virtio’, ‘VirtIO (paravirtualized)’]

And in the /etc/pve/nodes/proxmox/qemu-server directory, you will see stuff like 100.conf, and look for a line like this:

net0: rtl8139=56:65:DB:52:7F:F2,bridge=vmbr0

And change it to the AMD PCNet ..

net0: pcnet=56:65:DB:52:7F:F2,bridge=vmbr0

See, easy right?  Then you can mount up your ISO, and install!

Once you’ve installed, and applied service pack 6, you can then turn on KVM acceleration, although I’d leave the CPU level knocked down to a Pentium.


NT 4.0 Terminal Server on Proxmox/VE

NT 4.0 Terminal Server on Proxmox/VE

So far, so good, yay!

Aclock BSOD

(This is a guest post by Antoni Sawicki aka Tenox)

Do you remember the famous Windows NT Blue Screen Of Death? For years it was a source of jokes and bad reputation of Windows reliability.

There even was a Blue Screen Saver. Today we fortunately see much less of it, but it still is there, reminding us that Windows NT internally is in fact a text mode operating system. The 1989 NT Design Workbook tells us that in the early days of development, before OS/2, Win32 subsystems or any GUI were developed, there was an ANSI console and bunch of command line utilities running in the text mode. Sadly all were removed in the retail version. The only true text mode application left around was autochk. Since the day Aclock was conceived I always wanted to run it on the NT text mode boot screen. In it’s twisted logic it actually makes a perfect sense.

So how do you actually output to the BSOD screen? Initially there was a lot hope in Windows NT Native Application, which can use NtDisplayString() function to display text before GUI takes over. Mark Russinovitch has written a sample Native Application with source code. Unfortunately I soon realized that NtDisplayString() does not allow for any control characters that would let me position the cursor or clear the screen. It doesn’t let much more than to display “Hello World” during Windows boot. This unfortunately wasn’t what I was hoping for. Out of lack of further ideas the project was shelved for nearly 10 years until I recently got some help from a real windows insider.

The new hope came from a HalDisplayString() and it’s helper functions HalQueryDisplayParameters() and HalSetDisplayParameters()which return screen resolution in characters and allow to position the text cursor. Exactly what I needed! Unfortunately these functions are part of the NT Kernel and there was absolutely no hope of calling them from user mode, even a Native application.

So a device driver version of Aclock was conceived. Err WHAT? Yes! A Windows Kernel Mode Device Driver version of Aclock. It sounds like craziest idea and most ridiculous waste of time ever. Worse than that, it definitely is! Despite that, development of the driver was actually surprisingly straight forward and the most difficulties I had was to do with setting up the right environment. It required Windows NT 4.0 SP6, an old version of NTDDK, SDK and Visual Studio. Once I had the project set up correctly, the only thing left to do was to figure out the kernel mode equivalents of some of the things I was getting for granted, for instance sleep(). My last surprise was rather unexpectedly difficult access to floating point in the driver. I was advised to avoid, so I have generated a pre computed tables of sin and cos values for every minute on the clock dial.

Aclock running on Windows NT BSOD in Kernel Mode

I must say that VMware Workstation Snapshots came very handy for launching and testing of the driver. It spared me from constant rebooting and re-launching the whole environment. I could load aclock and literarily click “back” like in a web browser.

Links:

Since running the driver on your own system will render it unbootable (you can always do a snapshot or use last known good configuration) I have built a minimal Windows NT Embedded (NTe) image that loads the driver on startup. It’s available as OVA image.

Windows NT Embedded project

The next steps may involve porting AA-Lib to NTHAL. From there the possibilities are unlimited aalib-quake? 😉

Update:  Video

Aclock Windows NT BSOD Driver from Antoni Sawicki on Vimeo.

Windows NT 4.0 MIPS on Qemu 1.1.1 (OS X)

I’ve got to find a way to build Qemu for Win64, it looks like the only way for it to produce anything other than trivial hello world applications is to cross compile on linux.. which no doubt will need a billion dependancies…

But in the interim the MIPS emulator in Qemu 1.1.1 has made a bunch of progress, and can install & run NT 4.0 without any issues!

There is a few things to look out for, the first is that you have to specify a NVRAM image file to keep it persistant across instances.  And you need to ‘expand’ it beyond the definition size to get things like the MAC address to be stored.

./qemu-system-mips64el  -L . -M magnum -hda MIPS.disk -net nic -net user  -global ds1225y.filename=nvram  -global ds1225y.size=8200

And by default the Qemu MAC address to configure within the Magnum BIOS is 525400123456 ..

Windows NT 4.0 MIPS on Qemu 1.1.1 on OS X

I’ve been able to download & install Internet Explorer 3, and Quake World.. And even connect up to quake.xs4all.nl and it worked!

One thing I’d advise is to copy the directory OS\WINNT40 on the system partition to OS\NT to make it that much easier to re-add the boot statement, if you have to go down that road.

ARC boot statement


As always, special thanks to Hervé Poussineau for making all of this possible.

Upgrading through Windows NT; Windows NT 4.0

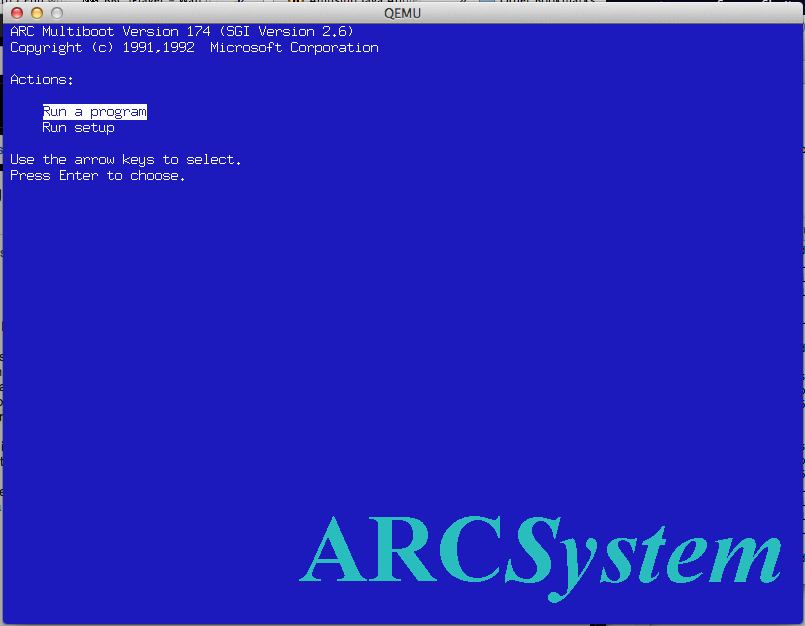
Windows 95 Interface – Windows NT Power

Windows NT 4.0 was without a doubt the smash through success that Microsoft had been hoping for with Windows NT.  There is no doubt that NT 4.0 was at the right time, right place for all of this to happen.

First corporate computers were finally out of the 386/486 class machines, for people to have at least a Pentium class computer in 1996 with 32MB of ram, computers had effectively caught up to something capable of running Windows NT.

The other big tipping point was that the internet was starting to gain mainstream acceptance, this meant that NetBEUI and IPX/SPX were starting to face their decline in corporate networks and being replace by TCP/IP based systems. This was a big win for Windows NT as not only did it include TCP/IP  but it could network over TCP/IP out of the box, unlike Netware. In addition Internet Explorer 2.0 shipped with NT 4.0, although even back then I don’t think anyone seriously used it, Netscape was still the king back then.  Another interesting feature was PPTP, the ability to setup VPNs, although at launch time I was still dialing directly into work with IPX/SPX.  The final ‘big’ thing was the inclusion of IIS in both Workstation & Server versions. Now it was a trivial thing to setup & deploy a web server.

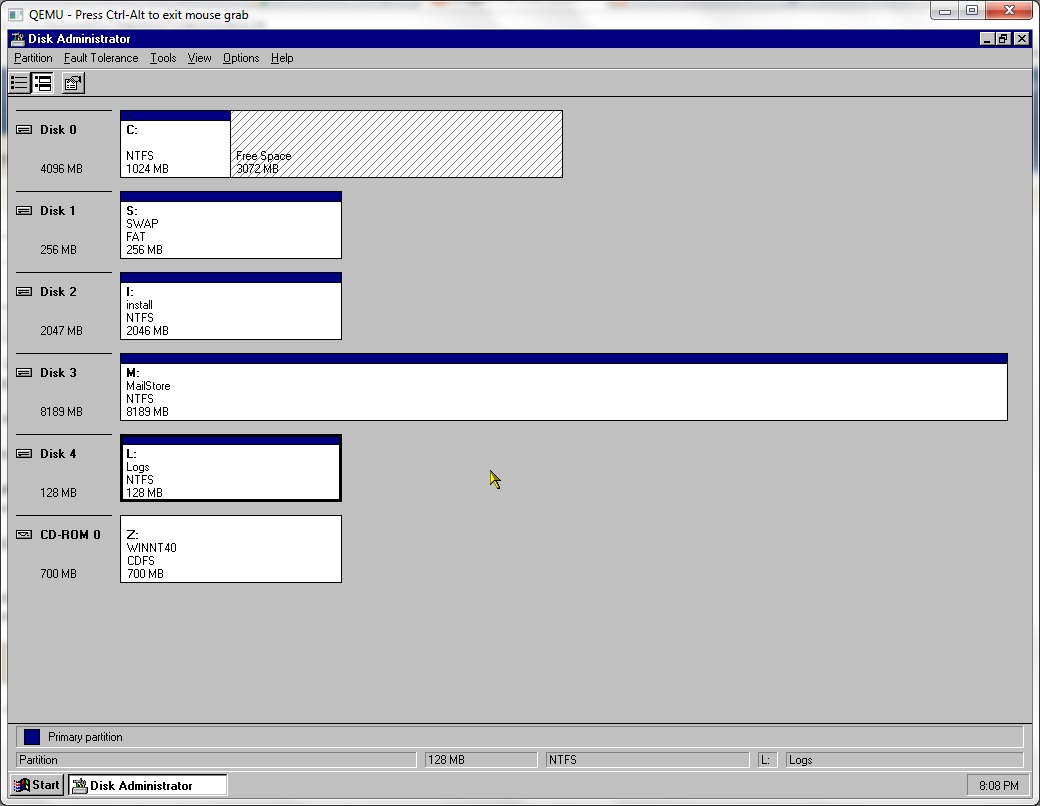
Windows NT 4.0 shipped with support for the Dec Alpha, i486, MIPS and PowerPC CPU’s. The discs are super rare to find, but the original shipment of NT 4.0 had a catastrophic SMP bug that wasn’t addressed until SP1.  Almost all NT 4.0 media you will encounter has SP1 slip streamed in.  Shortly after SP1, the MIPS platform was dropped.  Before SP3 the PowerPC had been dropped as well.  The Dec Alpha survived all the way to SP6, being dropped between NT 4.0 and Windows 2000 as Compaq who had bought DEC saw the AlphaNT product cannibalizing sales of its high end Pentium systems, and sinking too much R&D money into the product.

The most obvious change from NT 3.51 to 4.0 was the user interface.  Gone was the program manager, and in was explorer.  Another big change was that the video subsystem was moved into the kernel space which resulted in significantly faster video performance.  Windows NT also included DirectX support (2.0 in the box, 3.0 with SP3) and even hardware OpenGL support for cards like the Diamond Fire GL 1000 (which was a big letdown as it couldn’t run GLQuake correctly…)

Also around the time of NT 4.0’s launch SMP capable motherboards were now starting to appear that didn’t cost an insane amount of money.  I had a Tyan Tomcat dual Pentium 100 board at the time, which was fantastic IMHO… While two CPUs don’t make things run twice as fast, they certainly are more responsive had handling a larger workload of various processes.

Windows NT 4.0 Resource Kit.

With the release of Windows NT 4.0 Workstation, the Resource kit was an excellent resource to have (OK I Know that sounds horrible… but nothing like built on NT Technology).  The number one thing was the desktop themes which were copied from the Windows 95 Plus! Pack.  This made Windows NT 4.0 feel far more like something that would be acceptable to an end user.  My personal favorite was the ‘Tropical Interlude’

Windows Desktop Update

With the release of Internet Explorer 4.0, the full downloadable version also included an option to install a Windows 98 like shell, AKA the Active Desktop.  Oddly this was left out of IE 5, 5.5 & 6.0 . Internet Explorer 3 added things like POP support to the mail client, 4.0 expanded on this with Outlook Express, Netmeeting, FrontPage express, and Microsoft Chat, the ‘comic chat’ IRC client.


The Option Pack

Later in   NT 4.0’s life saw the release of the “Option Pack” which was a bunch of Windows 2000 technology that was ready for release while ‘NT 5.0’ was stalling for release. This included things like the MMC (Microsoft Management Console), a SMTP Server, Transaction Server, and a stronger platform for hosting DCOM components (oh the horror!).

Besides IIS, NT 4.0 was the platform for Exchange 5.0/5.5 which pretty much gutted the old email systems that corporations relied on.  SQL Server 6.5 & 7.0 also gained quite a bit of ground for people wanting to move off expensive mainframes or midranges, heck you could even run it on your own workstation!

taskman!

One of my favorite and small addition to NT 4.0 was the new task manager. Gone was the simple list of programs running but now you could quickly view the CPU level, see who the hog was without resorting to perfmon, but you could easily kill processes, change their priority and affinity.

It is hard to imagine (impossible really) to imagine Windows NT without this great feature.


During Windows NT 4.0’s lifetime patching had started to become somewhat of a problem.  While there were 6 major service packs, and one security rollup, there were tonnes of vulnerabilities that were found while NT 4.0 / IIS 4.0 were actively supported, and needed to be corrected via hotfixes. Starting with IE 5.0 there was a ‘windows update’ feature which could then scan the OS, and determine what fixes needed to be applied.  While on the one hand there were constant updates, and no real good automated way to push them, there was at least a way to finally get updates onto NT 4.0 systems. Even later with SUS/WSUS this is something that IT shops still struggle with.

As far as application compatability goes, much to my amazement ALL of my applications are continuing to work, this includes Excel 3.0, MS-Word 5.5, SQL Server 4.21 and Doom 1.1 . I should also add that NT 4.0 added something really cool, pinball! Although all I ever did see is people addicted to solitaire. And of course WinDoom works GREAT as well!  One thing to point out is though NT 4.0 can still run OS/2 16bit text based exe’s there was an addon pack to run 16bit PM applications for 4.0.  Also by this point the HPFS filesystem had been removed from Windows NT.  While it was possible to put 3.51’s pinball.sys driver into a 4.0 system, and restore HPFS functionality, even us diehard OS/2 fans had given up at this point and either went Linux or NT.

Pinball!

Another great thing that was added into NT 4.0 was Hyperterminal.  While the old Windows 3.0 terminal had been ported to the Win32 subsystem, and was present in NT 3.1-3.51 it was finally nice to get something in the box that supported ANSI & Zmodem.. even if it was frankly too little too late, as everything was going internet.

And speaking of the internet in late 1996 we saw the release of Office 97 and it’s “internet centric” thinking.  One interesting thing is that Office 97 leaves my Excel 3.0a install alone. And much to everyone’s enjoyment Office 97 came with clippy! .. Who’s removal in Office 2003 was a selling feature.  Also included in Office 97 was Outlook 97, the first real email client for Windows. Much like the ancient Office 4.2 for Windows NT, there were versions of Write 97 & Excel 97 for the Dec Alpha… Although for the ‘full’ office suite I just ended up running !FX32 to run i386 Win32 binaries on the Dec Alpha.

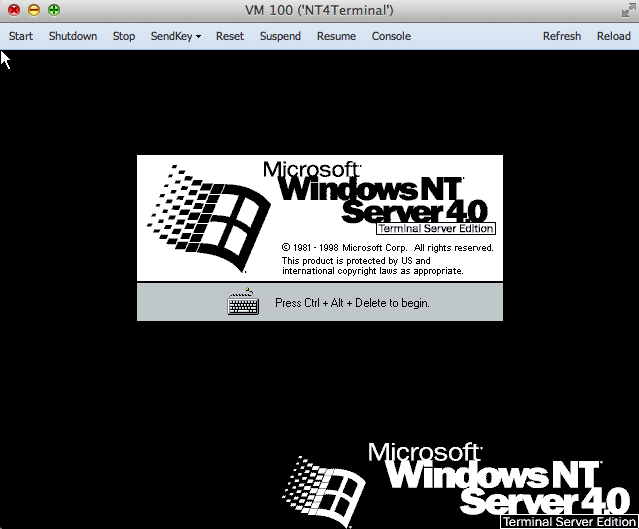
Windows NT 4.0 ended up being available in a Terminal Server edition which would support multiple users on special Windows Terminal appliances, or old workstations.  There also was an enterprise version which could use eight physical processors, and allow programs to access 3GB of ram directly, and page memory out to more ram to allow bigger working sets.  It was like LIM EMS it didn’t get around that arrays couldn’t directly be larger than 3GB.  Already in 1998 we were starting to actually hit the physical limitations of 32bit computing.

Though 4.0 was a major release there were several things lacking in Windows NT 4.0, such as good PCMCIA support (it came from many 3rd parties) USB support, power management, and multiple displays.  All of this was addressed in Windows 2000.

Internet Explorer 3.0 for the MIPS.

I got a tip that there actually was a version of Internet Explorer 3.0 for the MIPS. I was thinking there was no way, as there was no mention of this thing as IE 3.0 came out after the MIPS had been dropped from the roster.

Well luckily it turns out to be true.

The original download link is here, and I’ve mirrored it here.

Who knows what other things are out there for the MIPS?


Installing Windows NT 4.0 on Qemu 0.14.0 with SCSI

So for a test I needed an email server, so I thought I’d setup an Exchange server quickly. Exchange 5.5 runs best on NT 4.0 so I’m going to install it on Qemu 0.14.0. Along the way I ran into a few little gotcha’s so I thought I’d update on how to do this.

qemu.exe -L pc-bios -cpu pentium -hda nt4-server.qcow2 -net nic,model=pcnet -net user -cdrom nt4server.iso -boot d

As you can see on NT 4.0 you now have to set the CPU level. This needs to be done going forward with NT 4.0 as again it’s too old to detect newer CPU’s and gets confused. Also I’d recommend selecting the ‘standard pc’ HAL. Oh sure it may look all nice with a MPS/Uniprocessor, but I’ve found it noticeably slower.

The default cirrus logic driver works at 16bit depths at 800×600 well enough (The hardware mouse pointer doesn’t work so you’ll need to turn on a custom pointer). Another thing is my choice of the AMD PCNet NIC, is that it’s the same that VMWare uses, so you can always run these disks under VMWare if need be (as long as VMWare has IDE disk support, and you convert the disk first!!).

Ok that basically covers an IDE install, but let’s get onto SCSI. Qemu now (it’s been in there for a while..) emulates a SCSI controller, the PCI 53c895a adapter. And I’ve found that you can get it to work with Windows NT 4.0! First you’ll need a driver diskette & BIOS both found at LSI’s webpage. The NT driver is nt896.zip if you’ve gotten the correct one.

Now that I’m going to install exchange, the best practice I’ve found for NT is something like this:

OS DISK 4GB
SWAP DISK 256MB
INSTALLS 2GB
MAIL STORE 8GB
LOGS 128MB

So that’s a bunch of SCSI disks, right? I guess I could build a stripped set but that’d be kind of crazy… so here is how I’m going to do it:

qemu-img.exe create -f qcow2 scsi0.qcow2 4G
Formatting ‘scsi0.qcow2’, fmt=qcow2 size=4294967296 encryption=off cluster_size=0

qemu-img.exe create -f raw scsi1.qcow2 256M
Formatting ‘scsi1.qcow2’, fmt=raw size=268435456

qemu-img.exe create -f qcow2 scsi2.qcow2 2G
Formatting ‘scsi2.qcow2’, fmt=qcow2 size=2147483648 encryption=off cluster_size=0

qemu-img.exe create -f qcow2 scsi3.qcow2 8G
Formatting ‘scsi3.qcow2’, fmt=qcow2 size=8589934592 encryption=off cluster_size=0

qemu-img.exe create -f raw scsi4.qcow2 128M
Formatting ‘scsi4.qcow2’, fmt=raw size=134217728

Since the swap & log disk are constantly being written to, it’s best to leave them in the ‘raw’ disk format.

Ok now to install. I know it’s a massive command line but this is how I’m going to kick off the install:

qemu.exe -cpu pentium -m 256 -L pc-bios -net nic,model=pcnet
-net user -drive file=scsi0.qcow2,if=scsi,bus=0,unit=0 -drive file=scsi1.qcow2,
if=scsi,bus=0,unit=1 -drive file=scsi2.qcow2,if=scsi,bus=0,unit=2 -drive file=sc
si3.qcow2,if=scsi,bus=0,unit=3 -drive file=scsi4.qcow2,if=scsi,bus=0,unit=4 -opt
ion-rom 8xx_64.rom -fda lsi.vfd -cdrom nt4server.iso -boot d

And if it’s done right, you’ll notice that now the SCSI bios will be initializing as seen below with a bunch of disks…

qemu 0.14.0 scsi bios

qemu 0.14.0 scsi bios

Once your NT CD starts to boot up, you’ll see a blue screen like this. It’s important that you hit both F5 and F6 over and over to tell the setup program that you want a custom HAL, along with an install time SCSI driver.

qemu 0.14.0 nt 40 scsi hit f5/f6

qemu 0.14.0 nt 40 scsi hit f5/f6

And as I did above, I’ll first select the ‘standard pc’ HAL.

qemu 0.14.0 nt 40 scsi load Symbios driver

qemu 0.14.0 nt 40 scsi load Symbios driver

Select the  Symbios driver

Select the Symbios driver

Then You can tell it to load the LSI / Symbios scsi driver, and install will roll through as normal. Since this is going to be an Exchange server, I’m also going to make it a PDC on it’s own domain, since Exchange requires DC functionality.

Make it a DC

Make it a DC

And from there it is a somewhat normal NT install. I did leave out the messaging stuff, because it’s that ancient “Microsoft Mail” stuff, and it’s somewhat crippled at that.

For the fun of it, if you load 256 colors, you’ll wind up with this:

Windows NT 4.0 with 256 colours

Windows NT 4.0 with 256 colours

And all the icons will be blank squares. Not terribly useful. Maybe for low displays the regular VGA would be best…. But again with 16bit and custom pointers (much like an old MIPS issue) it will work enough. 1024x768x16million colors at 43Hz (interlaced) works pretty good too!

Next I fired up the disktool, (diskman) and slapped down a bunch of partitions… I let the swap formatted FAT as I don’t care about it’s crash to crash integrity, but the rest can be NTFS. Also from a boot limitation the first disk is only 1GB out of it’s 4… I don’t know if that matters.

qemu 0.14.0 nt 40 partition disks

qemu 0.14.0 nt 40 partition disks

Then into the system tool to move the swap to the ‘s’ drive.

qemu 0.14.0 nt 40 scsi setup swap

qemu 0.14.0 nt 40 scsi setup swap

I don’t know if the actual setup of Exchange is all that … interesting so I’ll just leave it to your imagination.

Windows NT 4.0 MIPS revisited

MIPS at it's best

MIPS at it’s best

Over the last few days, I’ve received a few ports of some software for Windows NT 4.0 MIPS, that I am sure the rest of everyone will be interested in.

The first one provided by nandhp is lynx, the text mode browser! While it may not seem like a super big deal, it *IS* a http 1.1 compliant browser, and it is more useful then Internet Explorer 2.0.

The next, also by nandhp is putty! So now you can ssh out into the world!

I’ve also received unzip & gzip for handling compressed files.. .No word on a tar yet. For now I’m using gnutar for MS-DOS.

And finally I took my quakeworld for MS-DOS with some of the SDL parts merged in to provide a preliminary QuakeWorld for the MIPS.

What is more cool, is that there is still people out there playing Quake. I suspect the non intel numbers are pretty low.

At any rate, enjoy!

Net Hack wiki moved

I just received notice that the NetHack wiki has now moved and the new site is nethackwiki.com.

It’s great when old software just doesn’t revive for a little while then fade back to obscurity, so update your links, or just browse the site and be blown away by all their information on such a great (and difficult) game.

And of course, I have NetHack for the Windows NT 4.0 MIPS, and various 4.X BSD on sourceforge under the package tapes….

OpenWatcom for the DEC Alpha

Someone had contacted me about running some Fortran programs on the DEC Alpha with Windows NT. Now I know that DEC had released some compilers for the Alpha, the Digital Visual Fortran thing which some people still sell for around $600 USD.

OUCH.

But luckily a friend mentioned that I should look at the source code for Open Watcom.

So, I figure for the hell of it, I’ll show how to build a Dec Alpha cross compiler for both C & Fortran. First I’m using Open Watcom 1.8, the current ‘release’ version. You are on your own for older or newer versions.

First install Open Watcom 1.8, with whatever your host is (I’m running on win64, so I’m using the win32 install), and set the target for 32bit NT. We will need the headers so this is the easiest way to ensure your Watcom can make NT exes.

Next you are going to need the file owaxp0401.zip. This is a pre-compiled version of the compiler & libraries for the DEC Alpha. All we need from this is the libaxp directory, which you can just unzip to your Watcom directory.

Now we’ll need to copy some files to satisfy the build process.

C:\WATCOM\binnt>copy wcl386.exe bwcl386.exe
C:\WATCOM\binnt>copy wlib.exe bwlib.exe
C:\WATCOM\binnt>copy wrc.exe bwrc.exe

Ok, now with that out of the way, run c:\watcom\owsetenv.bat to setup your environment, and now let’s extract the source to 1.8. I’m just going to use c:\temp as a place to put it. Also you will have to edit the setvars.bat file, and change the following:

set OWROOT=c:\temp\ow18src
set WATCOM=c:\watcom
set DOC_BUILD=0

Now I suppose you could save this into a batch file, and kick that off, and this will build the needed libraries, then the C compiler.

cd c:\temp\OW18src\bld\builder\nt386
wmake
cd c:\temp\ow18src\bld\dwarf\dw\osi386\
wmake
cd c:\temp\OW18src\bld\yacc\nt386
wmake
copy yacc.exe \WATCOM\binnt\byacc.exe
cd c:\temp\OW18src\bld\re2c\nt386
wmake
copy re2c.exe \WATCOM\binnt\re2c.exe
cd c:\temp\ow18src\bld\cg\risc\axp\nt386\
wmake
cd c:\temp\ow18src\bld\sdk\rc\wres\flat386\mf_r
wmake
cd c:\temp\ow18src\bld\cfloat\osi386
wmake
cd c:\temp\ow18src\bld\as\alpha\inline\osi386\
wmake
cd c:\temp\ow18src\bld\owl\osi386\
wmake

Now this will build the cross compiler…

cd c:\temp\OW18src\bld\cc\wcl\nt386.axp
wmake
copy wclaxp.exe \WATCOM\binnt
cd c:\temp\OW18src\bld\cc\nt386.axp
wmake
copy wccaxpc.exe \WATCOM\binnt\wccaxp.exe
copy wccdaxpc.dll \WATCOM\binnt\wccdaxp.dll
cd c:\temp\OW18src\bld\as\alpha\nt386
wmake
copy wasaxp.exe \WATCOM\binnt

Now for the Fortran 77 compiler. Please note that the default flags include -we which will cause the compiler to error if there is a warning. And as luck would have it, one function doesn’t declare a prototype… So you can either remove the -we flat from the mif file, or fix the c file… The choice is yours.

cd c:\temp\OW18src\bld\f77\wfl\nt386.axp
wmake
copy wflaxp.exe \WATCOM\binnt
cd c:\temp\OW18src\bld\f77\wfc\nt386.axp
wmake
copy wfcaxp.exe \WATCOM\binnt
attrib c:\temp\OW18src\bld\f77\f77lib\flags.mif -r
notepad c:\temp\OW18src\bld\f77\f77lib\flags.mif

Do a search and replace on -we and replace it with nothing…

cd c:\temp\OW18src\bld\f77\f77lib\winnt.axp\_s
wmake
copy flib.lib \WATCOM\libaxp

With all that out of the way, let’s build some test programs…

Let’s start with hello.f for the Fortran compiler.

C234567
program hello
print *, ‘Hello!’
end

c:\temp>wflaxp hello.f
Open Watcom F77 Alpha AXP Compile and Link Utility Version 1.8
Portions Copyright (c) 1990-2002 Sybase, Inc. All Rights Reserved.
Source code is available under the Sybase Open Watcom Public License.
See http://www.openwatcom.org/ for details.
wfcaxp hello.f
Open Watcom FORTRAN 77 Alpha AXP Optimizing Compiler Version 1.8
Portions Copyright (c) 1984-2002 Sybase, Inc. All Rights Reserved.
Source code is available under the Sybase Open Watcom Public License.
See http://www.openwatcom.org/ for details.
hello.f: 3 statements, 40 bytes, 1 extensions, 0 warnings, 0 errors

Open Watcom Linker Version 1.8
Portions Copyright (c) 1985-2002 Sybase, Inc. All Rights Reserved.
Source code is available under the Sybase Open Watcom Public License.
See http://www.openwatcom.org/ for details.
loading object files
searching libraries
creating a Windows NT(AXP) character-mode executable

c:\temp>

Watcom Fortran cross on Dec Alpha

Watcom Fortran cross on Dec Alpha

Ok, now that’s enough for now…! Later I’ll show how to build these compilers so they’ll run on the Dec Alpha.