Revisiting a UnixWare 7.1.1 install on Qemu/KVM

So after nearly 8 years ago from messing around with UnixWare, I wanted to confirm something from a SYSV Unix that has a C compiler that isn’t GCC, and I remembered I have UnixWare 7.1.1 from a long time ago.  Anyways I have long since lost the virtual machine I had installed onto, but I still have media and of course the more important licenses.

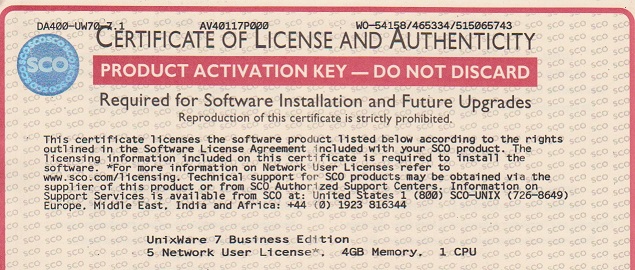
unixware certificate of license and authenticity

UnixWare licenses. the dread of fixing things 20+ years later

Yep it’s the real thing.  So with my certs in hand I do an initial install in Qemu and on reboot the system basically has bricked itself.

WARNING: System is in an unreliable state.

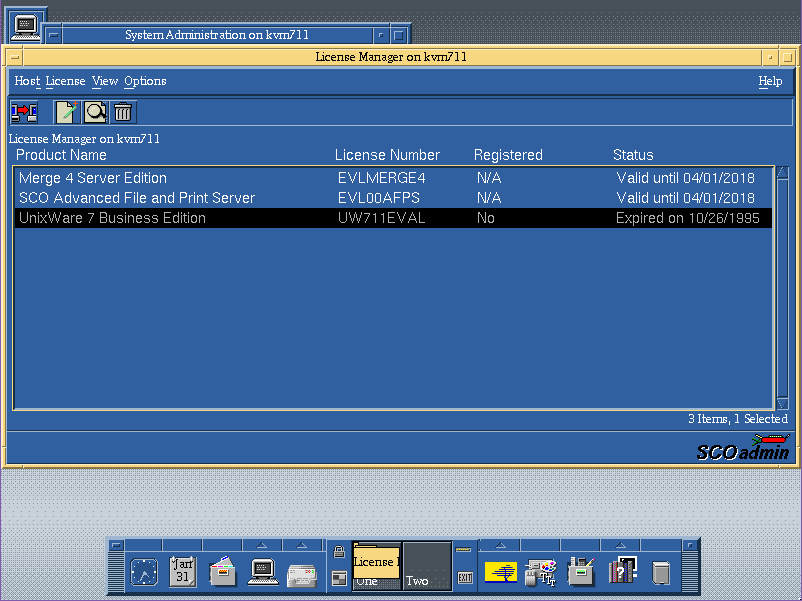
And then looking at the licenses it turns out that my license has expired.  What?

Somehow I got lucky before, but it turns out that the installation process for ancient UnixWare is NOT Y2K compliant!  And this actually turned out to be a known issue.  I can’t find the original article, but a mirror is here: ischo.net

So basically install using an eval license, which will of course expire on install, and then use your actual license after the installation, remove the eval, reboot and all will be well.

License Number: UW711EVAL
License Code: airhorpx
License Data: d60;m7hjbtt

Now isn’t that great.

The OS install license immediately expires.

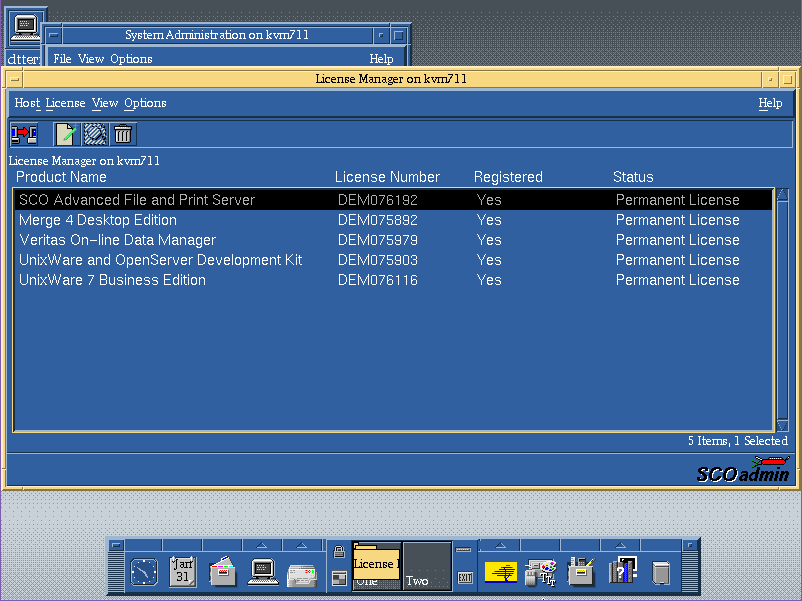
Although you can’t boot up in any real useful state, the networking will kick people off, and it’ll constantly complain that you are in license violation, you can at least bring up the SCO Admin tool, and add in your actual licenses, and then delete the evals.

And now we’re good!

Ok, now for the real fun part, flags and how to run with kvm/qemu.  Since I was loading this onto a server for remote access something like this works fine for me as I’m using the VNC remote console.

qemu-system-x86_64 -enable-kvm -m 1024 -smp 4 -hda UnixWare.vmdk -cpu pentium -net none -monitor telnet::444,server,nowait -curses -vnc 10.12.0.1:11 -cdrom iso/SCO_UnixWare711.iso

So the key things are to restrict the CPU level, and I’ve deferred the network configuration so I can update network drivers, and the OS.  I’ve found that by doing the networking during the install resulted in an OS that crashed with an integer divide by zero after installing the fixpack 5.

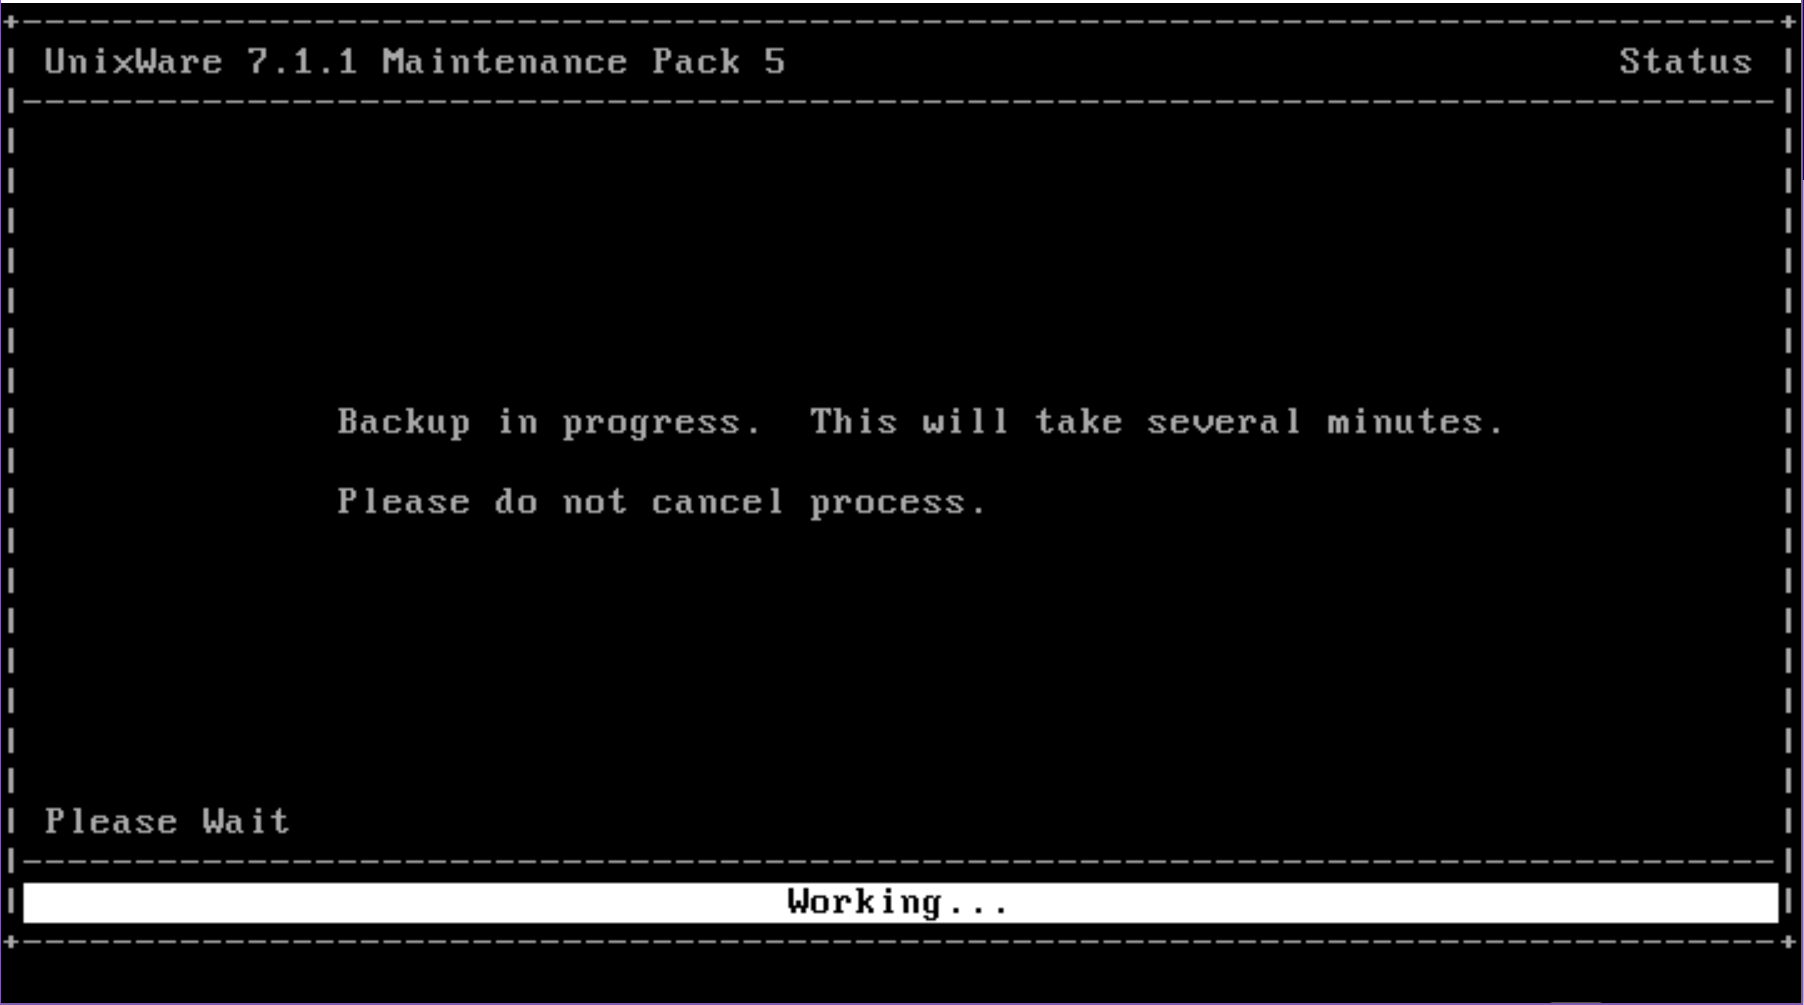
Once you have UnixWare 7.1.1 installed, be sure to install Maintenance Pack 5, which is thankfully still online over at sco.com  I’d also recommend to do this in single user mode, you can enter single user mode by hitting a key during the boot logo and typing in:

INITSTATE=S
boot

And you’ll boot in single user mode, and can install the Maintenance pack with ease.  Until the maintenance pack is installed, expect poor stability, and the system won’t actually listen to the real time clock device, and it’ll accelerate the clock like crazy where I was passing an hour every minute or two.

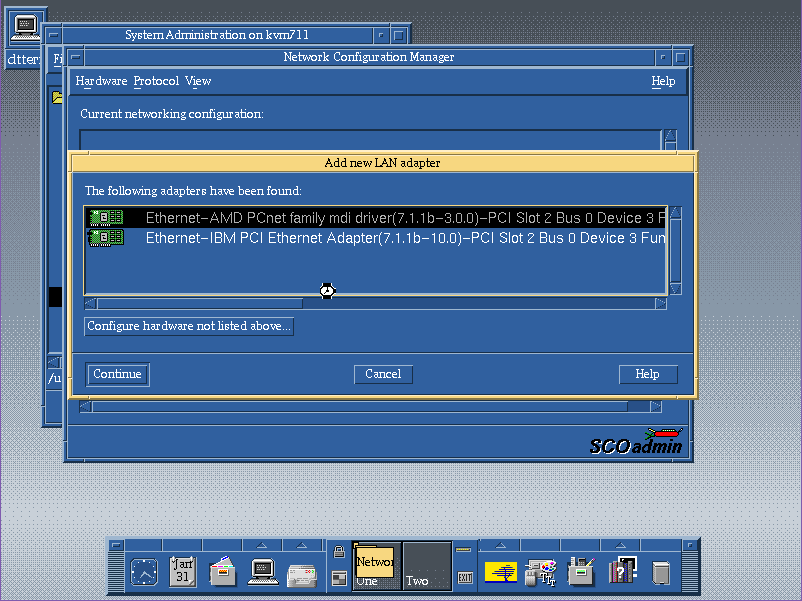
Adding the AMD PCnet on UnixWare

Once the install and update is done, I just added a PCI network card (So older versions of Qemu work well with the ne2k_isa, but newer work much better with the AMD PCNet card.), which is a popular choice for both machines and VM’s of the era.  Although you can use SLiRP the built in NAT for Qemu/KVM alternatively you can also use tun/tap.  I tried to enable SMP, however it has issues binding to the other processors, although it does see them.  And this is better to give full access to the network stack for fun things like FTP, NFS and whatnot.

qemu-system-x86_64 -enable-kvm -m 1024 -smp 4 -hda UnixWare.vmdk -cpu pentium -monitor telnet::444,server,nowait -curses -vnc 10.12.0.1:11 -device pcnet,netdev=net0 -netdev tap,id=net0,ifname=tap10,script=/etc/qemu-ifup

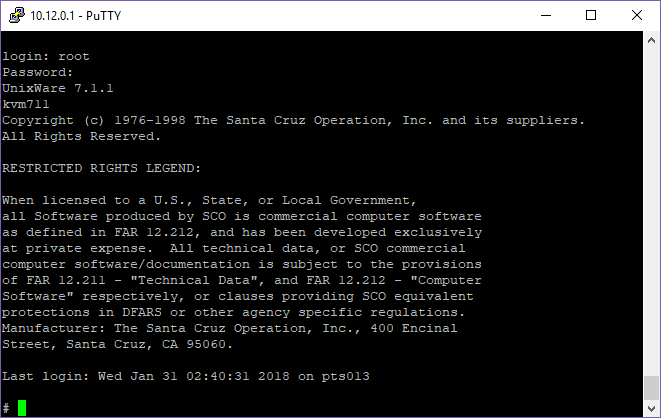
Telnet access

And just like that I can now access the VM.

And for fun…

# uname -a
UnixWare kvm711 5 7.1.1 i386 x86at SCO UNIX_SVR5
# uname -f
architecture=IA32
bus_types=PCI2.10,ISA,PnP1.0
hostname=kvm711.joes.local
hw_provider=Generic AT
hw_serial=DEM076116
kernel_stamp=04/11/11
machine=Pentium
num_cg=1
num_cpu=1
os_base=UNIX_SVR5
os_provider=SCO
release=5
srpc_domain=
sysname=UnixWare
user_limit=5
version=7.1.1

Oh yeah so I don’t forget years from now I’m using the following OS & Qemu version:

# qemu-system-x86_64 -version
QEMU emulator version 2.8.1(Debian 1:2.8+dfsg-6+deb9u3)

# cat /etc/issue
Debian GNU/Linux 9 \n \l

Also I found an eval serial for SMP, but it doesn’t recognize the second processor after the boot.

# psrinfo -v
Status of processor 0 as of 01/31/18 16:40:07
Processor has been on-line since 01/31/18 16:13:57.
The Pentium processor has a i387 floating point processor.
The following conditions exist:
Device drivers are bound to this processor.

I’ll try apparently this as for some reason it doesn’t detect the MP in Qemu/KVM so it never installed the osmp driver.

pkgadd -d cdrom1 osmp

Add the following line to the file /stand/boot:
ACPI=Y

AT&T 3B2 400 emulated

This is super awesome!

AT&T 3B2 SYSTEM CONFIGURATION:

Memory size: 4 Megabytes
System Peripherals:

        Device Name        Subdevices           Extended Subdevices

        SBD
                        Floppy Disk
                        72 Megabyte Disk

        Welcome!
This machine has to be set up by you.  When you see the "login" message type
                                setup
followed by the RETURN key.  This will start a procedure that leads you through
those things that should be done the "first time" the machine is used.

The system is ready.

Console Login:

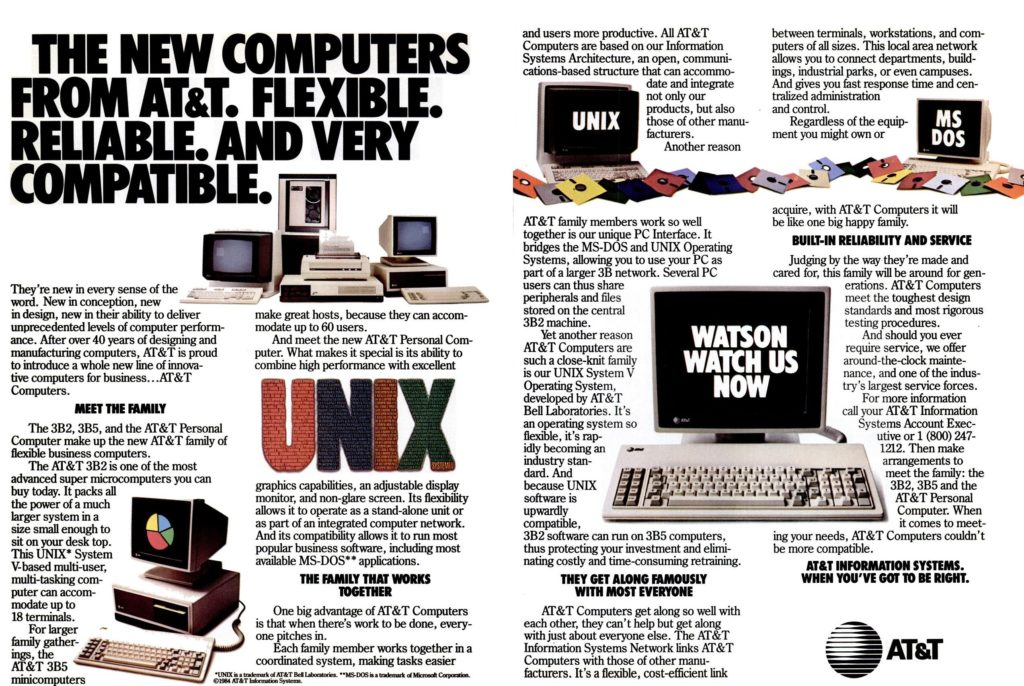
Back in the 1980’s AT&T shifted UNIX from being an internal research project that got somewhat popular in college spaces (and larger companies, General Motors was an early UNIX adapter, along with companies like Industrial Light and Magic).  Quickly after the divestiture of 1984, AT&T entered the commercial space with it’s own custom machines & their home made UNIX operating system.  Below is one of the ads they ran in 1984, touting their so called ‘super microcomputers’, featuring the 3B2, the 3B5, and the AT&T Personal Computer.

Thew new computers from AT&T

And indeed for many a government institute bewildered by the dozens of UNIX vendors, standards, and chaos of different platforms and processors many were all to happy to buy AT&T UNIX on AT&T machines.

And indeed this was my first experience with genuine SYSV Unix.

And I hated it.

Initially I had been thrown at an English computer lab because I knew how logon and do my work in style & diction, they decided I could help.  The system was aging and had major problems, as some prior students had figured out enough of the link kit that they would put their own attempts at re-writing portions of the kernel into the system, and it’d break.  Naturally the original installation diskettes were lost, and the best that could be done was basically shut it down throughout the day and run the disk repair utilities.  It was not a fun job.

Later on the 3B2’s were thrown into the ‘common garbage’ aka free kit for other departments, and the 3B2’s re-appeared at the next place I was volunteering at on campus.  However in addition to the two machines, there was a few other boxes of manuals, and oddly enough the installation diskettes.  And also about a dozen of these AT&T ISA Starlan adapters.  These weren’t the ones that were basically Ethernet (Starlan10) but rather the original ones.

Through some incredible luck we did find an NDIS 3 MS-DOS driver for the Starlan car, and we were able to cobble together a Starlan1 LAN consisting of a 3B2 that we cannibalized the RAM and disks from one of them to make a ‘super’ 3B2, with added TCP/IP software and a massively cut down port I did of samba to turn it into a tiny file & print server (72MB MFM disks were it’s biggest if I recall), along with Windows 95 clients.  And of course with a TCP/IP lan we could easily load a proxy server (WinGate?) on one machine with the 56kb modem, and now we all had internet access.  I know it’s sad today, but trust me back then it was “a big deal” that we had a fully functional LAN.

Over on loomcom.com there is an incredible amount of information about the reverse engineered WE32100, along with the 3B2 hardware, and of course information about the newest SIMH simulator the 3B2/400!

Instructions and disk images on the site made it incredibly easy to grab the latest SIMH Windows Development binaries, and get my own virtual 3B2 up and running in minutes! So naturally I pasted in dhrystone.c to see if it’d work.  And that was the first weird issue is that the backspace is the pound # key.  So all the C macro definitions lost their # sign.  I added them in vi without full terminal support because I’m crazy and:

# uname -a
unix unix 3.2 2 3B2
# ./dhrystone
Dhrystone(1.0) time for 500000 passes = 40
This machine benchmarks at 12500 dhrystones/second

Obviously this is 100% bogus, as the real machine should get around 735, and I didn’t even bother with the -O flag.

The current emulator doesn’t do any additional serial ports, nor any Ethernet adapters.  So you only get a console.  But with the pre-installed C compiler image, I was able to build a trivial file just fine.  Although pasting on the console really leaves a lot to be desired.

SDF AT&T 3B2/500 UNIX System

I know for some of us old people the 3B2 hid in the corners of our call centres, running our AT&T Definity switches, our voicemail, and even some of our early ISPs.  After funneling money into SUN to get them to work on SYSVr4 which was the grand unification of BSD + SYSV AT&T’s interest if UNIX quickly waned, and they divested themselves of UNIX, and eventually all PC hardware, although they did re-enter the PC space a few times before exiting yet again.

As time would tell, proprietary hardware + a previously ‘open’ operating system were not the winning combination.  And so far the only UNIX vendor to weather the Linux storm so far is IBM with it’s A/IX.

WYSE Unix Virtualized

(this is a guest post from Tenox)

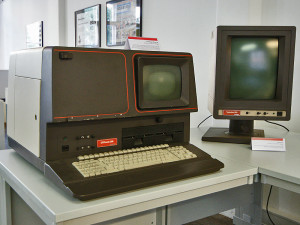
wyseunix

WYSE Unix Virtualization Challenge has been officially won by Mihai Gaitos of hawk.ro. He received $100 prize via PayPal. Congratulations!

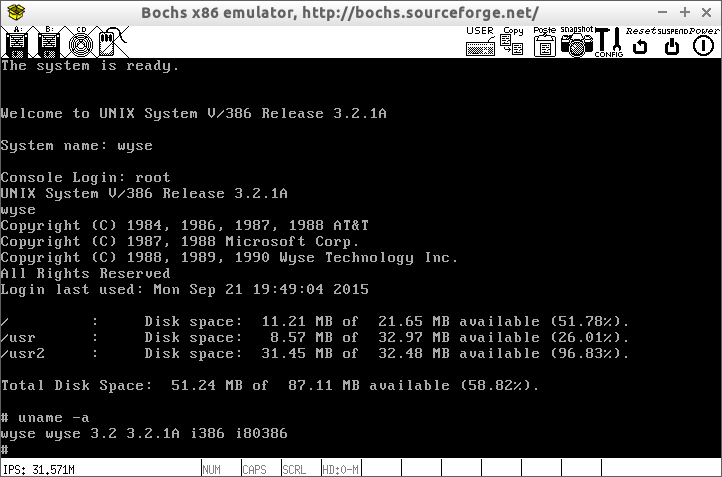
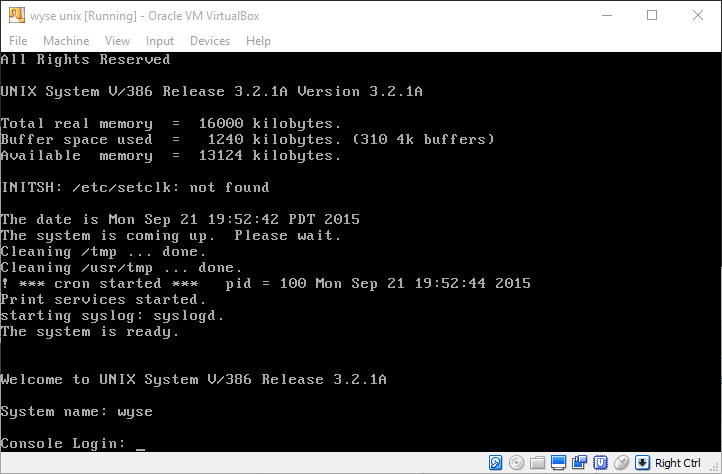
WYSE Unix has now been virtualized and can run in Qemu via Curses mode, or modified Bochs due to character map issues and vanilla VirtualBox!

wyse_on_bochswyse_on_vboxMihai has posted some gory details of the installation challenges on his website.

Ready to run image with modified Bochs binary for Linux is available here.
VirtualBox OVA file available here.

For hard core fanatics, the system comes with SLIP/slattach so you should be able to network it much like Dell Unix.

Special thanks to:
Andrew Gong for finding a tape image on eBay
Al Kossow of bitsavers.org for recovering the tape image
Michal Necasek for patching up the original floppy disk image

Virtualization Challenge Part II – WYSE Unix

(this is a guest post from Tenox)

The second virtualization contest is now on! Similar to the previous one, the winner receives $100 via Paypal and the submission is posted on this blog! Hopefully this one will be little bit more challenging. 🙂

The subject is the rarest of the rare WYSE Unix!

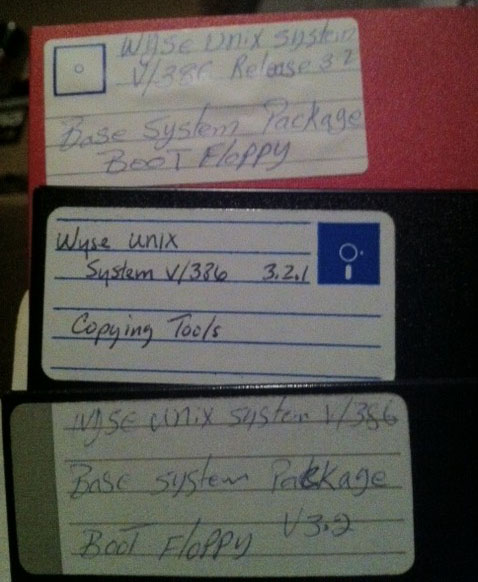
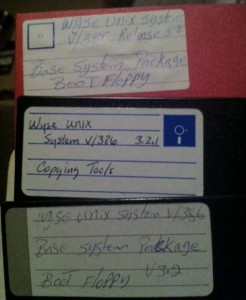
The progress so far: A few years ago I came in to possession of a set of floppy disks pictured here:

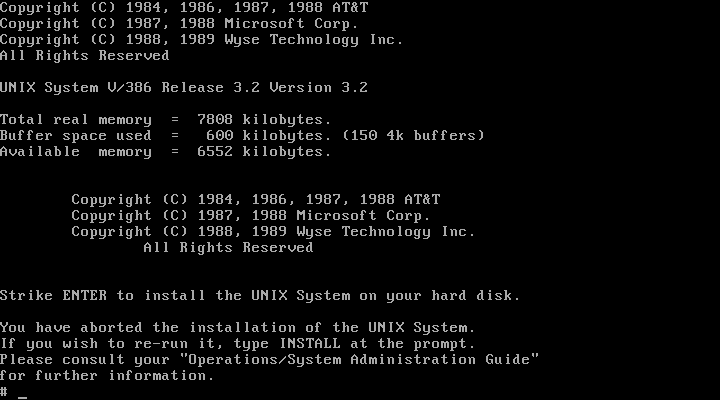
Wyse UnixThanks to Al Kossow from bitsavers.org the floppy disk content has been recovered. Michal Necasek of OS/2 museum successfully converted them in to an usable format and made some modifications to get them to boot on VirtualBox:

Wyse Unix in VirtualBoxCouple of years later, thanks to Andrew Gong, a WYSE Unix tape has been found on eBay:

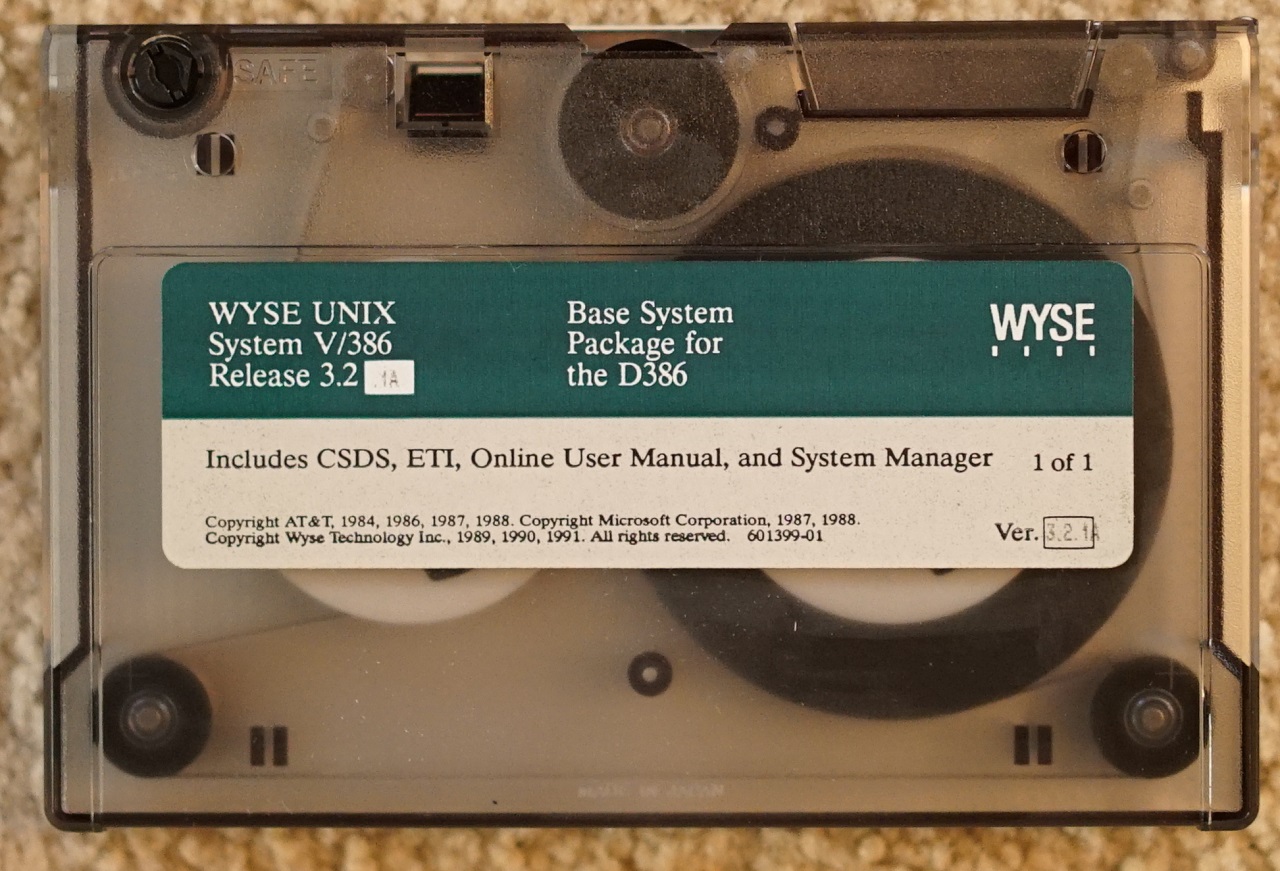
wyseunixMore recently Al Kossow was able to read the tape in to an image, which now I have uploaded to my web server: wyseunix321a.zip

The next step is yours! Install the whole system on to a hypervisor of your choice, document the process and supply a vanilla boot image or VM.

The winner shall be the person who will first post a comment declaring success including a screenshot and can further prove it by emailing emailing me the submission shortly after. If the comment gets blocked by spam filter, don’t worry the original submission time will of course count. Oh and almost forgot: I also need aclock binary for it, however if there is no compiler and the standard SysV binary works fine, you are exempt from the requirement.

The catch? Looks like floppy disk trouble. The boot disk is fine after it has been fixed up by Michal. The Base floppy looks like has same content as boot. Copy Tools is very small. Looks like it may be truncated. Hopefully not, but if yes I count on your creativity. Remember that Dell Unix is an exactly save release of SystemV/386 and did not have or needed copy tools to install.

Good Luck!

Update: Looks like the contest has been won by Mihai! Congratulations!

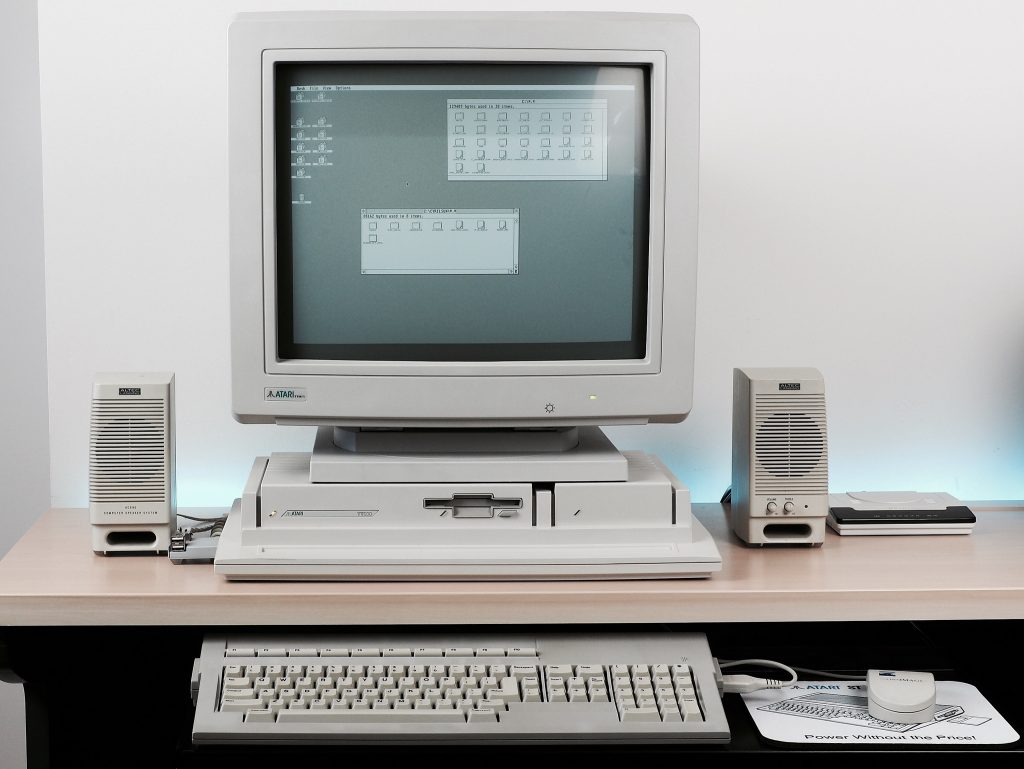
Atari System V UNIX Saga – Part I – Intro

(note this is a guest post from tenox)

SONY DSCA long long ago, my father had a printing business. An emerging technology called Desktop Publishing (DTP) was just taking to the mainstream. I have been involved in migration from Linotronic typesetting machines (see above) to more modern and GUI driven Atari TT with Calamus. Those were fun times. Long story short, I became an avid fan of Atari. Unfortunately as time progressed, Ataris got in turn obsoleted by Macs with Quark Xpress and Photoshop. I myself started exploring world of Unix and ended up selling my Atari to be able to run Linux. Bit of shame from time perspective as there were plenty of Unix flavors for the Atari: Minix, Linux, NetBSD and MiNT. Unfortunately they were released after I parted with the platform.

Atari System V on Cebit

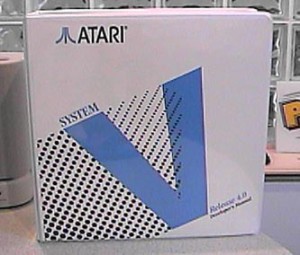
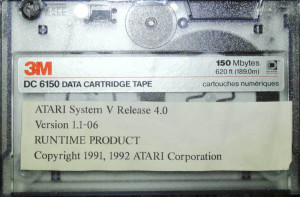
Fast forward 20 years, Atari own UNIX version surfaced the earth. It was originally released in mid 1992 but died shortly after, no one ever heard about it. It has been lost to humanity. Only two good souls had working versions of the system and under pressure of the community finally made disk images of their installations. Some time after a documentation set has been found and digitized. Now I’m in process of trying to restore last existing set of damaged installation tapes. You can find little bit more history of the efforts on this thread.

RUNTIME_PRODUCT-QIC

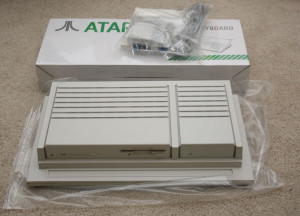
Out of nostalgia and the fact that Atari TT has been designed as a Unix Workstation, but never got a chance to play with it in this role, I decided to purchase one for myself. I have turned to Best Electronics who is a local Atari dealer around the corner. They sell Ataris like brand new, assembled from spare or reconditioned parts. I paid a small fortune for it, but I got myself a brand spanking new Atari TT, factory sealed and smelling like new after 20 years. It was fitted with latest motherboard revision, TOS, 1.44 MB FDD, 4 MB ST RAM and 16 MB TT RAM.

tt

I was told to just hook it up to a VGA monitor and viola, it will work. Which it did… except to my utter shock in a whopping resolution of 640×480. It looked absolutely horrible stretched on a 19″ LCD panel. I don’t have any pictures but it looked like this. For games maybe OK but not for Unix or any sensible applications.

Using TTs professionally in DTP I certainly didn’t remember them suffering in the resolution department. So what was I doing wrong? Aha! In the old days we used to use special high resolution VME graphic cards.  So I went to search for one on eBay and Atari Forums. These obviously proven to be impossible to find… obviously. Additionally I learned that Atari UNIX does not support any of these as they required special TOS/NVDI drivers. In order to run ASV X11 with a decent resolution, one needs a special high resolution monitor called either TTM 194 or 195. These were “professional” 19″ monitors specifically for DTP work. They worked with the built-in graphics card in a special black and white mode at 1280×960, which is actually decent even in modern standards. In a fact we did have these monitors at the printing shop.

Unfortunately these are very old, bulky CRTs and weight 50 lbs. My wife would kill me if I brought one home and even if she didn’t I would hate having one of these on my desk. So why won’t the “TT High” mode work on a standard VGA LCD which normally supports 1280×1024? Well back in a day VGA standard didn’t support such resolutions and Atari had to make the monochrome monitors using ECL signal similar to old SUN/3 and HP monitors. Higher resolution modes were only added later by VESA BIOS extensions.

Researching the topic a lot of people were actually looking for an ECL to VGA signal converter but one did not exist. Some managed to use old EIZO CRTs with ECL support and with decent results, but still these are 50 lbs CRTs and I wanted to run ASV on a LCD panel. An adapter to convert ECL signal to a real VGA has actually been tried before but with rather awful results. Something had to be done!

TenoxVGA was born. And this will be covered in the next post… 😉

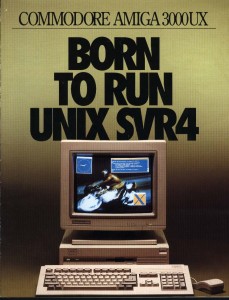
AMIX

AMIX Ad

AMIX Ad

Back in 1990 Commodore took the Amiga in a new direction with it’s new Amiga 3000, by commissioning a port of A&T SYSV Unix to the Amiga. Taking advantage of the 3000’s 68030 CPU and 68881 Math coprocessor, along with its integrated SCSI controller. It certainly was the hallmark of typical UNIX machines of the time.

When originally announced there was some big interest in the platform by SUN, as their original SUN-1, SUN-2 & SUN-3 lines of workstations were all 68000 based machines, and being able to rebrand a mass produced Commodore model would have been a good thing, however the deal ultimately fell through.  The machine would have been the Amiga 3500, which later became the Amiga 3000T.

Another thing to keep in mind is that SUN’s SYSV (Solaris) was targeted to the SPARC processor, and it is unlikely that they would benefit from selling a 68030 based machine in 1991.

Typical of the time, AMIX installs from a set of boot floppies, and then pulls the rest of the installation from a tape drive, such as the A3070.

AMIX was released at a time when the UNIX world was rapidly moving to RISC processors, SUN had their SPARC, SGI had their MIPS, IBM and their POWER, Motorola built UNIX machines around their 88000 RISC processor, NeXT was also going to move to the 88000 until they gave up making their own hardware and shifted to a software company.  So who would want a then dated 68030 based machine when the industry had made their first steps into the world of RISC computing.

So how does it measure up?  Well it is SYSV, and if you’ve seen one, well honestly you’ve seen them all.  What is kind of neat is that AMIX includes OpenLook and a C compiler, which is kind of a rarity for the period.

Another flaw was that when the 68040 processor was released it’s MMU was incompatible with the 68030, and the VM subsystem for any UNIX would have to be rewritten.  While NetBSD can run on both the 68030 and 68040, AMIX never was updated, and so it can only run on 68030 based machines.

AMIX never did get any critical traction, and slipped into oblivion with the death of Commodore.

Up until recently it was impossible to run AMIX in any emulator, but there has been a lot of work on the ARANYM and Pervious emulators which included doing 68030 MMU support for the possibility of running early versions of NeXTSTEP. Toni Wilen was able to adapt their work onto WinUAE and it is not possible to run AMIX.!

Reading through this thread,  I was able to put together the needed bits, and get it running under CrossOver, by using the pre-configured settings for WinUAE, and replacing the exe with the new beta exe, the supplied hard disk image from amigaunix.com and I was up and running in no time!  The only real change from the config was to change the SCSI ID of the hard disk from 0 to 6.

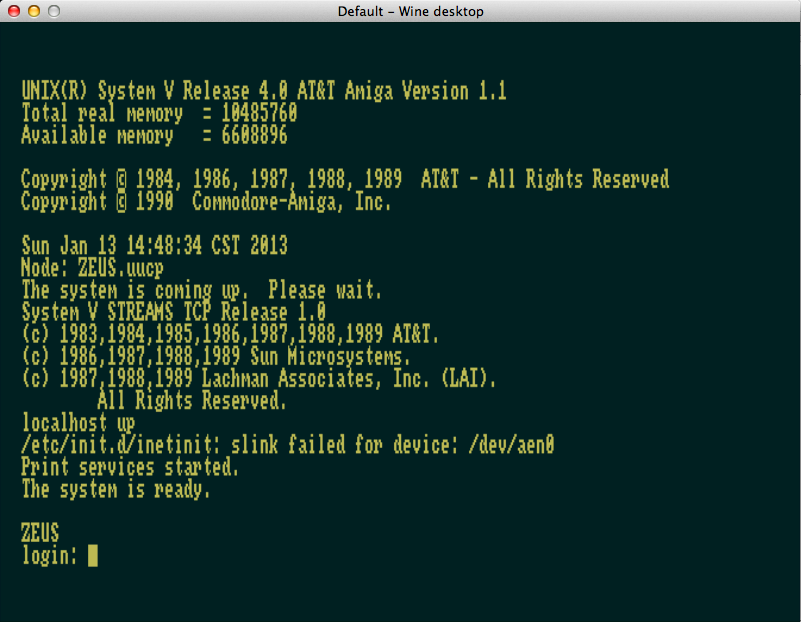
Screen Shot 2013-01-13 at 8.48.54 PM

AMIX starting up on WinUAE

The default password is wasp.  I thought it was kind of interesting that AMIX includes ‘dungeon’.  really cool!

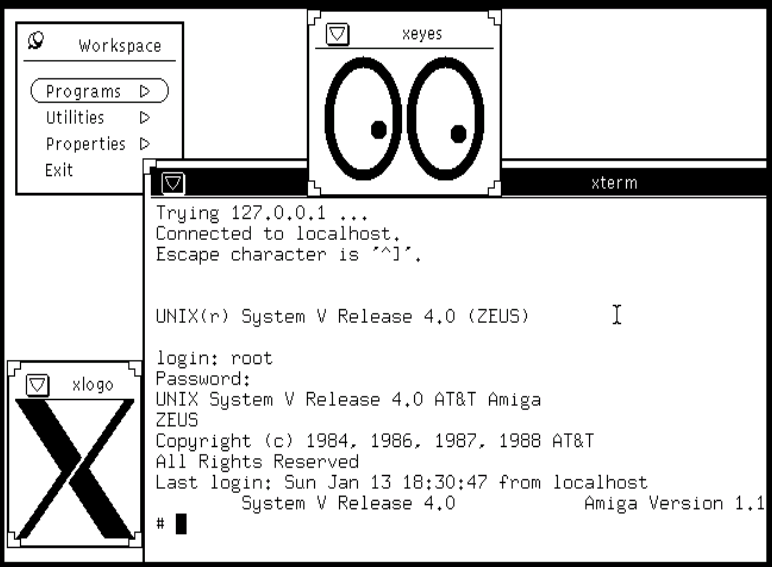
Open Look on AMIX

Open Look on AMIX

I am unsure of how to enable the high resolution graphics, but sadly the Amiga known for its multimedia capabilities, AMIX with stock graphics runs in monochrome.  Such a major underwhelming thing.

Oh well, for anyone inclined you can now run AMIX, and enjoy another dead SYSV.

Wyse Unix Lives Again! (sort of)

I was waiting for this for a long time. Recently I came in to possession of a box of 5.25″ floppy disks, among them following find:

Thanks to efforts of Al Kossow of bitsavers.org and Michal Necasek of OS/2 Museum we got the system to boot on VirtualBox!

Unfortunately we are missing the rest of the system which was distributed either on 15 floppy disks or a tape. If anyone has it, please let me know…

Little bits of information I have found on the web about Wyse Unix:

Interestingly Wyse Unix is a supported os emulation for iBCS.

Update: A full install tape has been found and the system has been fully installed

Dell UNIX Lives Again!

(please note that this is a guest post from Antoni Sawicki)

Dell UNIX is so ultra rare among rare Unix species that it doesn’t even have a Wikipedia entry. I have been hunting this elusive but important piece of computer history for well over 15 years now. Fortunately thanks to Charles H. Sauer and his excellent blog post I was finally able to lay my hands on disk and tape images and the restoration process begun.

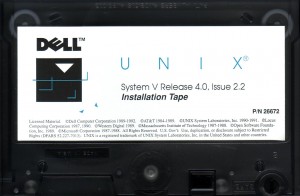
The install tape

The system can be installed from either a tape or network server (presumably NFS). Unfortunately no virtualization software can emulate a tape drive. Hopes for a network install are even slimmer since the required network support floppy disk has been lost and chances of suitable Ethernet driver working in Bochs or Qemu are equal to that of finding the lost floppy disk.

I have decided to try a hard disk image from a readily pre-installed system. The original Dell 486 workstation had a 1GB SCSI hard disk. Unfortunately neither Dell UNIX supports LBA mode nor Qemu/Bochs support the Adaptec 154x controller required by the OS.

As all normal install options have been exhausted, the only option left was to use a second hard disk image as source of cpio archive files. Booting from the two install floppies and attaching two disk images was a snap. The next step was to inject the tape “file” in to a right place on the disk, so it can be read by cpio command. A hard disk in Dell UNIX is pretty much unusable without a valid SysV partition and VTOC. Fortunately dellsetup command does it all for you. Once VTOC was put in place I’ve attached the transfer disk image as a loopback device in my host OS. In couple of iterations I was able to aim the host os dd if=file1 of=/dev/loop0 bs=512 seek=offset at the right place, which you work out using prtvtoc /dev/rdsk/1s0 command. Then cpio -ict < /dev/dsk/1s1 was able to list contents of the emulated tape… with errors…

In my infinite wisdom, for some unknown reason I’ve assumed that LBA addressing is required above 540MB. So to be on a safe side I have made the hard disk images 512 MB. What a mistake it was! I have lost several hours trying to figure out cpio header errors coming from the disk… By pure coincidence, while the tape archive was installing (with errors) I was researching for this very blog article and found that LBA starts at 504 MB… Recreating the hard disk images just few MB smaller took all tape and prior boot problems away!

Once the cpio archive was extracted I have made few final touches taken from the original tape install script. After a reboot Dell UNIX booted perfectly. You can experience this by using the firstboot image file. The final part of installation was injecting the second tape file containing System V PKG file to the transfer disk image and running pkgadd -d /dev/dsk/1s1. This is what’s included on allsoft.img.

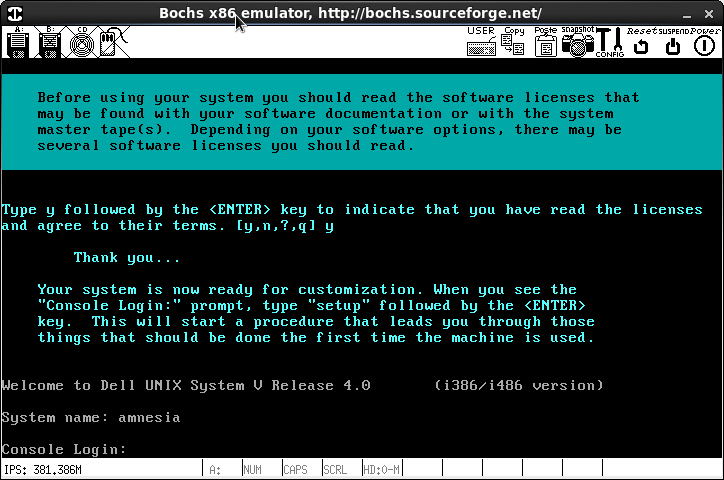
Dell Unix at First Boot

Some final notes on running the OS:

  • To enable mouse to work:
    • Qemu just add “-chardev msmouse,id=msmouse -device isa-serial,chardev=msmouse” to the launch arguments.
    • Bochs add to the config file:
      mouse: type=serial, enabled=1      
      com1: enabled=1, mode=mouse
      then you have to kill mousemgr process and prevent from starting by deleting /etc/rc2.d/S25mse
      then edit /usr/lib/X11/Xconfig:
      disable Xqueue      
      enable Microsoft Mouse
  • To enable keyboard to work correctly in VirtualBOX start with Num Lock OFF.
  • You can use qemu-img utility to convert the image to VMware vmdk to use in VirtualBox.
  • To run X window type startx

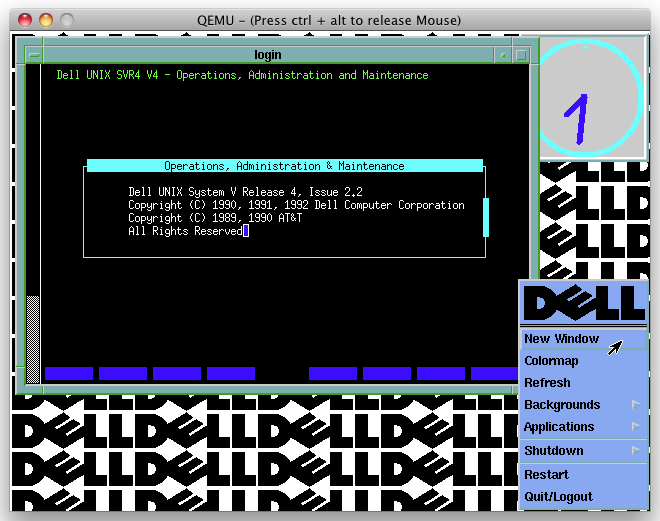
X11 and all its glory

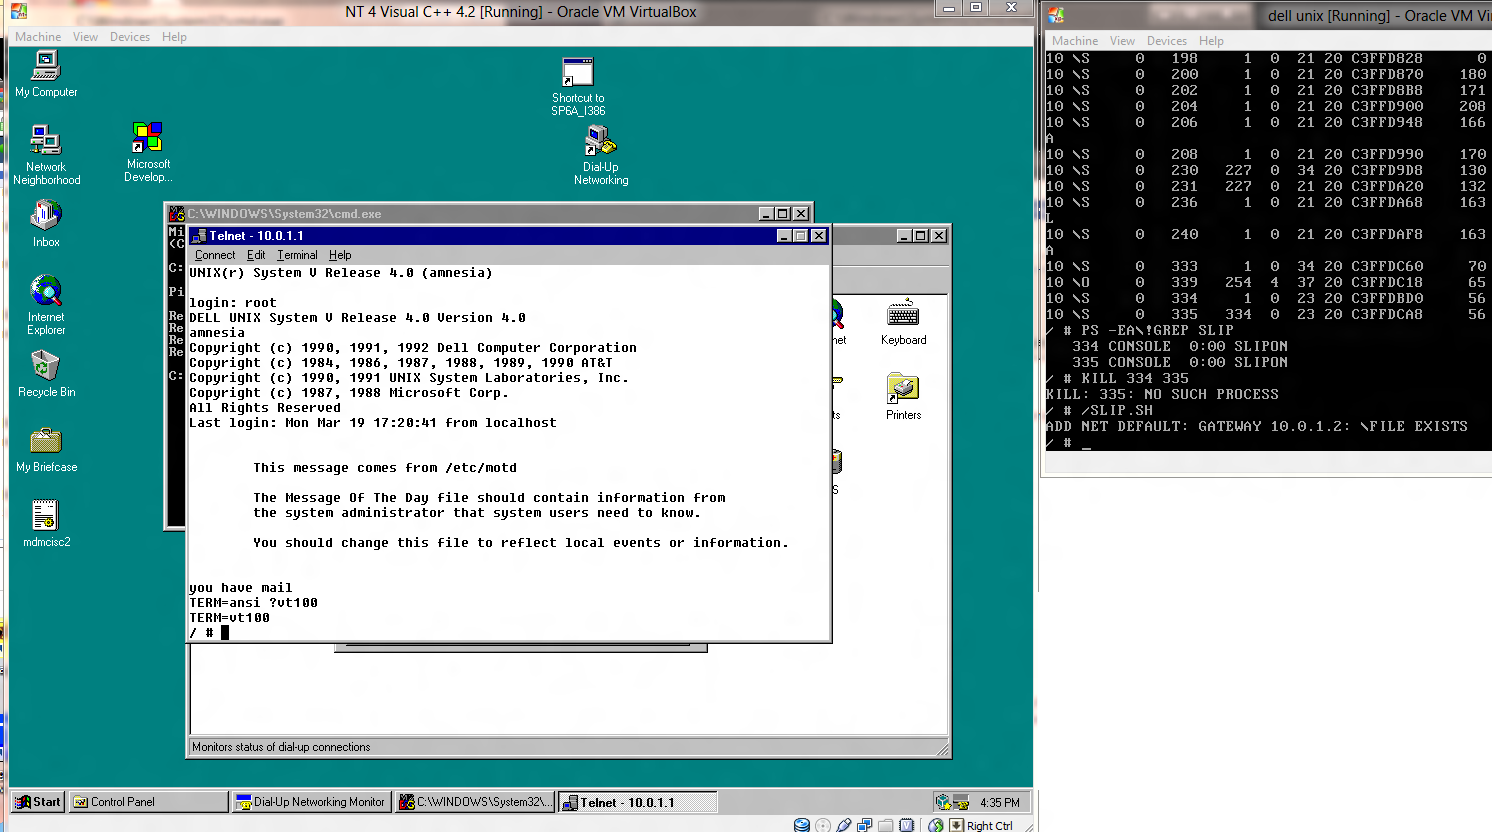
  • To attach it to internet use SLIP as there is no working Ethernet driver.  Contrary to most UNIXen of the time, the command is not slattach, but rather slipattach.  Thankfully it does work the same way.  I have found that running Dell Unix with VirtualBOX, along with Windows NT 4.0 I was able to connect into the Dell Unix VM, and get network access.  Just set the two VM’s up for a named pipe (\\.\pipe\dellunix) and make one of them a server, and start that VM 1st.  The steps to prepare Windows NT have been outlined before.

Telnet via SLIP

Legal disclaimer: Dell UNIX is a commercial software and should not be distributed without manufacturers permission. However as the operating system has been dead for 20 years and with a long tradition from Unix Heritage Society and Bitsavers I’m publishing this in good faith under abandonware category. If Dell or any other copyright holder wishes this software removed, please let me know.

Attached are:

  • firstboot image
  • all (pkg) software installed
  • setup instructions if you wish to install from scratch.

Download:

You may also be interested in my post about a sister System V operating system – Interactive UNIX:

Update: Dell Unix now runs on 86Box with higher resolution and proper networking.

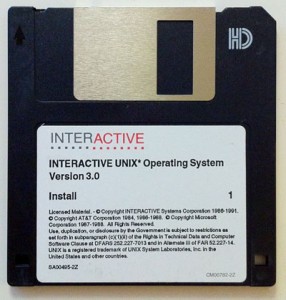
Fun with INTERACTIVE UNIX 3.0

(This is a guest post from Antoni Sawicki aka Tenox)

ix30
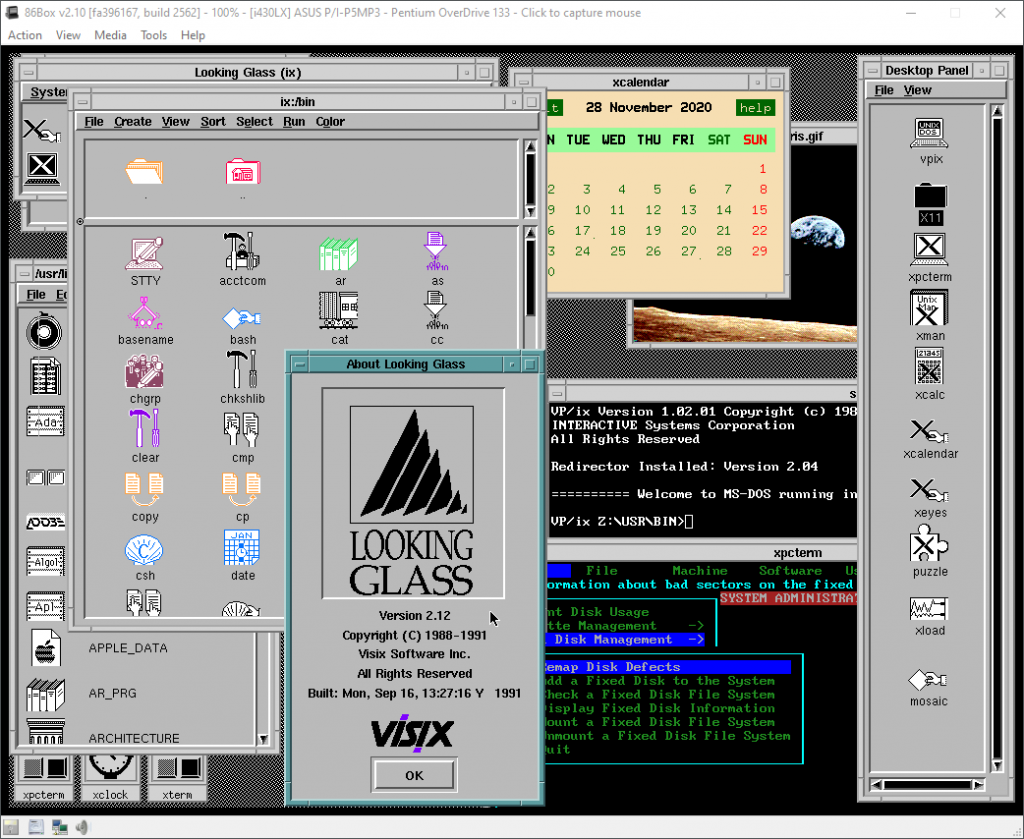
I’ve been hunting for a complete set of INTERACTIVE UNIX System for quite some time. While I had the “basic set” of it, the real stuff Visix Looking Glass graphical environment was nowhere to be found. Recently I got my hands on a box containing a massive set of 5.25″ floppy disks. Without further delay this is how the famous 386 UNIX GUI looks like:
The os has a long and convoluted history. It started as PC/IX for the IBM XT created by Interactive Systems Corporation. Later updated to 386/ix and renamed as INTERACTIVE UNIX System V/386. The company was acquired by Kodak and the OS was later sold to Sun Microsystems.
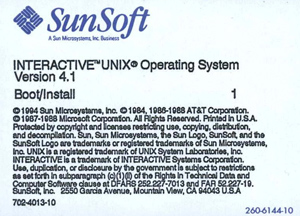
SunSoft INTERACTIVE UNIX 4.1
Sun has reportedly used the OS to help port SunOS/Solaris to x86 platform. However they also sold and supported it as a stand alone product. The system was widely used as part of Reuters Terminal and other embedded applications. It briefly survived Oracle acquisition making the os Oracle INTERACTIVE UNIX?

This article specifically covers version 3.0 released by ISC around 1991. The installation is pretty straightforward except for swapping 50 disk images and later configuration of NIC, TCP/IP and VGA/X11. The floppy images are available here. I have spent quite a lot of time to get TCP/IP working and VGA at half decent resolution.

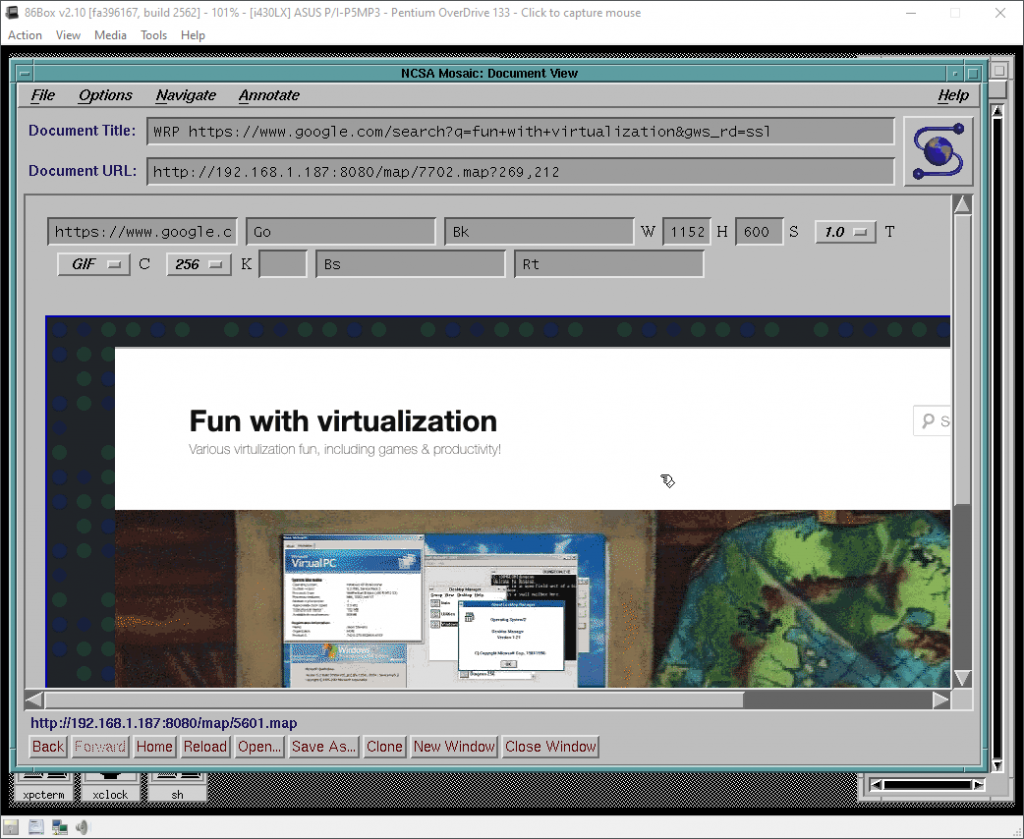
Fortunately thanks to 86Box you can enjoy a fully working OS in a “high-res” (1024×768) mode, 256 colors and working TCP/IP. You can even pretend to browse the web using early version of Mosaic and WRP:

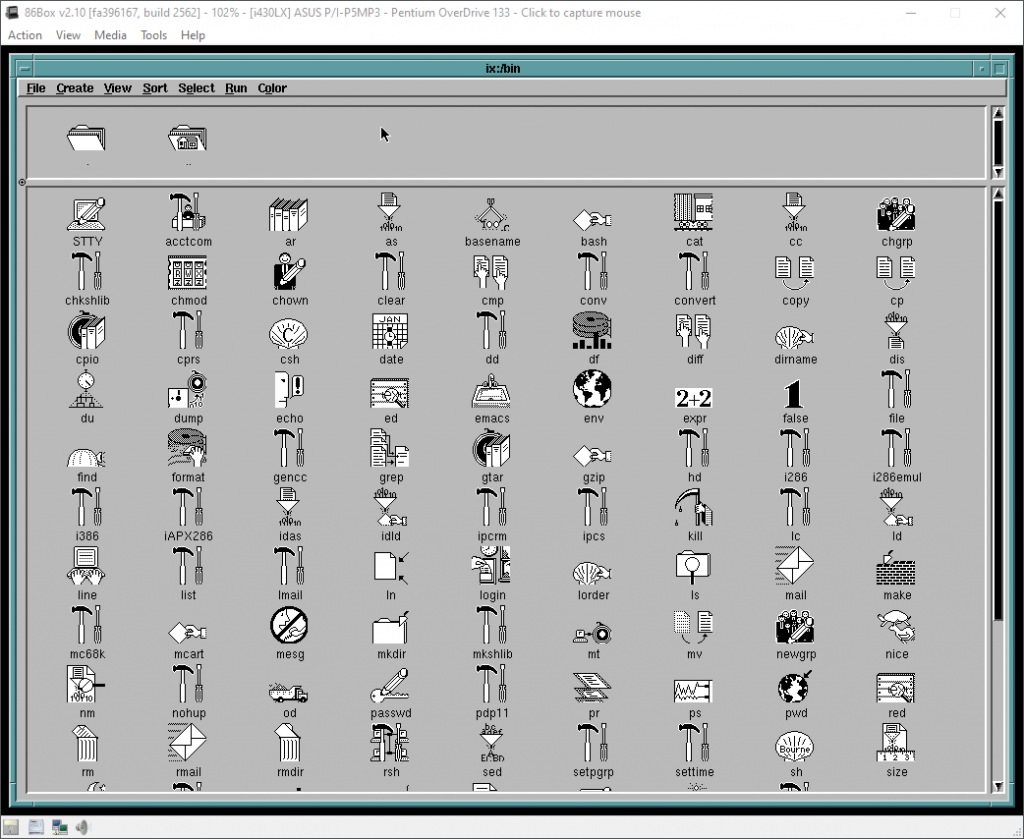
Looking Glass comes with a file manager and funky icons for pretty much every utility in the system:

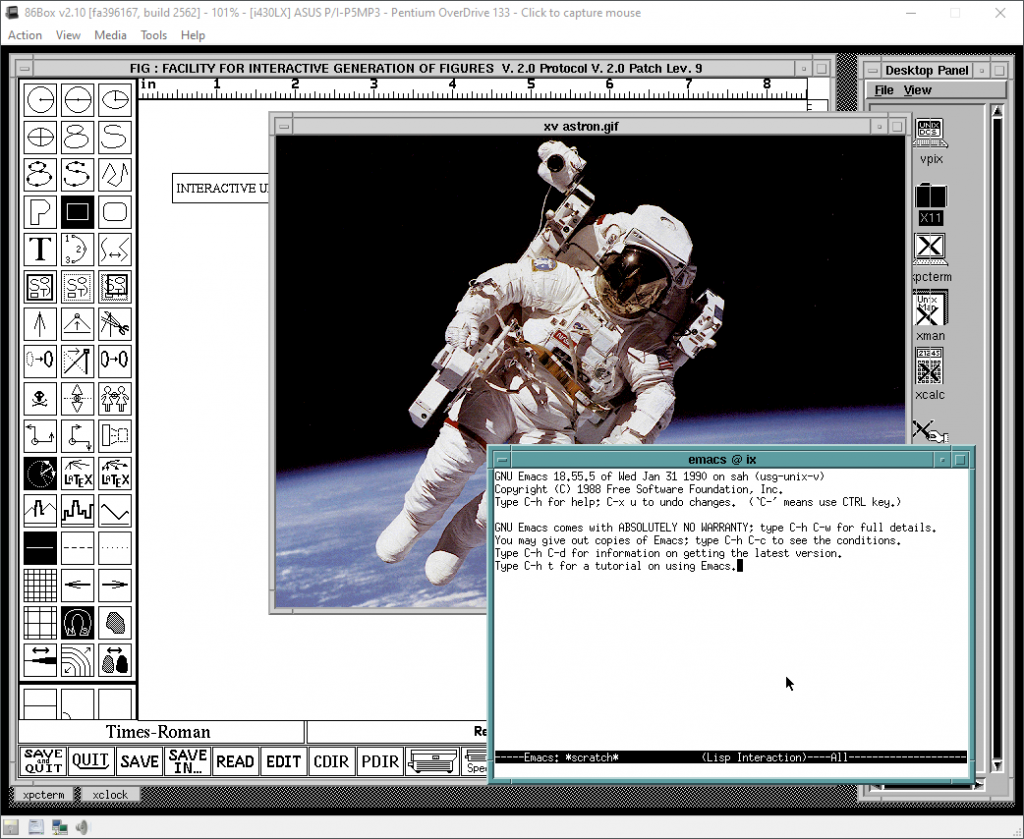
The OS has a bunch of GNU apps and I even found a super early version of xv:

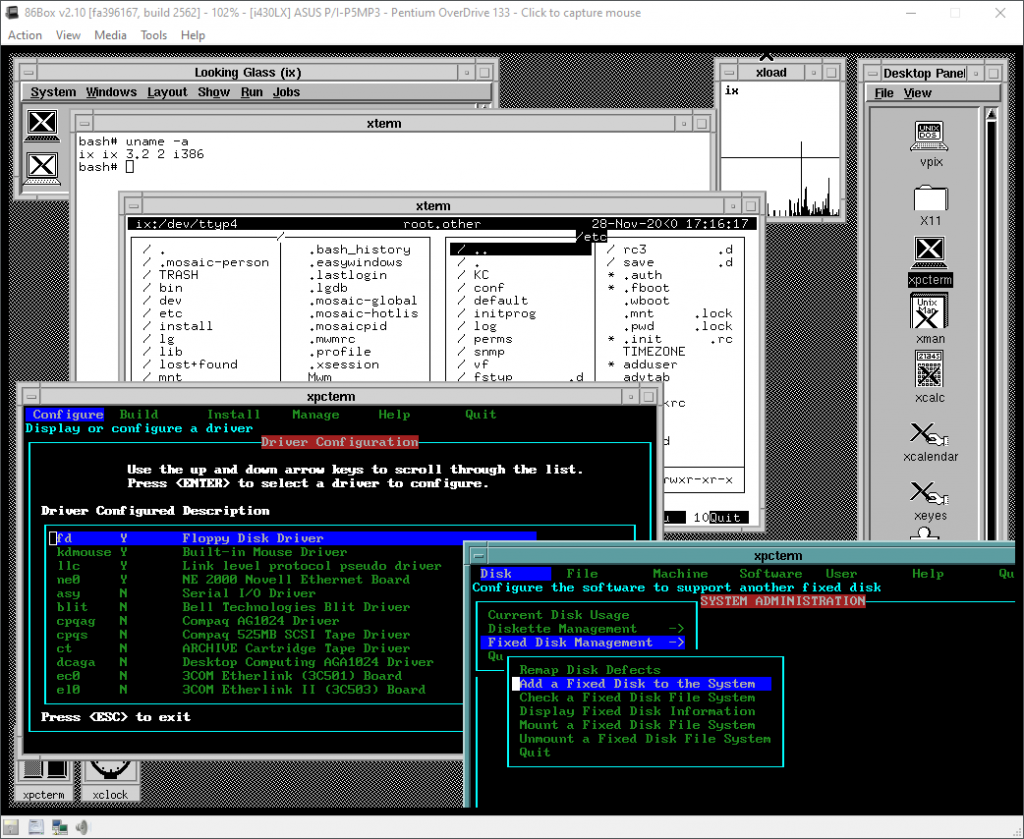
Finally this is how you manage the system with a “sysadm” utility and “kconfig” kernel configurator:

On a text console side, the OS has virtual consoles switchable via SYSRQ + F key. Console is on F8.

One should probably appreciate that PC had such a cool Unix version before Linux was even born. Unfortunately this stuff was all prohibitively expensive and mortals could not afford it to run on their 386s.

You can download 86Box version here. Make sure to look at readme for some last minute updates. Especially around configuring TCP/IP and Looking Glass licensing. There also is a VirtualBox OVA, however it only works in 800×600 and no networking/tcpip. Additional software can be downloaded from funet ftp. Install disks are here.

Also you may be interested in a follow up article covering VP/ix DOS hypervisor included with the OS.

Have Fun With Virtualization!

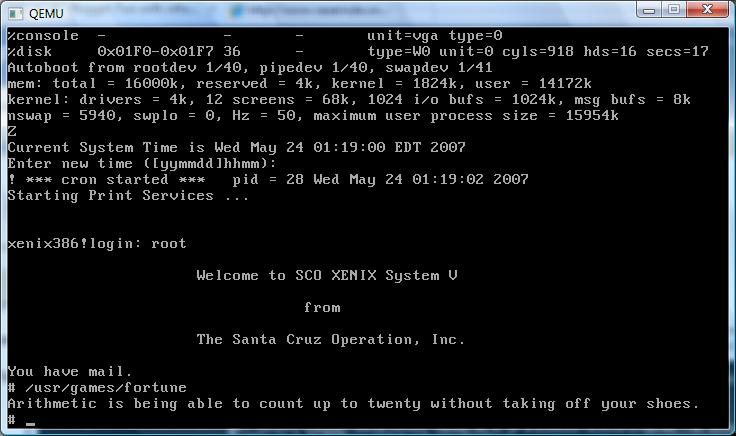
Running Xenix on qemu

Neither Bochs nor Qemu can boot the Xenix floppy diskettes all the way. Virtual PC & VMWare seemed to have no luck when the kernel transitions to protected mode. While on the way to work I had an idea. What if you had an old hard disk and a machine capapble of installing? Simply imaging the hard disk may be enough, since after that point you don’t need any floppy disks!

So this is what I have to show for the work today:

Freaking awesome, if I do say so myself.

OK, now how to do it? First you need an existing system running Xenix. If you have any plans on migrating an existing installation take note! This will preserve your install, just don’t format! On the Xenix boot screen take note of the geometry of the disk. We will need the geometry for later. Although I did a test boot without it, its a good thing to preserve it.

For virgin users, you will need a small disk to install on. I had a 2.5 GB disk that was too big, and 132MB disk that worked fine. I used a dell pc with 2 ide controllers for this. The longest task honestly was installing Xenix. I think that ran about 20 minutes. Once I was done, shutdown xenix, and put the disk in a machine running Windows (Linux fans can put it in their box, and just dd the Xenix disk into an image). Us poor Windows users don’t have dd. Anyways take not of what disk # it is, as Windows of course will not assign it a drive letter since it does not understand Xenix’s filesystem.

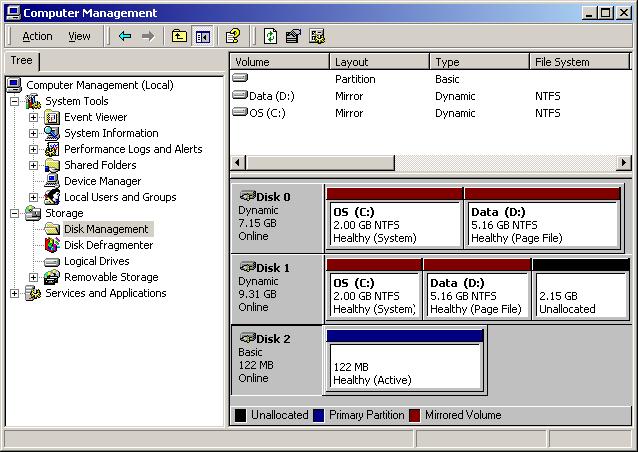
As you can see it’s disk #2 in this computer. Ok now we need to read the disk and write it into a disk image. I couldn’t find a util offhand to do it, so I wrote one real quick. Here is the source code, you’ll need a C compiler on your PC to compile it. I guess I could ‘neaten it up’ some, but for now here you go:

Source code

Executable

Yes I know its horrible, and blogger does a wonderfull job of formatting my program. Anyways compile it & run it. Now you’ll have a disk image of your hard disk!

Now for the fun part, running Xenix! We simply specifiy the hard disk geometry that we got earlier, and pass it the disk image that we created! I’m using an Quantum Pro drive ELS with the following geometry:

919 Cylinders
16 heads
17 bytes/sector

That translates into the following command:

qemu -M isapc -m 16 -hda xenix386-2.3.4.disk -hdachs 919,16,17 -L .


Let the good times roll!

–Update from 2011!

It is *NOW* possible to install Xenix in Qemu 0.14.0. You can read more about it here.