Announcing Cockatrice III

Well I was shuffling files back and forth into Shoebill, and with the advent of Ethernet support, I decided I wanted to build an AppleTalk network.  This endeavor seems to have taken a life of it’s own.

So, the first thing I did was tear into minivmac, as I figured it would be the easiest to modify, as ‘mini’ is in it’s name.  But it’s more geared to LocalTalk.  From it’s readme:

It does this by converting the LocalTalk packets between SDLC frames in the virtual machine to LocalTalk Over Ethernet (LTOE) packets.  These LTOE packets will be sent out the host machines Ethernet interface and will reach any other machine on the LAN.  LTOE packets are not routable and not recognized by EtherTalk devices.

Which is pretty creative, but I want to talk to A/UX, Windows NT and Cisco routers.  So this isn’t going to work out for me.

The next other ‘big’ names in Macintosh emulation are Basilisk II and SheepShaver.  Both of which are from Christian Bauer which is a sizable download (or so I thought) and has a very confusing release versions for Windows. So I went ahead and tried BasiliskII, which only does some native networking via a TUN/TAP & bridge solution (which is really popular solution for plenty of UNIX based stuff), which personally I don’t really care for.  The Windows version does support SLiRP, but for some strange and annoying reason it always crashes when I try to download anything big.  As a matter of fact, the Windows version crashes, a lot!

While digging around for various builds of Basilisk II, I found the defunct sourceforge page, which is thankfully still up.  And there I found the 0.8 and 0.9 release source code, which weighs in at a tiny 350kb in size.  This is something I could probably dive into.  So I went ahead and tried to build it on a Debian 7 x86 VM.  And much to my surprise, after altering configure to accept GCC 4.7, and forcing it to turn X11 on (I don’t know why it kept failing to detect it), I was able to build a binary in no time.  Even better, it worked!

So the first few goals were simple, I wanted to take 0.8 and remove it’s dependency on X11,and make it use SDL 1.2.  Why not SDL 2.0?  Well 2.0 is more about 3d space, and even to render a flat framebuffer it uses streaming textures.  Which is too heavy for me, so I’m sticking with 1.2.  I took a bunch of code from SDLQuake, and after a while of bashing it around, I was able to open a window, and capture some ouput from the framebuffer.  With even more bashing around I got it to work correctly.  I did make some small tweaks though, it only supports 8bit depth.  But I’m interested in networking, so 256 colours is fine by me.  Now that i could see what I was doing, I was able to then re-compile on OS X, and I was greeted with the Mac Boot screen.  The harder part was Windows, as the system code written by Lauri Pesonen who did an excellent job of porting BasiliskII to Windows, but to say their code took 100% advantage of the Win32 API would be an understatement.. And I wanted something more pure to being SDL so I really couldn’t use much of that code.  And what code I could find it was for far later versions.  However with enough pushing I did finally get BasiliskII to boot up on Windows.  I was once more again bitten by the fact that open on Windows defaults to being in ASCII mode.

The next thing to add was SDL input for the keyboard and mouse.  And at this point googling around for an example of an input loop for SDL that is appropriate for an emulator I stumbled uppon the fact that there already was a SDL support built into the more current version of Basilisk II.  But for some strange reason I kept going ahead, and incorporated some of the code into my 0.8 branch.  And then I could finally send some keystrokes, move the mouse, and click on things!  Things were looking up!

While looking at the SDL code, I did see they also have audio support, so I went ahead and borrowed the skeleton framework from there, although the initialization didn’t work at all as BasiliskII had drifted in how it hooked into the native sound support.  So I once more again turned to SDLQuake, and I was able to initialize sound, and Even get QuickTime to play the old Quadra quicktime video, which was the first QuickTime thing I’d ever seen, back when they were still making Quadras.

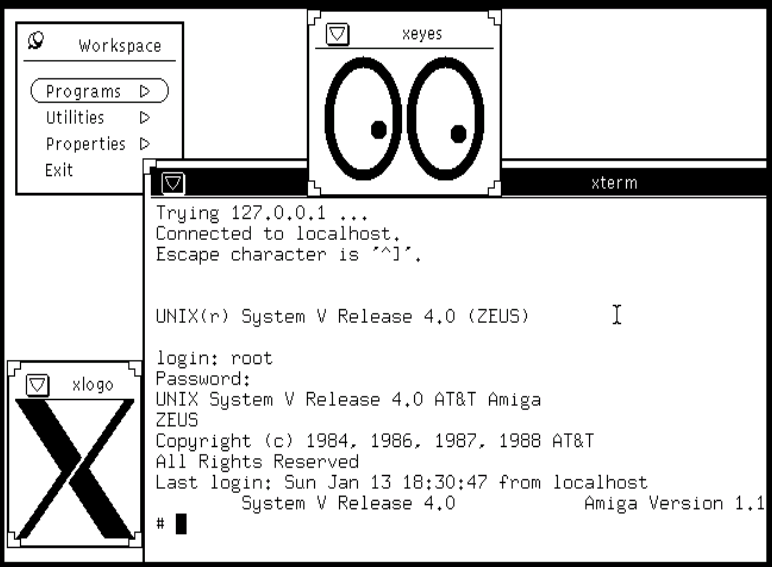
So now with video and sound in place, it was finally time to tackle the networking.  At first this seemed quite easy to do, and using SIMH for inspiration I was able to quickly replace the tun/tap code with some pcap code to open the interface, send packets, and receive packets.  One more again I started on Linux, made it build on OS X, although my MacBook air doesn’t have anything I can really inject packets into so I don’t know if it actually works.  The bigger test for me was on Windows with a GNS3 network, and with a few more minor changes I was happily sending AppleTalk to both Shoebill and Windows NT.

The next thing I wanted to tackle was SLiRP support.  Ironically to bring SLiRP to Shoebill I used the SLiRP from the github of Basilisk II.  At this point I figured this would be very simple, and I could wrap up later that day.  It ended up taking me three days.  Once more again my build would crash all the time, just like the later Basilisk II builds.  Using Internet Explorer 4.0.1 would seemingly crash the whole system within seconds with faults in SLiRP’s slirp_select_fill, and slirp_select_poll functions.  Now if you don’t call these functions SLiRP doesn’t process it’s TCP state and you end up with barely functioning UDP to only SLiRP which isn’t great beyond DHCP and DNS.  First I tried semaphores which only made things worse as the nature of Basilisk II’s threaded nature just made the requests stack up deadlocking within seconds.  I tried a mutex, timed mutexes and various other locking methods insdide of SLiRP and Basilisk II to no end.  Netscape would kind of work, but IE would crash the whole thing out after a few pages. Then a better solution hit me as I was playing with the system clock on the Windows build.  There is a 60Hz timer that calls a 1Hz timer once every 60 ticks.  What if I had the clock drive SLiRP?  And to my amazement not only did that work, but it worked great until I hit another problem that I had with Shoebill (that needs to be fixed now that I found away around it here).  There is a static buffer that passes data between SLiRP’s callback when it is going to send a packet to BasiliskII and when Basilisk II then feeds the packet to MacOS.  With enough traffic it will overwrite part of itself as they are on two different threads.  Once more again I tried semaphores, which of course is the wrong tool here as if something is stacking waiting for it to unstack is just crazy, and more mutexes.  The mutexes kind of worked but performance was horrible, as in 1992 dialup speed horrible.  And I didn’t want to simulate a 1992 internet experience 100%

So the obvious solution as a queue.  I took a simple queue implementation, added the ability to peek, changed it to accept a packet structure and I was set.  Now I only needed a mutex when I queued items, and dequeued them.  But I could hold 100 packets easily.

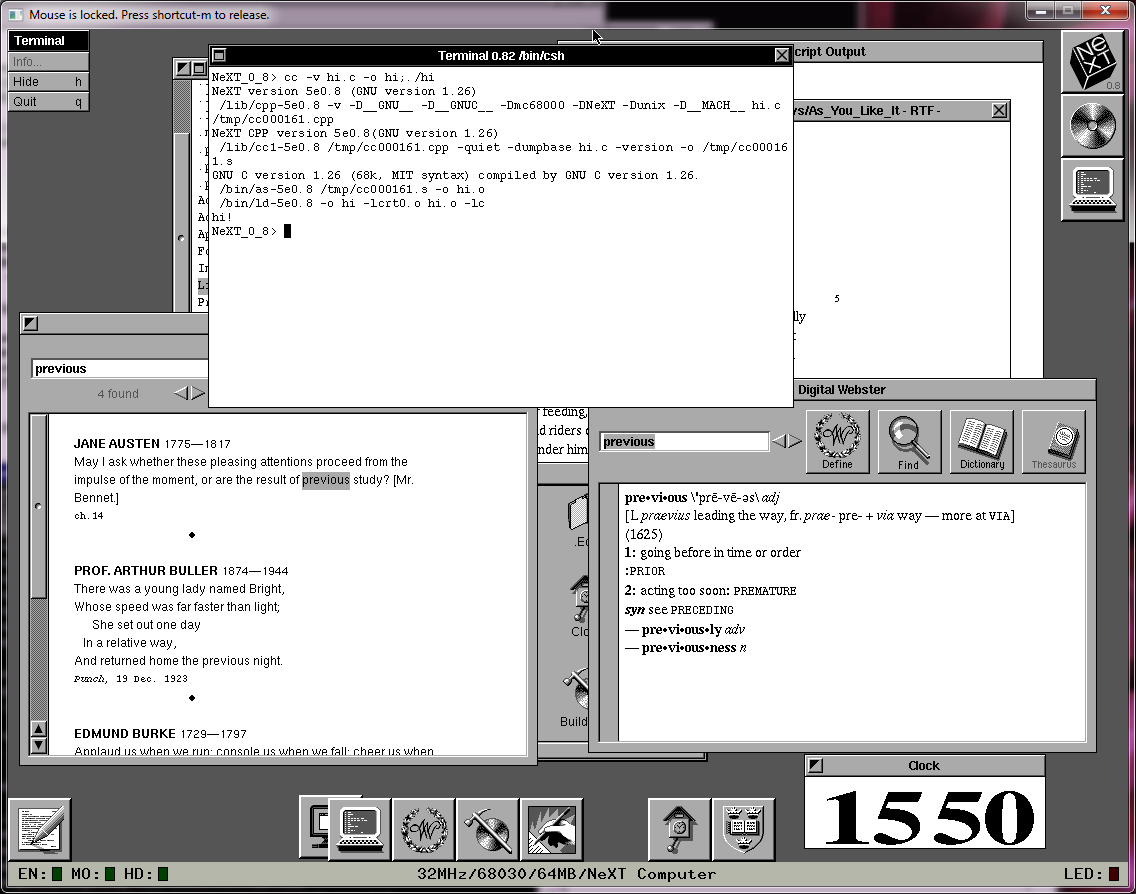
So with all that in place I can finally download files greater than 10MB, and even with Internet Explorer!
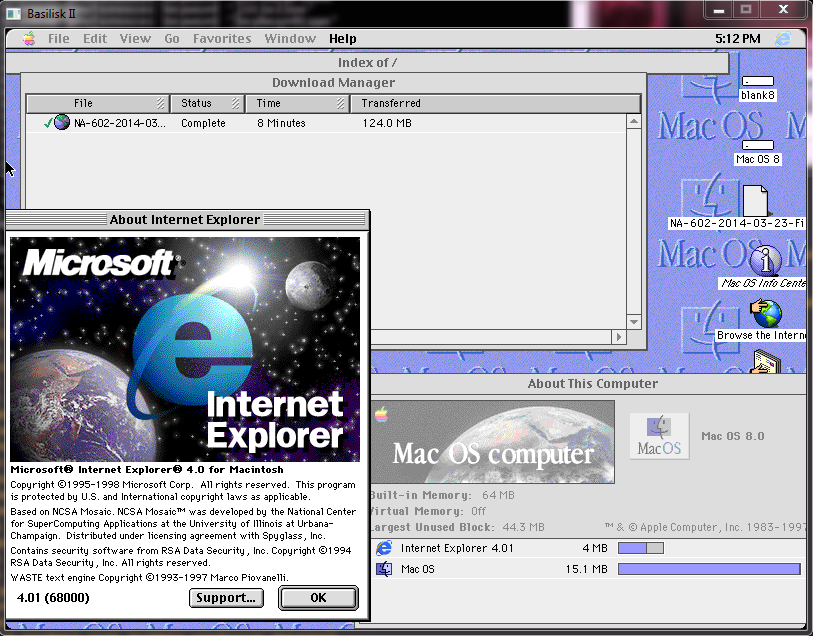
Download

124MB in 8 minutes!

So the next was to make Pcap dynamically loaded, which for C++ is a bit of fun with __cdecl, GetProcAddress and all that fun.  But I had it working after a bit so now if the user doesn’t have WinPcap installed they don’t get an error message, and I don’t have to maintain two builds.  Nobody likes doing that kind of stuff.  Ever.

Multitasking.. Kind of.

Multitasking.. Kind of.

There is still plenty of things broken afterall I’m using an ancient version of Basilisk to base this off of. I’ve also removed a bunch of features as I wanted to make this more of a ‘core’ product with again a focus on networking.

Will this interest the majority of people? Probably not.  But for anyone who wants to actually download a file this may be somewhat useful.

Where to go from here?

Well there is still a lot of OS specific stuff in the code that I want to convert to SDL.  I’d like to build from a 100% more generic code tree rather than having private files here and there.  The CPU optimization programs that re-read GCC’s assembly output don’t do anything.  I want to try it through an older version of GCC and see if there is any difference in speed.  I also recently received the source code to vc5opti.cpp and I’d like to try that to see if it speeds up the Windows Visual C++ based build.  Long term I’d love to patch in the UAE CPU code from the newer versions that have a far more solid 68030/68881 and 68040 emulation.  The price of standing on so many tall shoulders is that when I fall off I don’t know if the CPU exceptions I see are faults in the CPU emulation, Basilisk II or just plain crashes in MacOS which was certainly not the most stablest thing once you mixed in multimedia and networking.  It was par with Windows 3.1, which honestly both of them were ‘saved’ with help from the older generation, ala BSD Unix for MacOS, and the VMS team for Windows.

So after all this I’m ready to release some binaries, and code.  Although the last thing I wanted to do is add more confusion by calling this Basillisk II v0.8.SOMETHING … A quick google search on Basilisk gave me this:

As for some reason I actually never did look up what a Basilisk was.  So seeing that this project is basically the same thing I chose Cockatrice.

The Cockatrice III source forge page is here, Windows binaries, Mac OS X binaries, and source code here.

There are plenty of bugs, and plenty of things not working, but it works well enough to do things, and that is a credit to everyone who worked on Basilisk II before me.

Atari System V UNIX Saga – Part III – SCSI Disk Replacement

(note this is a guest post by Tenox)

In previous posts from ASV series I have explained why I got hooked on Atari System V UNIX and what I had to do to get a decent resolution out of Atari TT. Having built the VGA monitor adapter, the next challenge was to replace the internal SCSI hard disk with a flash storage of some sort. I really don’t like spinning hard disks and especial the old ones.

I have mentioned that there are two surviving ASV disk images. The better one was made out of a rather large old, loud and obnoxious Maxtor. I’m definitely not having this monstrosity inside of my beloved Atari!

Maxtor LXT340SY

Maxtor LXT340SY


So how can you replace an old SCSI hard disk with a modern flash device? There actually are several different ways.

If you have the money you can go industrial route, which is a SCSI disk replacement for various machinery and embedded systems produced by ReactiveData. You can buy one of these for a little over $1000 USD. The good part is that they substitute a specific real hard disk model and are exceptionally good in quality of emulation. However, spending a lot of money on my TT and TenoxVGA already, this really wasn’t an option without getting a divorce.

Another approach is to use SCSI to IDE bridge combined with IDE to CF adapter or possibly SCSI to SATA bridge and SATA SSD disk. These are widely used by Atari / Amiga / Mac 68k community. The most popular bridge come from a company called Acard. I actually had one of these at hand, AEC-7220U which I used for TOS/GEM work.

acard front

acard front


Did it work? As you can guess – of course it didn’t! The initial boot loader errors out unable to read disk capacity.

Atari SYS V failed to boot

Atari SYS V failed to boot


Atari ST/TT, somewhat similarly to 68k Macs require a hard disk driver, present on the hard disk itself. There are several 3rd party implementations, some of them, like HDDRIVER maintained up to present date. Unfortunately these drivers are TOS specific and obviously don’t work with Atari Unix. The system comes with it’s own hard disk driver which seems to be obsolete and with limited hardware support.

The next step was to research and try out some other SCSI to IDE bridges in hope one would just work. And surprisingly there are several to choose from.

The second on the line was I-O Data R-IDSC21-E/R. No longer produced and supported, however still fairly popular. Usually regarded as the ultimate bridge with most fancy options bells and whistles. It has most jumpers and modes of all tested devices. For instance ATA PIO and DMA modes.  Unfortunately this didn’t help at all and same error was observed.

idsc21e

idsc21e


Another device tried was Yamaha v769970. This bridge was conceived to allow use IDE CDROM and Hard Disks with Yamaha samplers. No longer produced and obsolete, it’s somewhat most easy to set up, robust and stable. It’s actually my favorite bridge for day to day use, except for ASV where it just doesn’t work.

v769970

v769970


More recent kid on the block is an integrated SCSI2IDE + IDE2CF in one device called Aztec Monster. Recently designed and currently produced in Japan (you can buy one on eBay) is a fairly decent choice, which I recommend to every one. I had a lot of luck with these, except for ASV of course…

CF_AM_r1_1

CF_AM_r1_1


I also looked in to SCSI to SATA bridges, like this one, but they have additional issues, like need to convert LVD to SE on one end and SATA to IDE to CF on the other. Little bit too complex for what I wanted.

Being out of luck I started researching if it would be possible to build an open source version, which can be easily diagnosed and fixed. Doing so I found out that there in fact is one open source SCSI adapter called SCSI2SD.

SCSI2SD_V3.0_plain

SCSI2SD_V3.0_plain


I was bit skeptical in the beginning but then I though that being open source it can be debugged and fixed if it needs to be. So I immediately ordered one.

Once it arrived, I plugged it in, applied the image to the card and BAM! It worked! The system booted fully and worked flawlessly!

Atari Unix System V – Boot Sequence from Antoni Sawicki on Vimeo.


Over time SCSI2SD proven stable and flawless. One feature that Mac users will appreciate:

--apple Set the vendor, product ID and revision fields to simulate an
        apple-suppled disk. Provides support for the Apple Drive Setup
        utility.

In the next article I will write about my first steps in the system post boot and then bringing it to a more or less usable state. Stay tuned!

I just played with NeXTSTEP 0.8

NeXTSTEP 0.8

NeXTSTEP 0.8

And I have to say, it’s pretty impressive!  Previous flies on my system, having owned a cube, I can say that the 68030 on this is WAY faster.  And I’ve always read about 0.8, and kind of figured it was basically lost to the winds of time.  It’s really cool to see it boot up!  And the emulated disks are so much faster than the magnetic optical drives of the day.

It’s amazing to think that in 1988, the current world of iThings had just started.

Previous boots NeXTSTEP!

So first we got AMIX, then A/UX now NeXTSTEP!

x

(I lost the original image, so here is OPENSTEP on 0.4)


NeXTSTEP 3.2 in single user mode

You have to grab the source from sourceforge, and build it yourself.  I haven’t attempted it yet, but wow!  Apparently the latest snap is capable of running 0.9 – OpenSTEP 4.0!

Atari System V UNIX Saga – Part I – Intro

(note this is a guest post from tenox)

SONY DSCA long long ago, my father had a printing business. An emerging technology called Desktop Publishing (DTP) was just taking to the mainstream. I have been involved in migration from Linotronic typesetting machines (see above) to more modern and GUI driven Atari TT with Calamus. Those were fun times. Long story short, I became an avid fan of Atari. Unfortunately as time progressed, Ataris got in turn obsoleted by Macs with Quark Xpress and Photoshop. I myself started exploring world of Unix and ended up selling my Atari to be able to run Linux. Bit of shame from time perspective as there were plenty of Unix flavors for the Atari: Minix, Linux, NetBSD and MiNT. Unfortunately they were released after I parted with the platform.

Atari System V on Cebit

Fast forward 20 years, Atari own UNIX version surfaced the earth. It was originally released in mid 1992 but died shortly after, no one ever heard about it. It has been lost to humanity. Only two good souls had working versions of the system and under pressure of the community finally made disk images of their installations. Some time after a documentation set has been found and digitized. Now I’m in process of trying to restore last existing set of damaged installation tapes. You can find little bit more history of the efforts on this thread.

RUNTIME_PRODUCT-QIC

Out of nostalgia and the fact that Atari TT has been designed as a Unix Workstation, but never got a chance to play with it in this role, I decided to purchase one for myself. I have turned to Best Electronics who is a local Atari dealer around the corner. They sell Ataris like brand new, assembled from spare or reconditioned parts. I paid a small fortune for it, but I got myself a brand spanking new Atari TT, factory sealed and smelling like new after 20 years. It was fitted with latest motherboard revision, TOS, 1.44 MB FDD, 4 MB ST RAM and 16 MB TT RAM.

tt

I was told to just hook it up to a VGA monitor and viola, it will work. Which it did… except to my utter shock in a whopping resolution of 640×480. It looked absolutely horrible stretched on a 19″ LCD panel. I don’t have any pictures but it looked like this. For games maybe OK but not for Unix or any sensible applications.

Using TTs professionally in DTP I certainly didn’t remember them suffering in the resolution department. So what was I doing wrong? Aha! In the old days we used to use special high resolution VME graphic cards.  So I went to search for one on eBay and Atari Forums. These obviously proven to be impossible to find… obviously. Additionally I learned that Atari UNIX does not support any of these as they required special TOS/NVDI drivers. In order to run ASV X11 with a decent resolution, one needs a special high resolution monitor called either TTM 194 or 195. These were “professional” 19″ monitors specifically for DTP work. They worked with the built-in graphics card in a special black and white mode at 1280×960, which is actually decent even in modern standards. In a fact we did have these monitors at the printing shop.

Unfortunately these are very old, bulky CRTs and weight 50 lbs. My wife would kill me if I brought one home and even if she didn’t I would hate having one of these on my desk. So why won’t the “TT High” mode work on a standard VGA LCD which normally supports 1280×1024? Well back in a day VGA standard didn’t support such resolutions and Atari had to make the monochrome monitors using ECL signal similar to old SUN/3 and HP monitors. Higher resolution modes were only added later by VESA BIOS extensions.

Researching the topic a lot of people were actually looking for an ECL to VGA signal converter but one did not exist. Some managed to use old EIZO CRTs with ECL support and with decent results, but still these are 50 lbs CRTs and I wanted to run ASV on a LCD panel. An adapter to convert ECL signal to a real VGA has actually been tried before but with rather awful results. Something had to be done!

TenoxVGA was born. And this will be covered in the next post… 😉

NetBSD 1.0 on the Amiga

NetBSD's old logo

NetBSD’s old logo

So while I was on the path of running some ancient Linux on the UAE Amiga 3000 emulator but without any real luck.  So for the heck of it I figured I’d give NetBSD a whirl.  Much like Linux, the first platform other than the i386 to get some mainstream love.

While 4.4 BSD had been adding support for the m68k via the HP 9000-300 series based workstations, the Amiga was something that was sold retail, and could be put in the hands of hackers, rather than lab rats..

So yeah, NetBSD started to integrate Amiga patches as of NetBSD 0.9 as it says from the install notes:

This version is strictly for the kernel hackers among you, there’s no sense in `normal’ users trying to install it, possibly killing their other partitions, facing kernel panics and not knowing what to do. Please keep that in mind, if you feel like going on…

So maybe I’ll try to bring it back to life some time now that I can at least run NetBSD 1.0 .. Or maybe I’m getting ahead of myself.

Installing NetBSD 1.0 on the Amiga is somewhat straight forward, providing you are doing this from a new Amiga.. First just create a small-ish (15MB? lol) partition for AmigaDOS, and make sure it is bootable.  The work partition should be big enough to hold the compressed packages of NetBSD, I went with 60MB, while NetBSD 1.0 is a mere 15MB, well compressed of course.  After that you’ll want to create a ‘root’ partition of say 65MB, a 32MB swap partition and a giant /usr partition.  I created a 384MB virtual hard disk, so my remainder is 209MB which is more than enough.  From there you have to make sure that they are not set to auto mount, and edit the filesystem type to be the following:

root partition  : 0x4e425207
swap partition  : 0x4e425301
other partitions: 0x4e425507

Where the ‘other’ is of course the /usr partition.  Then with that in hand it is a simple matter of loading the boot loader from within AmigaDOS.  The one weird thing I found is that while this part goes all fine,  later on under NetBSD you can only mount AmigaDOS partitions read only, so how do you get a new kernel back onto the Amiga side?  I suppose a working network, and a 2nd machine.. Which would make sure, and of course NetBSD was built with the idea that everyone was collaborating over the internet so people would have net access.

So basically from within AmigaDOS you kick off the bootloader, kernel, and shove in a ‘root filesystem‘ diskette.  Next thing you know we are going through the install where it’ll pick up the partition tags, format the disk, and go ahead  and install..  Again another ‘trick’ is the partitioning scheme where NetBSD maps in the AmigaDOS partitions into NetBSD space.  My install looks like this form the NetBSD side:

NetBSD slices

NetBSD slices

It may not seem too obvious but back here the ‘a’ partition is the root, ‘d’ is the AmigaDOS operating system partition while ‘e’ is the work partition where our install was saved. From there it really is NetBSD and it just acts like any other NetBSD.  So of course I could prattle endlessly about this, how historic it is that NetBSD on the Amiga shows that the older hp300 port could not only be adapted to new platforms, but even eventually extended to support the 68040 processor which had a different and incompatible MMU.

For those of you are are impatient, you too can run NetBSD 1.0!  You can find a pre-installed image here. And just use the prior exe & config from the WinUAE beta that included MMU support.  Just alter the config so that it picks up the NetBSD disk.

NetBSD 1.0

NetBSD 1.0

The only catch I’ve seen so far is that trying to bring up the ethernet adapter hangs the system.  Sadly I don’t have any fix for this as of yet…. (edit: yes beta 4 and beyond work fine!)

AMIX

AMIX Ad

AMIX Ad

Back in 1990 Commodore took the Amiga in a new direction with it’s new Amiga 3000, by commissioning a port of A&T SYSV Unix to the Amiga. Taking advantage of the 3000’s 68030 CPU and 68881 Math coprocessor, along with its integrated SCSI controller. It certainly was the hallmark of typical UNIX machines of the time.

When originally announced there was some big interest in the platform by SUN, as their original SUN-1, SUN-2 & SUN-3 lines of workstations were all 68000 based machines, and being able to rebrand a mass produced Commodore model would have been a good thing, however the deal ultimately fell through.  The machine would have been the Amiga 3500, which later became the Amiga 3000T.

Another thing to keep in mind is that SUN’s SYSV (Solaris) was targeted to the SPARC processor, and it is unlikely that they would benefit from selling a 68030 based machine in 1991.

Typical of the time, AMIX installs from a set of boot floppies, and then pulls the rest of the installation from a tape drive, such as the A3070.

AMIX was released at a time when the UNIX world was rapidly moving to RISC processors, SUN had their SPARC, SGI had their MIPS, IBM and their POWER, Motorola built UNIX machines around their 88000 RISC processor, NeXT was also going to move to the 88000 until they gave up making their own hardware and shifted to a software company.  So who would want a then dated 68030 based machine when the industry had made their first steps into the world of RISC computing.

So how does it measure up?  Well it is SYSV, and if you’ve seen one, well honestly you’ve seen them all.  What is kind of neat is that AMIX includes OpenLook and a C compiler, which is kind of a rarity for the period.

Another flaw was that when the 68040 processor was released it’s MMU was incompatible with the 68030, and the VM subsystem for any UNIX would have to be rewritten.  While NetBSD can run on both the 68030 and 68040, AMIX never was updated, and so it can only run on 68030 based machines.

AMIX never did get any critical traction, and slipped into oblivion with the death of Commodore.

Up until recently it was impossible to run AMIX in any emulator, but there has been a lot of work on the ARANYM and Pervious emulators which included doing 68030 MMU support for the possibility of running early versions of NeXTSTEP. Toni Wilen was able to adapt their work onto WinUAE and it is not possible to run AMIX.!

Reading through this thread,  I was able to put together the needed bits, and get it running under CrossOver, by using the pre-configured settings for WinUAE, and replacing the exe with the new beta exe, the supplied hard disk image from amigaunix.com and I was up and running in no time!  The only real change from the config was to change the SCSI ID of the hard disk from 0 to 6.

Screen Shot 2013-01-13 at 8.48.54 PM

AMIX starting up on WinUAE

The default password is wasp.  I thought it was kind of interesting that AMIX includes ‘dungeon’.  really cool!

Open Look on AMIX

Open Look on AMIX

I am unsure of how to enable the high resolution graphics, but sadly the Amiga known for its multimedia capabilities, AMIX with stock graphics runs in monochrome.  Such a major underwhelming thing.

Oh well, for anyone inclined you can now run AMIX, and enjoy another dead SYSV.