Updating a Toshiba T-01D Android phone to

First you’ll need to download the last version of Android, 4.03 right here.  This will step you up to build V11R42A.

I think you need the ‘version upgrade package‘, although I wound up kicking it via the bootloader.  Also you have to unzip the 600+MB download, and place it on a SD card on the phone.  Even though the image will fit into RAM on a zapped set, it’s really picky about reading it from flash.

Now because I’m not in Japan, I had to kick the installer off by shutting down the phone, then turning it back on while holding down the menu & back buttons on the phone.

T-01D upgrading itself.

T-01D upgrading itself.

Granted Android 4.0.3 isn’t exactly modern, but it’s a lot better than 2.3!  And for what it’s worth, it sure feels a lot more solid after the upgrade.

Look at all the runtime!

Look at all the runtime!

Having used the phone after the upgrade, it’s faster and the battery life is VASTLY improved.  If you are unfortunate to have owned one of these phones (or feel unfortunate at it’s 12 hour max lifespan) do yourself a favor and upgrade!

PCem now adds Innovation SSI-2001 emulation

While checking out the PCem source repository, I noticed this little addition:

Innovation SSI-2001 emulation. Using ReSID-FP.

Well, now that is pretty interesting!

from VOGONS

Innovation SSI-2001 board

The SSI-2001 card dates back from when people were starting to try to make the PC into a gaming platform.  While some people were adding chips not used in other platforms, Innovation went the direction of adding a Commodore SID onto an ISA card, giving the PC the sound capabilities of a Commodore 64.  Sadly the card failed to catch on (The Commodore curse?) and it only saw a hand full of games that supported it.

  • Airball
  • Bad Blood
  • Battle Chess II
  • BattleTech: The Crescent Hawks’ Revenge
  • F-19 Stealth Fighter
  • Falcon A.T.
  • Harpoon
  • Joe Montana Football
  • Lord of the Rings Volume 1
  • Red Storm Rising
  • Super Jeopardy
  • Ultima VI
  • Windwalker

From googling around this is the only games I’m aware of.

I recompiled PCem, and enabled the SS1-2001, and loaded up Ultima VI.  It works perfectly well.  And to be honest I like it more than the Adlib! emulation.

Using expect with the F5

Now this one is a little weird.  While it is a *NIX box you can ssh into, the ‘command shell’ tmsh adds some bells and whistles to make it more ‘fun’ for interactive users.  Things like colour, and a pager.  Even worse is that it embeds a bunch of ANSI control sequences in there.

So instead of fighting with a lot of post scrubbing, I googled around, and found you can can invoke tmsh with the -e flag to remove a bunch of the ‘nice features’.  However the pager still embeds itself in the stream.  Apparently a bunch of people re-config the devices to the page length is insanely huge.  I don’t like the idea of making changes just to pull a config, or poke around in an automated fashion.

So luckily there is also the -c flag which let’s us submit a command and get back the results in a nice batch fashion.  And we don’t have to bang the space bar like a crazed lunatic.

#!/usr/local/bin/expect —
set MYUSER “root”
set MYPASS “g00Dp455w0rd#”

set HOST [lindex $argv 0];
set timeout 90
if {$argc!=1} {
puts “Usage is scritpname <ip address>\r”
exit 1
}

#
#
puts “Connecting to $HOST\r”
# turn off stdout
#log_user 0

spawn ssh $HOST -l $MYUSER
# Deal with hosts we’ve never talked to before
# or just logon
#
expect {
“*yes/no*” {send “yes\r” ; exp_continue }
“*assword:” {send “${MYPASS}\r” }
}
expect “*# “

send “tmsh -e -c \”show running-config\”\r”
expect “*(y/n)*”
send “y\r”

#Let’s get out of here
#send “quit\r”
expect “*~ #”
send “exit\r”
expect eof
exit 0

And that’s it!  This one is really simple, compared to the others.

Using expect with Cisco IOS

Following up my JunOS post, here is a handy script I cooked up to pull the configuration from a Cisco IOS device.  The one trip up for this stuff is sometimes you can logon to a cisco device, and you can be at the enabled state, you may have to enable,  and depending on how it’s configured you may have to use an enable password, which may be your password (again) or you may have to use a different password.

So yeah with a bunch of testing around this seems to work well enough for me.

#!/usr/local/bin/expect —
set MYUSER “my_user_name”
set MYPASS “my_password”
set ENPASS “my_enable_password”

set HOST [lindex $argv 0];
set timeout 90
if {$argc!=1} {
puts “Usage is scritpname <ip address>\r”
exit 1
}

#
#
puts “Connecting to $HOST\r”

spawn ssh $HOST -l $MYUSER

# Deal with hosts we’ve never talked to before
# or just logon
#
expect {
“*yes/no*” {send “yes\r” ; exp_continue }
“*assword:” {send “${MYPASS}\r” }
}
set ALREADY 0
expect {
“\r*>” {}
“\r*#” { set ALREADY 1}
“*enied” {exit 1}
“*assword” {exit 1}
}

if { $ALREADY < 1 } {

send “enable\r”
expect “*assword:” {
send “${MYPASS}\r”
expect {
“*enied” {
send “enable\r”
expect “*assword:”
send “${ENPASS}\r”
expect {
“*enied” {
exit 1}
“\r*#” {}
}
}
“\r*#” {}
}
}
}

send “show run\r”

expect {
“ore” {send ” “; exp_continue}
“\r*#” {}
}

#Let’s get out of here
send “q\r”
expect eof
exit 0


This is a little more cleaner than the prior JunOS one, as I’ll keep on improving it.

It works with ASA’s (tested 8.2)and IOS (tested 12.2)

Using expect with a JunOS device.

I’ll add more as I go along, but the first annoying thing was that there was no ‘central’ repository of configs.  Now call me old fashioned, but I liked the old days when telnet was scriptable and I could go and talk to my Cisco stuff.. but here we are in 2014, and I suppose I should break down and use that ‘expect’ package I’ve heard so much about.

So I have this Linux host that I want to talk to all these hosts.  The first problem is that it being a new host it hasn’t talked to anything so it doesn’t know the private keys.  Annoying.  The other thing is that some commands like to initiate a pager, which takes time to slap the space bar.  It’s much better to have the computer do it.

#!/usr/local/bin/expect —
set MYUSER “my_user_id”
set MYPASS “my_password”
set HOST [lindex $argv 0];
if {$argc!=1} {
puts “Usage is scritpname  <ip address>\r”
exit 1
}

puts “Connecting to $HOST\r”

spawn ssh $HOST -l $MYUSER
# Deal with hosts we’ve never talked to before
# or just login
#
expect {
“continue connecting (yes/no)?”
{send “yes\r”
expect “password:”
send “$MYPASS\r”
}
# We’ve been here before
“password:”
{send “$MYPASS\r”}
}
# Some commands run from configure, some don’t.
# It may be easier to just enter configure mode
expect “> ”
send “configure\r”
expect “# ”
#
# Pick a command to run
send “run show arp no-resolve\r”
#send “save terminal\r”
#send “run show lldp neighbors\r”
#
# Deal with paging. I don’t want to make any
# changes at *ALL* to the device, so instead
# I deal with the pager
#
expect {
“more” {send ” “; exp_continue}
“# ” {send “exit\r”}
}
# We are done, get out of here!
#
expect “>”
send “exit\r”

So in this shell example I’ve set it up to recognize that it’s never established before.  I know it’s messy that it has the password 2x I guess I could do variable substitution if I was more scripty but right now I just want to get some basic things in/out of the routers all the time, such as port status, MAC’s and I want it like yesterday.

The important part of the ‘more’ bypass is the exp_continue keyword.  Which took a lot of googling around because everyone “expects more”.  It’s kind of annoying when your keywords are common English words.

And as you can see, this is a good enough base for doing some more complicated things.  Of course I wouldn’t roll changes out automatically, but for the adventurous there you go.  It wouldn’t take much to adapt this for Cisco stuff, as the CLI operates more or less the same.

The real fun begins with parsing all this stuff.

A sneak peak at Microsoft OS/2 2.0

No really!  It’s an article from PC Magazine, 29th of May, 1990. And it’s authored by Ray Duncan, before the infamous split.

NOTE FROM THE FUTURE It’s now possible to look at the version that Microsoft published after this version “An actual look at Microsoft OS/2 2.0“!

Of course, the thing that stands out from the screen shot is that OS/2 2.0 looks more like OS/2 1.2.  And there is it’s ability to run two MS-DOS VDM’s in a window at the same time!

Flight Simulator, in a Window!

Flight Simulator, in a Window!

Although this was a feat that Windows/386 was capable of doing, going far back as far as 1987.

Windows 2.1/386 running Flight simulator 3.0 in a window

Windows 2.1/386 running Flight simulator 3.0 in a window

But as you can see, OS/2 did it better.  Windows/386 was unable to run EGA graphics in a window, instead I was forced to run Flight simulator 3 in CGA mode.  While the OS/2 2.0 beta could give over 620kb to a MS-DOS session, Windows/386 could only give me 550kb.

And when it came time to ship, well here is IBM OS/2 2.00 0xr6100 running Flight simulator 3.0 in a window and showing a MS-DOS box with about 600kb free.

IBM OS/2 running Flight Simulator 3.0

IBM OS/2 running Flight Simulator 3.0

The real shame is that MS OS/2 2.0 was looking really promising in 1990, but thanks to the split the world didn’t get to try it out until 1992.

The article is a good read to get an idea of the state of development back in 1990.  And of course all of PC Magazine’s 1990’s magazines are up on google books.  I’ve managed to find 2/3rd of the Beta since I started looking (from 1990… been looking a long long time), and I have reviewed the SDK/toolkit earlier, and here.

PC Magazine, May 29th 1990

PC Magazine, May 29th 1990 Pages 387-388

PC Magazine, May 29th 1990

PC Magazine, May 29th 1990 Pages 389

Power Programming part 2

Power Programming part 2

Power Programming Part II, contd.

Power Programming Part 2, contd.

Power Programming pt3 1-2

Power Programming pt3 1-2

Power Programming pt3 3-4

Power Programming pt3 3-4

Power Programming pt3 5

Power Programming pt3 5

Power Programming pt4 1-2

Power Programming pt4 1-2

Power Programming pt4 3-4

Power Programming pt4 3-4

Freebie VMWare ESXi 5.5

So on reddit, I came across this link to download a free version of VMWare ESXi with Vcenter.

Naturally I had to give it a shot.  And run it on my desktop for the heck of it.

VMWare download page

VMWare download page

And with the 3 files downloaded, I simply fired up VMWare Player, created a new VM, and pointed the setup program to the ESXi ISO ( VMware-VMvisor-Installer-5[1].5.0.update01-1623387.x86_64.iso), and it figured out we were going to do a nested VMWare install on it’s own.  The only thing I had to change was the network card from NAT to bridged.

Because I’m just going to use this install for testing (I haven’t put it on hardware just yet), the default DHCP is just fine, but enabling SSH on the console will be important.  Remember to record the root password for the ESXi box as you’ll use that to point the client to it.

ESXi 5 on VMWare Player

ESXi 5 on VMWare Player

The installation was pretty simple.

Now because I wind up using various versions of VMWare for work, I don’t want to try to keep 4.x and various 5.x clients balanced on a PC, I just run them on various VMs.  However 5.5 has an issue with Windows XP.  The SSL implementation are out of date.  Naturally there is a hotfix, KB948963, but it will only install on Windows Server 2003.

VMWare SSL failure on XP

Network failure KB948963

I suppose booting into safe mode and overwriting the DLL’s by hand may be an option, but because it is only me talking to my ESXi server I don’t need it to be on the internet, so the easier option is to tell ESXi to allow all SSL types.

After some searching, the best fix I’ve seen is from the VMWare forums, by RichardVM:

ssh into the ESXi host and modify the following file:

/etc/vmware/rhttpproxy/config.xml

Insert the following xml line into the appropriate section:

<vmacore>

<ssl>

<cipherList>ALL</cipherList>

</ssl>

</vmacore>


After saving your changes restart the service:

/etc/init.d/rhttpproxy restart

And you’ll be good to go.

VMWare ESX on Player

VMWare ESXi 5.5 + Vcenter running on VMWare Player on Windows 7

For a simple test I installed an old copy of Windows NT 4.0 Terminal Server, which works fine (remember NT 4.0 on ESX5 needs SP6 installed for the networking to work).

VMware license

Applying the VMware license

As you can see once you apply the license you get from VMWare certain features are disabled.

vmware license

2 sockets, unlimited logical processors, no ram limit, never expires!

As you can see this may be more ‘limited’ from the Vcenter’s perspective, but this license doesn’t expire, and is good enough for ‘at home’.

For those needing and wanting more, the next step is the VMware vSphere Essentials Kit package, which is $560 USD.  But this is good enough to get your feet wet in the world of VMWare.

Running Microsoft Exchange from home.

Well thanks to my latest outage, I’ve gone back from having an Exchange server in the “cloud” (well really a server I rented), to a Virtual Server at home.

First my ‘plan’ is to get a VPS that I can run OpenVPN on.  From there I’m going to build a VM at home that will also run OpenVPN, and it will connect to the VPS.  I will then setup routing, so that the Exchange server can then communicate with the VPS’s internal interface, and the VPS can communicate directly with the exchange server.  I’ll then configure postfix to store & forward email to the Exchange server.  This way if the link drops, the VPS will just spool the mail.  Finally I’ll setup SpamAssasin to filter out the SPAM.

First you will need to have a tun0 interface in your VPS.  Almost everyone supports this these days so it shouldn’t be too hard… If you cannot get a tun0 interface, perhaps ppp0 with pptp..?

I followed these instructions on setting up OpenVPN on Debian 6.  Now granted, I’m using Debian 7, but the instructions are pretty much the same.  Basically you have to setup a CA (Certificate Authority), and then you generate a Server certificate, and a client certificate.  For my needs, I’m going to issue single certificates for everything(one) that connects into my VPN.  I also have a network at home that I want routed to the VPS, so this is included (192.168.0.0/24).

A simple server.conf looks like this:

port 1194
proto udp
dev tun
ca ca.crt
cert server.crt
dh dh1024.pem
server 10.8.0.0 255.255.255.0
ifconfig-pool-persist ipp.txt
client-config-dir ccd
route 192.168.0.0 255.255.255.0
keepalive 10 120
comp-lzo
persist-key
persist-tun
status openvpn-status.log
verb 3

And a the client configuration I’m using is this:

client
dev tun
proto udp
remote MYHOST MYPORT
resolv-retry infinite
nobind
persist-key
persist-tun
ca ca.crt
cert hong-kong-home.crt
key hong-kong-home.key
ns-cert-type server
comp-lzo
verb 3

In the directory /etc/openvpn/ccd on the server, I have to ensure that I have a file called ‘homefw’ which is the common name of the client certificate.  It has to contain the following line to ensure that my home network is routed to the VPS.

iroute 192.168.0.0 255.255.255.0

Don’t forget to turn on ip forwarding on both the VPS, and the local ‘tunnel router’.  For Linux based stuff you need to make sure that “/proc/sys/net/ipv4/ip_forward ” is a 1.  You can just do a simple “echo 1 > /proc/sys/net/ipv4/ip_forward ” in “/etc/rc.local” or go through your distributions networking documentation to make sure you set it up ‘correctly’.

In OpenBSD I just simply uncomment the following line from /etc/sysctl.conf

net.inet.ip.forwarding=1 # 1=Permit forwarding (routing) of IPv4 packets

If you don’t have routing in place you’ll notice that you can only ping the tunnel interfaces, but not the IP’s on the LAN.  While this may be fine for a p2p or client setup it isn’t good enough if you want to route traffic.

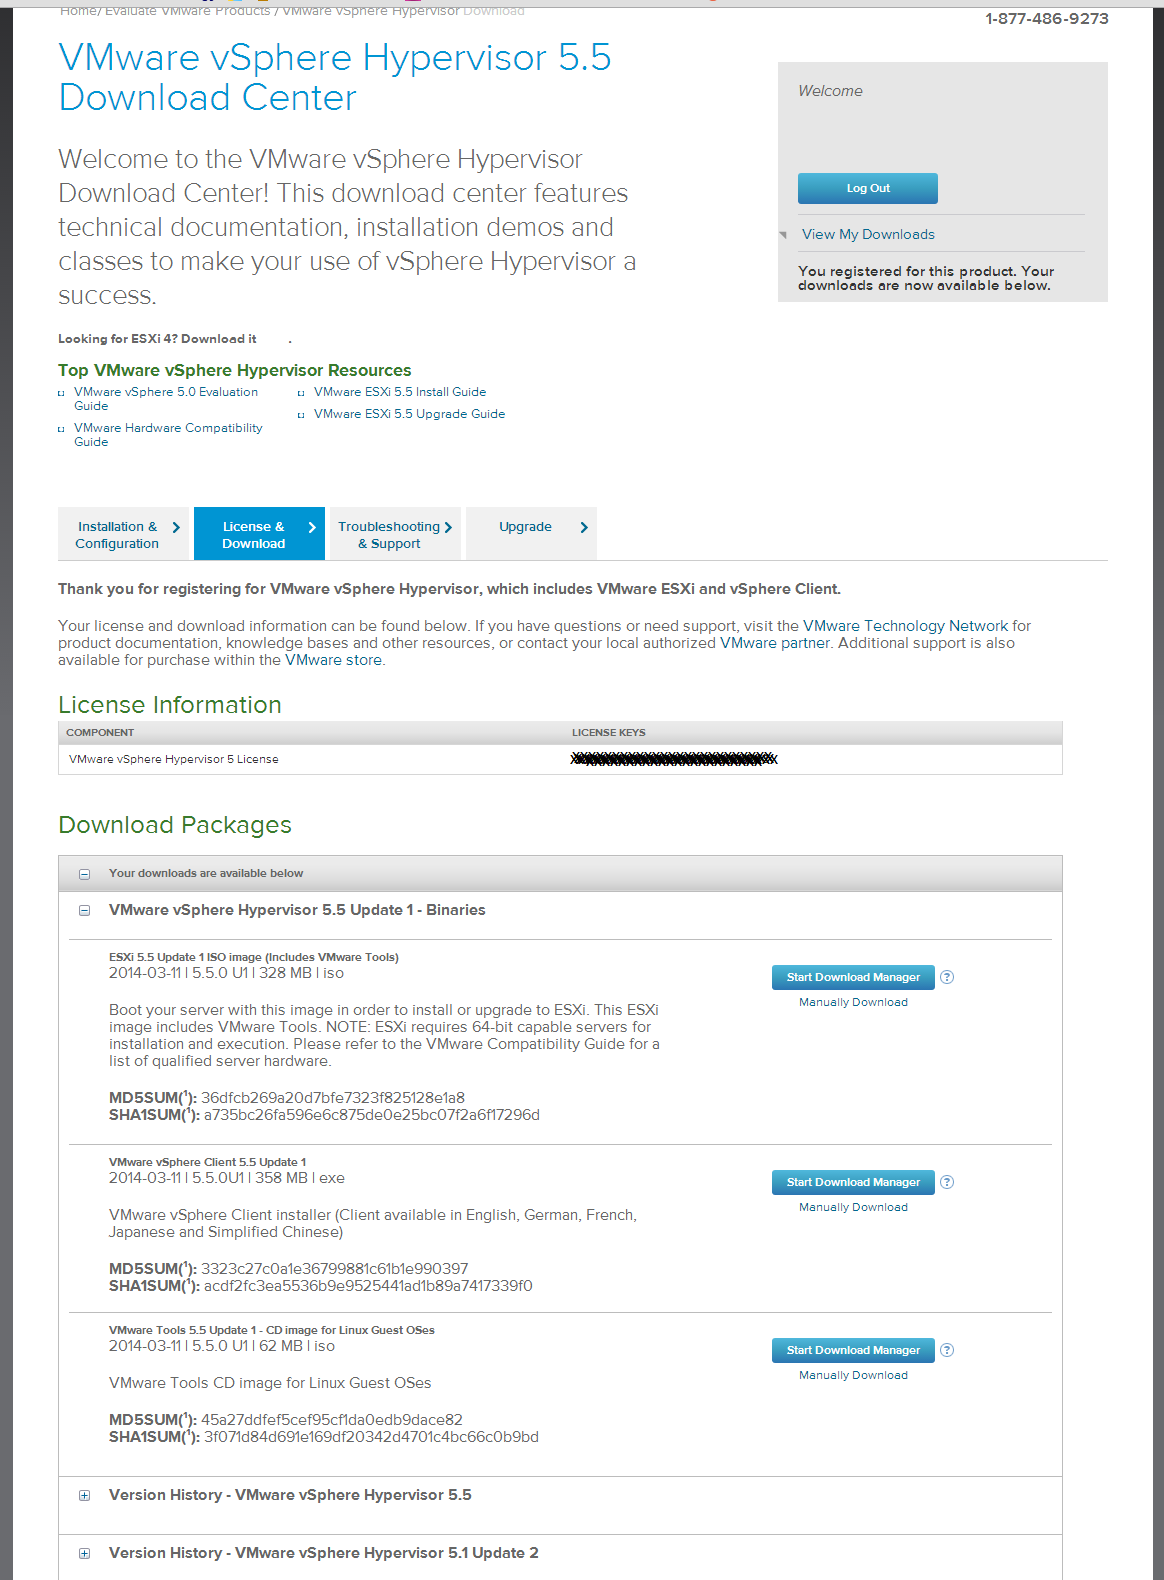
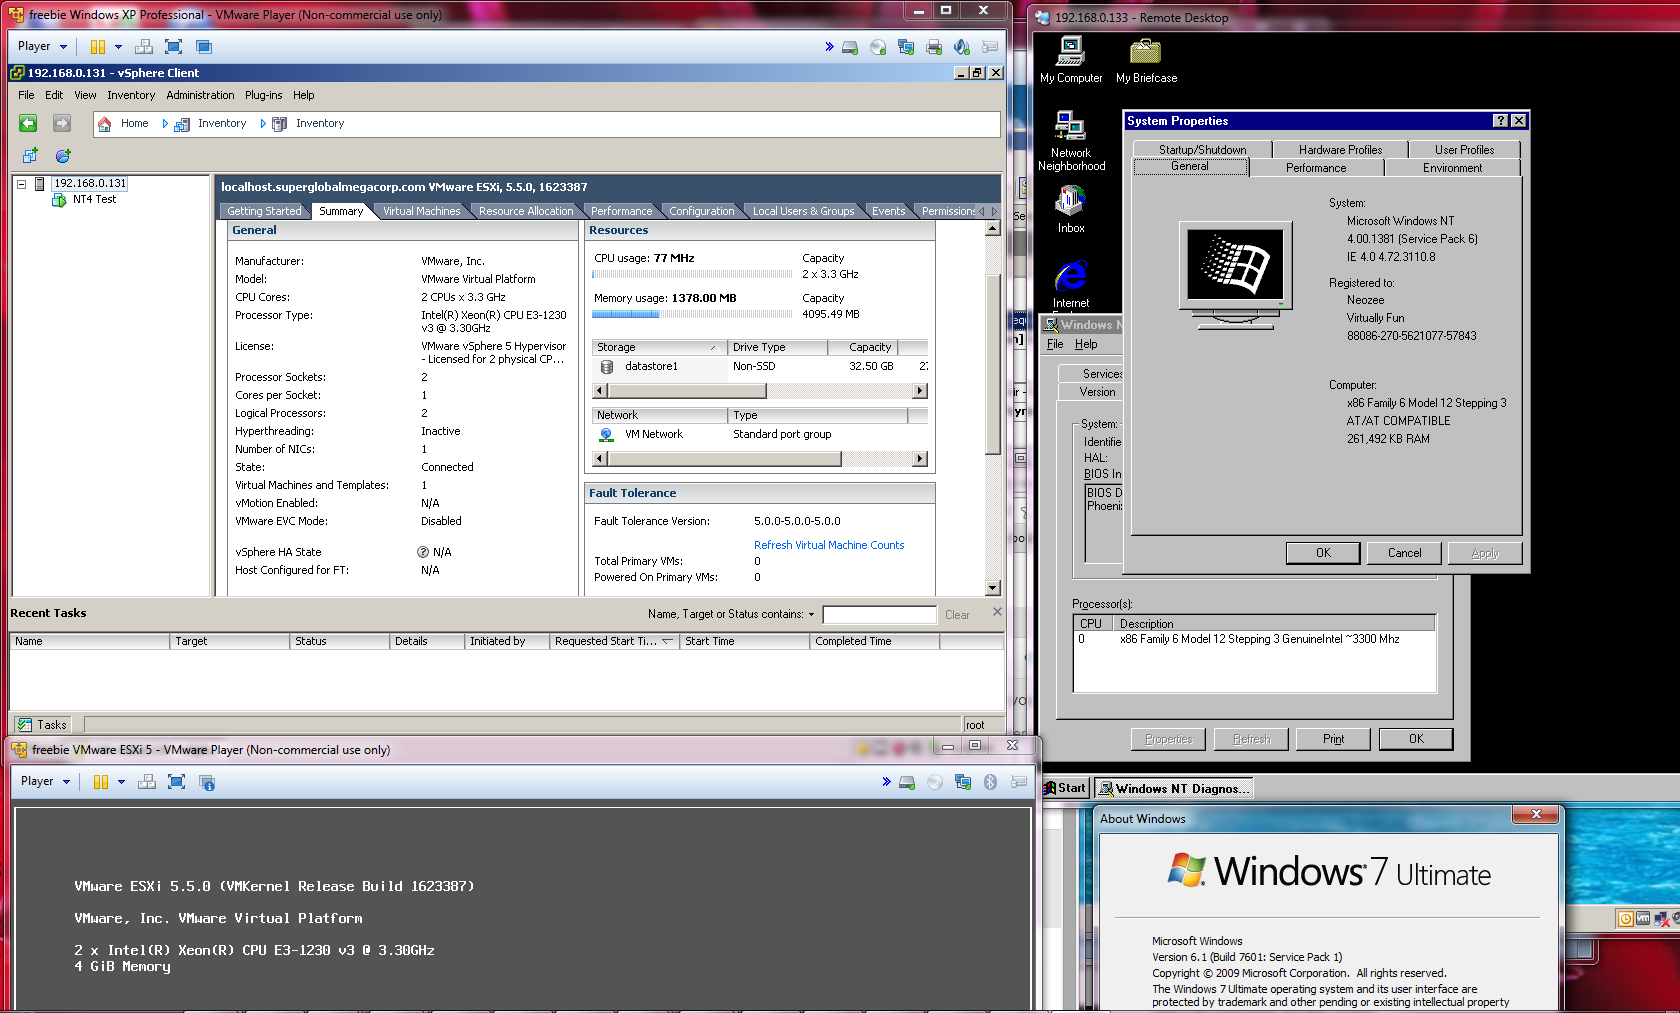
I’m running VMWare ESXi 5 at home, and thankfully it does support Windows NT 4.0 Server out of the box.  I setup a Domain Controller running DNS & WINS.  The VMWare tools won’t work properly with some service pack (4 I think?) but I went all the way to 6, along with the rollup.  Until you load the service pack, the network adapter will *NOT* work.

I’m going with Exchange 5.5, so again I installed another NT 4.0 server, service packed it, and joined it with the domain controller.  Remember to install IIS, and the ASP update, as 5.5 OWA needs asp. Be sure to apply the latest service pack for Exchange, SP4 – in the case of Exchange 5.5 .

Now for routing I could go with dynamic routing, or static routing.  I chose static as I didn’t want to get too involved for this project, as I needed to get email flowing as quickly as possible.

route add 10.8.0.1 mask 255.255.255.255 192.168.0.49 -p

From Windows NT.

It is imperative no matter what version of Exchange you run, that you turn off the open relay “feature”.  A great step by step guide is available here on msexchange.org .

With the basic routing in place you should be able to talk to the Exchange servers’ SMTP engine.  You may want to setup either a local DNS and populate the VPS’s source address or put in some host entries for it.

# telnet 192.168.0.55 25
Trying 192.168.0.55…
Connected to 192.168.0.55.
Escape character is ‘^]’.
220 exchange.superglobalmegacorp.com ESMTP Server (Microsoft Exchange Internet Mail Service 5.5.2653.13) ready
HELO
250 OK

Now it would be insane to place an Exchange server directly onto the internet.  Plus when the VPN link is down, it’d be nice to have the VPS store email and forward it when it can.  So for this task I installed postfix.

For me the big changes in main.cf were:

mydestination = nodedeploy.superglobalmegacorp.com, localhost.superglobalmegacorp.com, , localhost
relayhost =
mynetworks = 127.0.0.0/8 [::ffff:127.0.0.0]/104 [::1]/128 10.8.0.0/24 192.168.0.0/24
mailbox_size_limit = 0
recipient_delimiter = +
inet_interfaces = all
relay_domains = superglobalmegacorp.com work.com
transport_maps = hash:/etc/postfix/transport
virtual_alias_domains = virtuallyfun.com
virtual_alias_maps = hash:/etc/postfix/virtual

This will permit my exchange server to relay out my VPS, and tell postfix that it’s OK to accept email for the various domains I have.

My transport database is very simple.  For the email accounts I’m using two domains, so I simply instruct postfix to forward emails destined to these domains to the exchange server

superglobalmegacorp.com smtp:192.168.0.55
work.com smtp:192.168.0.55

And for domains I couldn’t be bothered to create mailboxes for, instead I have their email setup to forward to an existing box using a virtual domain in the ‘virtual’ file.

[email protected] [email protected]
[email protected] [email protected]

Now due to the nature of postfix you need to generate database hashes for it to work, so my script to kick this off is:

postmap hash:/etc/postfix/transport
postmap /etc/postfix/virtual
newaliases
postfix reload

Which isn’t too involved once you get the bits in the right place.

Assuming you’ve got your MX records setup on the outside, with any luck you should start seeing some mail flow through.  If not telnet to port 25 and start talking to your mail server.

One problem I have is that superglobalmegacorp.com is an old domain, and it’s lapsed a few times to different idiots who not only added to the ridiculous spam lists I’m on, but also spammed from it as well.  So to deal with SPAM, I went ahead and installed spamassassin, as described in this page.

As mentioned adding the two lines to master.cf got it going

smtp inet n – – – – smtpd -o content_filter=spamassassin -o syslog_name=postfix/submission
spamassassin unix – n n – – pipe
user=spamd argv=/usr/bin/spamc -f -e /usr/sbin/sendmail -oi -f ${sender} ${recipient}

And I did change the spamassasin local.cf

use_razor2 1
use_dcc 1
use_pyzor 1

As I do get a lot of spam.

I don’t think most people will care, but this is more so for me keeping my notes straight.  So yeah I run Exchange 5.5 at home (which I got on ebay for $25!) with Outlook 2003 on Windows XP x64.  It works well enough for me.

CannonBall!

CannonBall!

CannonBall!

So while indulging my SEGA kick, I came across something super cool, a blog dedicated to reverse engineering and porting outrun to C++, Reassembler!

Now this is pretty awesome in that not only does it work (and boy does it!), his Outrun! project, CannonBall runs on OS X, Windows, Linux, and can you believe it, javascript. (you need an OutrunB ROM for this, as it loads all it’s sound, music, graphics and map resources from an Outrun rom set).   You can read about his javascript porting adventure here, the TL;DR version is that he used emscripten to  convert clang’s LLVM bytecode into javascript.  Boy does this seem to open up quite a few possibilities as javascript compilers seem to get better and better on the browser side.  I happily get 60fps on my MacBook Air with Chrome.

Even better he’s got another project, LayOut, which lets you build your own maps for CannonBall!

For fun, be sure to check out his Easter Eggs section, there is quite a bit of stuff hiding in these old ROMs.  Not to mention there is enough other gamestuff in them, that SEGA didn’t build each game for their boards in a vacuum.

All and all, I’d say it’s a good read!