
Ok, we left off from part one, having prepared the hard disk. Now we are going to boot off the hard disk like this:
qemu.exe -L pc-bios -m 16 -hda xenix.disk -fda b1
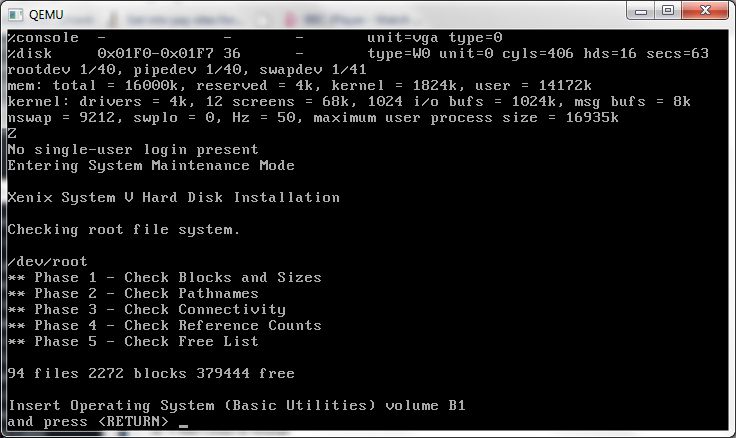 Now if we go ahead and try to install normally it’ll fail like this:
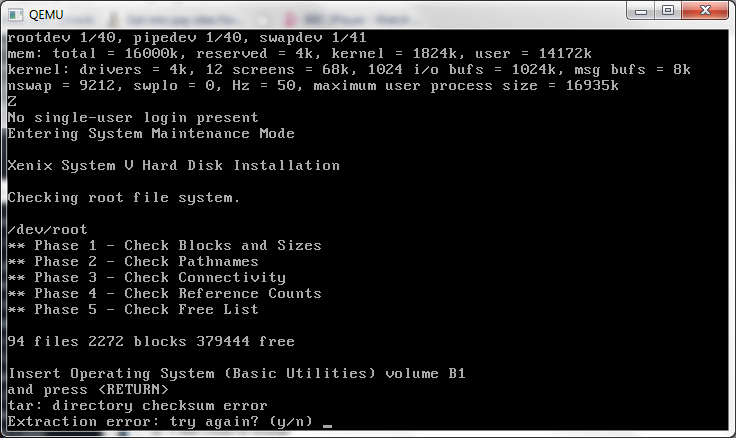
Which isn’t good at all.
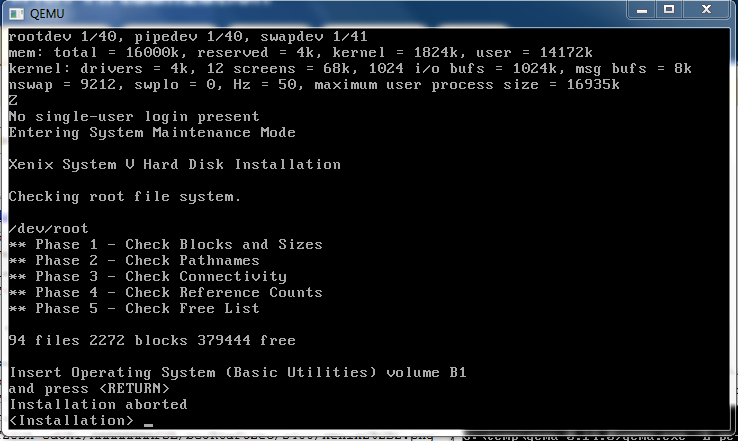
Instead, what we are going to do is hit the delete key breaking us to an install shell.
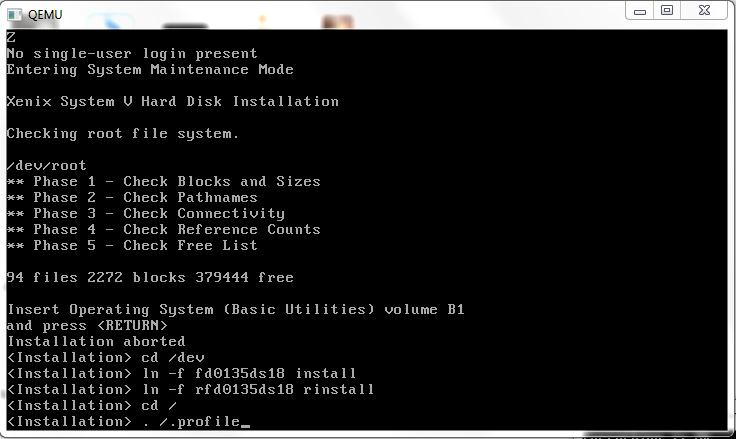
So at the shell, we are going to fix the install/rinstall devices to force them to the 3 1/2″ high density diskette like this:
cd /dev
ln -f fd0135ds18 install
ln -f rfd0135ds18 rinstall
cd /
. /.profile
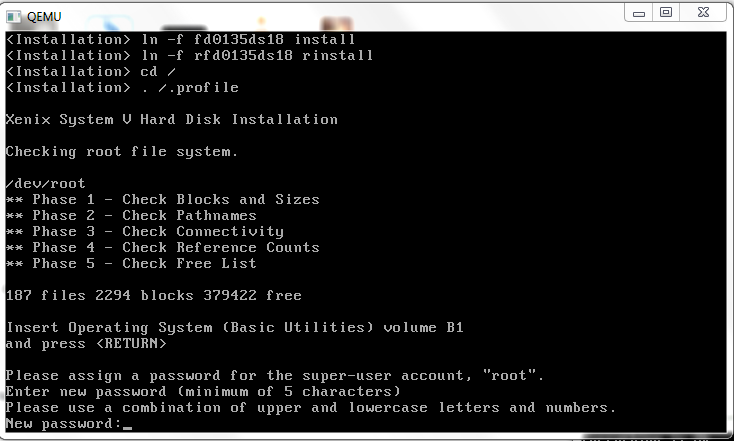
Now we can proceed with the install, and since diskette B1 is already in the drive, we just hit enter. Once the B diskette is copied, the install script will prompt for a root password.
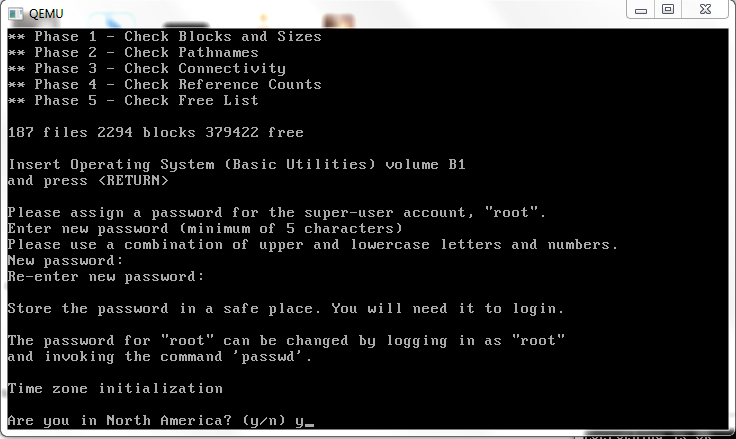
Now it’s time to pick a timezone, and yes, I’m in North America.
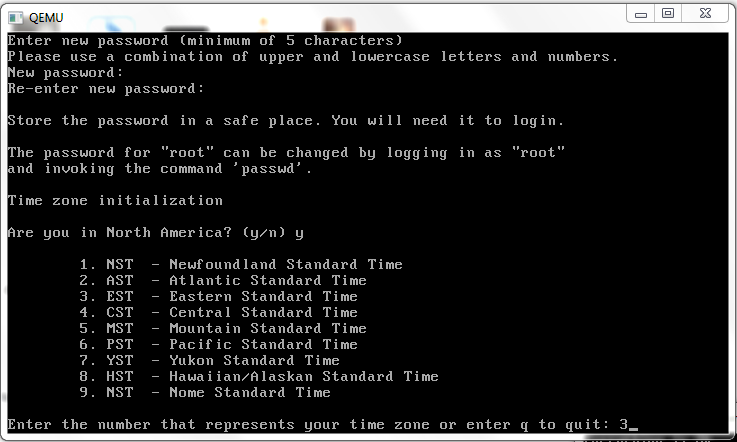
In EST.
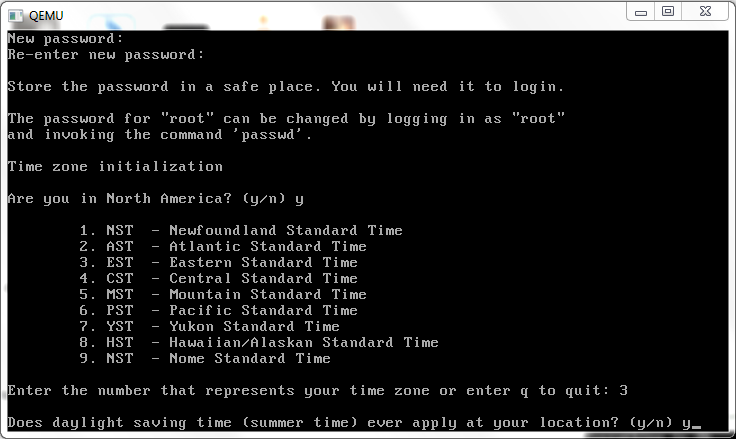
And sadly, yes we do DST. (*NOTE being this old, you can bet the offsets are all wrong for DST, I’m sure there is some deal to update the files, but I’m not sure of it off hand. But it’d be nice to update the timezone stuff for 4.2BSD as well).
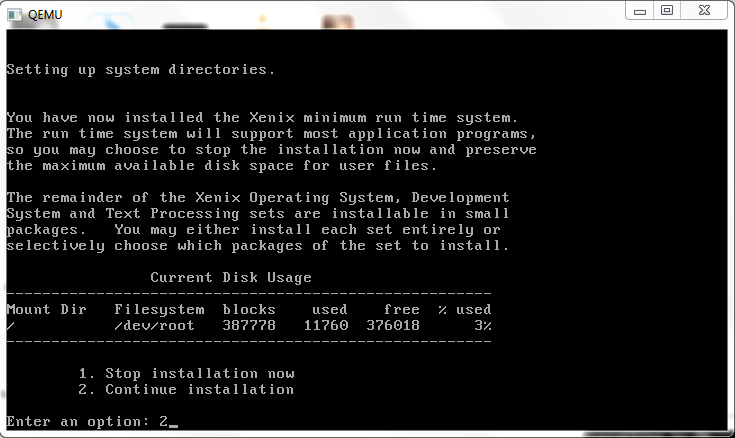
Let’s continue with the install.
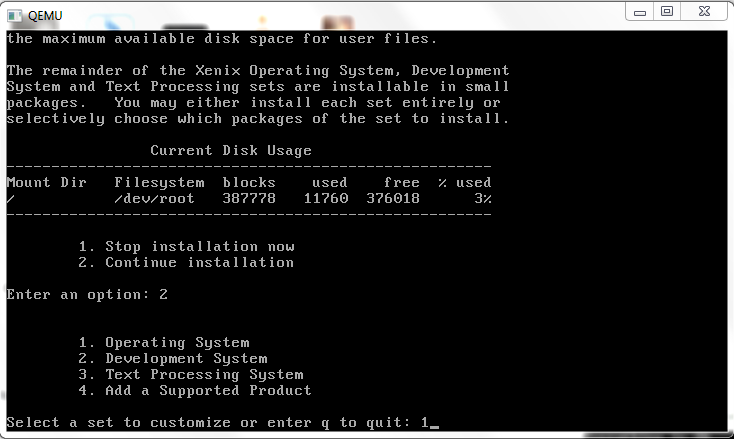
And let’s finish the operating system install.

Now we’ll need the X1 diskette…

So far we’ve not needed to swap diskettes live under Qemu, but I thought I’d remind people that it’s a simple matter of hitting ctrl+alt+2 to bring up the Qemu console, then typing in:
change floppy0 x1
To verify you’ve even done this correctly, you can issue a “info block” command, and you should now see the floppy0 device referencing the x1 file.
Once you are done, you can switch back by hitting ctrl+alt+1
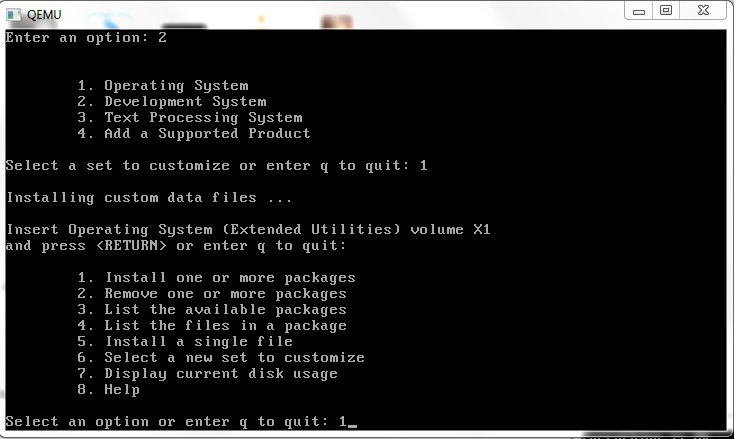
We are going to install one or more…

All of them as a matter of fact.
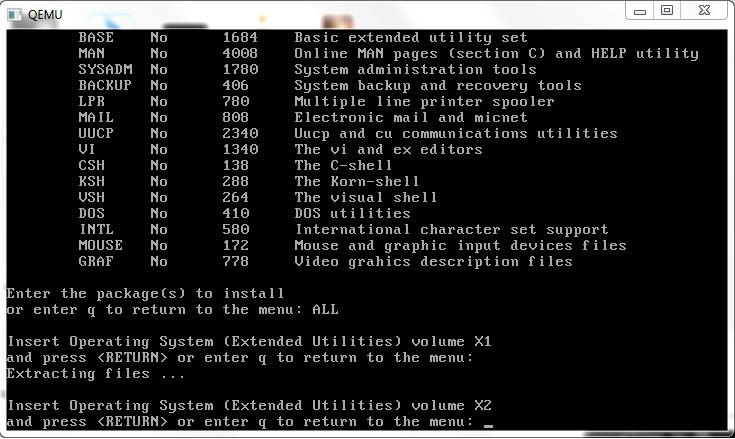
I’m going to fast forward a little here, and process all the X diskettes… there isn’t much to see here, it’ll prompt for a diskette, mount it in the qemu console, and switch back and proceed.
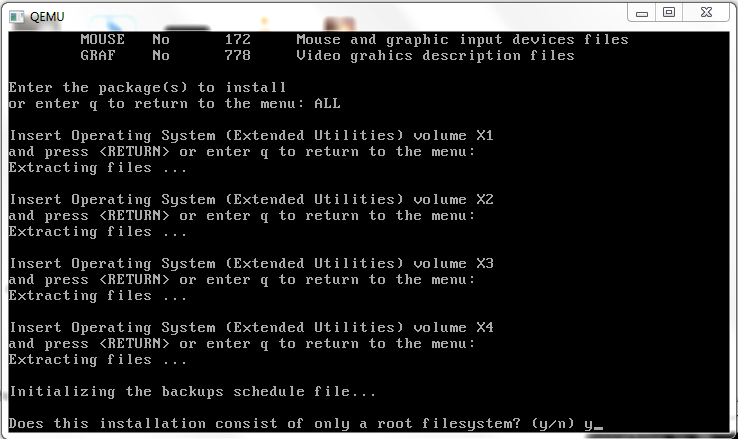
Yes this is a root only install, KISS (Keep it simple stupid) as they say.
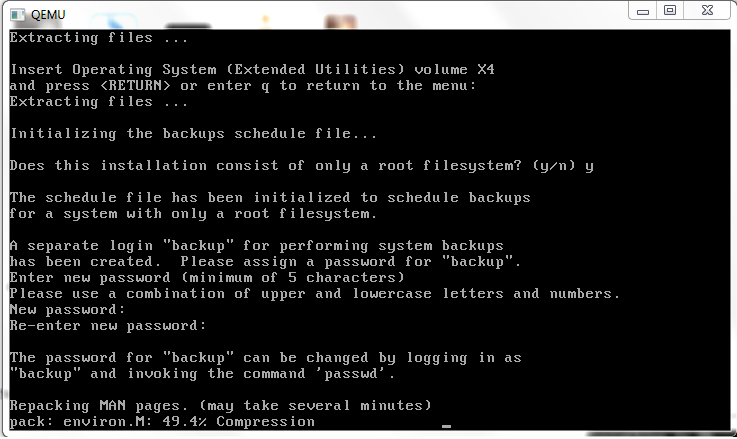
Now it’ll prompt for the backup user password, then start to compress man pages. Needless to say on a fast computer this takes mere seconds… Not so back in the day on a 386!
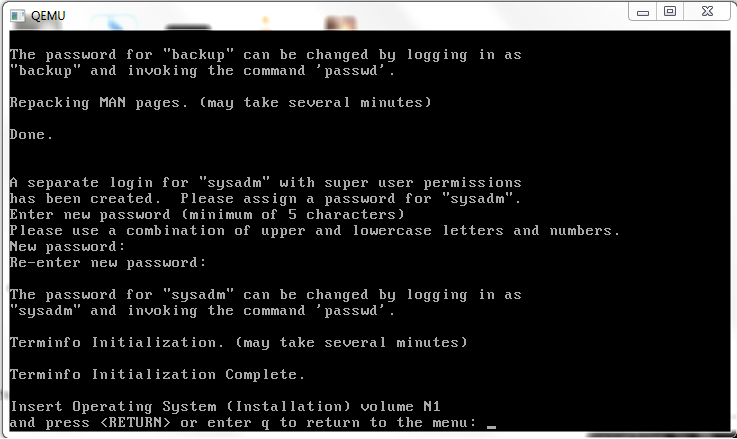
Now it’ll prompt for the sysadm password, generate the termcap, then it’s time to swap series to the N series diskettes..

Now onward to N2.

Time to license & activate the system. Again.

Ok we are done.
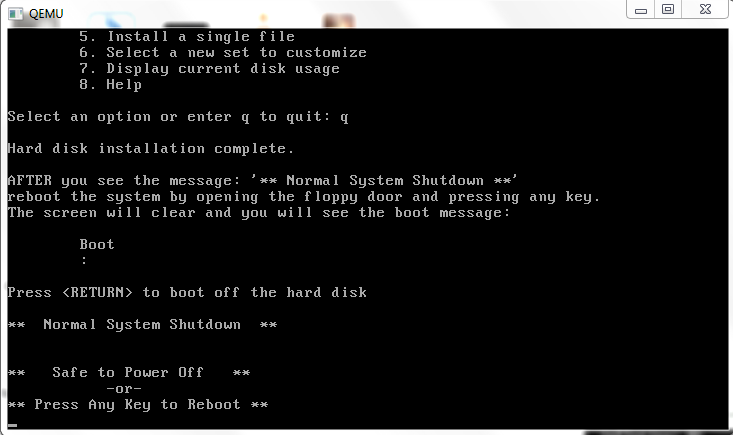
And there we go, Xenix is installed!

A quick reboot, and we are ready to go!
So looking back, we’ve just done the impossible, we’ve installed Xenix on Qemu.
Love your site, keep it up…
This method of installing also working in Vmware Workstation.
No way to get networking under qemu?
No, Qemu doesn’t emulate one of the 3 network cards that Xenix can utilize. However MESS can.
Yes you can do networking under qemu, and under virtualbox. Use virtual serial port from host and slip from guest. More details can be sent via email, if requested.
Fresh result – 2019 01:
qemu does support ne2k_isa NIC, so invoke it like this:
qemu-system-i386 -M isapc -m 16 -cpu 486 -no-reboot -net nic,model=ne2k_isa -net user -fda de200flp.tar -hda 825x16x63.vmdk -no-fd-bootchk
First, download de200 xenix drivers from dlink ftp sites.
There is a need for DE200 (NOT de220) xnx-specific driver. Install base os, then streams, then tcp. Then manually from a .tar file you made it previously from the de200 files with weird case sensitive names, which is simply padded with zeroes up to 1440kbytes in order to act as a floppy image.
Then from xenix console as root:
tar xvf /dev/install
then chmod three specific files in /usr/lib/*/
Then install with two specific commands in the readme enclosed to the dlink package.
Parameters: DE200 subtype (not the de100), IRQ = 9 (NOT 5), PORT 0x300 (default), segment arbitrary.
Successfully telnetted out to the host (netcat listener was the “telnetd” )
Enjoy!