
The topic had come up again about running Core3 aka the Star Wars Galaxies EMUlated server at home. It’s always been a somewhat involved setup, but with the advent of the Windows Subsystem for Linux, there exists the ability to export and import filesystems as if they were containers. With that in hand I went ahead and set one up.
I initially targeted the older WSL v1, as it supports far more hardware, and I didn’t want to leave so many behind. The added benefit of targeting v1, is that the end user can upgrade the filesystem to v2 if they so choose. The only real difference in this project between v1 & v2 is that v1 cannot run the needed MySQL instance. This isn’t a showstopper however as there exists MySQL & MariaDB native versions for Windows.
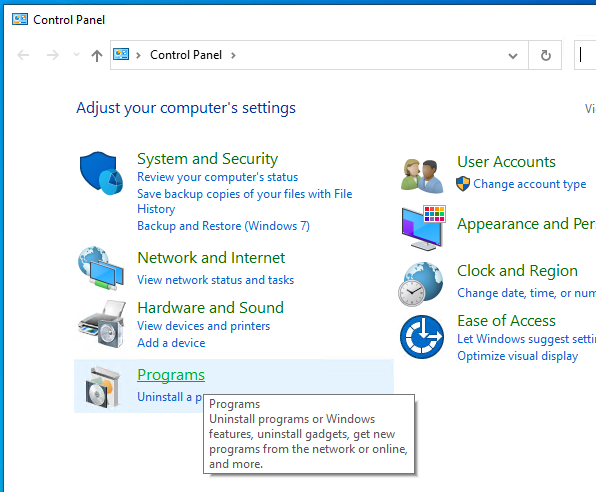
Obviously, you’ll need Windows 10 or 11 to do this. From what I can tell even the home version of Windows 10 has WSL capabilities, so this doesn’t pose any problems. Simply open the legacy control panel (Windows+R then type in ‘control’), and go to the Programs.
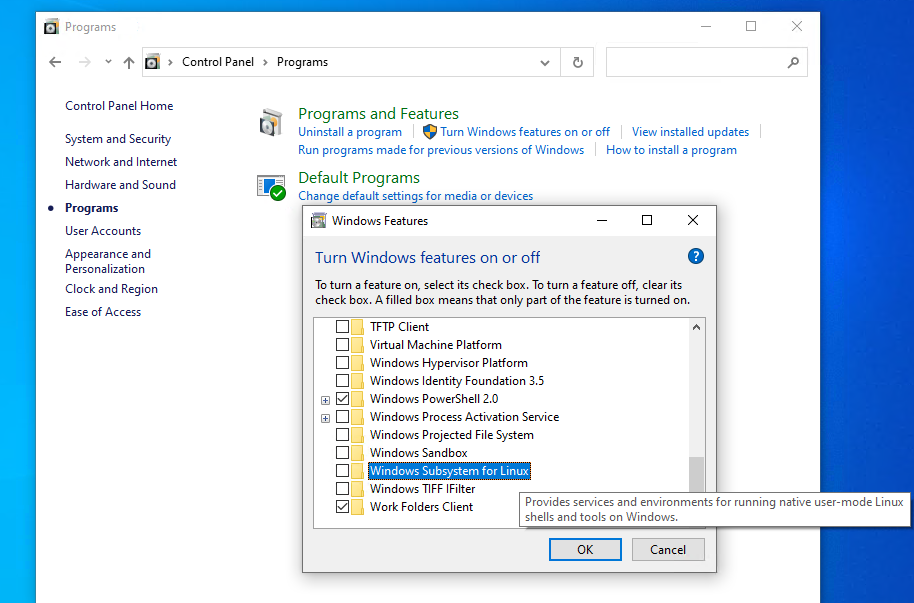
and then ‘Turn Windows features on or off’, scroll down and select ‘Windows Subsystem for Linux’.
Hit OK, and it’ll download what is needed from the internet.
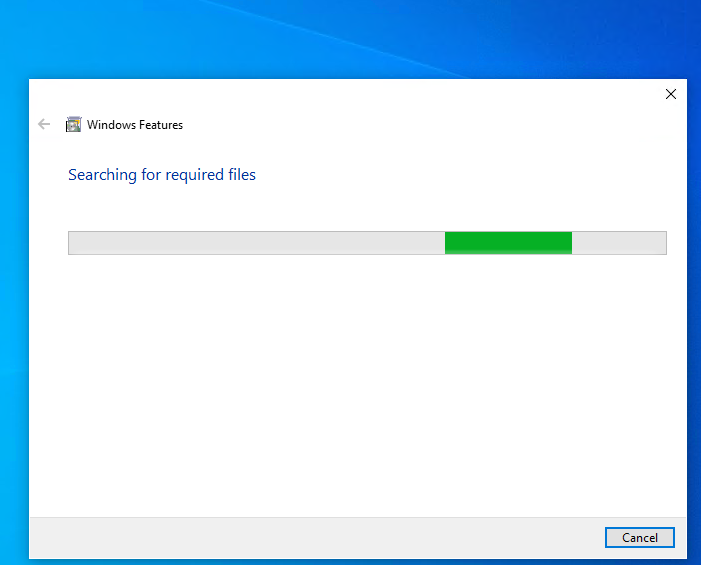
This shouldn’t take too long, then it’ll want to reboot the computer.
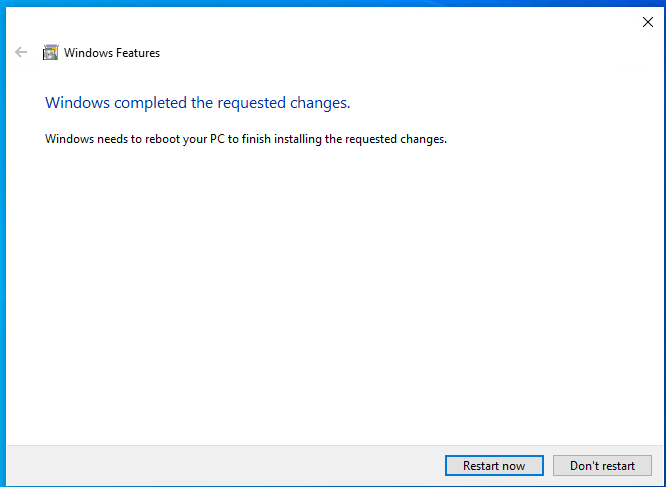
Now you just have to wait for Windows to reboot.
Now you’ll need to download the filesystem. I’ve put it on archive.org for the time being right here: wslv1-SWGEMU_Ubuntu20.22 directory listing (archive.org)
At a minimum you’ll need the files:
- swgemu-ubuntu.tar.gz
- mariadb-10.10.2-winx64.msi
Keep in mind that the filesystem is 4.8GB. It will take some time to download. If the torrent servers are functioning I would highly recommend that.
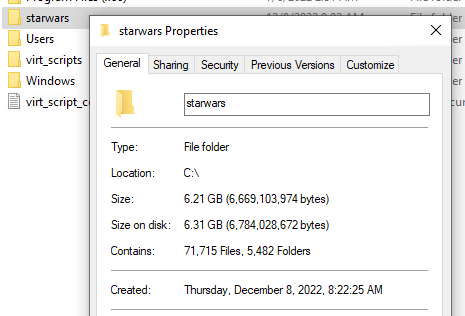
Once it’s installed and it’s generated it’s own databases it’ll need just under 7GB of disk space. So figure that you need 15GB free for this fun experiment.
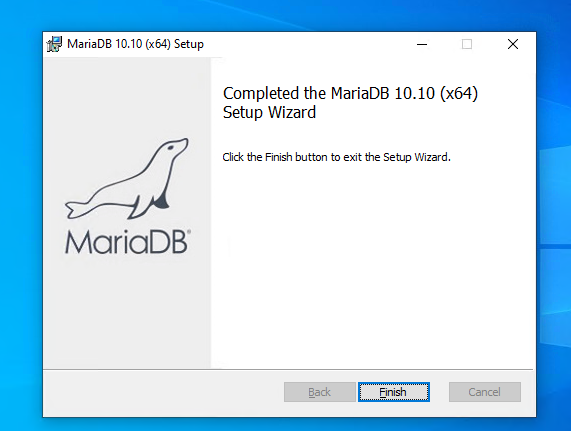
The first step is to install the database server. We will need to know the settings in order to configure the swgemu server.
You can use any MySQL, but Maria is fully GPL, and small, and more importantly doesn’t involve Oracle.
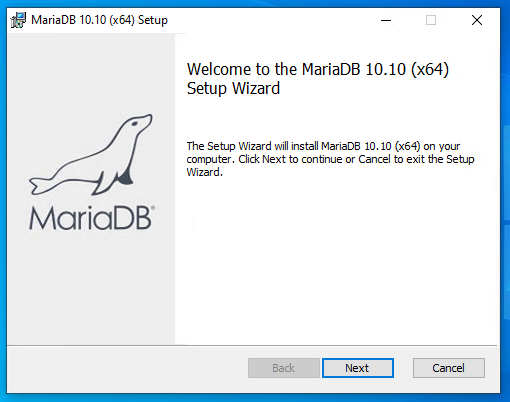
The install is pretty striaghtfoward.
GNU software requires it reproduce the license sooo here we are.
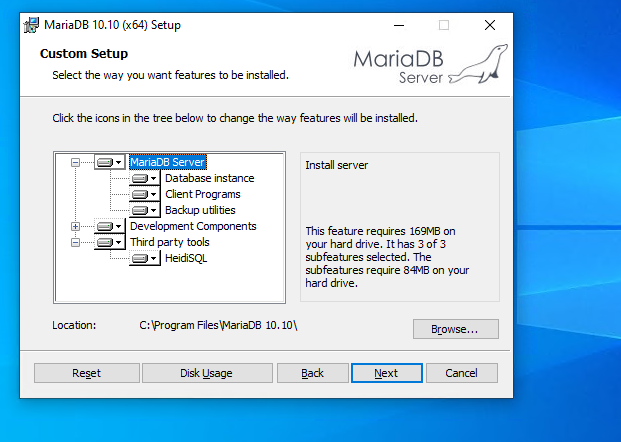
I would HIGHLY recommend use the default option of install everything.
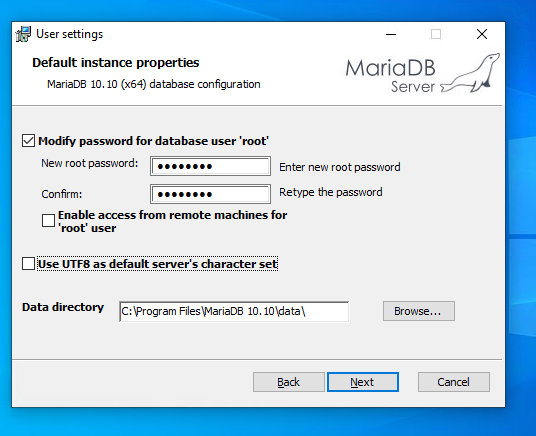
It will ask for a root password. In this example I’m using ‘password’, of course you can use anything you want, as long as you remember it. You don’t have to allow remote machine access to the database as WSLv1 runs in the same userspace on Windows, so it’ll effectively be connecting to itself.
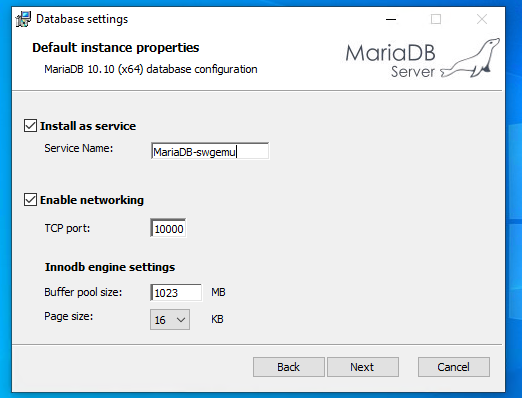
I use TCP port 10000 as I want the default port 3306 for another insance. Again it’s all up to you but you will have to remember what port you put it on. Ports below 1000 are highly NOT recommended as they need special permission. I left the buffer pool as default
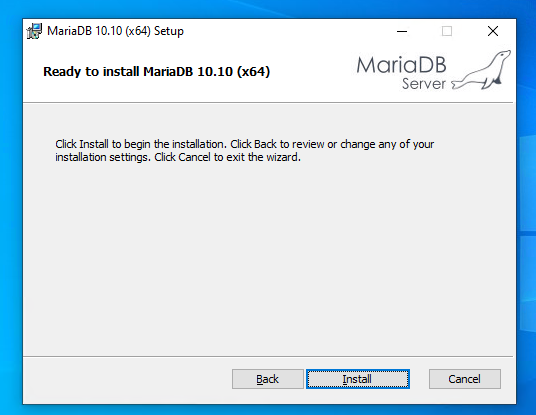
With those options set we can let it do the install.
Now the database is installed, and we can go onto restoring the WSL image, and then configuring the core3 server
Firstly we need place to put it, On the machine I built it on it was the D: drive, but for this re-deploy on a new machine I’m using the C: drive. It’s all up to you but it MUST be a locally attached disk, no USB disks.
Simply create the target directory and run the import command something like this:
md c:\starwars
wsl --import swgemu c:\starwars Downloads\swgemu-ubuntu.tar.gz
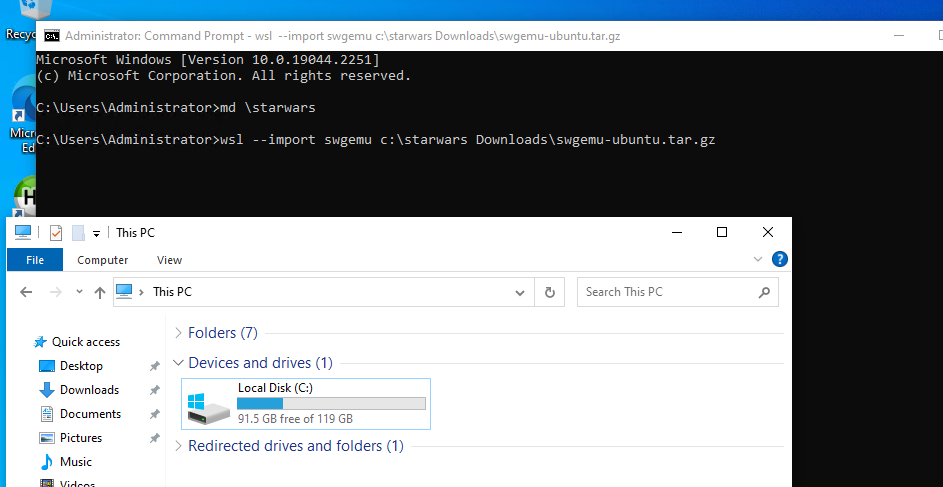
This will take a while.
Once it’s done you can check the subsystem status:
C:\Users\Administrator>wsl --list -v
  NAME      STATE           VERSION
* swgemu    Stopped         1
You may have more than one installed, so we’ll refer to this one by it’s name ‘swgemu’.
You can start the instance with wsl -d swgemu:
C:\Users\Administrator>wsl -d swgemu
Welcome to Ubuntu 22.04.1 LTS (GNU/Linux 4.4.0-19041-Microsoft x86_64)

 * Documentation:  https://help.ubuntu.com
 * Management:     https://landscape.canonical.com
 * Support:        https://ubuntu.com/advantage

  System information as of Thu Dec  8 09:02:39 EST 2022

  System load:    0.5185546875   Processes:             7
  Usage of /home: unknown        Users logged in:       0
  Memory usage:   28%            IPv4 address for eth0: 198.46.174.160
  Swap usage:     0%


0 updates can be applied immediately.


This message is shown once a day. To disable it please create the
/root/.hushlogin file.
You will need to edit the script to create the databases. I like using vi, but you may not. The easiest way is to just browse to the location and open it up in notepad. The path to browse is:
C:\starwars\rootfs\root\starwars\sql
You can drag/drop re-init.sh on notepad, or make the file association, it’s all up to you.
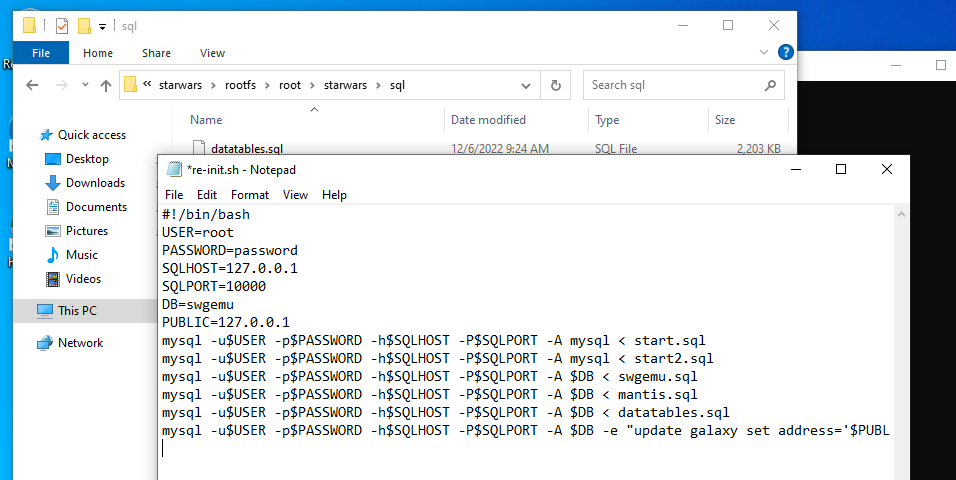
I had set the SQLHOST to the LAN IP I have, you should set it to 127.0.0.1 . The PUBLIC address is the one that you’ll be connecting to. You can set it to your LAN address, or a public one if you know it (you’ll have to setup NAT), or if you are running it all on one machine for testing, it’s fine to be 127.0.0.1.
Save the file re-init.sh and now you have to run it.
root@DESKTOP-E4F55FE:~# cd starwars/sql/
root@DESKTOP-E4F55FE:~/starwars/sql# ./re-init.sh
mysql: [Warning] Using a password on the command line interface can be insecure.
ERROR 1008 (HY000) at line 1: Can't drop database 'swgemu'; database doesn't exist
mysql: [Warning] Using a password on the command line interface can be insecure.
mysql: [Warning] Using a password on the command line interface can be insecure.
mysql: [Warning] Using a password on the command line interface can be insecure.
mysql: [Warning] Using a password on the command line interface can be insecure.
mysql: [Warning] Using a password on the command line interface can be insecure.
root@DESKTOP-E4F55FE:~/starwars/sql#
The first SQL query will attempt to drop the swgemu database. In this case it doesn’t exist, so the first error is expected. Nothing to worry about. That gives us the database, now it’s time to configure the server.
You can use explorer to browse to:
C:\starwars\rootfs\root\starwars\conf
Now open/drop on notepad the file config.lua
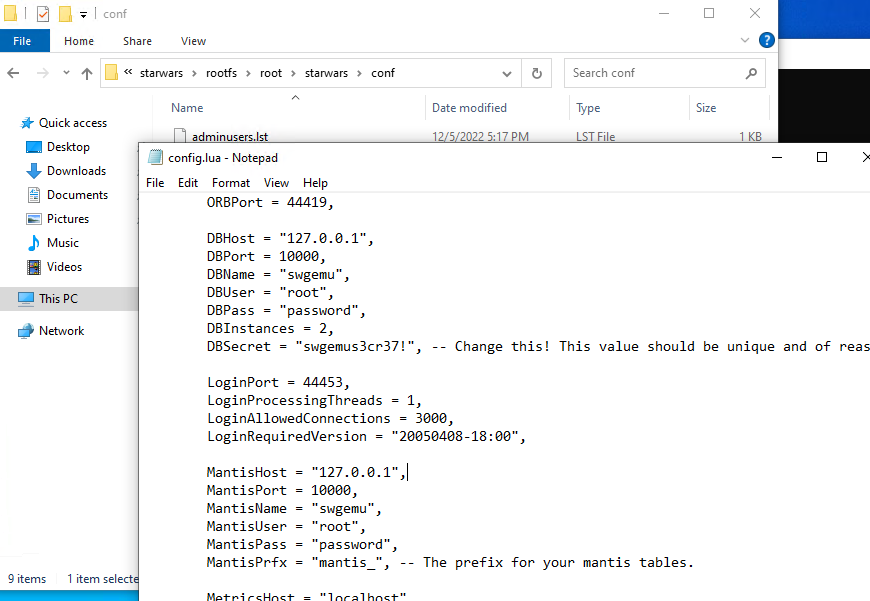
Again change the DBHost, and MantisHost to 127.0.0.1, and update the password for root, if you have changed it. You may also want to change the DBSecret, but since this is all for fun, I’m leaving it stock.
Now it’s time to run the server.
root@DESKTOP-E4F55FE:~/starwars/sql# cd ..
root@DESKTOP-E4F55FE:~/starwars# ./core3
(0 s) [Core] Server start, pid: 105, time: Thu Dec  8 09:11:54 2022
(0 s) [ConfigManager] Did not find conf/config-local.lua
(0 s) [DatabaseManager] converting database objects to new format
(0 s) [DatabaseManager] finished converting data to new format
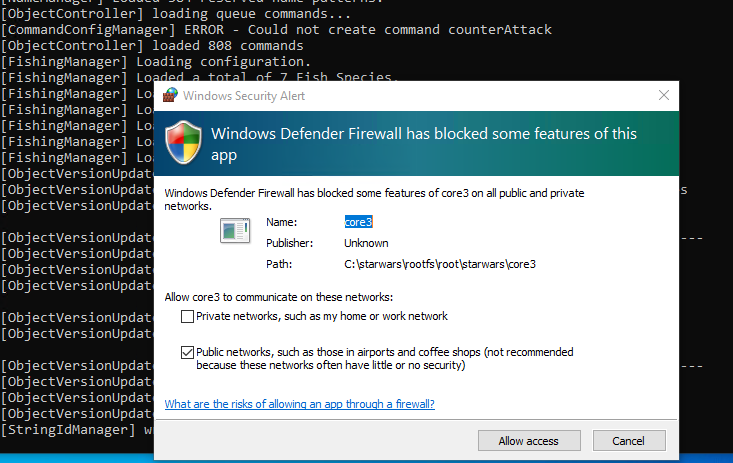
There will be a lot of messages going on, and this will take a few minutes. During the first run Windows will ask for network access permissions. Be sure to check both boxes allowing WAN and LAN access.
I have a Lenovo C20 and it takes about 2 minutes, depending on your config it may take longer or shorter.
One thing to point out is that I have configured Core3 for all the worlds, and this will need more than 8GB of ram to start up. So if you get something like this:
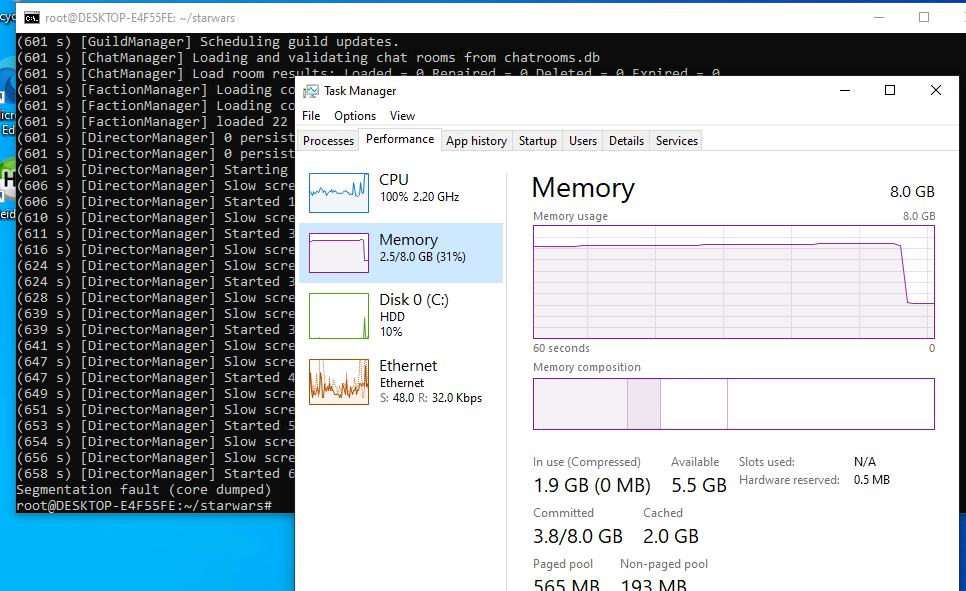
If this happens, you’ll have to try a minimal config, commenting out the areas from the config. On this test system, it only has 8GB of RAM, and that isn’t enough to have everything. However the minimal of the training & Tatooine fits no problem:

On the machine I originally set this up on, it has 32GB of RAM, so the processes needing just under 7GB of RAM wasn’t an issue. However an 8GB machine just isn’t enough as I found out the hard way re-producing my install.
Since we have previously allowed the Core3 application LAN/WAN access you should be able to connect. If you set the public address to something public, you will need to setup your firewall to forward the following ports to the machine hosting Core3
Otherwise you’ll need to open the following ports and protocols:
TCP 44419
TCP 44455
UDP 44453
UDP 44462
UDP 44463
Again making this a WSLv1 setup makes this easier as Windows runs core3 in the same memory space.
With any luck you should now be able to connect to the address you have specified as your PUBLIC address. If you want to change, you can either update the re-init.sh script and re-run it, destroying everything, or run the HeidiSQL tool, and just update it.
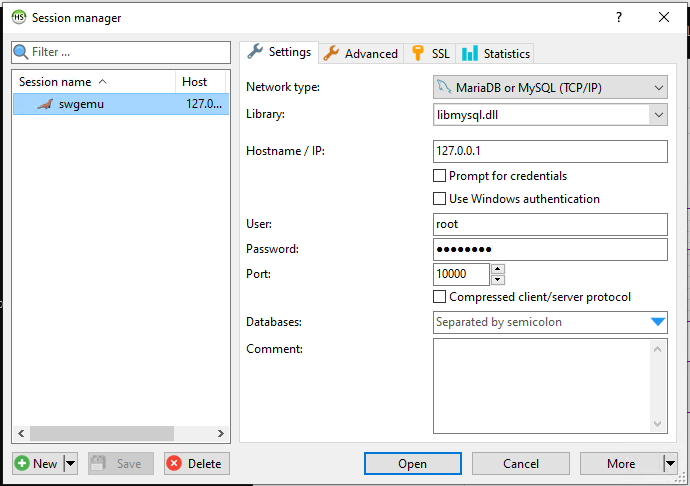
I had to set it to use libmysql.dll . As always remember your root password, and what Port you used to setup MariaDB. With the profile saved you can open it up.
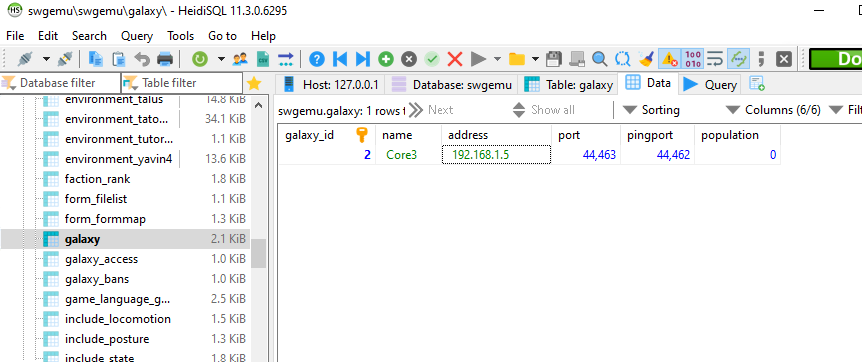
The address field tells the clients what IP address they can find the server on, so it can the the LAN if you are staying at home, or it has to be a Publicly accessible one. Another alternative is something like Hamachi, which lets you create your own virtual network of machines. It’s great, but not all that cheap, but the added benefit is that your server isn’t a public resource, so you know exactly who is connecting.

If you do change the IP you have to restart the core3 program.
Simply type in ‘exit’ at the console and it’ll start to gracefully shutdown.
Then simply start it again with a ./core3
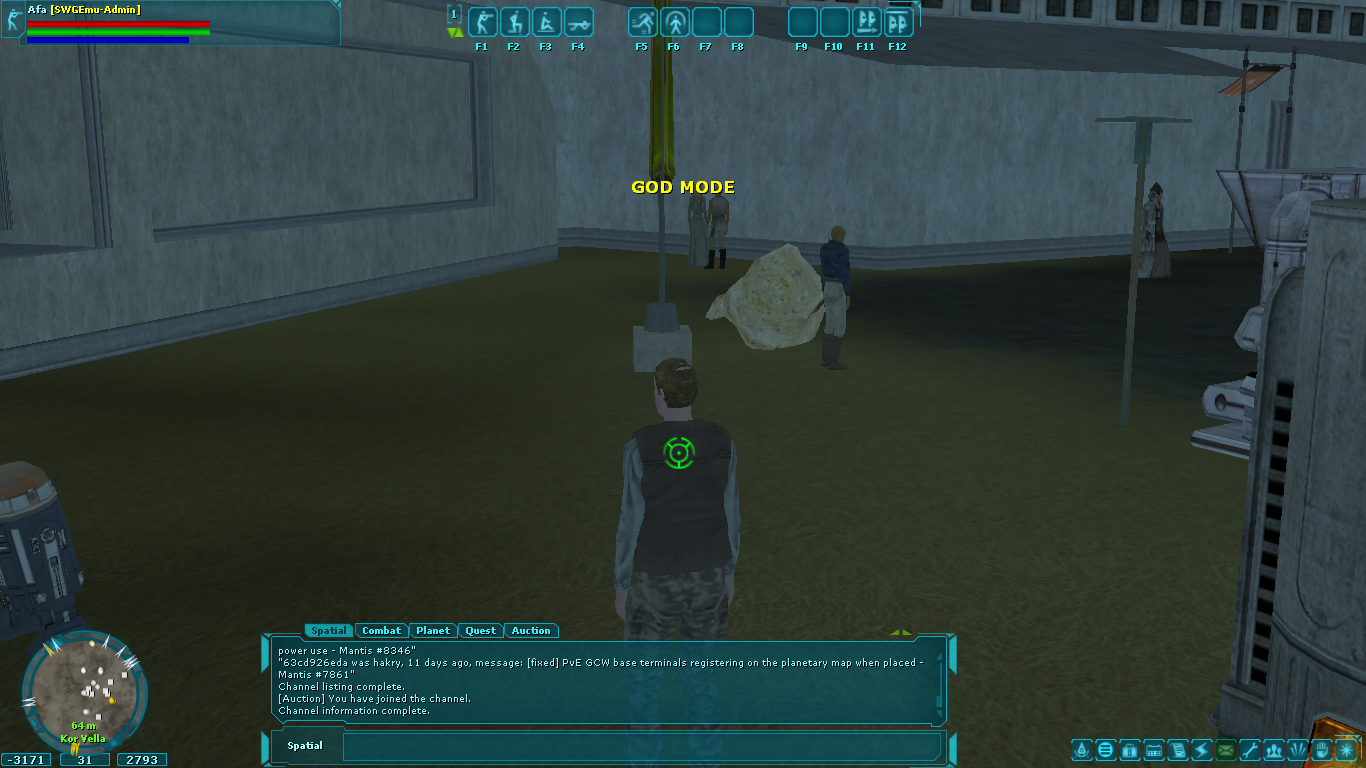
If you want to enable the god mode, I assume you have read how what changes to make on the client side, and the table to edit is the accounts table, once you have logged in, it’ll create your record, and you can find it on HeidiSQL and change the admin_level field to 15. With this set the next character you create will be a ‘god’.
I’m not going to go into setting up the client, installing the SWGEMU stuff and how to add custom servers, as I assume you already know how to do so. This is more to let people run their own instances at home, or among friends.
On building core3 for yourself, be aware that by default it’ll use a ‘native’ config option that tunes the compiler to generate code as fast as possible for YOUR processor. So if you want to run it somewhere else, it has a good chance of not running. I had to edit the following files:
./CMakeLists.txt
./utils/engine3/MMOEngine/CMakeLists.txt
And change NATIVE to NO.
I also had issues with the SQL not having a default setting for timestamps, and it would fail to create accounts. Look for stuff like this:
TIMESTAMP NOT NULL,
and replace it with
TIMESTAMP NOT NULL DEFAULT CURRENT_TIMESTAMP,
And as of this current rev I had some issues with malloc hooks, which I just commented out:
$ diff -ruN AllocationHook.cpp_ utils/engine3/MMOEngine/src/system/mm/AllocationHook.cpp
--- AllocationHook.cpp_ 2022-12-06 07:59:42.160402900 +0000
+++ utils/engine3/MMOEngine/src/system/mm/AllocationHook.cpp 2022-12-06 08:00:22.510402900 +0000
@@ -50,6 +50,7 @@
        instance = this;

 #ifndef PLATFORM_MAC
+#if 0
        __saved_malloc_hook = __malloc_hook;
        __saved_free_hook = __free_hook;
        __saved_realloc_hook = __realloc_hook;
@@ -58,6 +59,7 @@
        __malloc_hook = mallocHook;
        __free_hook = freeHook;
        __realloc_hook = reallocHook;
+#endif

 #else
        malloc_zone_t *dz = malloc_default_zone();
@@ -91,9 +93,11 @@

 void AllocationHook::uninstall() {
 #ifndef PLATFORM_MAC
+#if 0
        __malloc_hook = __saved_malloc_hook;
        __free_hook = __saved_free_hook;
        __realloc_hook = __saved_realloc_hook;
+#endif
 #else
        malloc_zone_t *dz = malloc_default_zone();

$
Yes it’s terrible, but I was in a rush so.. yeah.
Also I have access to a Windows 2019 Server which is Windows 10 1809 based, and it doesn’t support the import-export of filesystems. So this won’t be a clean install, I guess it’d be easier to copy files over from Windows 10, and install Ubuntu 20.22 from the store.
Good Luck!
First – thank you!
Second – I had an old SWG server using Zonoma dev but that is no longer supported etc. I unfortunately will have to start from scratch when it comes to Linux. I mean learn both Linux and the above guide you wrote. Before I start, I wanted to find out if this is still valid? IE would this still work today?
yeah it should be working as the 5gb download is the entire linux distribution. As long as you have Windows 10/11 it’ll be fine
I’m getting lua not found when I try to run core3 any suggestions they’re all there
I’ve deployed it on a few machines… Are you importing the whole filesystem?
Not sure how much you followed?
https://youtu.be/J90fZ_tes3o
I am going to try this tonight from scratch. Had a few failed attempts so far that I’m sure are because I did something wrong in my SQL and ip address stuff.
If I want to make this server public (so I can play from other locations and have my brother log in with me) how would I do that? Would I put my public IP address into the galaxy area in Maria as well as the SQL file under the Starwars root?
Also does 127.0.0.1 work for anyone as their local IP if hosted on the same machine?
how are you going to get it onto the internet? The biggest thing you’ll run into on residential internet is that they tend to block a lot of incoming traffic, and they’ll change your address from time to time with no warning, which would require you to reconfigure the server..
I rent a cheap VPS, as it’s got a static address, and use that to forward.. Back in the day hamachi was a popular service to host stuff at home, as you can hand out access to your friends, and it’s not open to the world at wild.
I just upgraded my laptop to 64GB of RAM so I can run them all on one place now, I guess I should revisit both a PPTP/VPS install, along with a Hamachi/private install. It’s a bit involved to setup, but it’s not impossible.
I fixed this issue. I got all the errors from running it in version2 not version1 which made things not work to 127.0.0.1 for some reason. WLS1 is the way to go.
Also, thank you so much for this guide. Appreciate all the effort put in.
Now that I have my server all up and running, just working on making it public so I can access from work and get my brother and friends on.
I think i’m in for another long process of figuring this side out.
My Admin commands weren’t working even though I was in god mode though, any idea why? I edited a lot of the .lua files for the game for more items on blue frog and different item stats etc that I need to copy over but wondering if maybe I need to copy the core3 swgemu command file as well.
Thanks for the great guide!
This is what I found on the SWGEMU forums for making it public
You will need to open up some ports in your router.
Here are the ports that need to be opened.
DBPort = 3306
LoginPort = 44453
MantisPort = 3306
PingPort = 44462
StatusPort = 44455
WebPorts = 44460
ZonePort = 44463 (This value i located in a different file than the others)
The computer the Dev Enviroment is on is 192.168.0.13
My dev Enviroment ip is 192.168.0.10
Port range forwarding needs to have.
Heres what i have;
Port Range
Start_____End____Protocol____Ip Address
3306____3306____Both_______192.168.0.10
44453___44463___Both_______192.168.0.10
Info below is for the old VM image. The newer VM will ask you what IP you want to use when you start your server.
——-
This info was crossed out but im thinking maybe this is what I need to do too?
Now in your VM.
goto Applications -> Programming -> MySQL Query Browser -> (login)
under swgemu -> galaxy
I changed the address from “192.168.0.10” to my external ip 99.245.12.65 (Not mine, just on the example on their forums)
side note: you can change the server name.
Save your changes.
Open a terminal and type in:
Code:
cd ~/workspace/MMOCoreORB/bin [Press Enter]
./core3 [Press Enter]
you dont need to open the database to the world!
You just need these:
TCP 44419
TCP 44455
UDP 44453
UDP 44462
UDP 44463
If you are familiar enough with your router, then yeah open those ports to your machine and as long as you have your ip defined as your ‘public’ ip address (https://https://www.whatismyip.com/) then run the orb and you should be golden.
Ok last question.
I’m in the swgemu script files from your download .tar.gz file. When I edit any of them it breaks when I run ./core3
Do I need to edit them on the Linux MSL or in my c:/Starwars folder? Do I need to reload the files somehow or is the best way to unpack your tar.gz, edit all the files I want (blue frog items, buff timers, skill points, armor base stats, and weapon base stats all .lua files) and then repack it as a tar.gz and follow the server build from scratch?
I’m thinking editing them then building the server is probably the way to do it but then I can’t change anything later on without keeping my current char etc.
Any advice and help would be great.
i only unpacked the tar.gz file once. Its the entire wsl distribution so I assume you are importing it, not trying to overlay something.
I just used the windows 10 notepad, I think I know they had added the transparent ability to edit linux files without any magic. It should just be a matter of editing those files and running it. Or it did for me
Building the server is another adventure.
Hi Neozeed,
I have one somewhat detailed and big question maybe you have a simple answer for. I am going into Mariadb and editing some things like Skill_skills to make skills cost 0 points. Also I am going into no_build_zones and making it so I can make a player house in anchorhead etc.
Once I edit the MariaDB how do I make it live?
I also was able to get all the .lua files edited that I wanted and it is working great. I’m going as far as adding mobs to Anchorhead, changing loot tables, armor values, weapons etc. Pretty cool to see how everything works and i’m almost having more fun setting stuff up than playing.
Thanks for the help and tutorial!
-Deton Echo
The easiest way is to shut down the orb and re-start it from what I recall. This will make it re-read the db, and force you to logout/login.
Look into backing up the lua files & dumping the database! You don’t want to lose all that work!
I tried and nothing happened once editing the info in MariaDB. I did exit on my server, let it fully shut down, then ran core3 again and still all the skill cost values are the same and Anchorhead still can’t be built in. I think it’s getting some of this info from the TRE files to populate the server info. I’m going to mess around tonight with editing the TRE files and see. Found a good TRE editor on the SWGEMU site. I’m definitely backing up my LUA edits often so I don’t lose them.
I think there is some flag to set in the client for picking up god mode?
MariaDB [swgemu]> update accounts set admin_level=15 where username='neozeed';Query OK, 1 row affected (0.000 sec)
Rows matched: 1 Changed: 1 Warnings: 0
MariaDB [swgemu]> update accounts set admin_level=15 where username='swgadmin/testing';
Query OK, 1 row affected (0.000 sec)
Rows matched: 1 Changed: 1 Warnings: 0
aparently you need to set modes in the db
also this is needed in the client config?
[SwgClient]allowMultipleInstances=true
[ClientGame]
0fd345d9=true
[ClientUserInterface]
debugExamine=1
I meant building it as in just following your tutorial after unpacking, editing, and repacking your exact tar.gz.
Wonder why my changes are breaking the core3. Hmm. I made a super small change just on the resist value of the basic blue frog comp armor right bracer to test and it broke it.
Not on my comp right now but I’ll see what error it has and post it later.
Just using notepad to edit and saving.